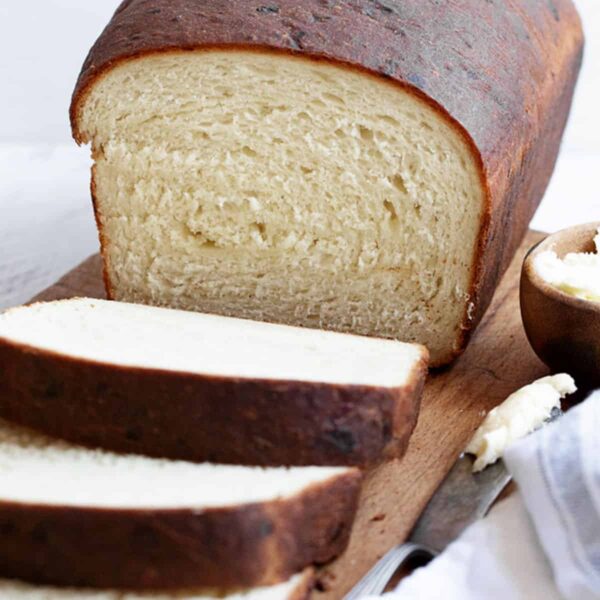
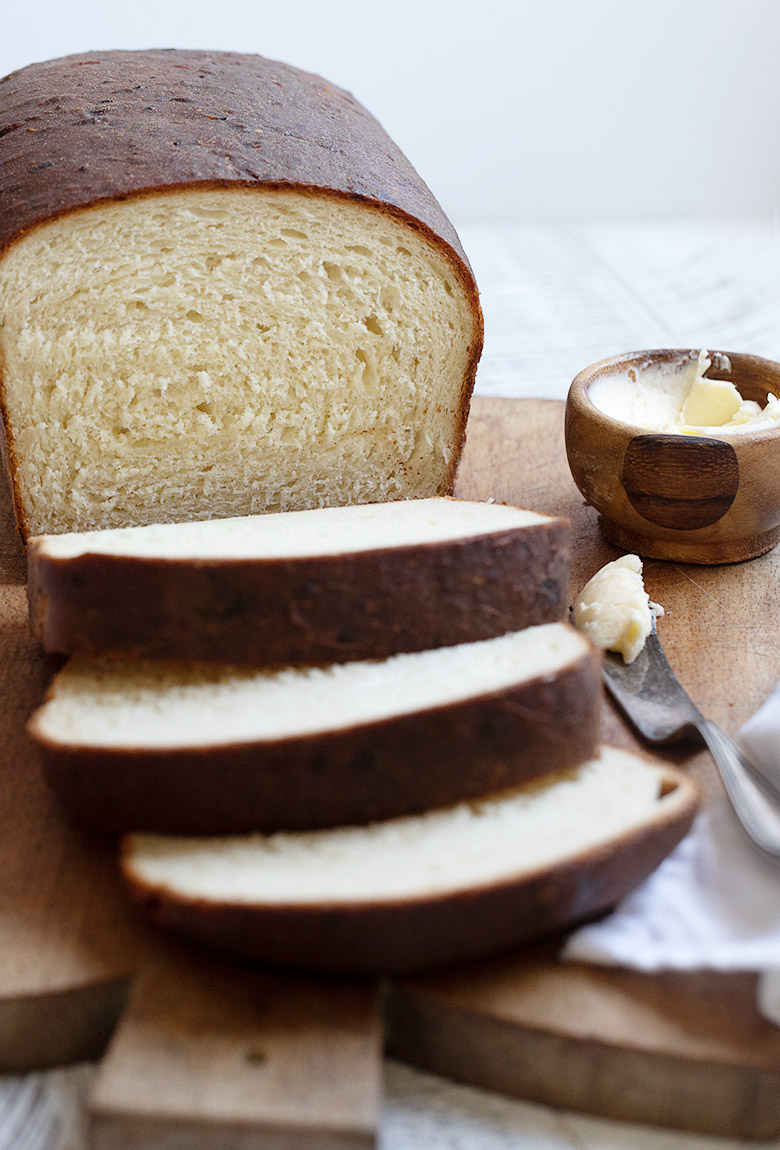
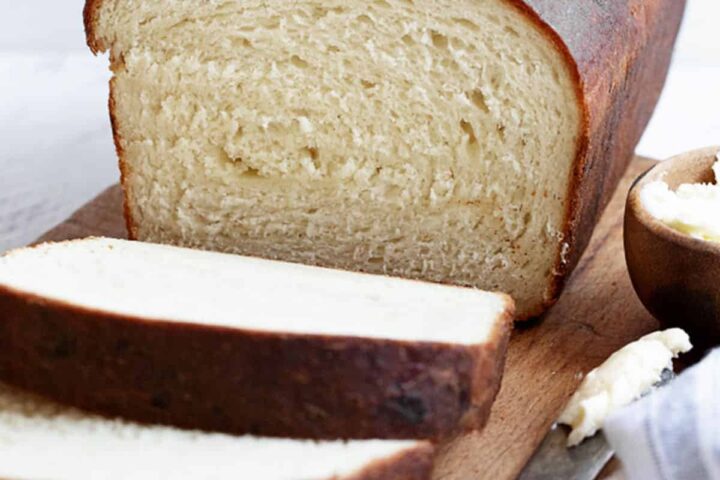
This buttermilk cheese bread is a yeast bread that needs just one rise to produce this large and impressive loaf. Enjoy plain or toasted as a side for soup or stew or great as a sandwich bread.
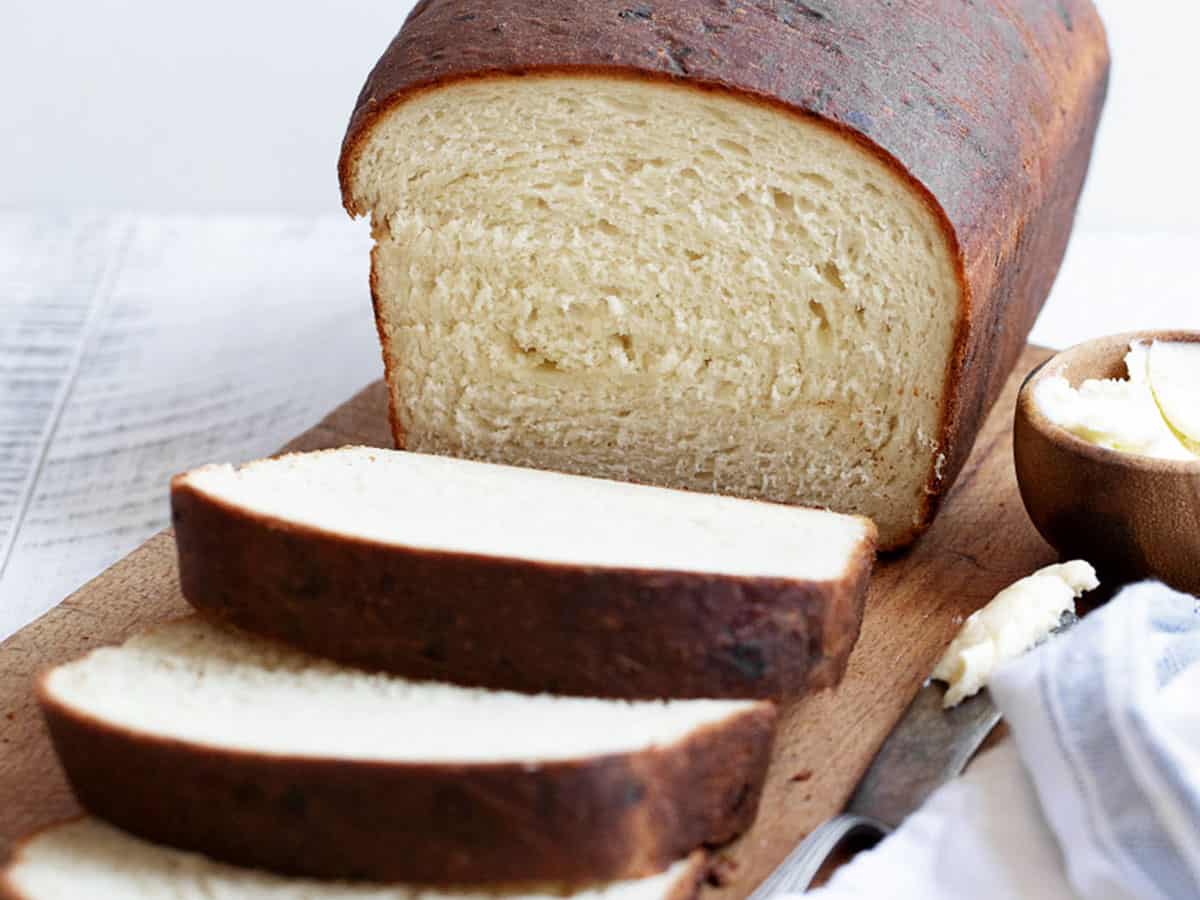
We enjoyed this delicious buttermilk cheese bread over the weekend to accompany a pot of chilli. It turned out to be the absolute perfect bread for dipping and for toasting, too.
This bread is a great way to use up leftover buttermilk and I especially loved how quick and easy it was so it’s a great bread for when time is tight.
Ingredients and substitutions
A few notes about the key ingredients …
Yeast – you can use either Active Dry Yeast or Instant yeast for this bread.
Buttermilk – this recipe is best made with regular buttermilk and is, in fact, a great way to use up left-over buttermilk! That said, I’ve included a DIY buttermilk substitute in the Recipe Tips below. Be sure to start with room temperature buttermilk.
Baking powder – yes, really! It’s an unusual addition to a yeast bread, but it’s what is responsible for the need for only one rising period for this bread. It also creates the nice, coarse and tight texture in this bread.
Sharp Cheddar cheese – a nice old Cheddar will give you the best flavour. I used an old white cheddar in my loaf here, so you don’t really see it in the bread, as it blends in. If you use an orange cheddar, it will be more obvious. You can use another type of cheese here, if you like or you have a bit you want to use up.
How to make buttermilk cheese bread
Here is a walk-through of the steps for making this bread. Always refer to the complete ingredient list and instructions in the Recipe Card below.
Mixing the dough:
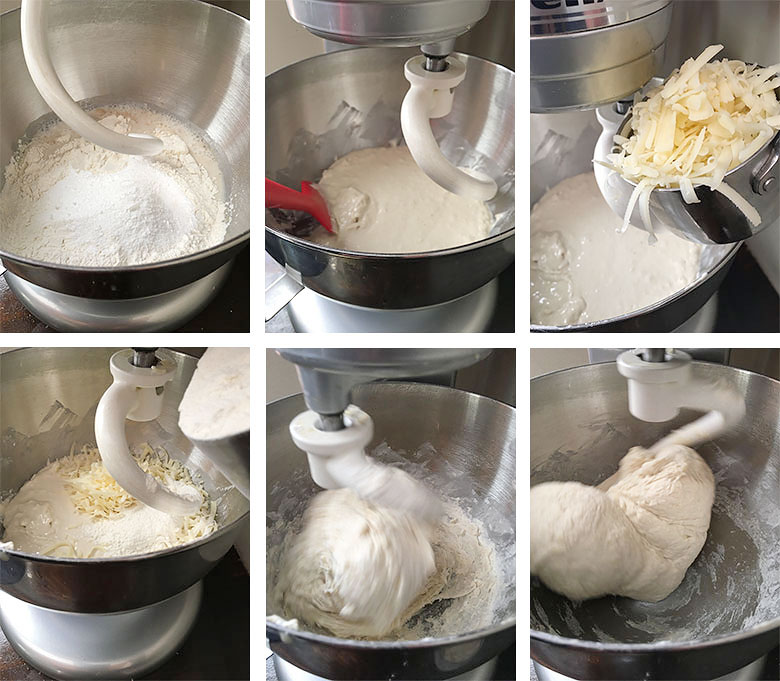
Be sure to add the flour in small increments and continue mixing until you have a dough that is soft and moist and that “cleans the bowl”. You may need a bit less flour than specified or a bit more. Add flour only until you have a moist but not sticky dough.
Shaping the Loaf:

Add flour to your work surface as needed to avoid sticking. Roll the dough into a rectangle that is about 11-inches wide and about 15 to 16-inches long. Roll up from the short end closest to you. Avoid stretching the dough as your roll. Pinch together the bottom seam, then pinch ends and fold them underneath the roll on each end. Place into a greased 9×5-inch glass or metal loaf pan.
Rising and Baking:
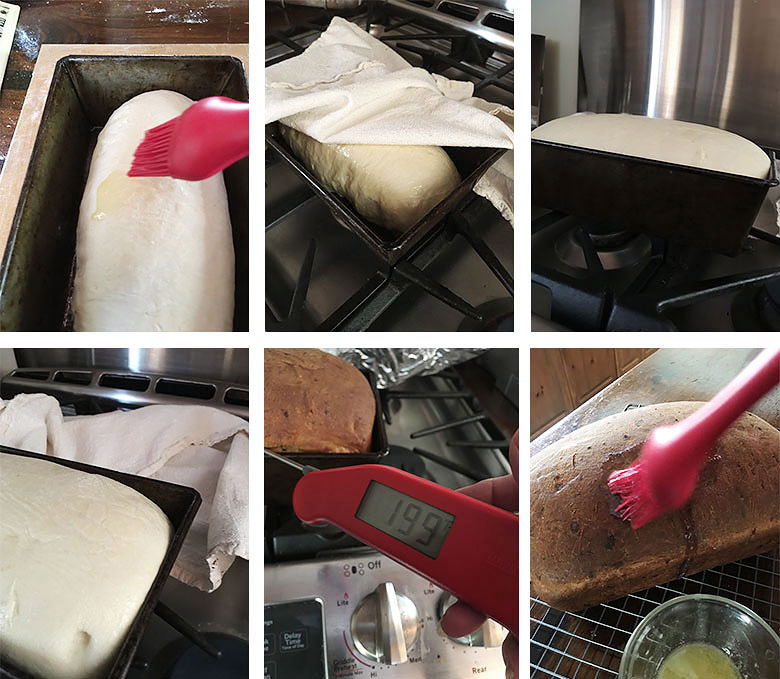
Brush the top of the loaf with melted butter to help keep it moist. To rise, cover your bread with a clean tea towel. Allow to rise until the loaf crests the pan by about 1 inch in the centre of the pan. You can test that it’s ready to bake by poking it with your baby finger. If the dent remains, it’s ready to bake.
Bake in preheated oven, checking loaf at about 25 minutes and covering loosely with aluminum foil, if loaf has browned enough already. Leave the foil on top until and continue baking about 35 minutes total, or until the loaf tests 195-200F internal temperature.
Remove from oven and immediately remove loaf from the baking pan to a cooling rack. Brush the top of the loaf with more melted butter, for a nice soft crust.
Recipe tips!
- You can leave out the cheese completely if you’d like a straight-up buttermilk bread. No other modifications are needed.
- If you don’t have buttermilk on hand but still want to make this bread, you can make your own buttermilk substitute. Simply mix regular milk with either lemon juice or white vinegar and let stand 10 minutes, before using. For this recipe, you’ll need to add 1 Tbsp + 1 tsp of lemon juice or vinegar to 1 1/2 cups regular milk.
- Starting a yeast dough with a cold liquid isn’t going to help your bread rise quickly :) Starting with room temperature buttermilk, combined with the warm water, will give your yeast a nice warm environment to rise in. If you’re in a hurry, give your buttermilk a quick shot in the microwave to take the chill off it.
Storage and freezing
To store this bread, simply wrap the cut end well with plastic wrap and store it on the counter for 2-3 days..
This bread will also freeze well, tightly wrapped, for up to 3 months, but I find they are at their best enjoyed within 1 month of freezing.
Want to save this recipe?
Enter your email and I’ll send it to your inbox. Plus, you’ll get great new recipes from me every week!
By submitting this form, you consent to receive emails from Seasons and Suppers.
You can unsubscribe at any time.
Get the Recipe: Buttermilk Cheese Bread
Ingredients
- 4 1/2 teaspoons active dry yeast or Instant yeast
- 3/4 cup lukewarm water, 105-110F.
- 1 1/2 cups buttermilk, at room temperature *see Notes below for substitute
- 4-4 1/2 cups all-purpose flour, approximately
- 2 Tablespoons white granulated sugar
- 2 teaspoons baking powder
- 2 teaspoons fine salt
- 1 cup sharp Cheddar cheese, shredded and packed
- 2 Tablespoons butter, melted, for brushing loaf before and after baking
Equipment
- One 9 x 5 inch loaf pan
Instructions
- Grease one 9 x 5-inch loaf pan and set aside. If using a glass loaf pan, be sure to reduce the stated oven temperature by 25° F.
- In a large bowl or the bowl of a stand mixer fitted with a kneading hook, add the warm water and yeast to the bowl and stir to combine. Allow to stand for 5 minutes.
- Add the room temperature buttermilk to the bowl with the yeast mixture, 2 1/2 cups of the flour, the white sugar, baking powder and salt. Blend together with a spoon or on low speed in a stand mixer for about 30 seconds. Scrape down the sides of the bowl, then increase speed to medium speed and mix for about 2 minutes (or vigorously stir with a spoon if using a bowl).
- Reduce speed to low and add the shredded cheese and a bit more flour. Mix to combine. Begin adding more flour, in small increments, mixing between additions, until you have a moist and smooth dough that cleans the side of the bowl. You may not need quite all the flour specified or you may need a touch more. Only add as much flour as needed to bring the dough to the desired consistency.
- Remove the dough to a floured work surface and knead briefly, adding additional flour only if the dough is sticking to your hands or the work surface. Form into a ball. Using a rolling pin, roll the dough into a rectangle that is about 11 inches wide and about 15-16 inches long. Starting from the short side, roll the dough up jelly-roll style, pinching the seam together to seal the roll. Fold about 1 inch of each end of the roll underneath the roll. Your roll should now be about 9 inches long. Place the roll into your greased 9×5-inch loaf pan.
- Brush the top of the loaf with some melted butter, then cover with plastic wrap or a clean tea towel. Allow the loaf to rise until the loaf crests the pan by about 1 inch in the centre of the pan, approximately 90 minutes (depending on how warm your kitchen is). I like to set mine on top of my pre-heating oven for a bit of extra warmth.
- Move oven rack to the lower-third position in your oven. Preheat oven to 425° F (non-convection/not fan-assisted) Reduce 25° F. for glass pans.
- When loaf has risen, you can test if it is ready to bake by poking your baby finger into the corner of the loaf. If the indentation persists and fills back partway very slowly, it's ready to bake.
- Bake in preheated oven for about 35-40 minutes, checking the loaf at about 25 minutes and loosely covering the top with a sheet of aluminum foil to prevent the top of the loaf from over-browning. Bake loaf until the internal temperature reaches between 195-200° F. If you don’t have a thermometer, remove the loaf from the oven, then from the pan and tap on the bottom of the loaf. It should sound hollow. If not, return to the pan and to the oven and bake a little longer.
- Once baked, immediately remove the loaf from the pan and place it onto a cooling rack. Brush the top of the loaf with more melted butter for a little shine and softer crust.
Notes
More yeast bread recipes to love!

Hi! I’m Jennifer, a home cook schooled by trial and error and almost 40 years of getting dinner on the table! I love to share my favourite recipes, both old and new, together with lots of tips and tricks to hopefully help make your home cooking enjoyable, stress free, rewarding and of course, delicious!
I added about a 1/2 teaspoon each of garlic powder and dill weed. I used extra sharp cheddar. Baked 35 minutes to 199°. I might bake it for just a couple minutes longer next time. You definitely need to cover it to keep from browning too much (I suggest doing it sooner than later) but the crust was still tender enough with a nice chew. The crumb is tight but not dense. Great for sandwiches or toast. So good! I’ll definitely be making this again!
Glad you enjoyed it, Callie and yes, it’s a great loaf for adding some extra flavours and herbs to. Thanks!
This was ridiculously good. I thought I used too much flour and over-proofed it, but it came out fantastic.
Changes: I used 4 tsp. instant yeast. I mixed everything but flour and cheese together and then followed the instructions as written. I did have to bake for 45 minutes.
Glad to hear, Katie :) Thanks so much!
I wasn’t impressed with this recipe. First, it took about two cups more flour in my mixer before it came together. Then after 60 minutes it had overproofed and I had to punch it down and try again. Then when baking, even with covering it with foil, the crust was too dark. This is the first recipe of yours I didn’t like!
Hi Jennifer…this loaf is calling my name!! Looks so splendid! Question, can I use instant yeast instead of dry active yeast? Thanks..
Hi Lola and yes, Instant yeast should work fine here. Best if it’s regular Instant Yeast (such as SAF), but I suspect even quick/rapid-rise instant yeast would work here as it’s just a one-rise bread (haven’t tested though). Enjoy! It’s a nice loaf :)
Will this work in a bread machine?
I honestly don’t know Judi. I have never used a bread machine, so I don’t have any experience in that department. It’s a single-rise bread, so I’m thinking you could use the dough function to mix the dough, then remove and bake, for sure. It’s a large loaf though, so make sure your machine is big enough to handle it. If you try it, let me know how it works.
Hello Jennifer: Thank you for the awesome recipe. I made it on the weekend. Mine turned out just as pictured and it was just as good they day after. This will be in my bookmarks. Rina
I’m so glad! Isn’t it a grand loaf? It will be in regular rotation here, as well. Thanks so much :)
What a gorgeous loaf of bread! I’ve never tried buttermilk bread but I really want to now. You are an accomplished bread maker Jennifer and I know I would enjoy this very much. We have chili in the slow cooker now!
Thanks Tricia! Buttermilk is a great way to use up buttermilk and then, of course, you can freeze the bread, too.
Looks like such a fluffy loaf Jennifer. Can’t beat a fresh baked loaf of bread. Love the way it makes my kitchen smell. Pinned!
Thanks Mary Ann! I never tire of the smell of fresh bread :)
This is amazing! Is there anything better than homemade bread, warm from the oven?
Thanks so much, Annie :)
I could never leave out the cheese, lol! Cheese obsessed over here, I tells ya ;) Homemade bread is the best and this loaf looks sooooo good! I’d hardly be able to wait for it to cool before I’d be smearing with butter!
Thanks Dawn and yes, the waiting for it to cool is always the hardest part :)