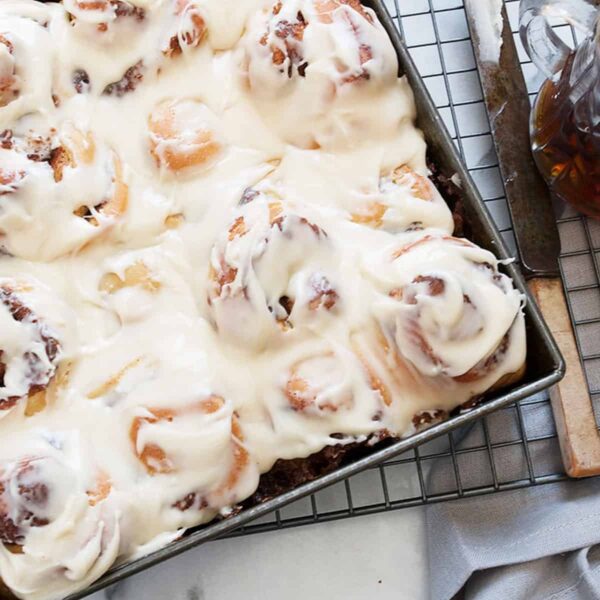
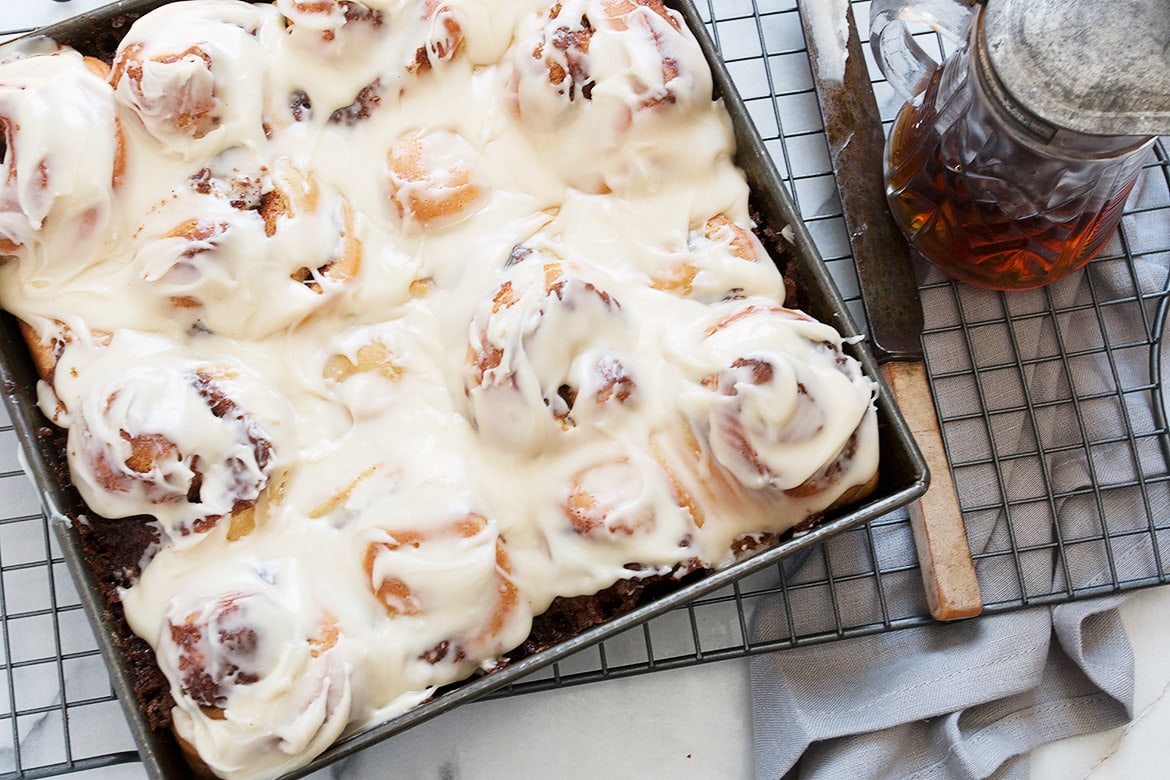
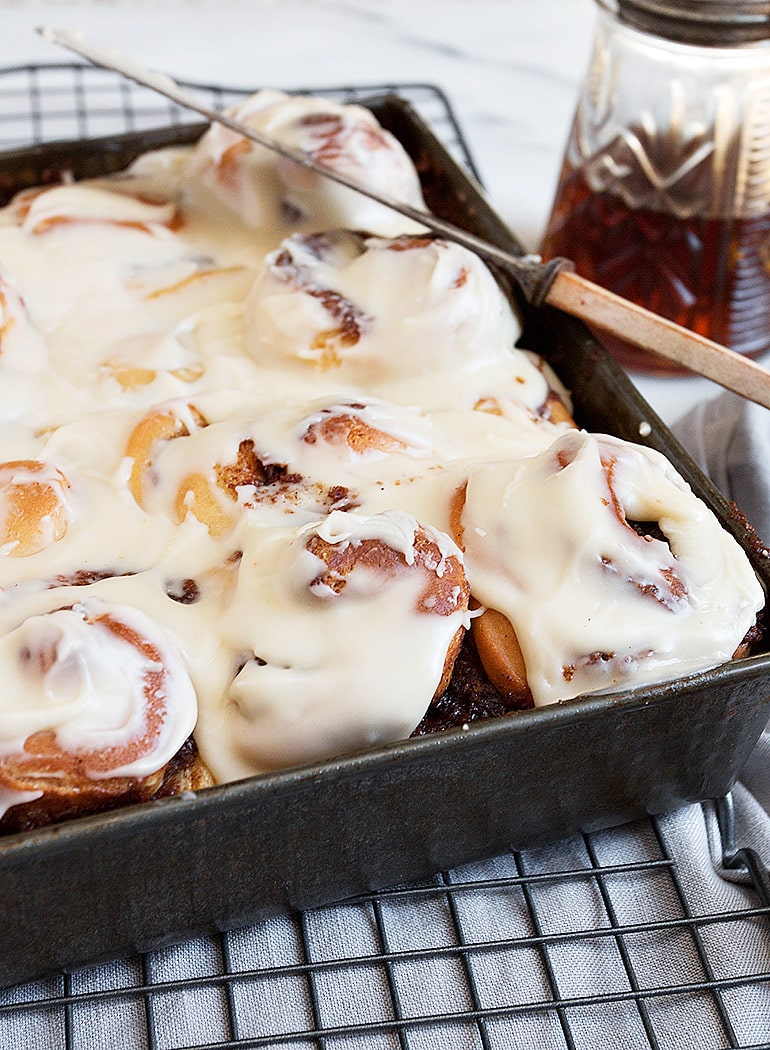
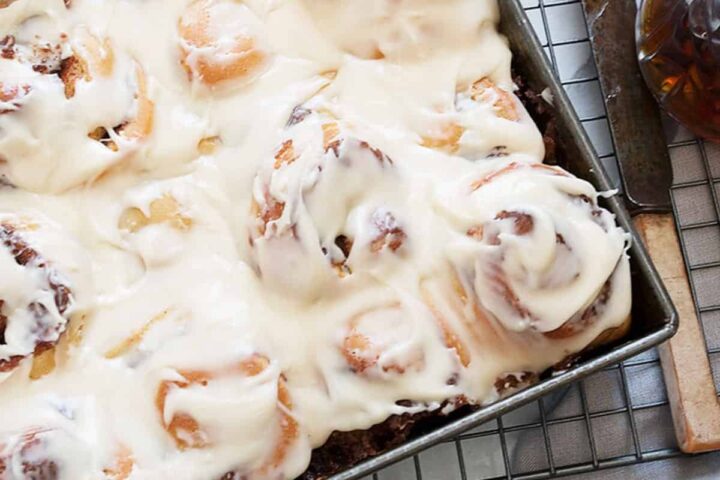
These maple cinnamon rolls feature maple syrup flavoured sweet rolls, topped with a delicious maple glaze. These tender and light buns are a delicious way to enjoy maple season.
I know some people think of maple as a Fall flavour, but if you live in maple syrup country, like I do, you will always associate it with Spring.
It’s these still cold nights and increasingly warmer days here that start the sap running in the maple trees. And that starts the only weeks long season of collecting and boiling that takes us through the last bit of Winter and start of Spring. Fresh maple syrup is the best way to welcome Spring, I think!
These Maple Cinnamon Rolls have maple syrup both in the roll dough, but also in the delicious glaze on top.
Ingredients and Substitutions
Maple Syrup – there is no substitute for real maple syrup when it comes to baking. I know maple syrup is expensive (even here!), but you need less than 1/2 cup to make these and you’ll enjoy such wonderful maple flavour and a delicious sweet treat, too!
Yeast – you can use Instant Yeast or Active Dry Yeast. I recommend Instant Yeast, such as SAF Brand.
Step-by-Step Photos
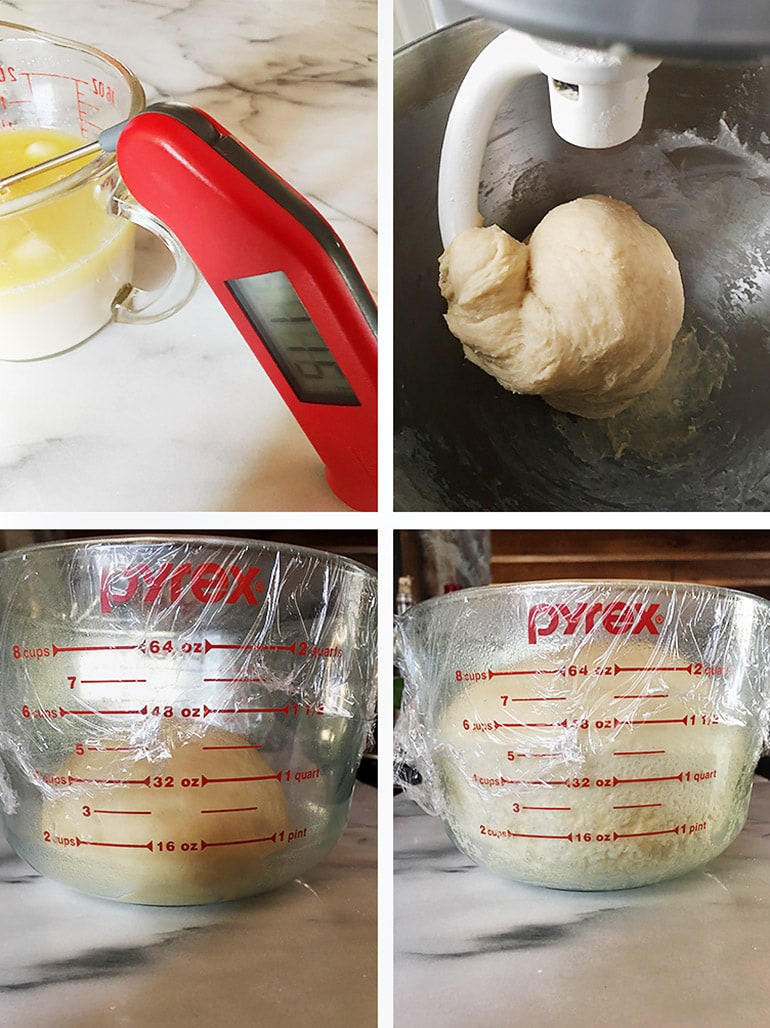
I used Instant Yeast here, that can handle a little higher temperature liquid. For Active Dry Yeast, closer to 110F is better. I also heat the milk, maple syrup and butter together in the microwave. The butter doesn’t need to be completely melted.
I do most of the kneading in my stand mixer, then remove to a floured work surface and give it a bit of hand kneading. You don’t need a stand mixer to make yeast rolls. It just saves a little mixing and kneading.
Proof the dough in a greased bowl or glass measuring cup, covered with plastic wrap. I just leave it on the counter to do it’s thing. Using a glass measuring cup makes it easy to see when the dough has doubled.
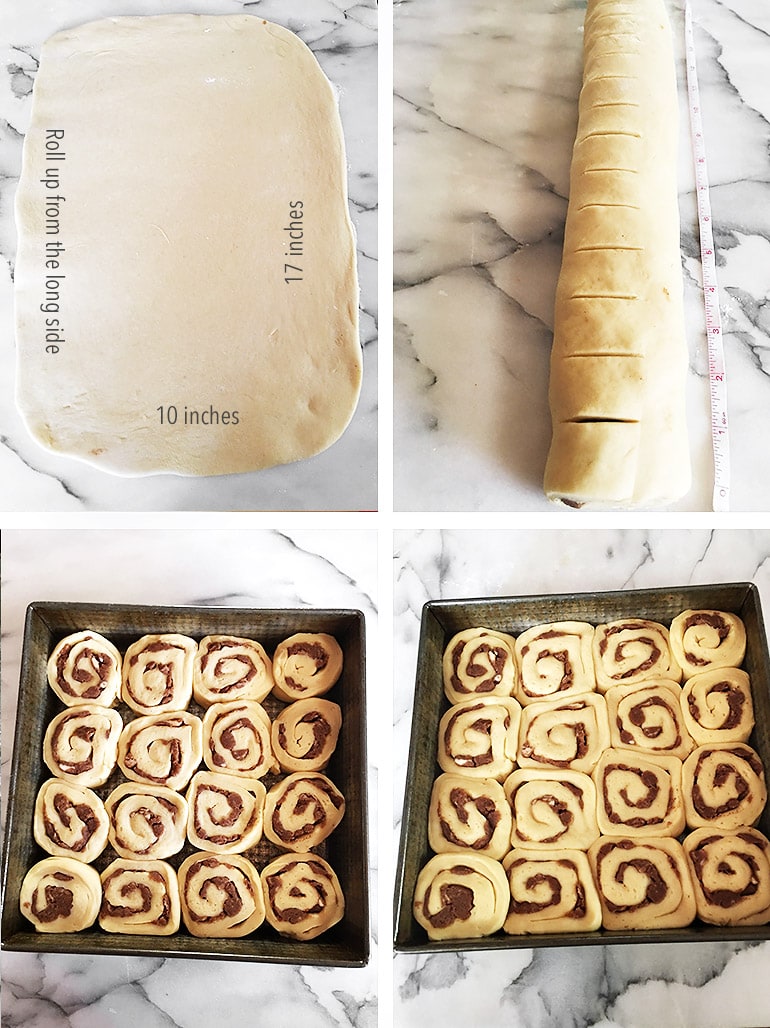
Roll out the dough into an 11×17-inch rectangle. Scatter the filling overtop, then roll up STARTING FROM THE LONG SIDE. Pinch together the seam.
I like to trim about 1/2-inch off each end, since there’s rarely any filling there anyway. That should leave a 16-inch log. (You can stretch or compact it a bit to get it to 16-inches if you need to).
Use a ruler or measuring tape to score sixteen 1-inch widths, then cut into rolls. (I love my little flexible, rewindable measuring tape! One of the handiest little tools in my kitchen :)
Place the cut rolls into a lightly greased 9×9-inch square baking pan. Cover with a clean tea towel and allow to stand about 30 minutes. You’ll notice that the rolls don’t increase a ton in size, but have filled out the pan a bit and the dough looks puffy.
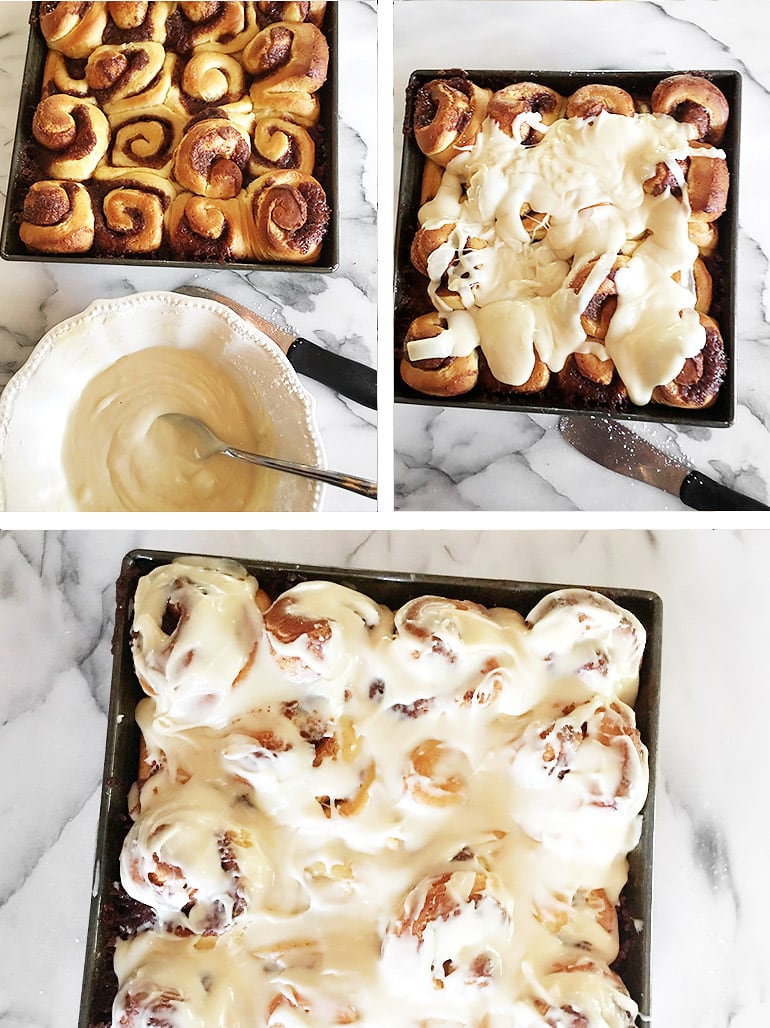
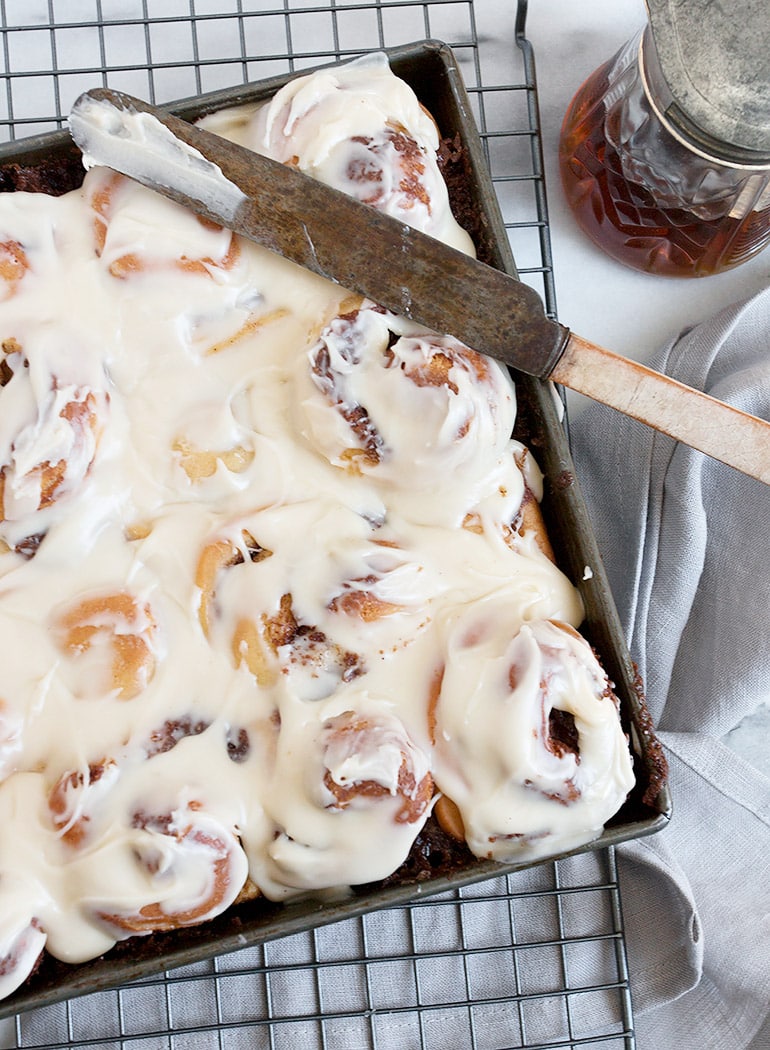
Bake rolls until golden. Some of the rolls may pop out a bit in the centre when baking :) Once completely cooled, prepare the glaze and pour over-top. Use a spoon to move the glaze around and over all the rolls.
Baking Tips
These rolls are made with quite an enriched dough, meaning that it has an egg and a good amount of butter in it. These things make for lots of great flavour and texture in the finished rolls, but the downside is that they don’t tend to stay fresh as long as a lesser-enriched dough. So … enjoy them the day you bake them or if you can’t eat them all right up, wrap well and freeze to enjoy later.
If you just can’t get real maple syrup or it’s cost prohibitive, you can use a good quality maple pancake syrup instead.
This dough is a slow riser. The first rise will probably take 2 hours. After forming, they will only rise an additional 30 minutes. During the second rise, they won’t grow substantially, but will a bit and the dough will be a bit puffy. They will rise much more once they get in the oven!
As noted above, these freeze beautifully.
My Best Tips for Baking with Yeast
I think most of the problems people have with baking with yeast, is treating yeast-based recipes like say, a cake recipe, where you just measure the ingredients, mix them all together and bake.
Yeast-based recipes just can never be that precise. Things like temperature, moisture in the flour your are using, the season your are baking in and rising time can differ from one kitchen to the next. All that makes yeast recipes less consistent from one kitchen to the next.
Now that you know this though, that’s more than half the battle :) Baking with yeast isn’t just measuring, mixing and baking, like a cake, for example. You’ll need to add to the mix a little trust in what you see (it looks sticky, so it needs more flour, regardless of how much flour the recipe says should go in), and a feel for the dough (does it feel smooth like a baby’s bottom when you’re done kneading?) and watching much it has grown in size as it rises (rather than watching the clock). Do that, and all will be good!
- Be careful with the temperature of your proofing liquid before adding the yeast, so you don’t compromise the yeast from the start. If the liquid is too cold, the yeast won’t activate. Too hot and it will die. The best temperature range for proofing liquid is 105-110F for Active Dry Yeast. Instant yeast is a bit more forgiving and can take temperatures up to 120F. All yeasts die at about 140°F. An Instant Read thermometer is handy to have on hand to check.
- Always treat the amount of flour specified in yeast-based recipes as “approximate”. Flours will vary from kitchen to kitchen and by season, so the amount needed to make a smooth, soft dough will vary.
- Given tip #2, I always hold back 1/4-1/3 of the flour specified in a recipe and add in only as much as is needed. If you dump all the flour in at the start, you may find that it is too much and it’s difficult to adjust well after that.
- Use a large glass measuring cup to proof your dough. It’s easy to see when the dough has doubled.
- Be patient. Rising times are also “approximate” and will vary as well. Trust what you see and not the clock.
Want to Save This Recipe?
Enter your email & I'll send it to your inbox. Plus, get great new recipes from me every week!
By submitting this form, you consent to receive emails from Seasons and Suppers.
Get the Recipe: Maple Cinnamon Rolls
Ingredients
Dough:
- 2/3 cup milk, whole milk recommended
- 1/3 cup maple syrup
- 1/3 cup salted butter, or add a pinch of salt to the dough if using unsalted butter
- 1 Tablespoon Active Dry or Instant yeast
- 1 large egg
- 3 cups all-purpose flour
Filling:
- 1/2 cup brown sugar
- 2 Tablespoons all-purpose flour
- 4 teaspoons cinnamon
- 6 Tablespoons butter, cold, cut into 6 pieces
Glaze:
- 1 cup icing/confectioners' sugar
- 3 Tablespoons butter, melted
- 3 Tablespoons maple syrup
- 1-2 teaspoons milk, to thin a bit, as necessary
Instructions
- Warm the milk, maple syrup and butter in the microwave for about 1 minute or in a small saucepan on the stove-top until just hot. Set aside to cool to about 110F (comfortably warm, but not hot). If you have a thermometer, check the temperature to be sure.
- Add the yeast to a large bowl or the bowl of a stand mixer, fitted with a kneading hook. Pour in the milk/syrup and stir to combine. Add the egg and mix in. Add 2 cups of the flour and mix/knead until you have a wet dough with all the flour mixed in. Begin adding in the last cup of flour, a bit at a time, kneading until you have a soft, smooth dough that is moist, but not tacky. If using a stand mixer, remove from mixer and knead on the counter a bit, adding addition flour, if needed.
- Form the dough into a ball. Place into a greased bowl and cover bowl with plastic wrap. Allow to rise until doubled, about 2 hours.
- When dough has almost doubled, prepare the filling by stirring together the brown sugar, flour and cinnamon in small bowl. Add the butter pieces and using a fork, work the butter into the cinnamon-sugar mixture, until all the dry mixture is moistened (no dry mix visible) and you have a crumb mixture. Set aside.
- Grease a 9-inch square baking pan and set aside. (Alternately a 10-inch round would work).
- Remove dough to a floured work surface. Roll dough into an 11x17-inch rectangle. Sprinkle the filling mixture evenly over the dough. Staring on the LONG (17-inch) side, roll the dough up jelly-roll style. Pinch the seam together and place the log onto a cutting board, seam side down.
- Trim 1/2-inch from each end of the log, leaving a 16-inch log. Use a tape measure or ruler to score 1-inch intervals along the log, then cut the log into 1-inch slices. Place the sliced rolls into your prepared pan in 4 rows of 4. Cover the pan with a clean tea towel and set aside to rise for an additional 30 minutes. (After 30 minutes, they will only rise a bit more, but the dough will look puffy).
- Preheat oven to 375F.
- Bake rolls in preheated oven for 20-15 minutes, or until quite golden. Remove from oven and set baking pan on a cooling rack to cool completely.
- When rolls have cooled, prepare glaze by stirring together the glaze ingredients until smooth. Pour over rolls, then use the back of a spoon to spread the glaze round and over all the rolls.
- Rolls are best enjoyed on the day they are baked. Left-overs can be frozen to enjoy later.
Notes
More Sweet Roll Recipes to Love!
Hi! I’m Jennifer, a home cook schooled by trial and error and almost 40 years of getting dinner on the table! I love to share my favourite recipes, both old and new, together with lots of tips and tricks to hopefully help make your home cooking enjoyable, stress free, rewarding and of course, delicious!
Jennifer thanks so much. I can make the 24hrs work. Are they buns cooked at internal temp of 190F?
Yes190-195 is good. Enjoy!
I would love to make those buns for my daughter and her partner but cannot make and deliver the same day. Do you think I can make them the day before, leave in fridge and let her cook the next day when I deliver?
Hi Kelly, how many hours are we talking about in the fridge? I think it’s pretty safe to do that up to 24 hours in the fridge. Pop in the fridge as soon as they are formed and in the pan. Once out of the fridge (at your daughter’s), they should be allowed to do their final rise, then bake. Hope that helps :)
How did I miss this? These are one of my all-time favorites yet I’ve never made them from scratch. Thank you for sharing! I need to try this!!
Thanks so much, Annie :)
Gorgeous rolls, I love the maple glaze!
Thanks Laura :)
Wow! These look amazing, all that wonderful icing! My family would go insane, for sure!
Thanks Chris!
If these are not a real treat, I don’t know what is! And with the maple twist, they must taste (and smell) heavenly!
Thanks Dawn :)
OMG! I want one this very minute Jennifer! They look totally amazing. That glaze has me drooling!
Thanks Mary Ann! The glaze is so delicious. I might have licked the bowl :)
Oh my! These are some of the prettiest maple rolls ever made. I love your step-by-step instructions and photos, and really wish I was your neighbor so I could stop by and “borrow” a few of these gems!
Thanks Tricia :) I need more neighbours to share with!