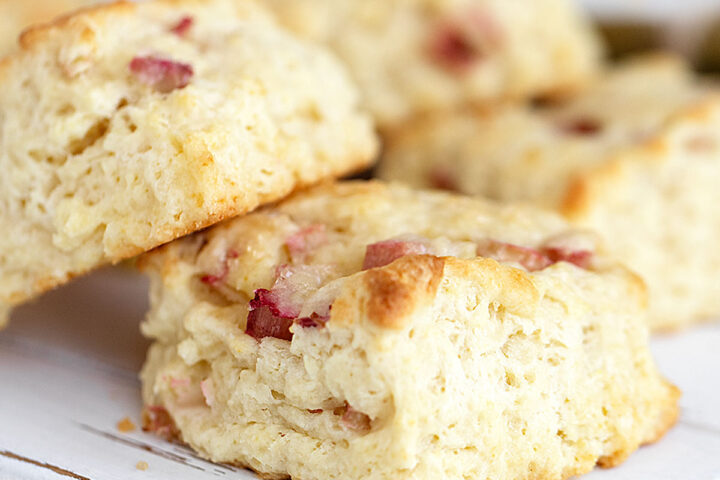
Get the Recipe: Rhubarb Scones
Delicious rhubarb scones, studded with pieces of rhubarb for a perfect sweet/tart taste. Can be made with fresh or frozen rhubarb.
Ingredients
- 1/3-1/2 cup fresh or frozen rhubarb, finely diced into 1/4-inch pieces
- 2 cups all-purpose flour, spooned and levelled
- 1/2 cup white granulated sugar
- 2 1/2 teaspoons baking powder
- 1/2 teaspoon salt, *reduce to 1/4 teaspoon if using salted butter
- 1/3 cup cold unsalted butter, cut into 6 or 7 pieces
- 1 large egg, cold
- 1/2 cup heavy whipping cream, cold (35% b.f.)
- 1/4 cup milk, cold (2 or 3% milk recommended)
- 1/2 teaspoon vanilla extract or vanilla bean paste
For topping before baking:
- Additional heavy cream, for brushing
- Turbinado, coarse or fine white granulated sugar, for sprinkling on tops
Instructions
- Preheat oven to 400°F. (non-convection)
- If using frozen rhubarb, thaw in a strainer to remove excess moisture, then pat dry well. Dice the rhubarb into a fine 1/4-inch-ish dice. Set aside.
- In a bowl or measuring cup, use a fork to whisk together the egg, whipping cream, milk and vanilla. Set aside.
- In large bowl, whisk together the flour, sugar, baking powder, and salt. Add the pieces of cold butter into the dry ingredients and toss to coat the butter in a bit of flour. Using your fingertips (or a pastry blender or pastry cutter), rub the butter into the flour, breaking up the larger butter pieces as you go, until you have a mixture with about pea-sized pieces of butter.
- Make a well in the middle of the flour mixture and pour about 2/3 of the cream mixture into the bowl. Using a fork, stir dough just enough that the liquid is absorbed. Begin adding additional cream mixture, stirring as you add it, until the dough is very moist, but not super sticky. You may not need to use all of the cream mixture.
- Turn the dough onto a lightly floured surface, and gently pan the dough into a rough oval about 1-inch thick. You can dust with additional flour as needed if the dough is too sticky.
- Scatter the rhubarb pieces over top of the dough. Fold the dough in half over onto itself and lightly press the dough down. Turn the dough 90 degrees and fold in half again. Using your hands or a rolling pin, press or roll the dough into a piece 3/4 to 1 inch thick.
- Use a 2-inch round or square biscuit cutter (or use a knife to cut into 2-inch squares). Place scones onto an un-greased baking sheet, about 1 1/2 inches apart. *You can use parchment paper if you like, for easy clean-up, but it is not necessary. Gather any scraps and re-roll and cut additional scones. *Alternatively, you can pat the dough into a 3/4 to 1-inch thick round and use a sharp knife to cut the round into 8 wedges. Remove the wedges to the baking sheet 1 1/2 inches apart.
- Place the baking sheet with the cut scones into the freezer for 15-20 minutes. *This step is important. Cold scones will bake up better and hold their shape well. If you can't fit the baking sheet into your freezer, place it in the refrigerator for 30 minutes instead.
- Use a pastry brush to brush the tops of the scones with a bit more cream, then sprinkle with sugar.
- Bake scones for 15-17 minutes, rotating the baking sheet front to back halfway through baking. Bake until they are light golden brown on the edges. Remove scones from the oven and leave them on the baking sheet for 2-3 minutes before transferring them to a wire rack to cool.
Notes
Scone Tips!
- Always start with cold butter, cold cream and a cold egg.
- Work quickly, so you don't warm and soften the butter.
- Don't be afraid to adjust the liquid amount, adding less or more, as needed, until the dough is very moist, but not super sticky. Different flours will absorb differently, so the exact amount will vary from kitchen to kitchen.
- It's ok to add a dusting of flour when shaping and cutting the scones, to prevent major sticking, but don't overdo it. Use just what you need.
- Don't overwork the dough. This warms and softens the butter.
- Fold the dough over several times before rolling and cutting. This creates layers and a better rise.
- Chill the cut scones before baking. This re-chills the butter and ensures the scones retain their shape, and layers and don't spread.
- If adding fruit, keep the fruit as dry as possible, to avoid adding extra liquid to the dough.
- When brushing the tops of scones with cream, be sure to brush carefully so that only the top is moistened with the cream. Don't use so much that it drips down the sides of the scones, as it can affect the rise by sealing the sides and not allowing steam to escape out the sides, which is what rises scones into lovely layers.
Serving: 1scone, Calories: 236kcal, Carbohydrates: 30g, Protein: 4g, Fat: 11g, Saturated Fat: 7g, Polyunsaturated Fat: 1g, Monounsaturated Fat: 3g, Trans Fat: 1g, Cholesterol: 49mg, Sodium: 131mg, Potassium: 169mg, Fiber: 1g, Sugar: 11g, Vitamin A: 407IU, Vitamin C: 1mg, Calcium: 71mg, Iron: 1mg
Tried this recipe?Mention @seasonsandsuppers on Instagram or tag #seasonsandsuppers.