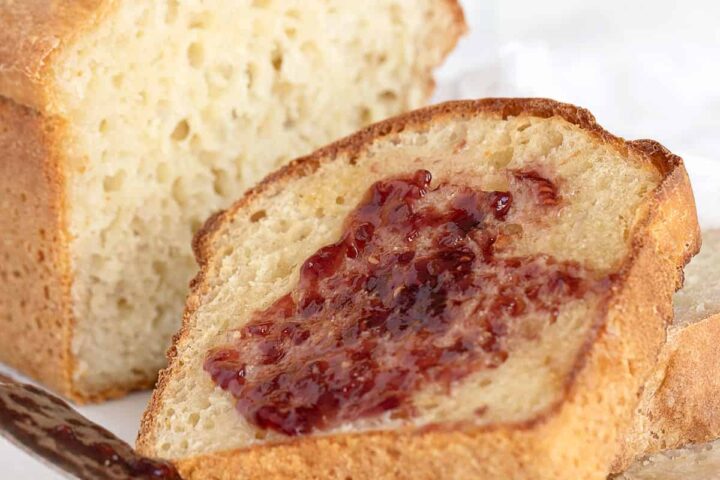
Get the Recipe: English Muffin Bread
A long time family favourite, this english muffin bread is perfect toasting bread, with lots of nooks and crannies to hold the melted butter. It's no-knead easy, too!
Ingredients
- 2 teaspoons dry active or instant yeast, not quick or rapid rise yeast
- Pinch white sugar
- 1/2 cup water, warmed to 105-115° F.
- 1 3/4 cups milk, warmed to 100° F.
- 1 1/2 teaspoons fine sea salt
- 3 1/4 cups all-purpose flour
- 1/2 teaspoon baking soda , dissolved in 1 Tablespoon water
- Cornmeal for dusting pans
Instructions
- In a large bowl or the bowl of a stand mixer fitted with a paddle attachment, sprinkle the yeast and sugar over the warm water. Stir and let stand for 5 minutes.
- Add the warm milk to the water and yeast mixture. Add the salt and mix in. With a large wooden spoon or the paddle attachment of a stand mixer running at low speed, add the flour 1 cup at a time, stirring the flour in after each addition. Stir until smooth and well-blended, about 30 strokes by hand or about a minute on low with a stand mixer.
- Cover the bowl with plastic wrap and place in a warm, draft-free place for about 1 hour. (I make this in a stand mixer. After mixing, I simply remove the paddle attachment and place plastic wrap over the top of the stand mixer bowl. Wash off the paddle attachment to use again later.)
- Prepare a 9x5 loaf pan by spraying well with non-stick spray (or grease well). (Alternately, you can use a 4x12, 4x13 or two 8x4 loaf pans. The 8x4 will make two small/short loaves). Sprinkle liberally with cornmeal on the bottom and sides of the pans. (Sprinkle the cornmeal into the bottom, then tip the pan so the cornmeal coats the sides, as well). Place loaf pan onto a baking sheet and set aside.
- At the end of the hour rise, the dough should have doubled in size and be quite bubbly.
- If making by hand, stir down the batter-like dough and add the dissolved baking soda/water mixture. (This is responsible for the lovely bubble texture of the finished bread.) Be sure to stir the baking soda in well. If using a stand mixer, remove the plastic wrap from the bowl and return the paddle attachment to the mixer, then add in the dissolved baking soda and mix into the dough on low speed for about 30-45 seconds or until well combined.
- Preheat oven to 375F (regular bake/not fan assisted), with the rack in the centre of the oven.
- Pour or spoon the batter into the prepared loaf pans, dividing the batter evenly between the two pans. A silicone bowl scraper works really well for this job. If necessary, use a spatula to push the batter into the corners of the pan. The pan will be about 1/2 to 2/3 full.
- Allow dough to rest in the pan until the dough rises to 1/2-inch from the top edge of the pan on the sides. **This can happen quickly, especially if using the 4x12 pan (10-15 minutes), so don't wander too far. As soon as the dough reaches that point, immediately put in the oven. (A 9x5 loaf generally takes about 30-35 minutes. If using a 4x13 with tall sides or two 8x4 pans, let rise no longer than 30 minutes).
- Place loaf into preheated oven, on the baking sheet and bake for 40-60 minutes or until at least 200F on an instant read thermometer or when the loaf is deep golden and the loaf pulls away from the side of the pan. (If at any point the loaf looks at risk of over-browning, place a sheet of aluminum foil loosely over the top of the loaves. My 4x12 dark-coloured loaf pan takes about 50 minutes. A 9x5 pan is generally done around 40 minutes.
- When done, remove from the oven, then immediately remove the loaf from the pan. Set to cool by laying them on their side on a wire rack (cooling on their sides prevents the centre of the loaf from sinking in). Allow to cool completely before slicing.
- *Sometimes this bread will develop a large bubble, that will cause a bubble to form on the side of the loaf. Just let it be and cut it off when the loaf is done :) The baking soda in the bread can also cause brown-ish steaks in the dough if it isn't mixed in well enough. It's harmless, too.
Notes
Be sure to read the Ingredient Notes and Baking Tips above this Recipe Card. You will also find step-by-step photos there.
Serving: 1serving, Calories: 194kcal, Carbohydrates: 39g, Protein: 7g, Fat: 1g, Saturated Fat: 1g, Polyunsaturated Fat: 1g, Monounsaturated Fat: 1g, Cholesterol: 1mg, Sodium: 264mg, Potassium: 106mg, Fiber: 2g, Sugar: 1g, Vitamin A: 49IU, Vitamin C: 1mg, Calcium: 40mg, Iron: 2mg
Tried this recipe?Mention @seasonsandsuppers on Instagram or tag #seasonsandsuppers.