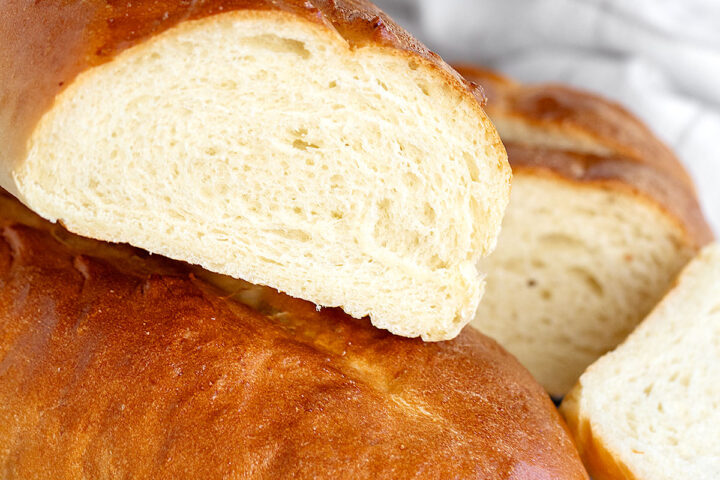
Get the Recipe: Easy Homemade Italian Bread
This quick and easy homemade Italian bread is ready to enjoy in just 2 hours! With a soft, chewy crust and a light as a feather interior. Keeps for days on the counter and freezes beautifully, too! Makes 2 loaves.
Ingredients
- 5-5 1/2 cups (625 g) bread flour or all purpose flour, spooned and levelled, bread flour recommended
- 4 1/2 teaspoons active dry or Instant yeast, instant yeast recommended
- 1 Tablespoon granulated white sugar
- 1 cup (250 ml) lukewarm water, about 105F
- 1/3 cup (76 g) butter, cold, cut into small cubes *see Note 1 below
- 3/4 cup (180 ml) hot water, (hot tap water is fine)
- 1 1/2 teaspoons fine table salt, add another 1/4 tsp if using unsalted butter
For the pan:
- Oil for brushing pan , or cooking spray
- cornmeal, for dusting the pan
For brushing before baking:
- 1 large egg white, lightly beaten
Instructions
- In a large bowl or the bowl of a stand mixer fitted with the paddle attachment, add the lukewarm water, sugar and yeast. Stir and let stand 5 minutes.
- Meanwhile, measure out the hot water in a 2-cup (500ml) measuring cup. Add the salt and stir to dissolve. Add the cold butter pieces into the water. Let stand until the hot water cools to lukewarm (105F).
- Add the hot water/butter mixture to the bowl with the yeast mixture. Add 3 cups (375g) of the flour to the bowl. Using the paddle attachment, mix together on low speed to start, then medium speed until well combined and all the butter pieces have disappeared.
- Remove the paddle attachment (scraping well), and replace with the kneading hook.
- Measure out 2 cups (250g) more flour. Being adding this flour to the bowl, starting with adding about 1 cup (125g), then adding more in smaller increments, kneading in well as you go. You want the dough to clean the bowl and wrap the dough hook, but still have a sticky bit at the bottom of the bowl. Add additional flour, as needed, to get the dough to that point. Once you get to that point, let it knead a couple of minutes to develop the dough. Tip! You may find that you don't need to use quite all of the additional measured flour or you may need to add even a bit more that the measured amount. That's fine. Add as much as you need to get the dough to the point described. (If you're unsure what the finished dough should look like, refer to the Recipe Video above this recipe card.) If in doubt, leave it a bit stickier, as it is easier to add flour on the counter than to add water to dough that is to stiff.
- Remove the dough to a floured work surface. If the dough is sticky, use a bench scraper or silicone scraper to fold the dough over on itself, dusting with additional flour as needed, until the dough is kneadable by hand. Knead the dough by hand for a minute or so.
- Divide the dough into 2 equal pieces (I like to weight the entire dough to calculate the exact weight for the two pieces and weigh the pieces out. My dough ball is typically around 1150g and the pieces are in the 575g range. Yours may be a bit more or less and that's fine, as long as it's in the ballpark.) Form the two pieces into balls and let rest 5 minutes. You can throw a clean tea towel over them if you like.
- Prepare a large baking sheet (11x15-inch pan works well!) by lightly brushing with oil (or spraying with cooking spray) and sprinkling with cornmeal. Set aside.
- With one piece of the dough, roll into a 12" wide by 8" deep rectangle. Starting with the 12" side, roll up tightly and as you roll, pinch the lower part of the rolled part down onto the flat part along the edge (refer to the Recipe Video if this isn't clear). Once rolled entirely, pinch the seams together. Place the roll with the seam side down. Measure the roll. You want it to be 12" long, so if it is a bit longer tap on both ends to shorten it back up, as needed. Tuck both ends of the roll under and pinch together to make rounded ends. Place onto prepared baking sheet, then repeat with the other piece of dough. Tip! Place the logs closer to the long edge than you think you should. I find leaving about 2 inches between the long edge of the pan and about 4 inches between the two loaves works well.
- Spray with cooking spray or lightly brush a large piece of plastic wrap with oil. Place oiled side down over the two loaves. Let the loaves rise until doubled in size. Tip! This can take anywhere from 30 minutes to 60 minutes, depending on the temperature of the kitchen, so be ready to check on it as it rises. Tip! Trust what you see and don't be married to the clock. You don't want to over-rise the bread.
- Preheat oven to 425F / 220C (not fan assisted).
- Meanwhile, prepare the egg white and have a brush ready. Measure out 1 cup of water and have ready a rimmed baking sheet, cast iron skillet or roasting pan.
- When loaves are almost ready, pop the empty rimmed baking sheet onto the rack below the centre rack to preheat. Remove the plastic from the risen loaves and brush thoroughly with the egg white (be sure to brush evenly all the way around and to the bottom of the loaves). If you like, you can cut 3 diagonal slashes into the loaves or a slash down the centre of the loaf (this is optional).
- Just before placing the loaves into the oven, pour the water onto the hot baking sheet (I pour it right through the centre rack onto the baking sheet, so I don't need to move the sheet in and out), then immediately place the baking sheet with the loaves onto the centre rack to bake.
- Bake the loaves for 15-20 minutes, rotating the pan front to back after 10 minutes of baking. Bake until deep golden and they sound hollow when tapped. If you have an instant read thermometer, you can use to check the loaves. They should reach 195F internal temperature.
- Remove the loaves from the oven, then immediately remove to a cooling rack to cool almost completely before slicing (slicing hot bread makes for a gummy interior, so let them cool as long as you can.) Tip! If your loaves have baked together in the centre, leave them attached while they cool, to keep the steam in the loaves, then separate them once cooled.
- Once cooled, store the loaves at room temperature in an airtight container or plastic bread bag. The bread will keep well for 3 days or more. This bread will also freeze well up to 3 months.
Notes
Note 1: You can replace the butter with an equal amount of vegetable oil, canola oil or olive oil, if you prefer. This substitution may alter the formula slightly and may require a bit more flour to bring the dough together as described. This change may also affect the flavour (less flavour) and the shelf-life (a little shorter shelf-life). I would generally recommend using the butter, unless you don't have butter on hand or you are wanting to make a butter-free loaf.
Be sure to read the notes above this Recipe Card, for more tips on making this recipe. You'll also find step-by-step photos and a Recipe Video, that you may find helpful.
Serving: 1serving, Calories: 82kcal, Carbohydrates: 13g, Protein: 3g, Fat: 2g, Saturated Fat: 1g, Polyunsaturated Fat: 0.2g, Monounsaturated Fat: 0.5g, Trans Fat: 0.1g, Cholesterol: 4mg, Sodium: 102mg, Potassium: 32mg, Fiber: 1g, Sugar: 0.4g, Vitamin A: 48IU, Vitamin C: 0.004mg, Calcium: 4mg, Iron: 0.2mg
Tried this recipe?Mention @seasonsandsuppers on Instagram or tag #seasonsandsuppers.