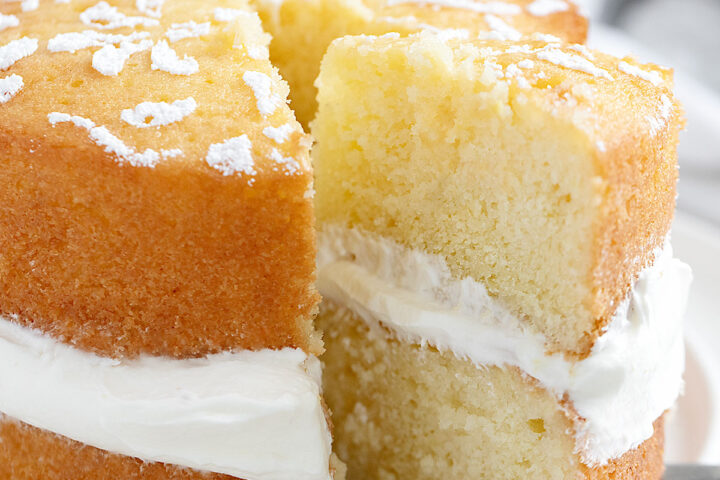
Get the Recipe: Lovely Lemon Syrup Cake
A lovely little lemon syrup cake, with two layers of lemon syrup soaked cake, with a layer of whipped cream sandwiched in between.
Ingredients
- 4 large eggs
- 3/4 cup + 2 Tablespoons (180 g) white granulated sugar
- 7 Tablespoons (100 g) unsalted butter, melted
- 3 1/2 Tablespoons (50 ml) vegetable oil, or similar neutral-tasting oil such as canola, sunflower
- 3 1/2 Tablespoons (50 g) full fat sour cream, or plain full fat yogurt
- 1 lemon, zested
- 1 3/4 cups (200 g) all purpose flour, spooned and levelled
- 2 1/2 teaspoons baking powder
- Pinch fine salt
For the lemon syrup:
- 1/2 cup + 1 1/2 Tablespoons (120 g) white granulated sugar
- 7 Tablespoons (100 ml) water
- 3 lemons, juiced
To serve:
- 3/4 cup (180 ml) heavy whipping cream, 35% b.f.
- 1 - 2 Tablespoons white granulated sugar, to taste, for sweetness
- icing/confections' sugar, for dusting before serving
Instructions
- Tip! This recipe is best made using a kitchen scale and the weight and the ml measurements on your measuring cups, for best accuracy. I have converted from these measures and they never convert quite exactly.
- Preheat oven to 350F (180C) regular bake/non convection setting), with oven rack in the centre of the oven. Grease or spray two 6-inch baking pans (2" deep) and line with parchment paper. *See Note 1 below for options for the pans and for some other baking pan size options.
- In a large bowl with an electric mixer or in the bowl of a stand mixer fitted with the whisk attachment, whisk together the eggs and sugar at medium speed (Speed 6 on a Kitchenaid mixer) until combined. With the mixer still running at medium speed, add and whisk in the melted butter, oil, sour cream and lemon zest.
- In a medium bowl, stir together the flour, baking powder and salt. Add this to the egg mixture with the mixer set to low (to avoid the flour flying out of the bowl), then once incorporated increase speed to medium and mix briefly until well mixed.
- Divide the batter evenly between the two cake pans (or single pan, if using) and spread top level. Bake in preheated oven for 25-35 mins or until a skewer inserted into the centre of each cake comes out clean. *Baking time will vary from oven-to-oven and depending on the colour of your baking pans. Darker pans will bake more quickly. Be sure to test to ensure the cakes are thoroughly cooked! Remove the cakes from the oven, leaving the cakes in the pans and placing the pans onto a cooling rack for 20 minutes.
- As soon as the cakes are out of the oven, make the lemon syrup. Add the sugar and water to a medium saucepan and heat over medium heat, stirring until the sugar has dissolved, then add the lemon juice and heat until the syrup is just about to boil. Remove from the heat and cool until warm before using. *I like to transfer the hot syrup to a 2-cup measuring cup so it will cool more quickly and it will be easier to pour over the cakes.
- Once the cakes have cooled in the pans for 20 minutes, use a cocktail stick or fine skewer to prick the surface of each cake with a lot of holes (press in about 1-inch or so). Pour the warm syrup over the cakes, dividing evenly between the two cakes (or pouring it all over if making a single, larger cake).
- Leave the cakes to sit in the pans with the liquid for 3-4 hrs before removing the cakes from the pan. Tip! If you aren't ready to serve the cake right away, you can wrap the cake layers well (double wrap with plastic wrap) and refrigerate up to 24 hours.
- To assemble the cake (close to serving): Whip the cream with the white sugar in a bowl until soft peaks form. Place one layer of the cake on a plate. Top with whipped cream (you may not need quite all of it) and spread to level, then carefully place the second layer on top. Dust the top of the cake with icing sugar and serve. (I used a cake stencil here, but a paper doily works, too, if you want to dust on a design.) Tip! To slice the layer cake with the whipped cream between the layers, rather than holding the knife horizontally and slicing straight down, hold the knife vertically and stick it into the cake straight down in the centre of the cake, then repeat this downward motion working toward the outside of the cake. This will help to prevent the whipped cream from squishing out the sides of the cake too much when cutting. (A little whipped cream will still squish out a bit, but I consider it just part of the charm of this casual cake :)
- If you made a single layer cake or loaf cake, slice and serve with a dollop of whipped cream on top or on the side.
- This cake will keep in an airtight container in the fridge for up to three days. If you don't have a container, be sure to wrap around the outside of the cake, as well as any cut edges, as the cake will lose moisture out the sides if not covered.
Notes
Note 1: For ease of getting the cakes out of the pans, you can fully line the baking pan with parchment paper, with an inch or so extending past the sides of the pan to use as handles to remove the cakes from the pan. The downside is that when fully lining the pans, you will probably get some wrinkles on the sides of the cakes where the parchment folds are. So try your best to make it as smooth as possible. You can also only line the bottom of the pan (as I did here) and take your chances that it will come out cleanly. If you go this route, use a knife and carefully run it around the sides before removing the cakes.
Pan Size Options: If you don't have two 6-inch round cake pans (6x2"), you can use one 9-inch round (2" deep) cake pan or one 9x5-inch loaf pan. In both of these alternative pans, you will forego the layer cake aspect of this cake, but you could serve slices with a dollop of the whipped cream on top or on the side. I don't recommend using a springform pan simply because when the syrup is poured over the cake, it may leak out of a springform pan and not soak the cake properly.
Be sure to read the notes above this Recipe Card, for more tips on making this recipe. You'll also find step-by-step photos there that you might find helpful.
Serving: 1serving, Calories: 438kcal, Carbohydrates: 57g, Protein: 6g, Fat: 22g, Saturated Fat: 11g, Polyunsaturated Fat: 4g, Monounsaturated Fat: 6g, Trans Fat: 0.4g, Cholesterol: 118mg, Sodium: 38mg, Potassium: 237mg, Fiber: 2g, Sugar: 37g, Vitamin A: 651IU, Vitamin C: 23mg, Calcium: 88mg, Iron: 2mg
Tried this recipe?Mention @seasonsandsuppers on Instagram or tag #seasonsandsuppers.