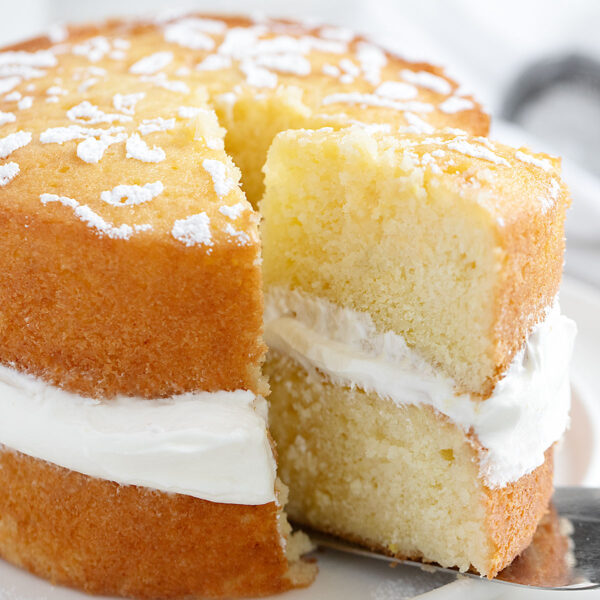
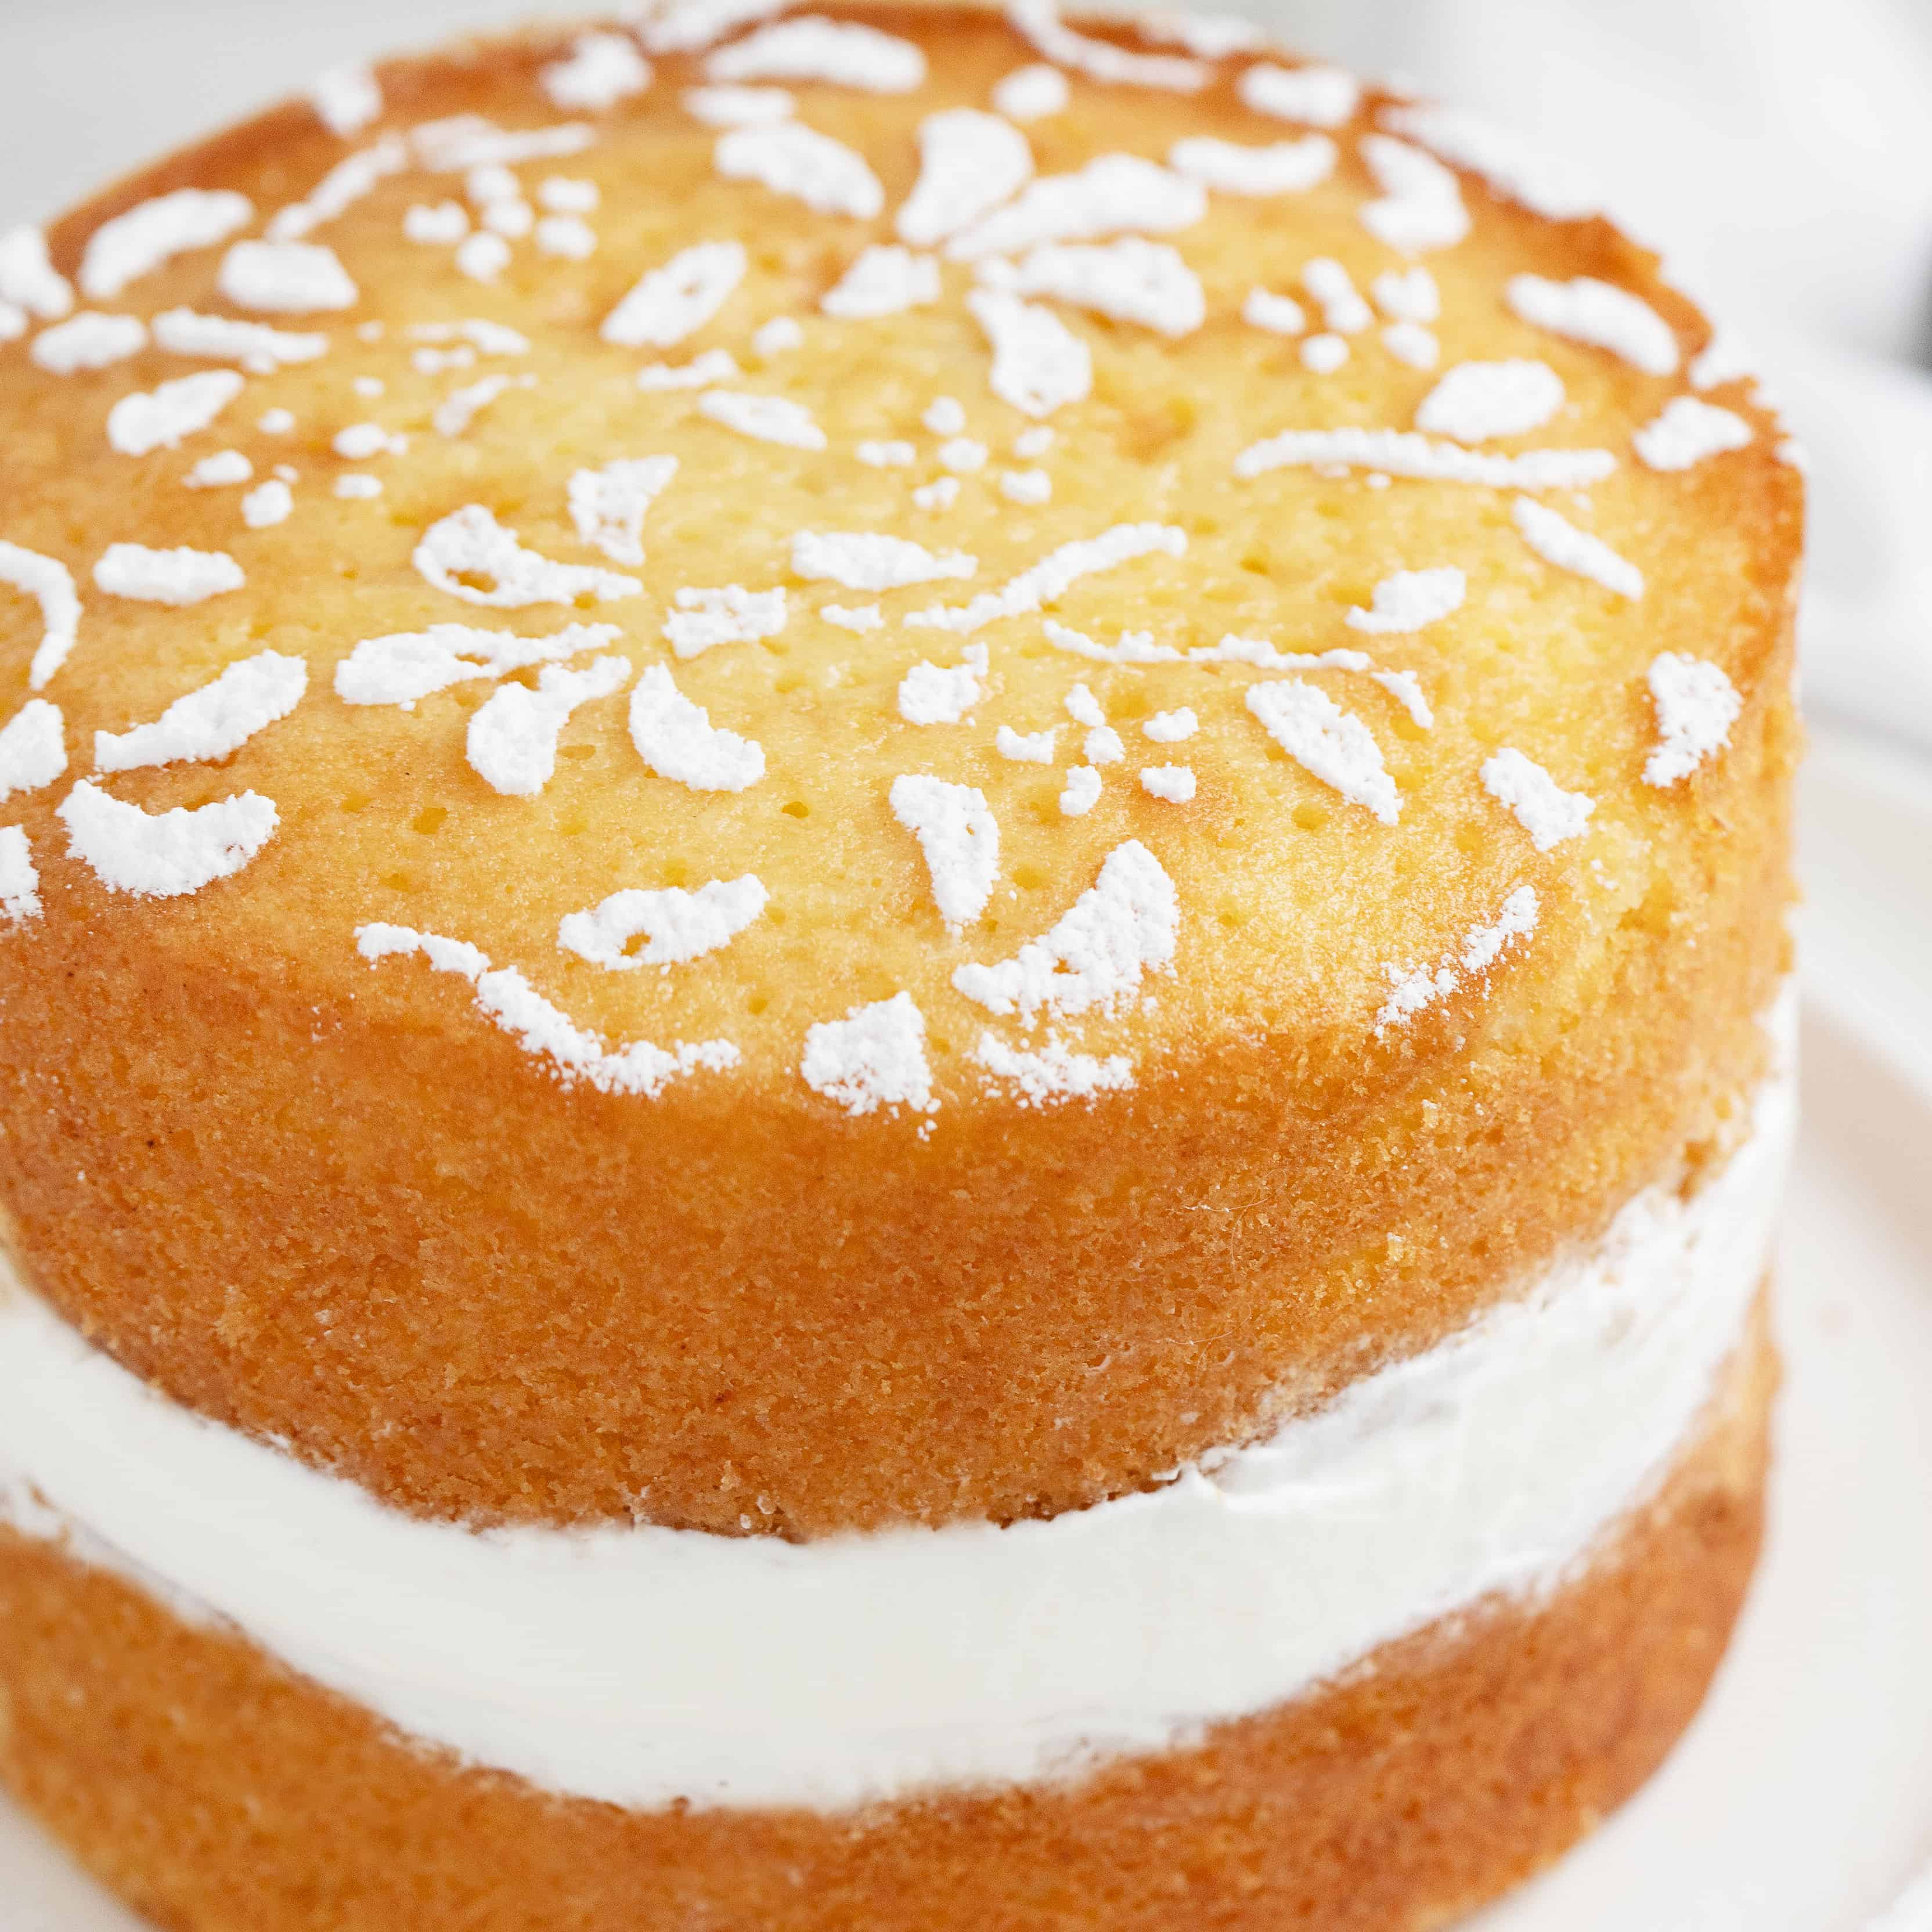
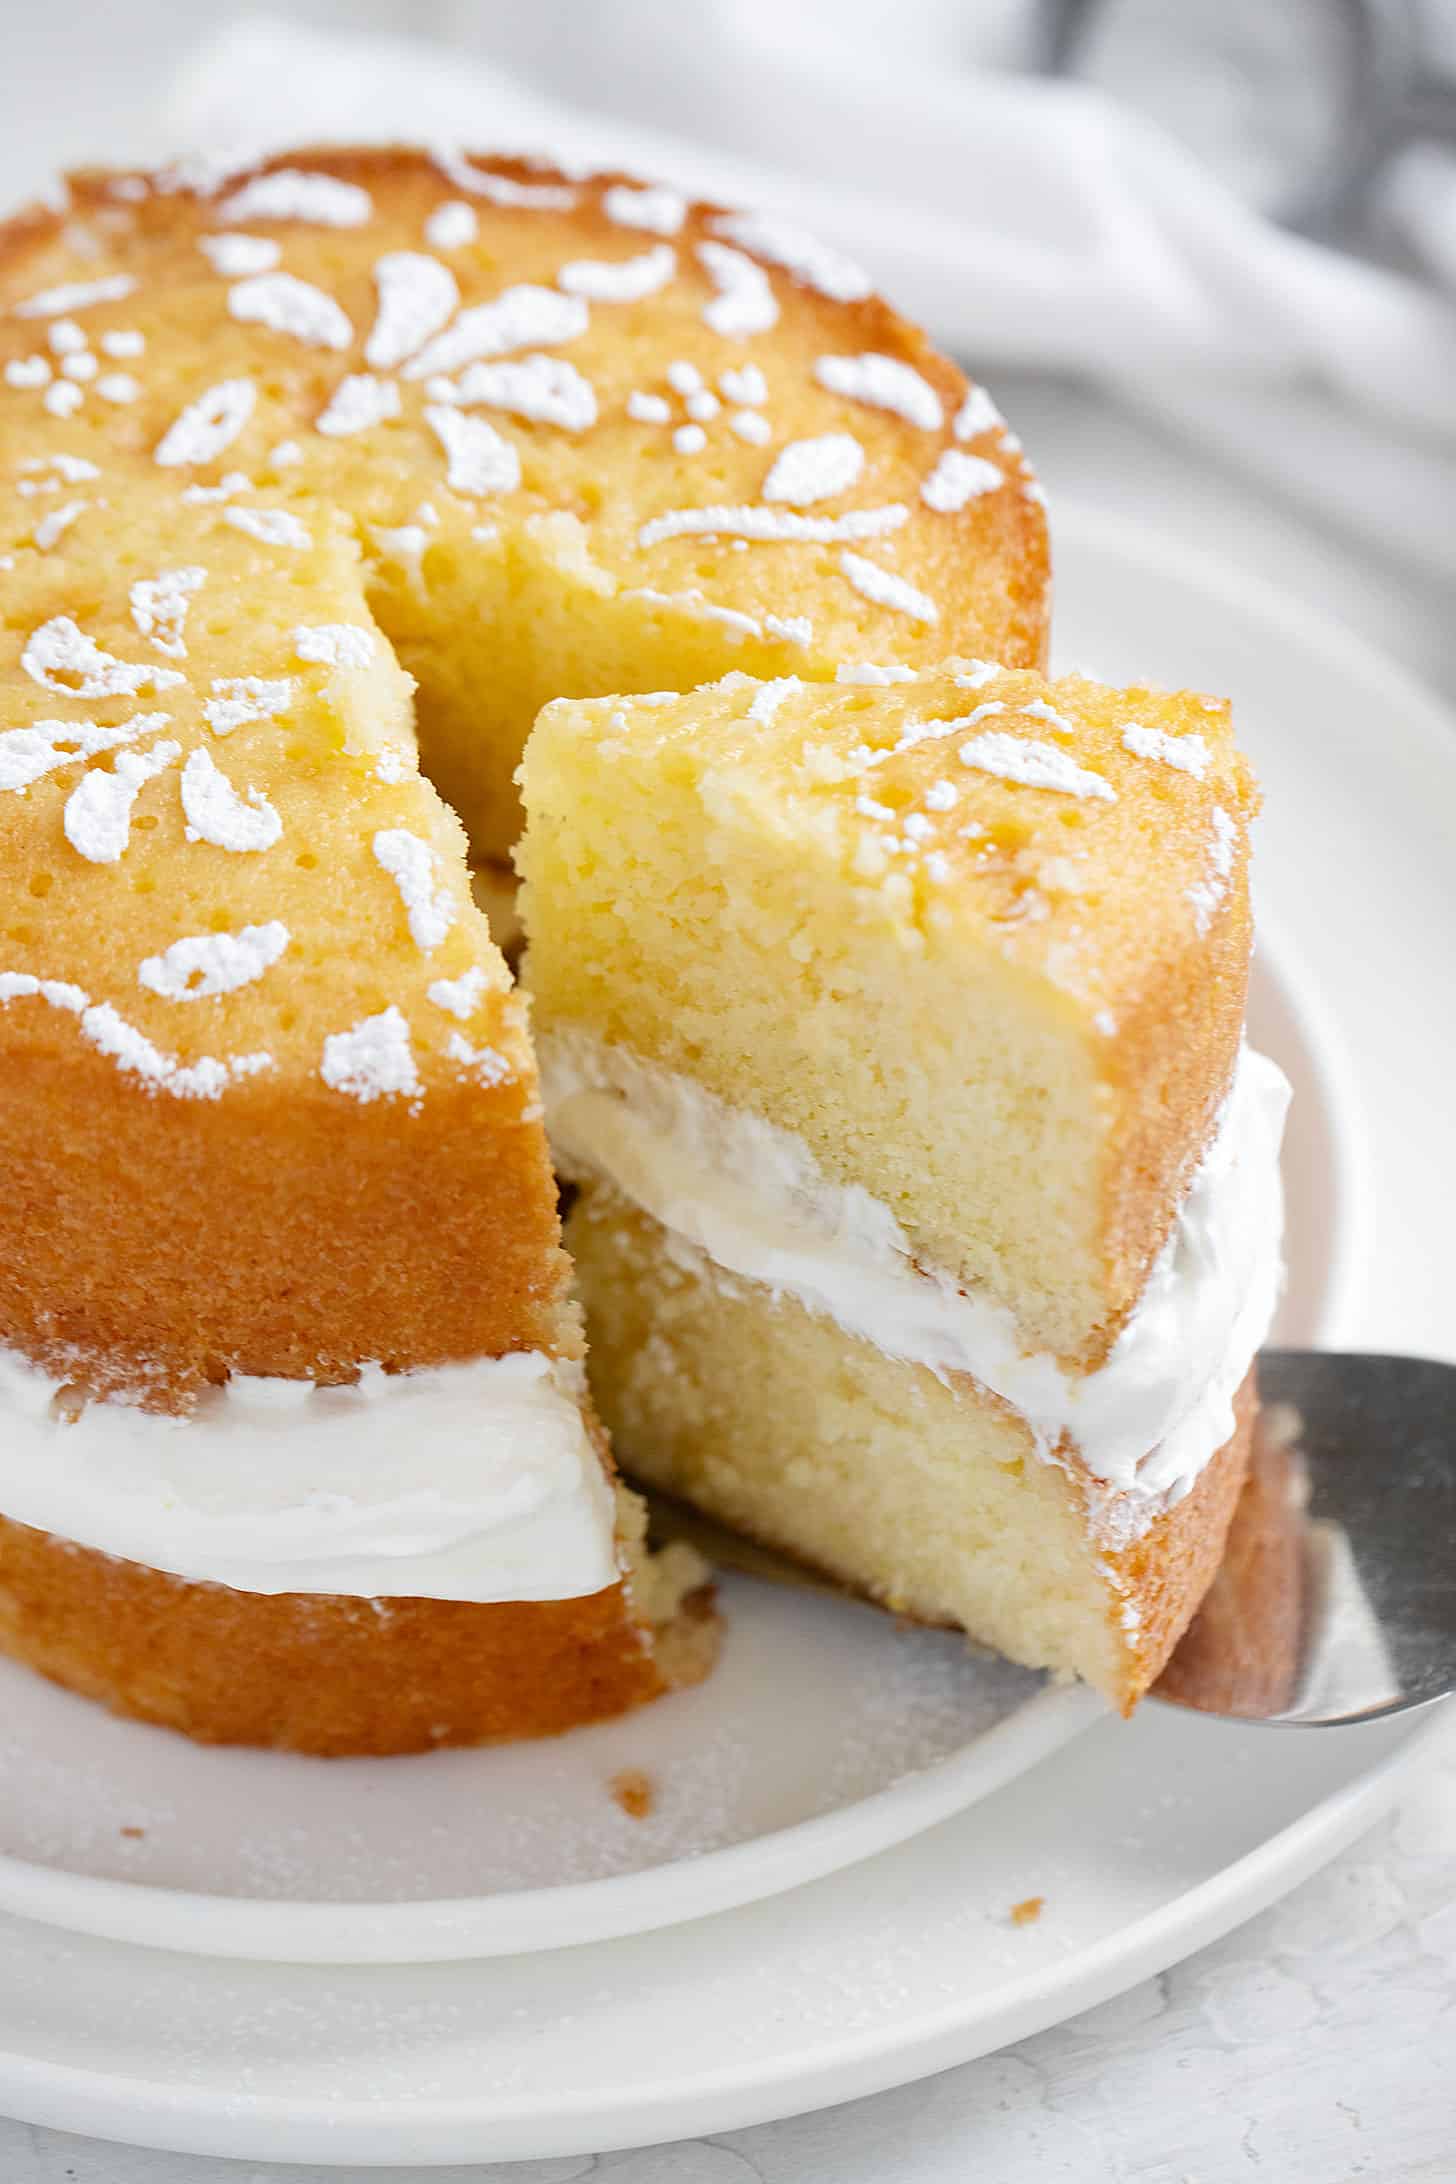
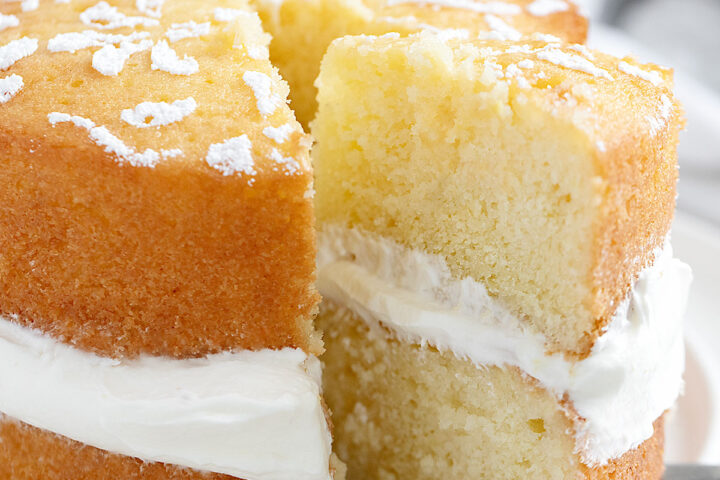
A lovely little lemon syrup cake, with two layers of lemon soaked cake and a layer of whipped cream sandwiched in between. This simple lemon cake is lightly sweet, perfectly moist and full of lemon flavour.

If you’re looking for an easy lemon cake recipe that is full of the lemon flavour you crave, this is it! I love this small lemon cake with syrup as it is always moist and while it looks special, it requires minimal decorating, so it’s perfect for a fuss-free, but fabulously delicious lemon cake!
What is a syrup cake?
A syrup cake is a regular cake that is soaked in syrup after baking. In this cake, it is a lemon cake, soaked in a lemon and sugar syrup, for twice the lemon flavour! The syrup is poured over the cake after the cake is baked and still warm, then left to soak into the cake for several hours. You might think it would make for a mushy cake, but as you can see, it absolutely doesn’t. It’s a bit of magic and it makes for such a full-on lemon-flavoured cake!
Key ingredients and substitutions
Lemons – you will need a couple of teaspoons of lemon zest for the cake itself. For the lemon syrup, you’ll need the juice from 3 lemons. So start with 3 average-sized fresh lemons, organic or well-scrubbed.
How to make this lemon syrup cake
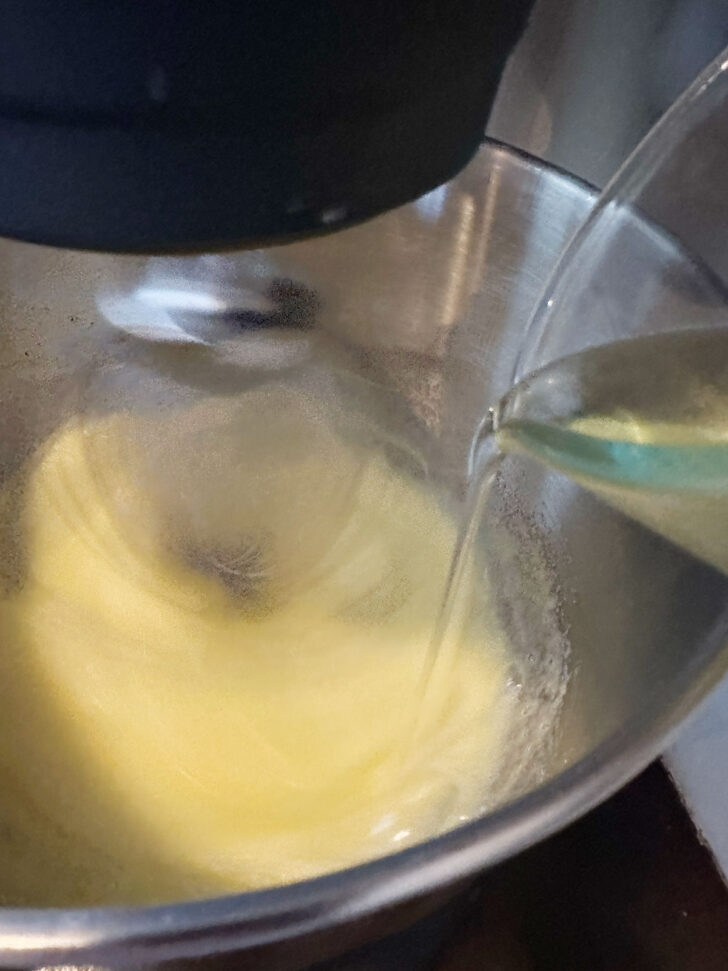
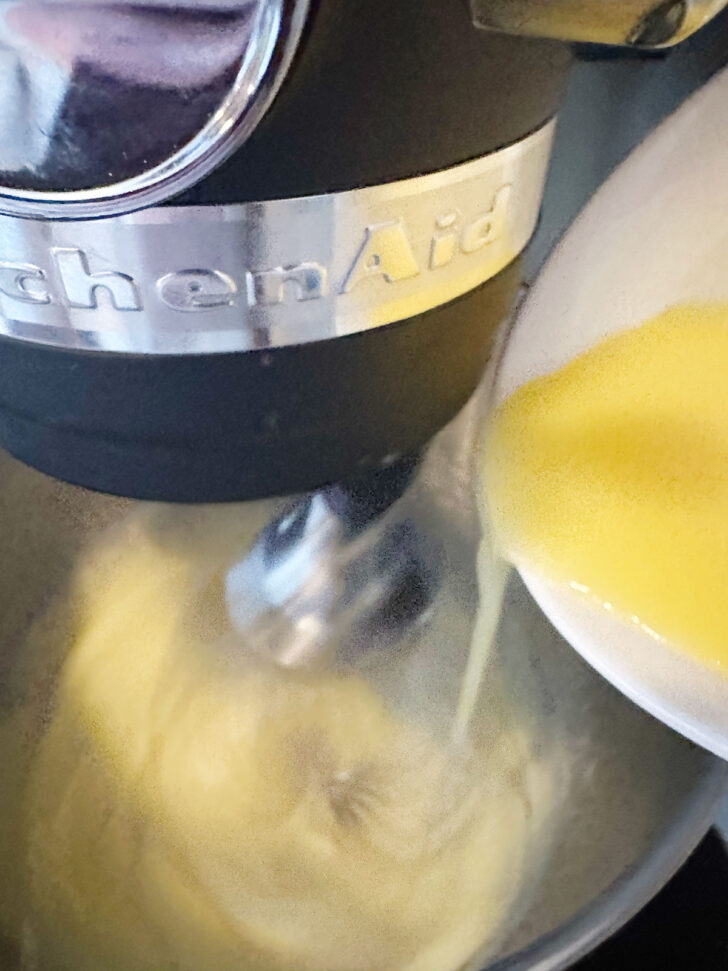
This is a visual summary of the steps to make this recipe. Refer to the Recipe Card below for a complete list of ingredients and instructions.
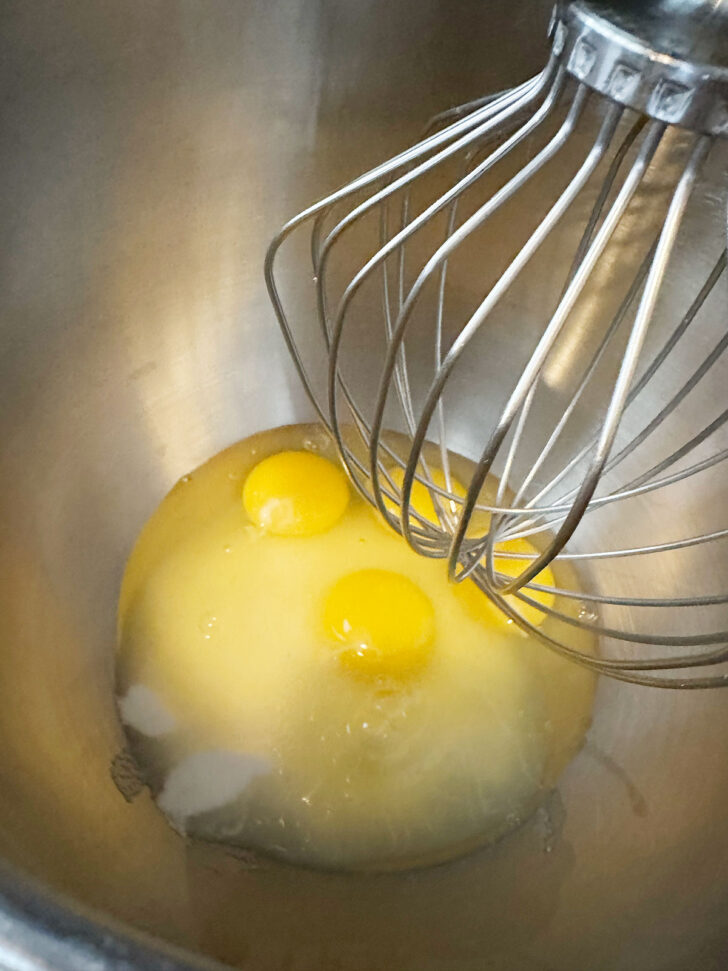
- Add the eggs and sugar to a bowl (with an electric mixer) or the bowl of a stand mixer fitted with the whisk attachment.
- With the mixer on high medium speed (Speed 6-ish on a Kitchenaid mixer) whisk together well, then whisk in the oil with the mixer running.
- With the mixer running, whisk in the melted butter.
- Continue mixing and whisk in the sour cream.
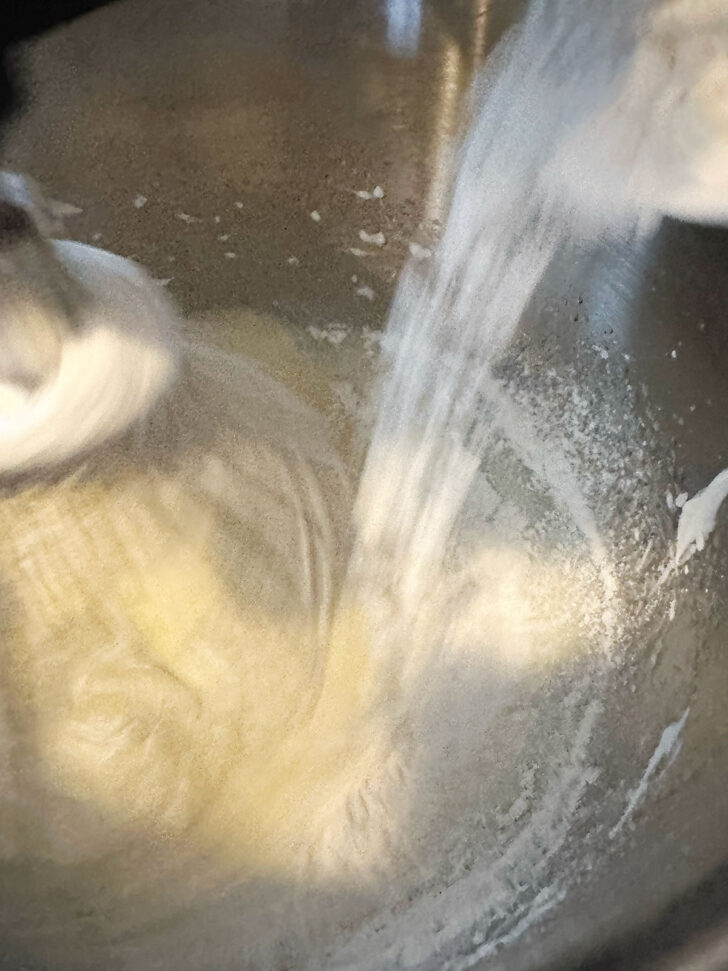
- Reduce the speed of the mixer to whisk in the flour mixture.
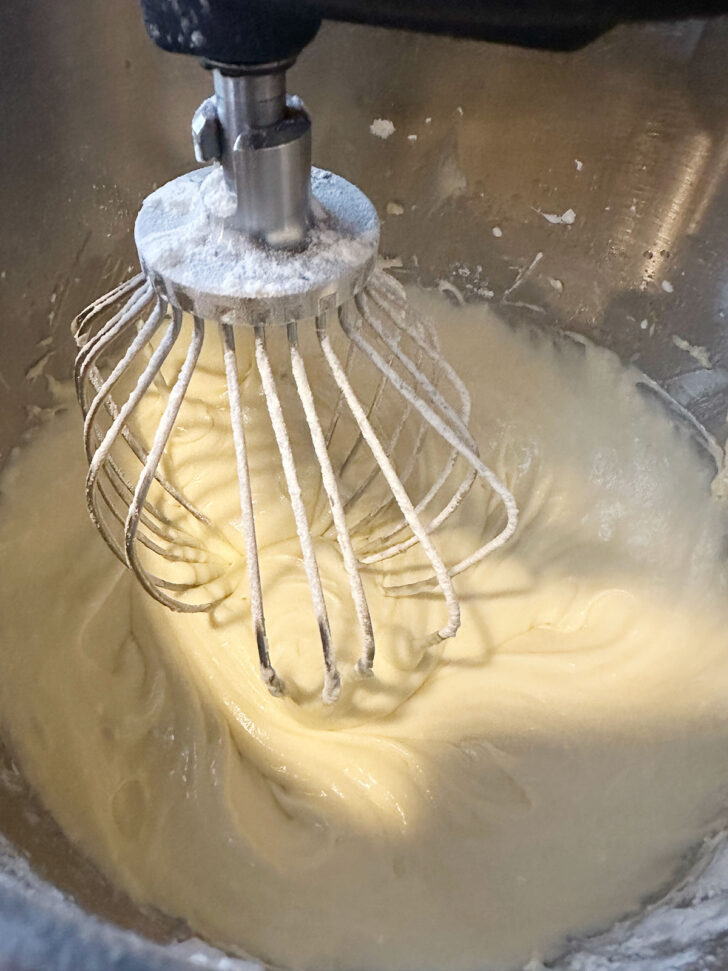
- Increase the mixer speed briefly to finish whisking the batter.

- Stir the batter in the bowl to make sure it is well combined.
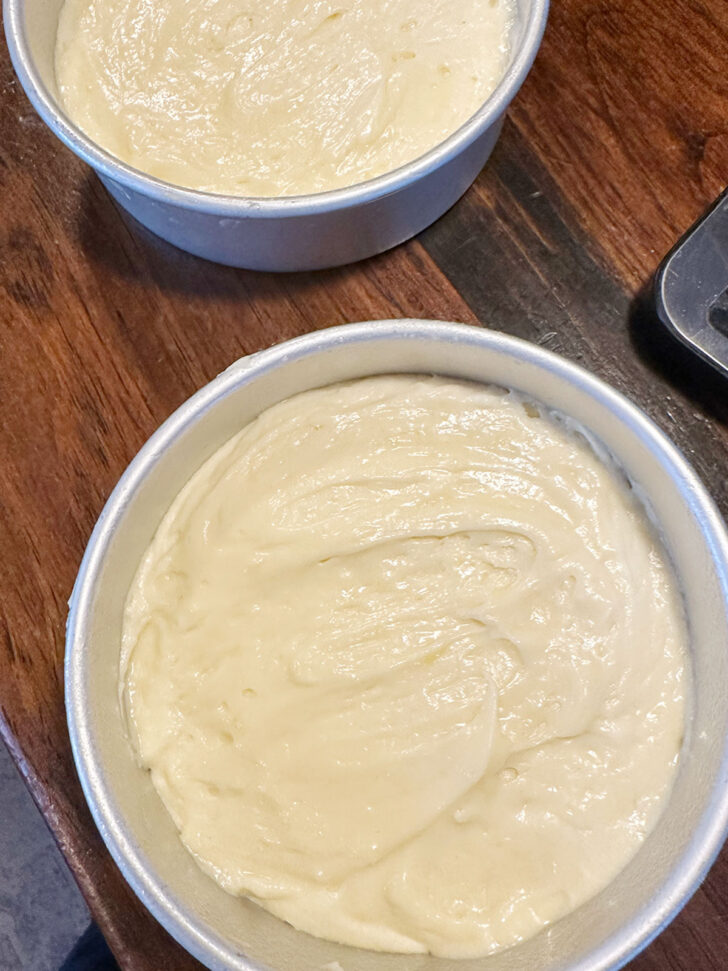
- Spoon the batter into the two prepared pans and bake.
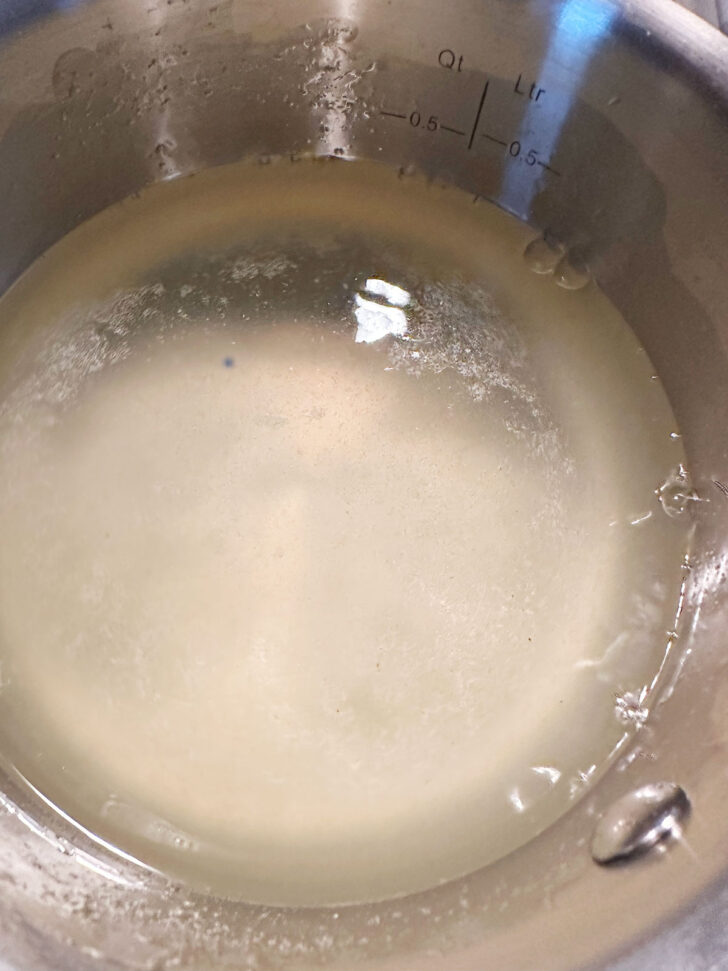
- Meanwhile, make the lemon syrup in a saucepan on the stove top.
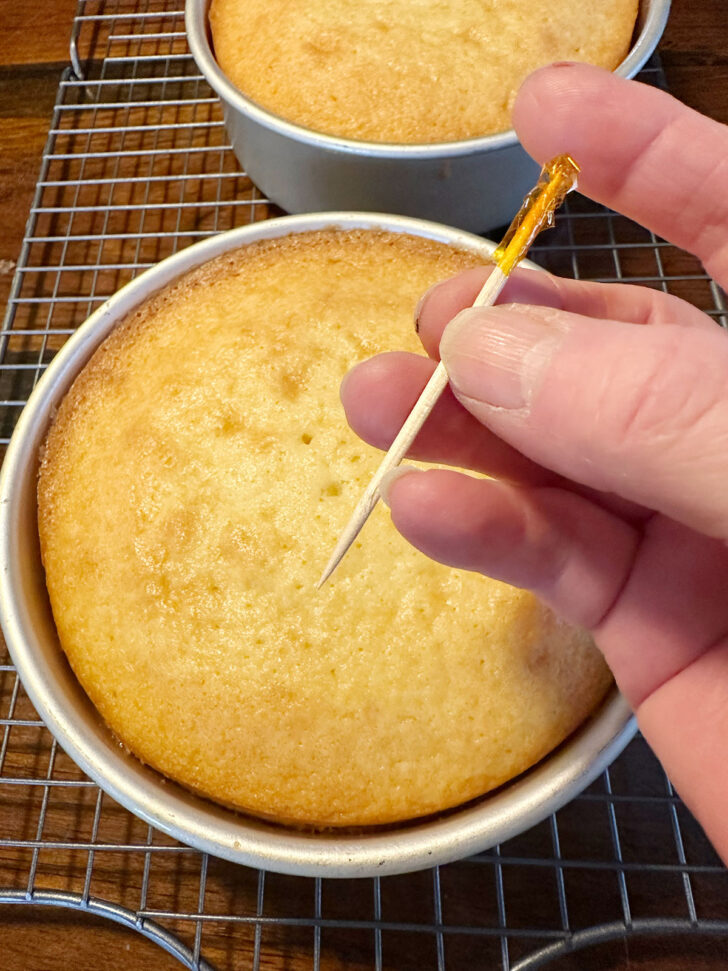
- Use a cocktail pick or small skewer to make a bunch of little holes in the baked cakes.
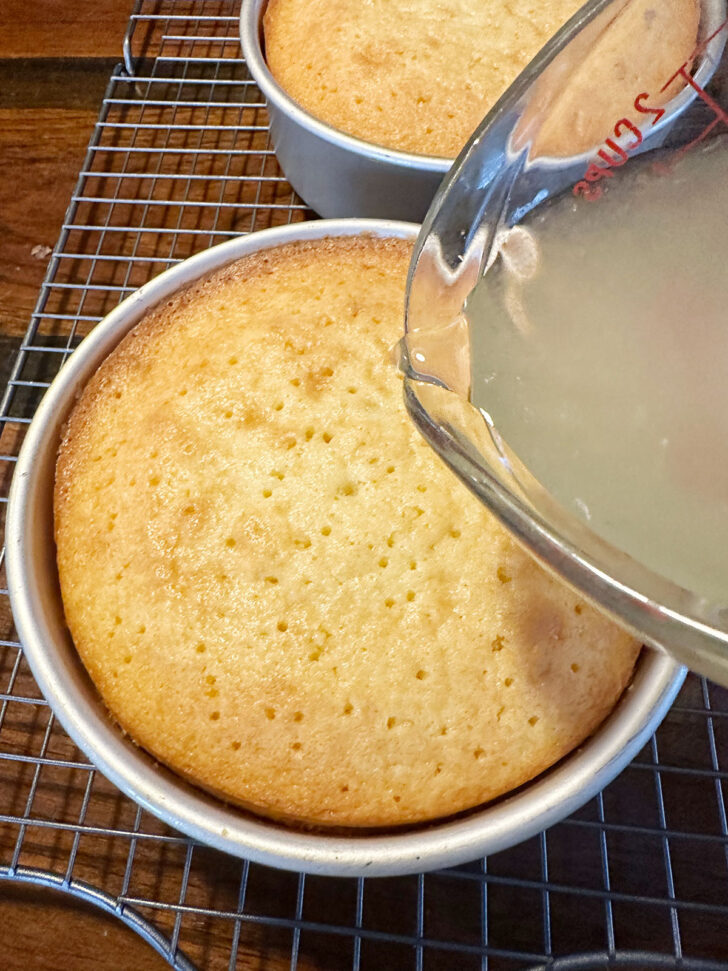
- Pour the warm lemon syrup over the baked cakes, dividing equally between the two cakes.
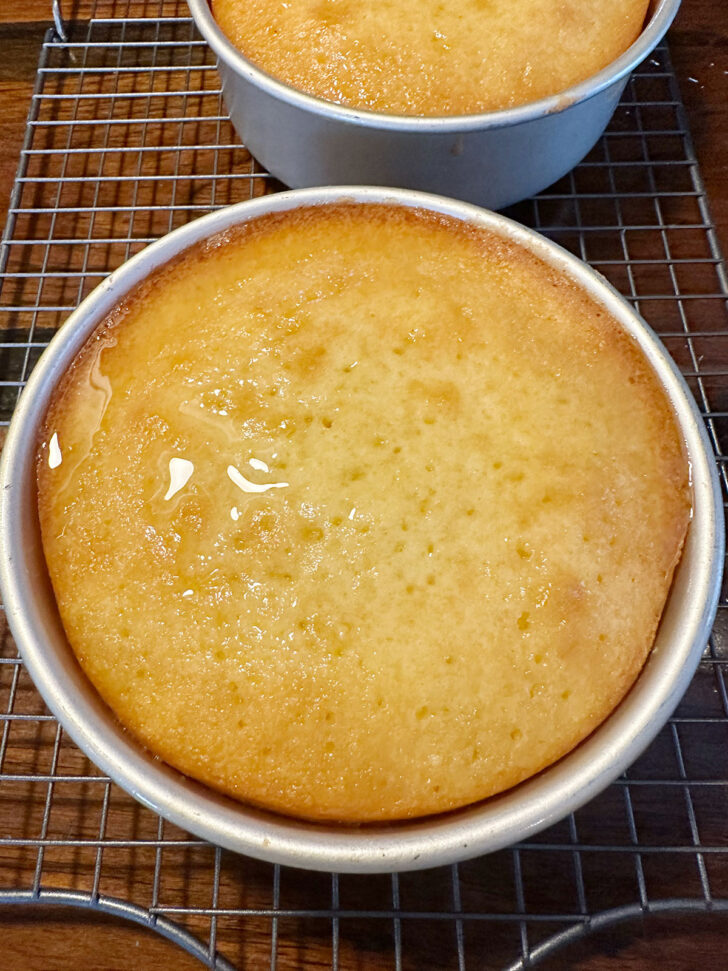
- Allow the cakes to stand in the syrup, at room temperature, for 3-4 hours.
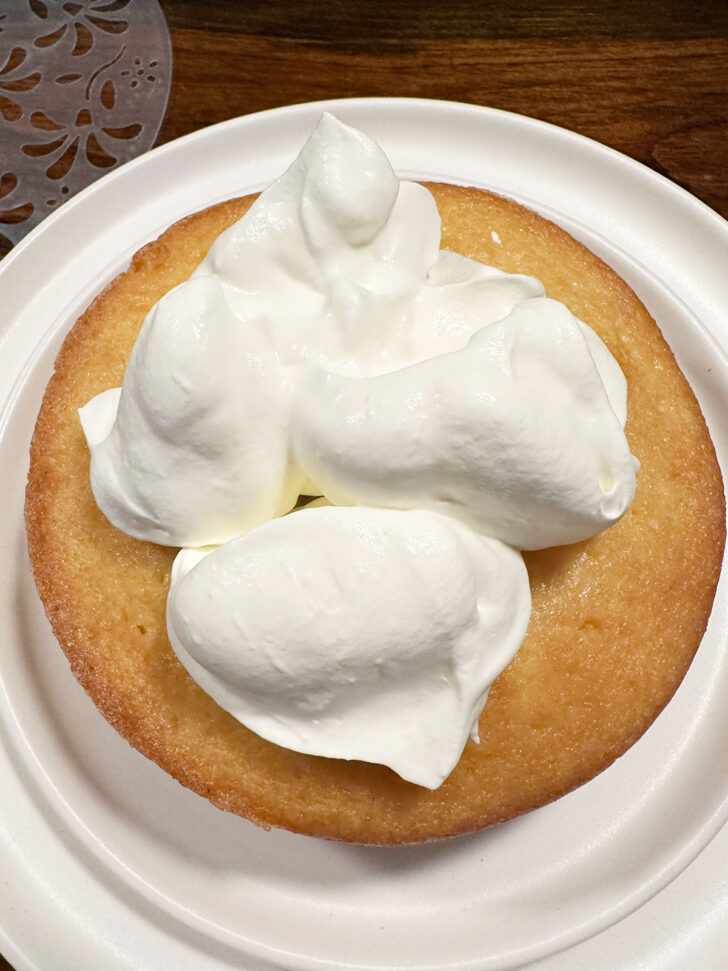
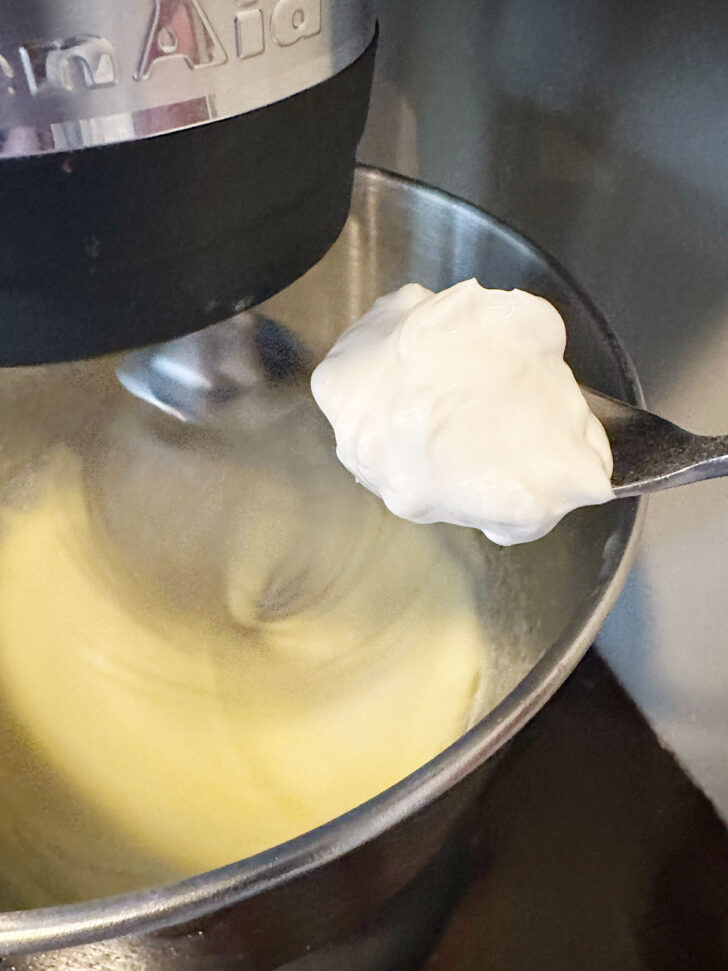
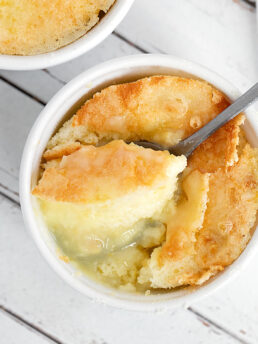
- Remove the soaked cakes from the pans and place one layer on a serving plate. Spoon the whipped cream on top.
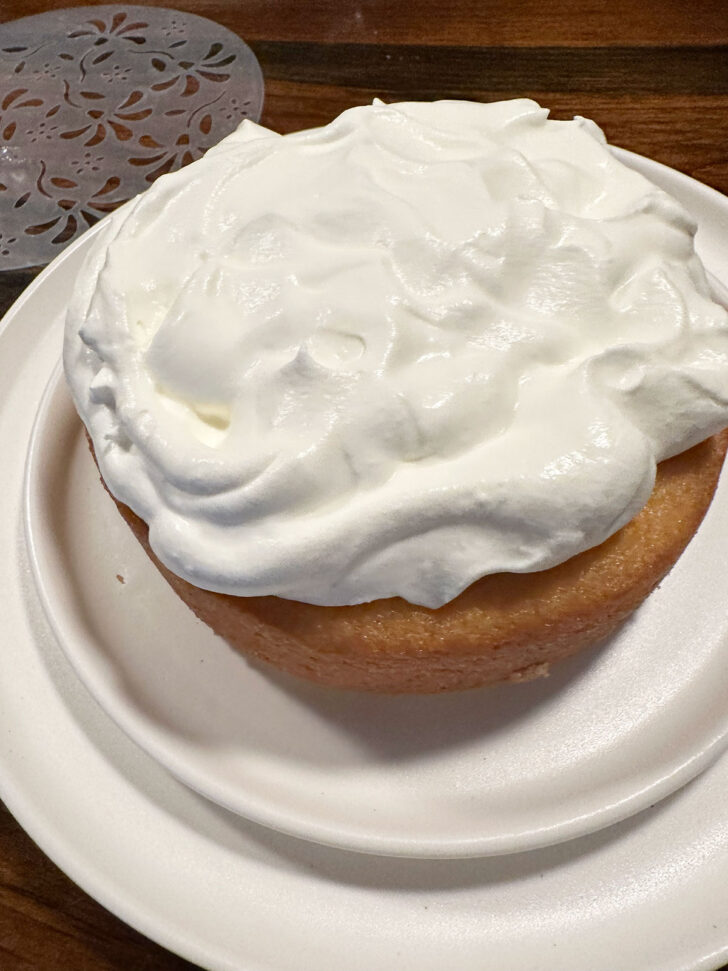
- Spread the whipped cream out towards the edges, then gently place the top layer on top.
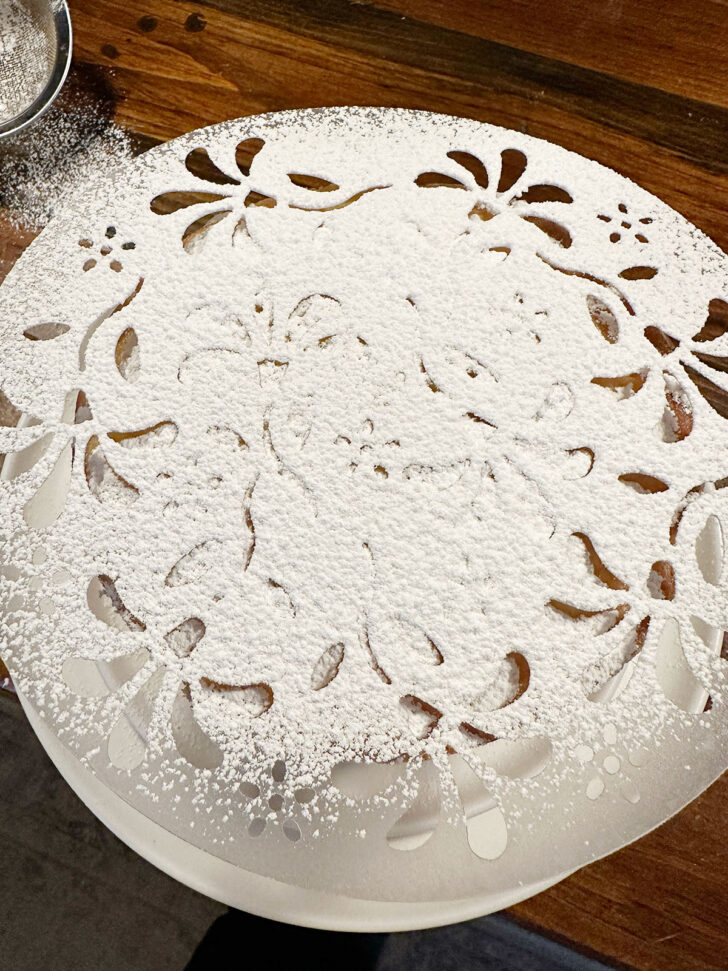
- Dust some icing sugar on top of the cake (with a doily or just plain) and serve.
Pan size options
- This cake is made with two 6-inch diameter pans. I love this size of pan for small cakes and if you’re a cake baker, this size of pan would be a great addition to your kitchen! If you don’t have two 6-inch pans, you still have some options!
- Alternatively, you can bake this cake as one 9-inch round cake or you can use a 9×5-inch loaf pan. In both cases, it’s probably best to forego the layers and serve with a dollop of whipped cream on top or on the side.
- I don’t recommend using a springform pan simply because when the syrup is poured over the cake, it may leak out of a springform pan and not soak the cake properly.
Recipe tips!
- You can use a paper doily to dust a pattern of icing sugar on top of the cake, but it’s certainly not necessary. Simply dust with icing sugar instead.
- I just put a round of parchment on the bottom of the pans, but you can line the entire pan if you like. The downside in round pans is that you’ll probably get some wrinkles on the side of the cake from the parchment folds. If only covering the bottom, be careful when using a knife to loosen the sides, to avoid scraping the sides of the cake.
- As you can probably foresee, cutting this cake could be a bit challenging with the very soft whipped cream. There is a trick! Instead of cutting this cake holding the knife horizontally, as you normally would, insert the knife vertically and cut straight down in the centre of the cake. Then repeat that motion working towards the outside of the cake. This places less pressure on the top layer which could cause the whipped cream to push out. (There will still be a little whipped cream movement, but it is part of the charm of this perfectly imperfect cake :)
Making ahead, storing and freezing
Making ahead is somewhat built into this cake, as it needs to sit in the syrup for 3-4 hours before serving. I’ve actually made the cakes the day ahead, soaked them, then removed them from the pans and refrigerated overnight well wrapped and they were fine. Fill with whipped cream right before serving.
Store leftover cake well-wrapped in the refrigerator for up to 3 days. (As this is a naked cake, the cake will lose moisture out of the top and sides if not wrapped all the way around.)
The cake layers should freeze well for up to 3 months. I wouldn’t freeze the finished cake, due to the whipped cream.
Want to save this recipe?
Enter your email and I’ll send it to your inbox. Plus, you’ll get great new recipes from me every week!
By submitting this form, you consent to receive emails from Seasons and Suppers.
You can unsubscribe at any time.
Get the Recipe: Lovely Lemon Syrup Cake
Ingredients
- 4 large eggs
- 3/4 cup + 2 Tablespoons (180 g) white granulated sugar
- 7 Tablespoons (100 g) unsalted butter, melted
- 3 1/2 Tablespoons (50 ml) vegetable oil, or similar neutral-tasting oil such as canola, sunflower
- 3 1/2 Tablespoons (50 g) full fat sour cream, or plain full fat yogurt
- 1 lemon, zested
- 1 3/4 cups (200 g) all purpose flour, spooned and levelled
- 2 1/2 teaspoons baking powder
- Pinch fine salt
For the lemon syrup:
- 1/2 cup + 1 1/2 Tablespoons (120 g) white granulated sugar
- 7 Tablespoons (100 ml) water
- 3 lemons, juiced
To serve:
- 3/4 cup (180 ml) heavy whipping cream, 35% b.f.
- 1 – 2 Tablespoons white granulated sugar, to taste, for sweetness
- icing/confections' sugar, for dusting before serving
Instructions
- Tip! This recipe is best made using a kitchen scale and the weight and the ml measurements on your measuring cups, for best accuracy. I have converted from these measures and they never convert quite exactly.
- Preheat oven to 350F (180C) regular bake/non convection setting), with oven rack in the centre of the oven. Grease or spray two 6-inch baking pans (2" deep) and line with parchment paper. *See Note 1 below for options for the pans and for some other baking pan size options.
- In a large bowl with an electric mixer or in the bowl of a stand mixer fitted with the whisk attachment, whisk together the eggs and sugar at medium speed (Speed 6 on a Kitchenaid mixer) until combined. With the mixer still running at medium speed, add and whisk in the melted butter, oil, sour cream and lemon zest.
- In a medium bowl, stir together the flour, baking powder and salt. Add this to the egg mixture with the mixer set to low (to avoid the flour flying out of the bowl), then once incorporated increase speed to medium and mix briefly until well mixed.
- Divide the batter evenly between the two cake pans (or single pan, if using) and spread top level. Bake in preheated oven for 25-35 mins or until a skewer inserted into the centre of each cake comes out clean. *Baking time will vary from oven-to-oven and depending on the colour of your baking pans. Darker pans will bake more quickly. Be sure to test to ensure the cakes are thoroughly cooked! Remove the cakes from the oven, leaving the cakes in the pans and placing the pans onto a cooling rack for 20 minutes.
- As soon as the cakes are out of the oven, make the lemon syrup. Add the sugar and water to a medium saucepan and heat over medium heat, stirring until the sugar has dissolved, then add the lemon juice and heat until the syrup is just about to boil. Remove from the heat and cool until warm before using. *I like to transfer the hot syrup to a 2-cup measuring cup so it will cool more quickly and it will be easier to pour over the cakes.
- Once the cakes have cooled in the pans for 20 minutes, use a cocktail stick or fine skewer to prick the surface of each cake with a lot of holes (press in about 1-inch or so). Pour the warm syrup over the cakes, dividing evenly between the two cakes (or pouring it all over if making a single, larger cake).
- Leave the cakes to sit in the pans with the liquid for 3-4 hrs before removing the cakes from the pan. Tip! If you aren't ready to serve the cake right away, you can wrap the cake layers well (double wrap with plastic wrap) and refrigerate up to 24 hours.
- To assemble the cake (close to serving): Whip the cream with the white sugar in a bowl until soft peaks form. Place one layer of the cake on a plate. Top with whipped cream (you may not need quite all of it) and spread to level, then carefully place the second layer on top. Dust the top of the cake with icing sugar and serve. (I used a cake stencil here, but a paper doily works, too, if you want to dust on a design.) Tip! To slice the layer cake with the whipped cream between the layers, rather than holding the knife horizontally and slicing straight down, hold the knife vertically and stick it into the cake straight down in the centre of the cake, then repeat this downward motion working toward the outside of the cake. This will help to prevent the whipped cream from squishing out the sides of the cake too much when cutting. (A little whipped cream will still squish out a bit, but I consider it just part of the charm of this casual cake :)
- If you made a single layer cake or loaf cake, slice and serve with a dollop of whipped cream on top or on the side.
- This cake will keep in an airtight container in the fridge for up to three days. If you don't have a container, be sure to wrap around the outside of the cake, as well as any cut edges, as the cake will lose moisture out the sides if not covered.
Notes
More lemon recipes to love!

Hi! I’m Jennifer, a home cook schooled by trial and error and almost 40 years of getting dinner on the table! I love to share my favourite recipes, both old and new, together with lots of tips and tricks to hopefully help make your home cooking enjoyable, stress-free, rewarding and of course, delicious!
I’ve made this cake at least a dozen times and received so many delightful comments and requests to share it. As I live in Hawaii and have an abundance of lilikoi (passion fruit), I have also had great success in making a lilikoi syrup cake. Trust me when I say it WOWS! I follow the entire recipe exactly as it is written, but for the syrup, I simply use 1/2 cup lilikoi juice instead of the lemon juice. I’ve only made this recipe using two 6″ bundt pans so when they are ready to serve I sprinkle the tops with powdered sugar and serve with the whipping cream on the side. I have also given them away as ‘birthday’ gifts and inevitably the recipients are tickled. I am a huge fan of Seasons & Supers and have loved every recipe I’ve tried. Mahalo nui loa for this simple and awesome recipe!
Thanks so much, Jojo :) Your cakes sound delicious and I’m so pleased you are enjoying this lovely cake!
A couple of ideas regarding the parchment paper liner. To line the side, use strips of cut parchment to cover the sides – if necessary, use a dab of butter to glue the overlapping strip ends if they are not long enough to fully enclose the pan sides, line the bottom with a parchment liner cut to fit the bottom of the pan.
I do not like springform pans but do use and prefer pans with removable bottoms. I have not had a problem with leakage. I do lightly butter the rim of the pan before inserting the bottom plate – this keeps the pieces together. You may find that a small amount of the butter does melt out the bottom, therefore using a baking sheet under the cake pas is helpful.
This is a method I use for all cakes and cheesecakes and it works perfectly. Hope this helps.
Hi Barbara, my concern with springform pans with this recipe is not the cake, but the lemon syrup soak, which may very well leak out the bottom if the pan has a bit of a warp at all. You certainly could like the sides of the pan as you suggested. I didn’t have any trouble getting mine out with just the bottom lined, but not all pans are so cooperative :)