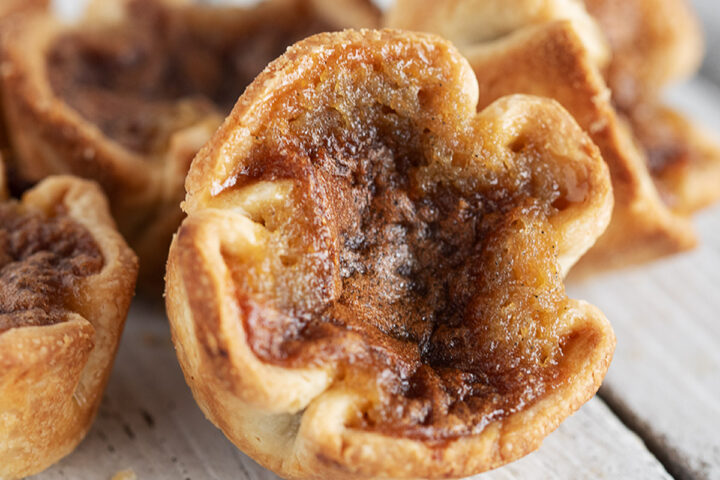
Get the Recipe: Butter Tarts
The classic Canadian butter tart, with a flaky crust and a loose-set filling flavoured with maple syrup. Raisins are optional!
Ingredients
For the pastry:
- 1 1/2 cups all-purpose flour
- 1/4 teaspoon salt
- 1/4 cup cold butter, cubed
- 1/4 cup lard , such as Tenderflake, cubed
- 1 large egg yolk
- 1 teaspoon vinegar
- ice water, as needed
For the butter tart filling:
- 3/4 cup light brown sugar, packed
- 1/4 cup white corn syrup, *see Note 1 below
- 3 Tablespoons maple syrup, dark/amber/Grade B maple syrup recommended
- 1/4 cup unsalted butter, melted and cooled slightly
- 1 teaspoon vanilla
- 1 teaspoon white vinegar
- 1/8 teaspoon salt, reduce to a pinch if using salted butter
- 2 large eggs
Optional:
- 1/2 cup raisins
Instructions
For the pastry:
- In a large bowl, whisk together the 1 1/2 cups all-purpose flour and 1/4 teaspoon salt. With a pastry blender or 2 knives, cut in the 1/4 cup cold butter (cubed) and 1/4 cup lard (such as Tenderflake, cubed) until the mixture resembles coarse crumbs with a few larger pieces.
- In a liquid measuring cup, whisk together the 1 large egg yolk with 1 teaspoon vinegar. Add enough ice water to make 1/3 cup. Sprinkle the egg yolk mixture over the flour mixture, stirring vigorously with a fork until the pastry holds together. Press into a disc and wrap in plastic wrap. Refrigerate until chilled, about 1 hour. Make-ahead: Refrigerate for up to 3 days.
For the butter tart filling:
- Add the 3/4 cup light brown sugar (packed), 1/4 cup white corn syrup (*see Note 1 below), 3 Tablespoons maple syrup (dark/amber/Grade B maple syrup recommended), 1/4 cup unsalted butter (melted and cooled slightly), 1 teaspoon vanilla, 1 teaspoon white vinegar and 1/8 teaspoon salt (reduce to a pinch if using salted butter) to a medium bowl or 4-cup measuring cup. Whisk the mixture together well until smooth. Add the 2 large eggs and whisk well until smooth and bubbly. Set aside briefly while you roll out the dough.
- (If using raisins, add the 1/2 cup raisins to a bowl of hot water and allow them to stand for 15 minutes. Drain and dry well before using.)
- Preheat the oven to 425F (regular bake setting/not convection or fan-assisted), with the rack in the centre of the oven.
- On a lightly floured surface, roll the chilled pastry out to 1/8-inch (3 mm) thickness. Using a 4-inch (10 cm) round cookie or biscuit cutter (or an empty 28 oz/796 mL can or an English muffin ring), cut out 10 circles, rerolling the scraps once if necessary.
- Spray a 12-cup muffin tin generously with cooking or baking spray. Fit the pastry rounds into muffin cups by making a cup shape with the dough rounds, then pinching in gently on both sides of the dough cup towards the centre with your thumb and middle finger to make a roughly four-leaf clover shape. Place into the muffin cups and adjust as needed. Divide the plumped raisins among the tarts, if using. Spoon or pour the filling into the tart shells until three-quarters full.
- Bake the tarts at 425F for 10 minutes, then reduce the oven temperature to 400F and bake for an additional 6-8 minutes, until puffy and deep golden coloured.
- Remove from the oven and let the tarts stand in the pan for a few minutes, then run a knife around the outside of the tarts to loosen them. Gently use a fork to lift the tarts out of the muffin cups and onto a cooling rack to cool completely.
- Store the tarts in an airtight container for up to 2 days or freeze for up to 3 months for longer storage.
Notes
Note 1: If you only have golden (dark) corn syrup on hand, you can use it, though the flavour will be slightly changed.
Tips!
You can make your favourite pastry recipe instead of the one offered here if you prefer, or use store-bought pie dough or tart shells.
Here's a quick little cheat for when you want a butter tart the quick and easy way!
Pick yourself up some Tenderflake (or similar) frozen pie shells, let them thaw, flatten them and cut the 4-inch circles out of the pie shells to use for butter tarts. You'll get 3 rounds from each pie shell (and probably another one if you gather and roll the scraps), so you'll get 6-8 tart shells from a 2-pack of frozen pie shells. Simply fill and bake!
Be sure to read the notes above this recipe card for more tips and step-by-step photos that you might find helpful.
Serving: 1tart, Calories: 341kcal, Carbohydrates: 47g, Protein: 4g, Fat: 16g, Saturated Fat: 8g, Polyunsaturated Fat: 2g, Monounsaturated Fat: 5g, Trans Fat: 1g, Cholesterol: 80mg, Sodium: 152mg, Potassium: 134mg, Fiber: 1g, Sugar: 26g, Vitamin A: 362IU, Vitamin C: 0.4mg, Calcium: 37mg, Iron: 1mg
Tried this recipe?If you enjoyed this recipe, please leave a star rating and comment. It helps others to find it!
