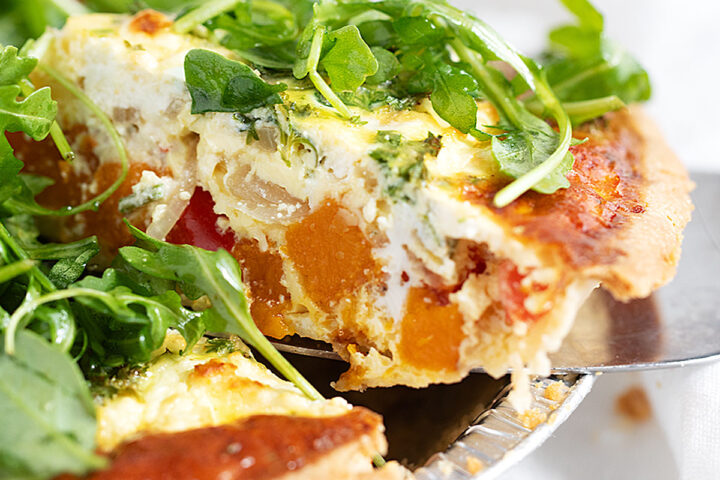
Get the Recipe: Butternut Squash Quiche
A delicious, vegetarian butternut squash quiche, featuring shallots, bell peppers and goat cheese, topped with balsamic vinaigrette-dressed arugula.
Ingredients
- 1 deep-dish frozen pie shell
For the quiche filling:
- 2-3 teaspoons olive oil
- 1 red bell pepper, cored and diced
- 3 shallots, peeled and thinly sliced
- 2 cups butternut squash, fresh or frozen, peeled and diced
- salt and freshly ground pepper
- 6 large eggs
- 1 cup half-and-half cream, 10% b.f.
- 2-3 Tablespoons fresh parsley, finely choped (or 1 Tbsp dried parsley)
- salt and freshly ground pepper
- 2-3 oz goat cheese, crumbled (or feta cheese, crumbled)
Arugula topping:
- 2 cups baby arugula
- 1 Tablespoon olive oil
- 1 teaspoon balsamic vinegar
- Pinch coarse salt
Instructions
- Preheat oven to 375F (non-convection/not fan-assisted). When the oven is preheated, par-bake the pie crust for 4-5 minutes. Remove from the oven, place onto a baking sheet and set aside. Leave the oven on.
- Meanwhile, add some oil to a skillet. Heat over medium heat. Add the shallots, the bell peppers and a bit of salt and pepper to the skillet. Cook, stirring, until softened, about 3-4 minutes. Remove the shallots and bell peppers to a plate.
- Add a bit more oil to the same skillet and add the diced butternut squash and season with a bit of salt and pepper. Cook the squash, stirring regularly, until the squash is tender, about 8-10 minutes for fresh squash or less for frozen squash.
- Add the cooked squash to the par-baked pie shell. Add the shallots and bell peppers to the pie shell, then add the crumbled goat cheese.
- In a bowl or large measuring cup, whisk together the eggs, cream and parsley. Season with some salt and pepper. Pour the egg mixture into the pie shell, adding as much as will fit in the pie shell.
- Transfer the quiche to the preheated oven on the baking sheet. Bake the quiche for about 35 minutes, or until puffy and golden. Remove from the oven.
- In a medium bowl, combine the arugula, olive oil, balsamic vinegar and a pinch of coarse salt. Toss to combine, then place on top of the quiche to serve.
Notes
Tips!
Be sure the butternut squash is tender before adding to the quiche, as it won't soften much more in the baking quiche. Taste test to be sure!
Seasoning with salt and pepper is key to bringing all the great flavours of this quiche together. I like to season each element as it cooks, as well as the egg mixture. That said, if using feta cheese instead of goat cheese, the quiche will need less salt overall as the feta is salty.
I love adding the arugula to the top of the quiche, but you can certainly serve it on the side if you like.
This quiche will keep well in the fridge for several days and can also be frozen for up to 3 months.
Be sure to read the notes above this recipe card for more tips on making this recipe, including substitution suggestions and step-by-step photos that you might find helpful.
Serving: 1serving, Calories: 262kcal, Carbohydrates: 19g, Protein: 9g, Fat: 17g, Saturated Fat: 6g, Polyunsaturated Fat: 2g, Monounsaturated Fat: 7g, Trans Fat: 0.01g, Cholesterol: 153mg, Sodium: 190mg, Potassium: 325mg, Fiber: 2g, Sugar: 4g, Vitamin A: 4773IU, Vitamin C: 29mg, Calcium: 98mg, Iron: 2mg
Tried this recipe?If you enjoyed this recipe, please leave a star rating and comment. It helps others to find it!
