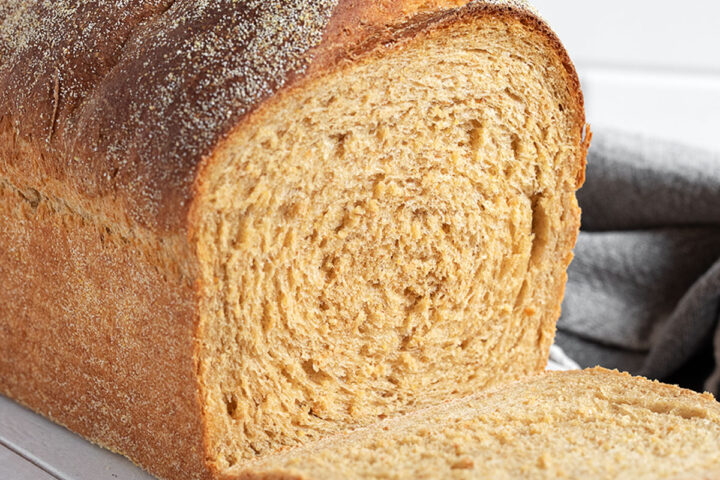
Get the Recipe: Anadama Bread
Classic Anadama bread, made with cornmeal and molasses. This version adds some whole-wheat flour to the loaf, as well. Anadama bread makes a great sandwich bread and is lovely toasted with butter.
Ingredients
Starter Dough (rest for 2 hours - 12 hours before using):
- 3/4 cup (91 g) bread flour, spooned and levelled *see Note 1 below
- 1/3 cup (91 g) water, room-temperature
- Pinch Instant yeast, *see Note 2 below if using Active Dry Yeast
Cornmeal Mash:
- 2/3 cup (140 g) water
- 1/2 cup (70 g) cornmeal, plus more for topping before baking
Dough:
- all of the Starter Dough from above
- all of the Cornmeal Mash from above
- 2/3 cup (150 g) lukewarm water, about 105F
- 2 1/2 teaspoons (8 g) Instant yeast
- 1/4 cup (85 g) Fancy molasses, *see Note 3 below
- 3 Tablespoons (40 g) vegetable or canola oil, or similar neutral-flavoured cooking oil
- 3/4 cup (90 g) whole wheat flour, spooned and levelled
- 1 1/2 teaspoons fine salt
- 2 1/2 - 3 cups (310-375 g) bread flour, spooned and levelled
Equipment
- 9x5-inch metal loaf pan
Instructions
- Mix the Starter Dough: Combine the 3/4 cup bread flour, 1/3 cup water, and Pinch Instant yeast in a small bowl. Mix until thoroughly combined. Cover the bowl with plastic wrap and let it rest for 2-12 hours.
- Make the Cornmeal Mash: In a small saucepan, combine the 2/3 cup water and 1/2 cup cornmeal and bring to a boil, stirring regularly. Bring the water to a boil. Once boiling, continue stirring/cooking until the liquid has been absorbed and the mixture is paste-like. Stir for 1 minute until no lumps remain and the mixture returns to a boil. Remove from the heat, spread the mixture on a plate, and cover with plastic wrap. Set aside until cooled before using.
- Mix the dough: To the bowl of a stand mixer fitted with the paddle attachment, add the 2/3 cup lukewarm water, all of the Starter Dough from above, all of the Cornmeal Mash from above and 2 1/2 teaspoons Instant yeast. Stir with the paddle attachment to break up the cornmeal and incorporate the Starter Dough. Add the 1/4 cup Fancy molasses and 3 Tablespoons vegetable or canola oil and stir to combine. Add the 3/4 cup whole wheat flour and 1 1/2 teaspoons fine salt, and stir in until well combined.
- Remove the paddle attachment and attach the dough hook to the mixer. Add 2 cups (250g) of the bread flour to the bowl and mix at the lowest speed for about 2 minutes or until no dry flour remains.
- Begin adding the last 1/2 - 1 cup of flour (62-125g) of flour a bit at a time with the mixer at Speed 2, allowing the flour to incorporate before adding more. Continue adding flour/mixing, until the dough clears the sides of the bowl and wraps the kneading hook. Continue to knead the dough at Speed 2 for 5 to 7 minutes. At the end of mixing, the dough will have gathered around the hook and will appear elastic, and will be somewhat tacky. (See the Step-by-Step photos in the Recipe Post above to see what the finished dough should look like.)
- Remove the dough to a lightly floured work surface and knead briefly, adding additional flour only if the dough is sticking to your hands or the work surface. Form the dough into a ball and place it into a greased bowl. Cover the bowl with plastic wrap and set at room-temperature to rise until doubled in size, about 1 - 1 1/2 hours.
- Remove the dough to a lightly floured work surface. Gently deflate the dough. Using your palms or a rolling pin, roll the dough into a rectangle about 9-inches wide and 16-18-inches long. Starting from the short end, roll the dough up jelly-roll style and pinch the seam together well. Sprinkle some cornmeal onto the work surface in a line about 9-inch long and 3-4 inches wide. Roll the top of the shaped loaf in the cornmeal to coat. Place the formed loaf into a greased 9 x 5-inch metal bread pan.
- Spray a sheet of plastic wrap with cooking spray and place over the loaf with the sprayed side down. Allow the loaf to rise for about 1 hour, or until the bread crests the sides of the loaf pan by about 1-1 1/2 inches. Toward the end of the proofing time, preheat the oven to 375°F (non-convection/not fan-assisted)
- Using a bread lame or a small, sharp knife, make four diagonal slashes across the top of the loaf. Bake the loaf for 35 to 40 minutes until it is a deep golden brown, and an instant-read thermometer inserted into the centre of the loaf registers 195°F to 200°F. Remove from the oven and immediately remove the loaf from the pan to a wire rack to cool. Allow to cool completely before slicing.
- Store the bread at room temperature in an airtight container or bag for 3-4 days. For longer storage, wrap well and freeze for up to 3 months.
For best results, use a kitchen scale and the weight measurements provided. If you don't have a kitchen scale, be sure to measure the flour using the spoon and level method.
Check the baking loaf after about 25 minutes of baking. If the loaf is dark enough already, loosely lay a sheet of aluminum foil over the top of the loaf to prevent over-browning.
Notes
Note 1: While bread flour is recommended for best results, you can substitute all-purpose flour if needed. You may need to use a bit more all-purpose flour than what is specified for bread flour to bring the dough to the specified consistency.
Note 2: This recipe is written for Instant yeast, but can be adapted to use Active Dry Yeast by ensuring that the Active Dry Yeast is proofed in the water before adding the flour.
Note 3: Fancy molasses is recommended, due to its lighter flavour. (It will be labelled as "Fancy"). Cooking molasses will technically work, though the molasses flavour will be more pronounced. Blackstrap molasses is not recommended, as the flavour is too strong for this bread.
Tips!
As with all yeast bread recipes, the flour measurement is approximate. Only add as much flour as is needed to bring the dough to the specified consistency. That may be a bit less or a bit more than specified.
Likewise, rising times may vary in your kitchen. Always let the dough rise until just doubled in size, however long that takes and don't rely on a clock. In your kitchen, it may be faster or slower than suggested in the recipe.
Be sure to read the notes above this recipe card for more tips, step-by-step photos and storage guidance.
Serving: 1 serving, Calories: 202 kcal, Carbohydrates: 41 g, Protein: 7 g, Fat: 1 g, Saturated Fat: 0.2 g, Polyunsaturated Fat: 0.5 g, Monounsaturated Fat: 0.3 g, Sodium: 297 mg, Potassium: 209 mg, Fiber: 3 g, Sugar: 5 g, Vitamin A: 1 IU, Vitamin C: 0.01 mg, Calcium: 24 mg, Iron: 1 mg
Tried this recipe?If you enjoyed this recipe, please leave a star rating and comment. It helps others to find it!
