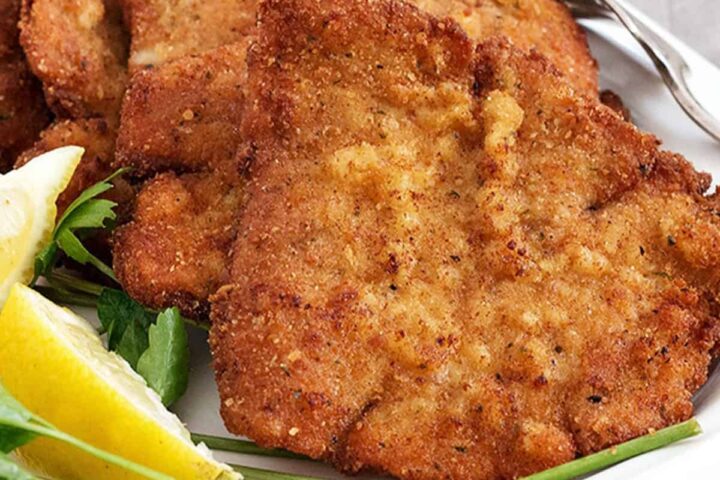
Get the Recipe: Classic Pork Schnitzel with Pork Loin Chops
Crispy, classic German-style pork schnitzel made with thin-pounded pork loin chops, breadcrumbs and a shallow fry.
Ingredients
- 6 boneless, centre-cut pork loin chops, 1/2-3/4-inches thick
Breading:
- 1/2 cup all-purpose flour, unbleached recommended
- salt and freshly ground pepper
- 2 large eggs
- 2 Tablespoons water
- 2 cups dried plain (unseasoned) breadcrumbs, plus more as needed.
- 1/2 - 1 teaspoons seasoning salt
- vegetable, canola, peanut or sunflower oil, for shallow frying.
- lemon slices, for serving
Instructions
- Trim the boneless centre-cut pork loin chops of any fat along the edge. Pound very thin, almost, but not quite, to the point of tearing, about 1/4-inch thick. Using the point of a sharp knife, cut small, 1/4-inch slits every 2-inches around the outside edge of the cutlet. This helps to prevent the cutlet from shrinking and curling at the edges during cooking. Set aside.
- Set up a breading station with 3 large shallow plates (or make a breading station on a sheet of parchment paper for easy clean-up). Add the flour to the first plate, spreading it into an even layer. Season with some salt and freshly ground pepper. On the second plate, use a fork to whisk together the eggs and water. Scatter the breadcrumbs on the 3rd plate and add the seasoning salt. Stir to mix in well. To bread your pork: first press the pork into the flour, flouring both sides and shaking off any excess. Next lay the floured pork into the egg mixture and swirl it around a bit. Flip over and do the same on the other side. Lift and let excess egg drip off back onto the plate. Finally, lay the pork onto the plate with the breadcrumbs. Use your fingers or a spoon to move some of the breadcrumbs onto the top of the pork. Press down gently so that the underside gets nicely coated in crumbs, then flip over and press down again. Make sure you have an even layer of crumbs covering the entire piece of pork on both sides. If there are bare spots, sprinkle breadcrumbs over that area and press down onto the meat with the palm of your hand.
- Place the breaded pork onto a cooking rack set on top of a baking sheet. Repeat with each piece of pork, placing onto the cooling rack without overlapping at all. Place the baking sheet/cooling rack with the breaded pork into the fridge, UNCOVERED, for one hour.
- When it has been almost an hour, start heating your oil. Add oil to a heavy-bottomed, high-sided skillet to about 1/2-inch (or about 1/2 the height of your breaded pork). Heat oil over medium-high heat until hot. Test by taking a few crumbs from the pork and dropping them into the oil. They should immediately sizzle and quickly float to the top.
- Add 1-2 pieces of pork to the hot oil. Don't crowd the pan or overlap them. The schnitzel should lay flat and have a nice bit of space between. Allow to cook for about a minute, then use tongs to regularly check the progress of browning on the underside. You may need to adjust your heat down if they seem to be browning too quickly or up a notch if they aren't browning quickly enough. It should take about 3 minutes per side with the right temperature of oil and the proper thinness of the schnitzel. Once the underside is a deep golden brown, flip and brown the other side, then flip again to finish the first side a bit more. Remove to a cooling rack with a piece of paper towel under the bottom of the rack (not directly under the meat) to catch any drips. Repeat with remaining pork pieces. *If making lots and you want to keep them warm, place a wire rack on top of a baking sheet in a 200F oven and transfer the cooked schnitzel to the oven to keep warm and crispy. Don't overlap or stack the cooked schnitzel in the oven.
- Serve the schnitzel hot with lemon wedges for drizzling or try some lingonberry jam on the side (my favourite!).
Be sure to top up the oil level as needed between batches, maintaining the 1/2-inch level. Allow the oil to reheat before you continue cooking. After about 3 batches, you probably will need to replace all the oil and heat up again, as dirty oil will discolour the finished schnitzel.
Notes
Tips!
Be sure to pound the pork very thin (1/4-inch), as that is what makes it schnitzel and not just a breaded pork cutlet.
Don't skip the 1 hour refrigeration after breading and before frying. That step is critical to creating a perfect breading that sticks beautifully to the pork and cooks up golden and crispy.
I don't recommend breading the pork ahead of time. Stick with the 1-2 hours recommended chilling time. Any longer and the breading will begin to pick up moisture from the pork and create a soggy breading. If you'd like to do some advance preparation, you can pound the pork up to one day ahead and refrigerate, then bread it only 1 to 2 hours before frying.
Be sure to read the notes above this recipe card, where I share more detailed tips, serving suggestion and an FAQ section for this recipe. You'll also find step-by-step photos and a recipe video that you might find helpful.
Watch how to make it
Serving: 1serving, Calories: 423kcal, Carbohydrates: 35g, Protein: 38g, Fat: 13g, Saturated Fat: 4g, Polyunsaturated Fat: 2g, Monounsaturated Fat: 5g, Trans Fat: 0.1g, Cholesterol: 152mg, Sodium: 817mg, Potassium: 626mg, Fiber: 2g, Sugar: 2g, Vitamin A: 173IU, Vitamin C: 1mg, Calcium: 93mg, Iron: 3mg
Tried this recipe?If you enjoyed this recipe, please leave a star rating and comment. It helps others to find it!
