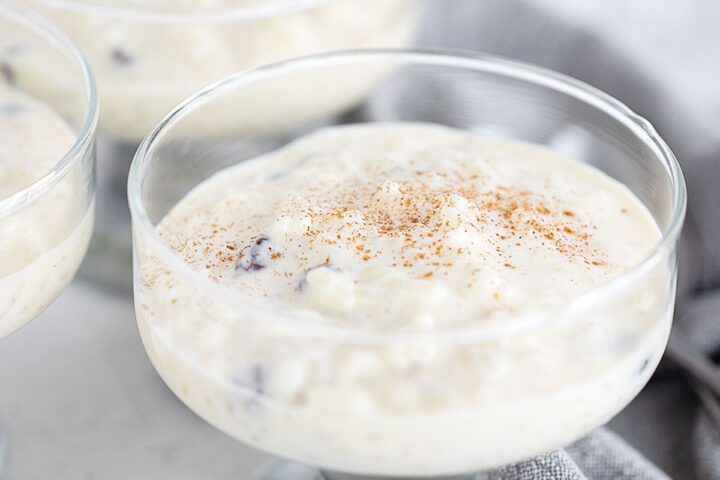
Get the Recipe: Creamy Old-fashioned Stovetop Rice Pudding
Old‑fashioned custard‑style rice pudding, cooked on the stovetop from uncooked rice with eggs and cream for the creamiest results. It takes a bit more time, but delivers the creamiest payoff.
Ingredients
- 4 cups (960 ml) whole milk, (3.5% b.f.), plus up to 1 cup more, as needed *See Note 1 below
- 1/2 cup (120 ml) uncooked and unrinsed long-grain white rice or Arborio rice, *See Note 2 below for other rice options
- 2/3 cup (160 ml) heavy whipping cream, 35% b.f.
- 1/3 cup (65 g) white granulated sugar, *See Note 3 below
- 2 large egg yolks
- 1 1/2 teaspoons pure vanilla extract or vanilla bean paste
- 1/8 teaspoon salt
- 1/3-1/2 cup (120 ml) raisins, optional
Instructions
- Rinse a large pot with cold water. Don't dry it. Set the pot onto the stovetop over medium heat. Add the 4 cups whole milk ((3.5% b.f.), plus up to 1 cup more, as needed *See Note 1 below). Heat the milk to a boil over medium heat, stirring regularly. WATCH CLOSELY as it nears the boil! When the milk hits the boil, it will boil up considerably and possibly overflow the pot. That's obviously not a good thing.
- While the milk is heating, use a medium-sized bowl to whisk together the 2/3 cup heavy whipping cream (35% b.f.) 1/3 cup white granulated sugar (*See Note 3 below), 2 large egg yolks, 1 1/2 teaspoons pure vanilla extract or vanilla bean paste and 1/8 teaspoon salt. Set aside on the counter, leaving the fork in the bowl. I like to do this early so that the egg mixture comes to room temperature. Set out a ladle to use later, as well.
- Once the milk boils, stir in the 1/2 cup uncooked and unrinsed long-grain white rice or Arborio rice (*See Note 2 below for other rice options) and keep stirring until the mixture returns to the boil. Reduce the heat under the pot to about medium- low, or to whatever level on your stove allows the mixture to gently simmer (bubbles breaking the surface but not too vigorously). Simmer for 20 minutes, stirring down the mixture after 10 minutes of simmering. (It's important that you stir it down regularly and ensure that there is no rice sticking to the bottom of the pan. You will notice that the mixture has probably formed a skin on top. Don't remove it. Just stir it back in.)
- Have a serving bowl at the ready. If you are adding raisins, scatter the 1/3-1/2 cup raisins (optional) onto the bottom of the bowl. Set aside.
- After about 20 minutes of simmering, continue cooking, but watch it more closely and stir regularly, until the rice is tender. Test the rice by tasting a grain. You want the rice to be just tender, so no hard center. As the pudding nears the end of cooking, the liquid level will reduce in the pot. There is an increased risk of the milk or the rice scorching if the liquid level gets too low before the rice is cooked. Stir regularly to keep the rice moving, and don't hesitate to add a splash of additional milk (or water) if the liquid level reduces too much. The rice needs enough liquid in the pan to keep it suspended in liquid and keep it off the bottom of the pan.
- Continue cooking, stirring down and adding additional milk, as needed, until the rice is tender. Arborio rice is often cooked for about 30 minutes, while long-grain converted rice often takes a little longer. Most rice is generally done at about 40-45 minutes of total simmering time. A lot will depend on how vigorously your mixture is boiling, so there is no hard and fast rule. Taste testing is always the best indicator!
- Once the rice is cooked, slide the pot off the heat to avoid scorching the rice. Re-whisk your egg mixture with a fork. Using the ladle, spoon out a ladleful of the hot rice/milk mixture, taking as much liquid as possible, but don't worry if you bring some of the rice with it. With the ladle in your left hand (assuming you're right-handed; if not, reverse) and using your right hand to start whisking the egg mixture with the fork, start adding the hot mixture to the eggs A DROP AT A TIME, at first, while continuously whisking with the fork. Increase to a slow stream of hot milk/rice, while whisking continuously, until the entire ladleful has been added. Get another ladleful of hot liquid and slowly add it to the egg mixture as well, whisking continuously. Once you have two ladles of hot milk/rice, pour the warmed egg mixture into your cooking pot.
- Return the pot to the heat, over medium-low heat. Cook, stirring continuously, just until a dime-sized bubble breaks the surface of the pudding. I like to stop stirring briefly as it cooks to see if a bubble will break the surface, then resume cooking/stirring until it does. Once a bubble breaks the surface, cook, stirring for about 30-45 seconds more, then immediately remove from the heat to the serving bowl. The finished consistency of the pudding should be noticeably thickened, but still looser/saucier than a finished rice pudding. The pudding will set more in the fridge as it cools. If the liquid seems almost like milk consistency rather than heavy cream consistency, it's too thin and probably needs a bit more cooking (but again, don't let it fully boil).
- Allow the pudding to stand on the counter for about 5 minutes to allow the steam to reduce, then cover the bowl with plastic wrap and place it in the refrigerator. Allow the pudding to cool and set in the refrigerator for at least 3 hours, but ideally 4-6 hours before serving. The pudding will set as it cools and will thicken more the longer it chills.
- Serve cold from the fridge with a sprinkling of cinnamon, or rewarmed gently in the microwave or a saucepan, if desired. If the pudding is or becomes too thick, simply add a tablespoon or so of heavy cream to the pudding and stir it in.
- Store rice pudding in the refrigerator for up to 3 days. You can also freeze rice pudding for up to 3 months.
Rinsing the pot with cold water before adding the milk helps to reduce scorching.
You never want to allow the pudding to boil vigorously after the egg mixture has been added, as you may end up with scrambled eggs. Heat slowly and stir continuously to monitor and avoid over-boiling.
Notes
Note 1: Whole milk is recommended for the best results. Whole milk is generally labelled as 3% or 3.5% milk. In a pinch, 2% milk will work, with a slight reduction in creaminess.
Note 2: Use long-grain converted white rice for a classic, old-fashioned rice pudding. Arborio rice also makes lovely rice pudding (my favourite rice choice for this pudding!), though it tends to absorb a bit more liquid, so expect that Arborio rice will cook to tender more quickly and that you will probably need to add a bit more milk or water towards the end of simmering. Jasmine and Basmati are other long-grain rice options, if you like. I don't recommend short-grain or quick-cooking rice here as it will produce a mushy rice pudding with this long-simmering method.
Note 3: You can reduce the sugar in this rice pudding to your personal taste for sweetness, though I do recommend making it as written the first time and then adjusting from there, to your taste for sweetness. As sugar is only used for sweetening, artificial sweeteners can be substituted. I suggest 1-for-1 granulated sweeteners in the same amount as specified for best consistency and avoiding liquid artificial sweeteners, which may thin the pudding too much.
If you enjoy eating rice pudding warmed, note that warm puddings will often taste sweeter than cold ones, so you may wish to reduce the sugar slightly if you plan to eat it warm.
Troubleshooting!
If your pudding doesn't thicken properly, it wasn't cooked quite long enough after adding the egg mixture. You want to cook it until a bubble breaks the surface of the pudding. You can rescue it by pouring it back into a saucepan, heating it, then stirring in a bit of cornstarch mixed with cold water, a bit at a time, until the pudding thickens as needed. Re-refrigerate.
If the custard looks curdled or slightly scrambled‑eggy, it usually means the mixture boiled too vigorously after adding the eggs. You can improve the texture by gently warming and whisking, then pressing through a fine‑mesh sieve, but for the best silky custard, follow the tempering and gentle‑simmer directions closely next time.
Be sure to read the notes above the recipe card for even more tips! You'll also find substitution suggestions, step-by-step photos and a recipe video that you might find helpful.
Watch how to make it
Serving: 1serving, Calories: 332kcal, Carbohydrates: 38g, Protein: 8g, Fat: 16g, Saturated Fat: 10g, Polyunsaturated Fat: 1g, Monounsaturated Fat: 4g, Cholesterol: 111mg, Sodium: 123mg, Potassium: 361mg, Fiber: 1g, Sugar: 20g, Vitamin A: 734IU, Vitamin C: 1mg, Calcium: 232mg, Iron: 1mg
Tried this recipe?If you enjoyed this recipe, please leave a star rating and comment. It helps others to find it!
