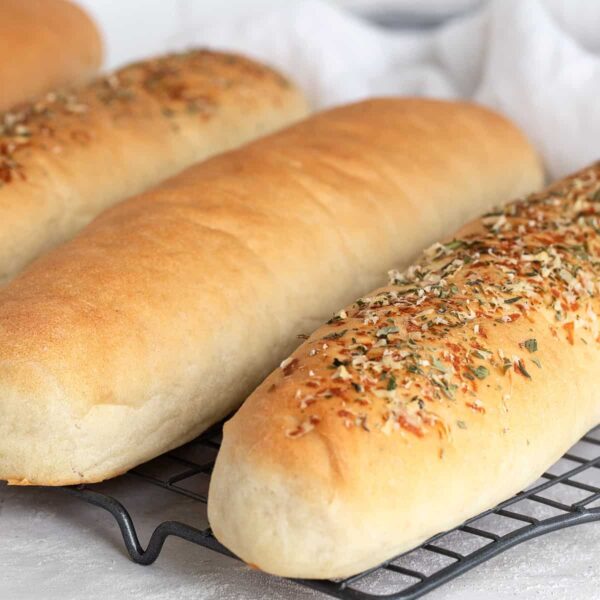
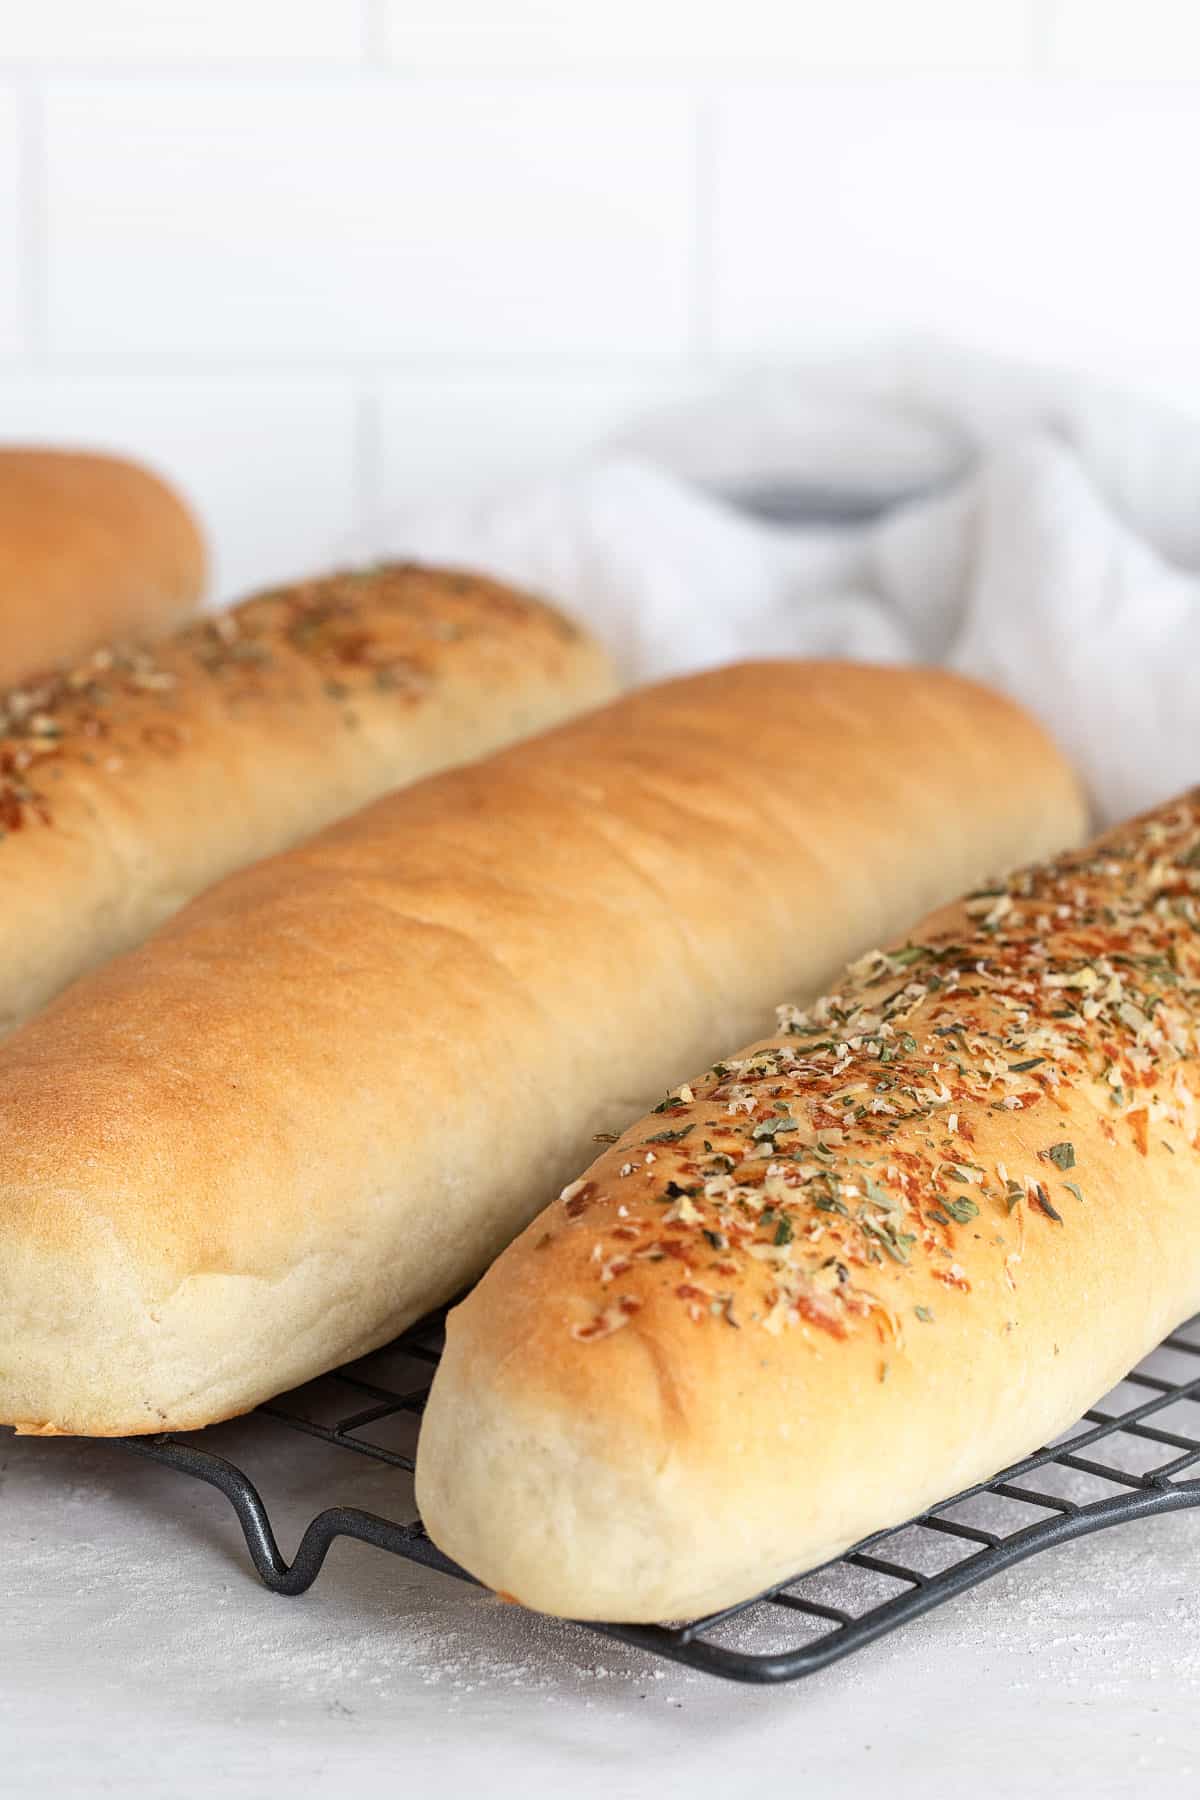
An easy, homemade sub roll recipe, which produces soft and light buns that are also sturdy enough to hold any fillings. Quick and easy and freeze well, too!
Why you’ll love this sub rolls recipe!
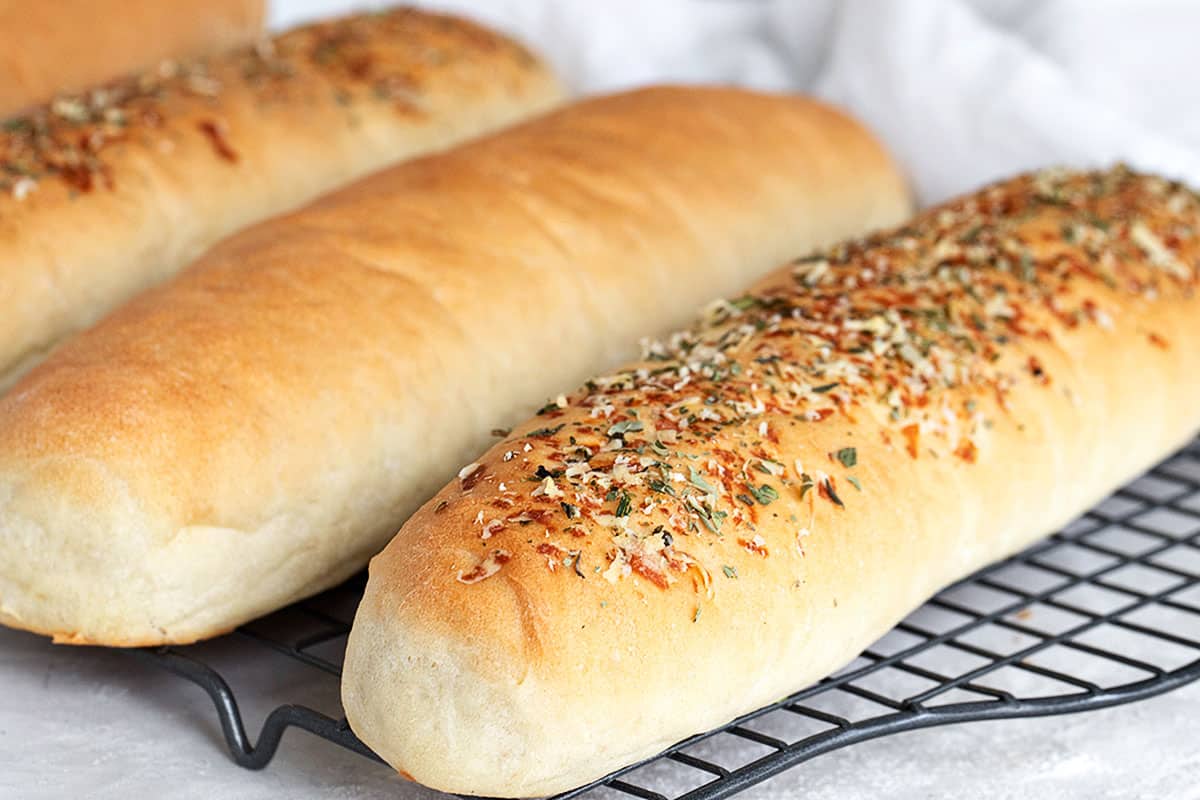
- These sub rolls are soft and light, but also sturdy enough to hold anything you’d like to put in them!
- These rolls are quick and easy to make! Using extra yeast means these rise quickly and are ready in less than 2 hours.
- These buns freeze beautifully, so stock up the freezer and you’ll have sub rolls at the ready any time.
Step-by-Step Photos

- Mix together the dough ingredients. The dough will be very moist at this point.
- Cover the bowl and let the dough rest 15 minutes.
- Remove to a floured work surface.
- Knead briefly, adding a bit more flour only if it is sticking to your hands or the work surface.
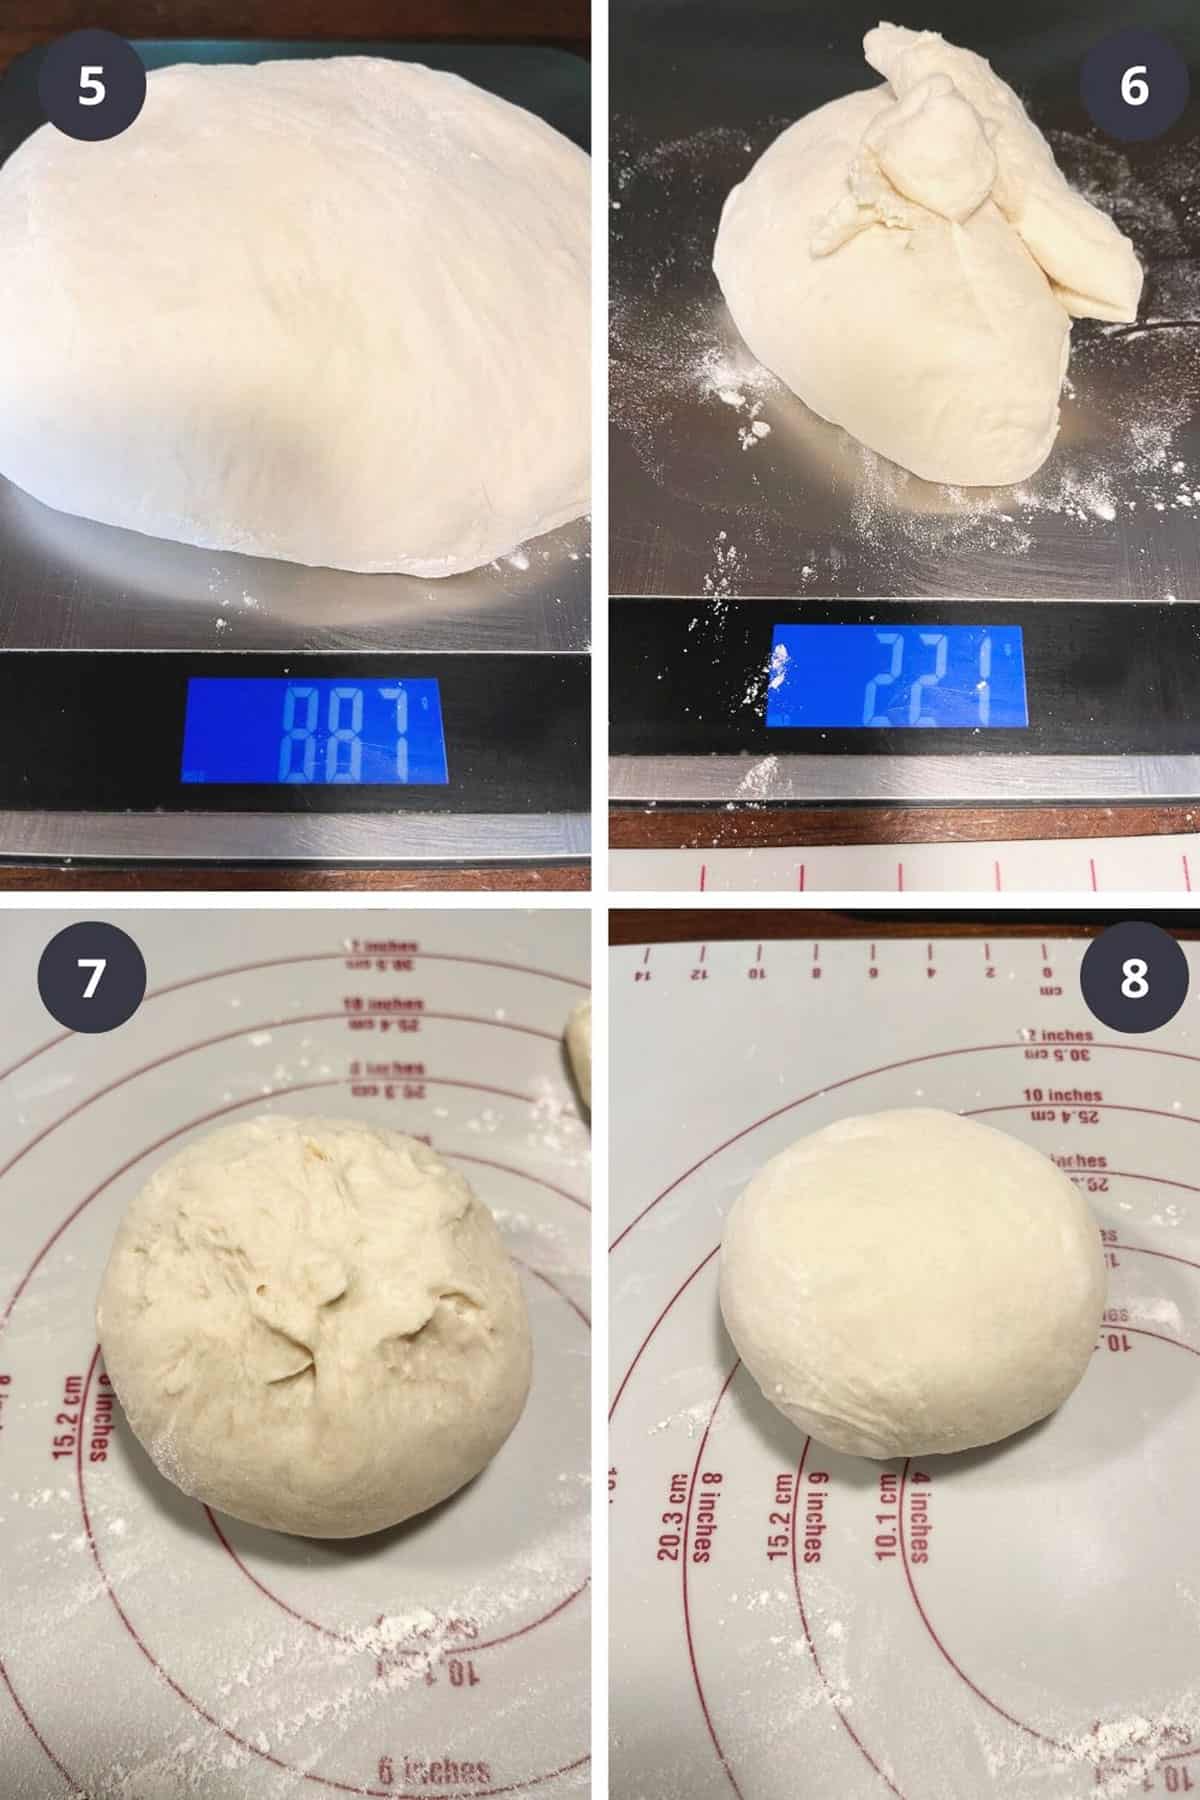
- Weight the dough ball and divide by 4 (for 4 buns).
- Weigh out 4 pieces of dough.
- Form each piece into a ball by pinching together underneath.
- Flip over with the smooth side up.
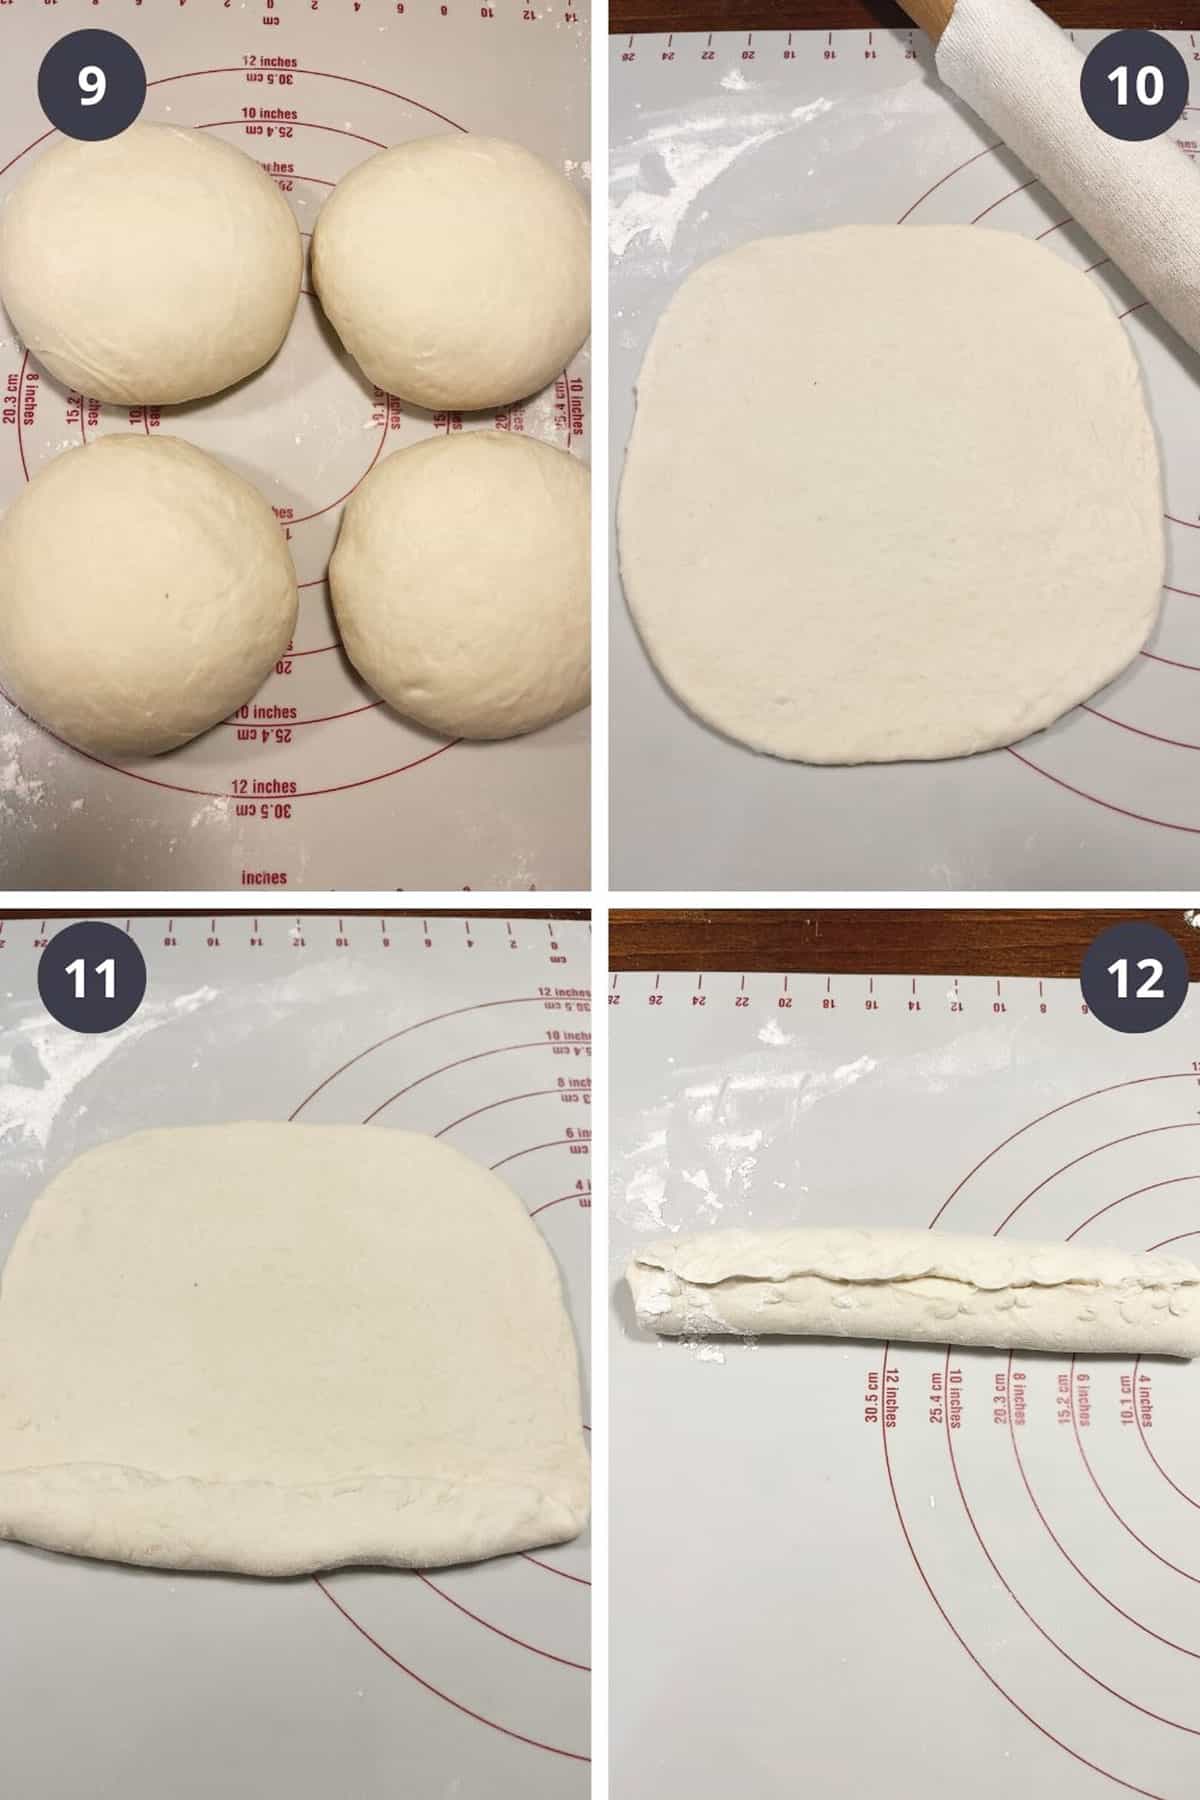
- Repeat with the remaining dough pieces.
- Roll a dough ball into an 8×8-inch square.
- Roll up jelly-roll style.
- Pinch the seam together.
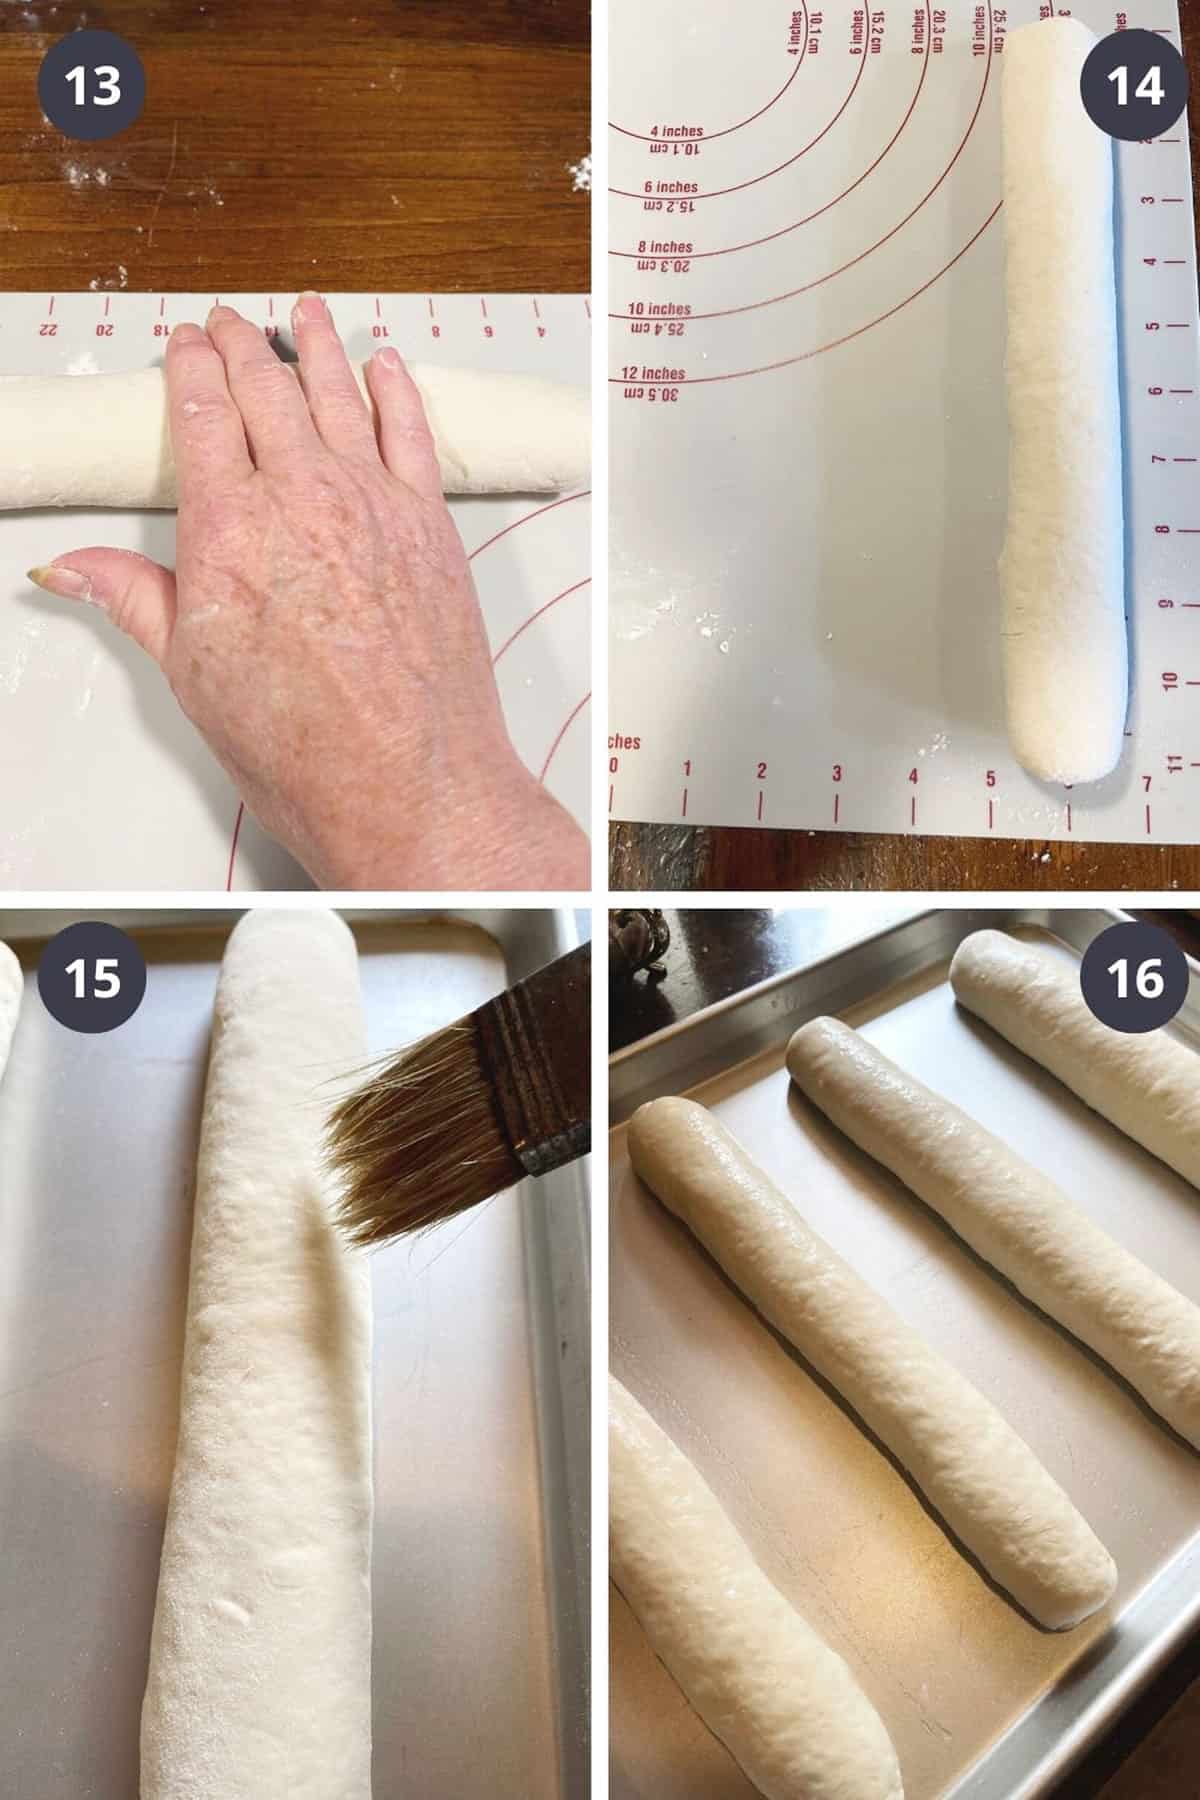
- Using the palm of your hand, roll and gently stretch the dough.
- Roll until the dough is even and is 11-12 inches long.
- Place on a baking sheet and brush lightly with water.
- Repeat with remaining dough pieces.
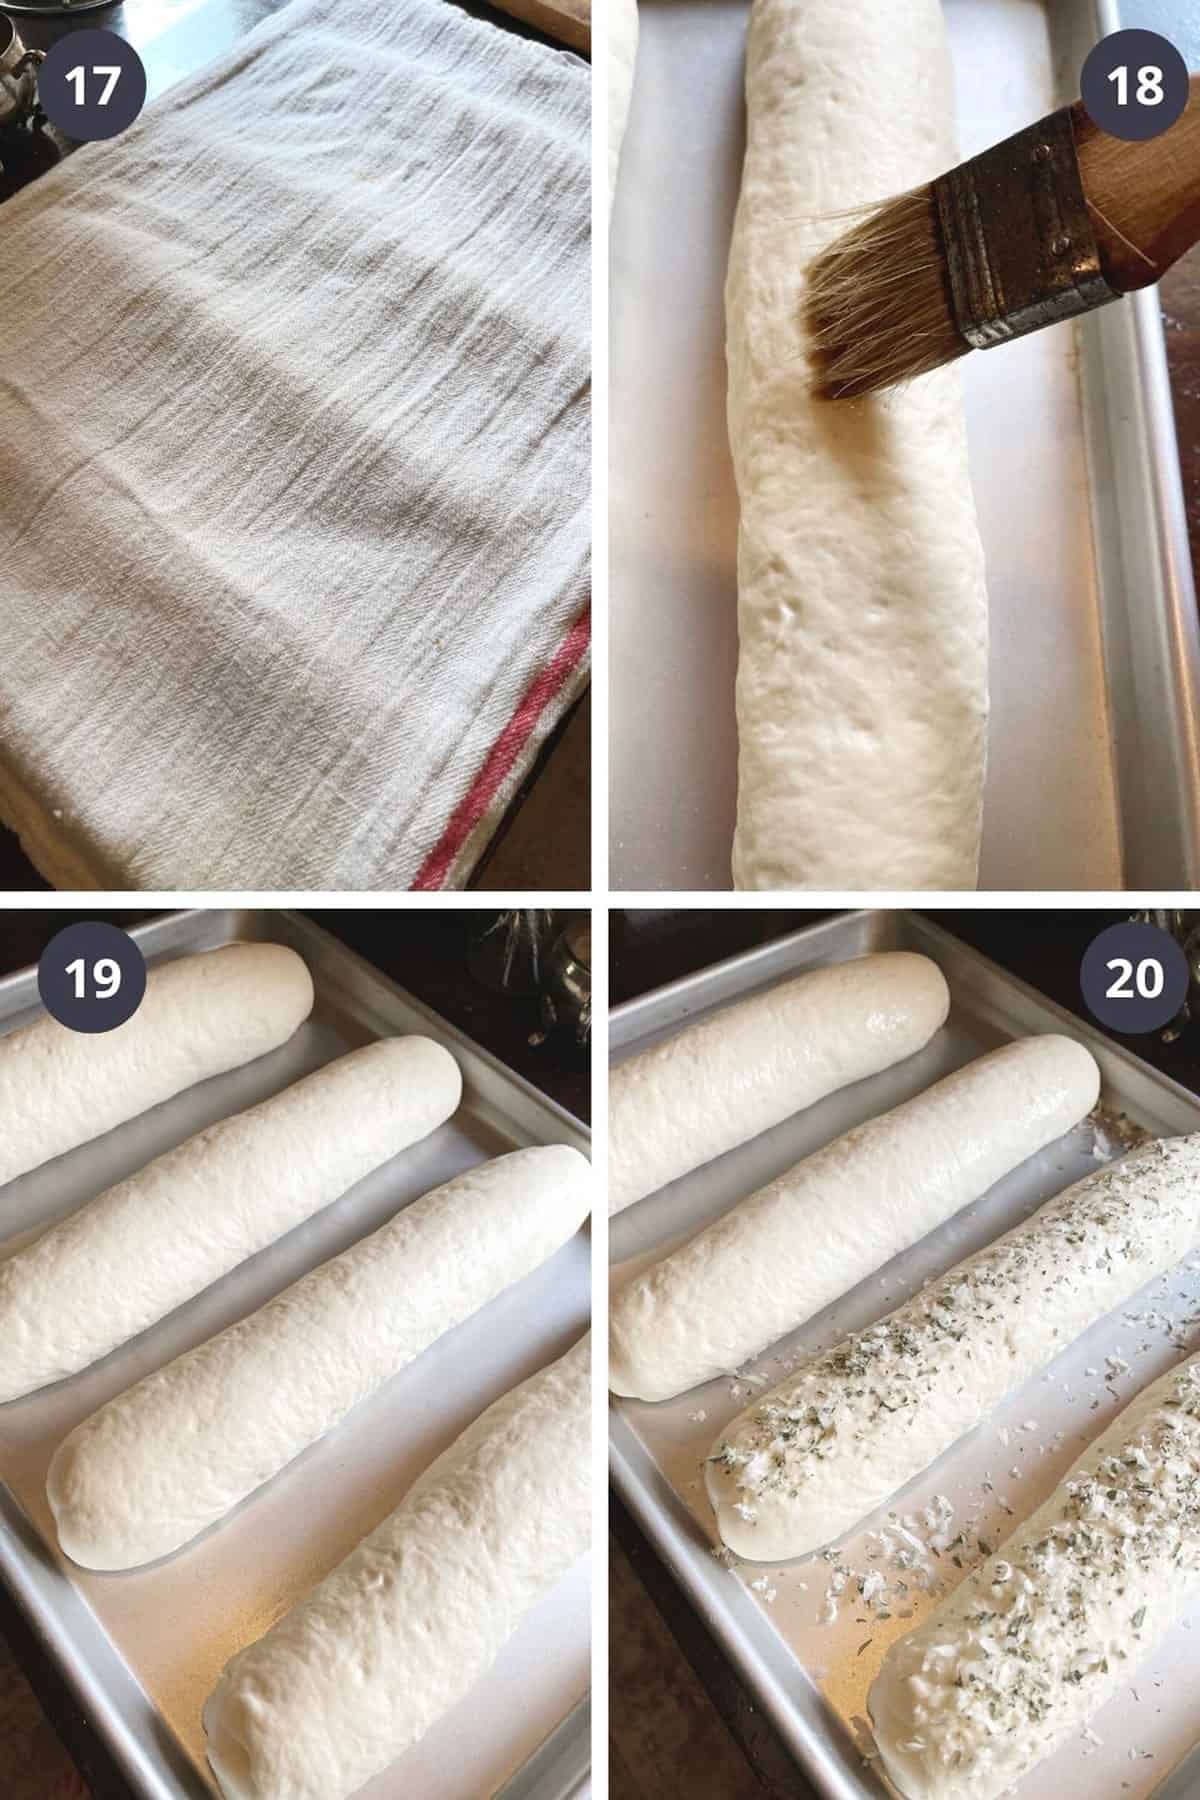
- Cover the rolls and allow to rise 20-30 minutes.
- Brush rolls with water again.
- Close up of risen rolls.
- Sprinkle with seeds, herbs and/or cheese, if using. Bake.
Baking Tips
- If you have a kitchen scale (and you should!), be sure to weigh the flour amount, for best accuracy. If you don’t, be sure to measure the flour using the stir, spoon and level method.
- The mixed dough is very wet. It will absorb some of the liquid as it rests for the 15 minutes at the start, so resist the urge to add anymore flour at the start. If necessary, add a bit more flour on the work surface if the dough is sticking.
Making ahead, storing and Freezing
These are best enjoyed within 24 hours of baking. Freeze for longer storage.
These buns freeze beautifully! I like to wrap individually, first in plastic wrap and then tightly in foil. The will keep well in the freezer up to 3 months.
Want to save this recipe?
Enter your email and I'll send it to your inbox. Plus, you'll get great new recipes from me every week!
By submitting this form, you consent to receive emails from Seasons and Suppers.
You can unsubscribe at any time.
Get the Recipe: Easy Homemade Sub Rolls
Ingredients
- 1 1/2 cups (360 ml) water, lukewarm about 105F
- 2 Tablespoons active dry or Instant yeast, Yes! It is Tablespoons not teaspoons
- 3 1/2 teaspoons sugar
- 1 1/2 teaspoons fine salt
- 3 1/2 teaspoons vegetable oil
- 4 cups (500 g) all-purpose flour, spooned and levelled
Instructions
- Add lukewarm water to a large bowl or the bowl of a stand mixer fitted with the kneading hook. Add the yeast and 1/2 teaspoon of the sugar. Let stand 5 minutes, then add the remaining sugar, salt and vegetable oil. Mix briefly to combine.
- Add the flour, one cup at a time, mixing between additions. When all the flour has been added, continue mixing for a 3-4 minutes, to develop the dough. The dough may be quite wet and sticky. That's fine. It will tighten up as it rests and you can add additional flour later, if needed. If using a mixer, remove the kneading hook and cover the top of the bowl with a clean tea towel. Let stand 15 minutes.
- Remove dough to a floured work surface. Knead dough a couple of minutes, adding additional flour as needed, only if the dough is sticking to your hands or the work surface. Divide dough into 4 equal pieces. *I like to weigh the entire piece of dough, then divide that amount by 4, to weigh out identically sized pieces.
- Form each piece of dough into a ball, cover with a clean tea towel and let rest 15 minutes.
- Roll each piece of dough into an 8x8-inch square. Starting with the edge closest to you, tightly roll the dough up, jelly-roll style and pinch the seam together. Using your palms, roll the dough log on a work surface, gently and evenly stretching it out longer, until it is 11 to 12-inch long. Be sure that the dough is even thickness along the length of the dough. Remove the dough to a large, un-greased baking sheet. *You can lightly dust the baking sheet with a bit of flour or line the baking sheet with a sheet of parchment paper, if your baking sheet is prone to sticking.
- Repeat with the remaining dough pieces.
- Brush the top of the rolls with water, cover and let rise 20-30 minutes, until puffy.
- As the rolls are rising, preheat the oven to 375F (regular bake/not fan-assisted), so the oven will be hot and ready when your rolls are ready.
- Brush the dough with water again and sprinkle with any toppings at this point (seeds, cheese, dried herbs etc.)
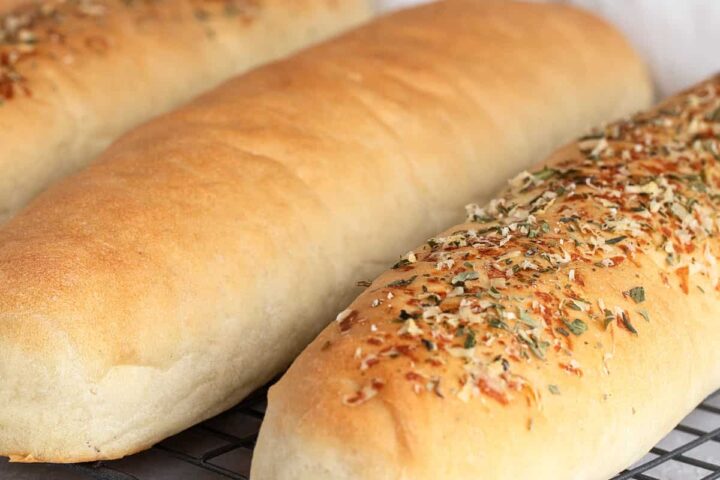
- Bake 18-22 minutes, or until deep golden. Remove from the oven and immediately transfer to a cooling rack to cool completely.
- Wrap and store at room temperature or in the fridge, to extend the freshness time. For longer storage, wrap well and freeze for up to 3 months.
Notes
Hi! I’m Jennifer, a home cook schooled by trial and error and almost 40 years of getting dinner on the table! I love to share my favourite recipes, both old and new, together with lots of tips and tricks to hopefully help make your home cooking enjoyable, stress-free, rewarding and of course, delicious!
Does it make a difference using grams and ml for the water and flour yet using tsp for the other ingredients as opposed to having those in grams also?
I don’t generally convert the teaspoon amounts, as the teaspoon measures are pretty reliable and unlikely to affect the outcome if it’s off by a little bit.