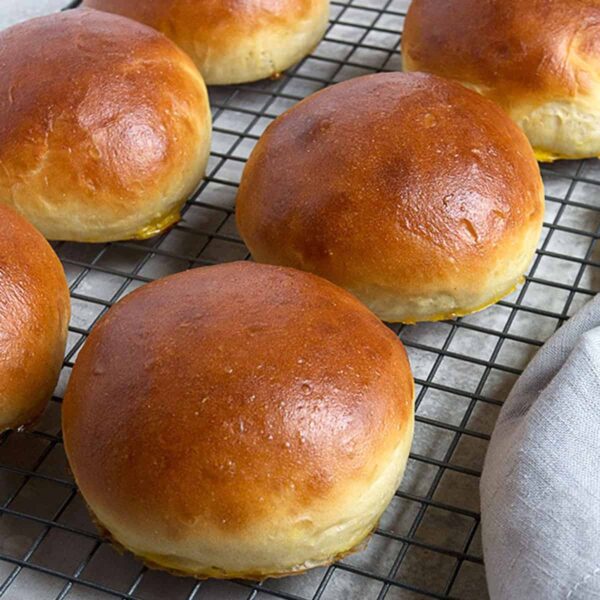
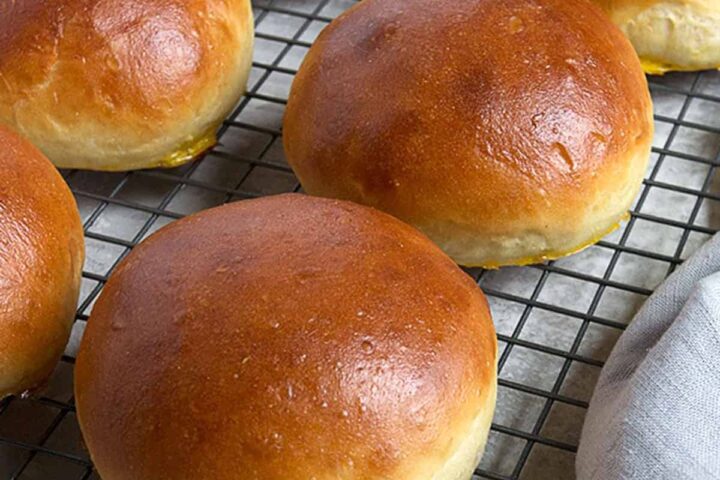
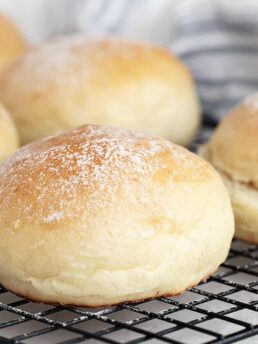
• Skip to primary navigation
  • Skip to main content
  • Skip to primary sidebar
  • All Recipes »
  • Most Popular »
    • 2-Banana Banana Bread
    • Creamy Baked Mac and Cheese
    • Extra Creamy Rice Pudding
    • Glazed Lemon Pound Cake Loaf
    • 15-Minute Udon Stir Fry
    • Multigrain Bread
    • Mango Salad
    • Pork Tenderloin Marsala
    • Homemade Baked Beans
    • Homemade Hamburger Buns
    • Carrot Cake Loaf
    • Classic Homemade Waffles
    • Authentic Poutine Recipe
  • SUBSCRIBE »
  • Nav Social Menu

    • Email
    • Facebook
    • Instagram
    • Pinterest
    • RSS
    • Twitter
Seasons and Suppers logo
menu icon
go to homepage
search icon
Homepage link
  • All Recipes »
  • Most Popular »
    • 2-Banana Banana Bread
    • Creamy Baked Mac and Cheese
    • Creamy Rice Pudding
    • Glazed Lemon Pound Cake Loaf
    • 15-Minute Udon Stir Fry
    • Multigrain Bread
    • Mango Salad
    • Pork Tenderloin Marsala
    • Homemade Baked Beans
    • Homemade Hamburger Buns
    • Carrot Cake Loaf
    • Homemade Classic Waffles
  • Subscribe
  • About
  • Contact
    • Email
    • Facebook
    • Instagram
    • Pinterest
    • RSS
    • Twitter
  • ×

    Home » Recipes » Rolls, Buns and Flatbreads

    Simply Perfect Homemade Hamburger Buns

    May 16, 2019 | by Jennifer | Last Updated: Jul 24, 2022

    Jump to Recipe Jump to Video

    Elevate your burger game with this delicious, homemade hamburger buns! These brioche-like buns are light in texture and high in flavour.
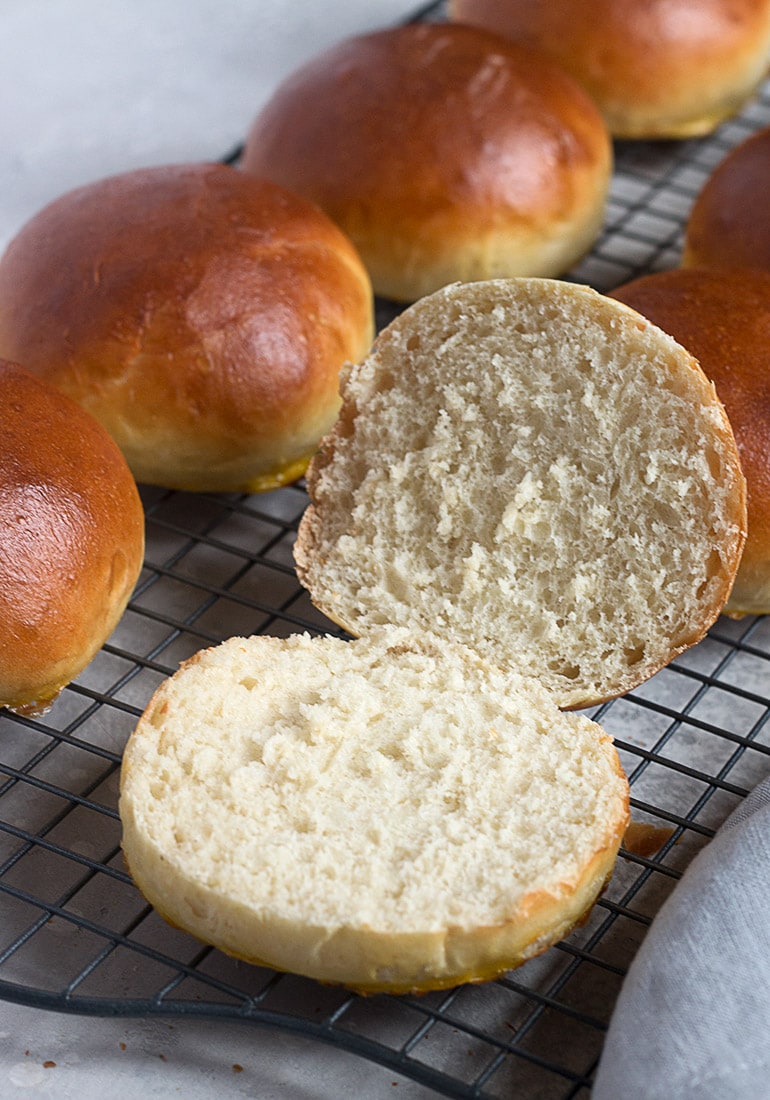
    homemade hamburger buns on cooling rack

    Jump to:
    • Key Ingredients
    • Video: How to make homemade hamburger buns
    • Baking Tips
    • Top Tip!
    • Making ahead, storing and freezing homemade hamburger buns
    • Recipe
    • You might also like ...
    • Save or share this recipe
    • Comments, Questions and Reviews

    This is the only hamburger buns recipe I've used to make hamburger buns for years! While these buns are enriched with eggs and a bit of butter for flavour, they somehow still manage to be light in texture, yet sturdy enough to hold all the burger and the toppings.

    I love that I can make these burger buns without a stand mixer. The simple dough comes together easily in a large bowl.

    So if you're looking to elevate your burger game this Summer, these delicious homemade hamburger buns are a great place to start. They freeze beautifully, so make a couple of batches and load up the freezer and you're always ready for a leisurely Summer BBQ

    Key Ingredients

    Bread flour: You'll get the best results if you start with bread flour and even better, if you start with unbleached bread flour. Here in Canada, that's not the easiest to find on the shelf in grocery stores. I get mine at Bulk Barn. Failing that, bleached bread flour is fine. You can use just all-purpose, but your buns might not rise quite as high.

    Active Dry or Regular Instant Yeast: Active dry yeast needs to be proofed (soaked) in warm water before using. I never use dry active yeast myself, but prefer to use Instant Yeast (such as SAF Brand). While Instant Yeast doesn't require proofing in water before using, it doesn't hurt if you do, so I just go ahead and proof the Instant Yeast in the same manner as described in the recipe. Instant Quick-rising or rapid-rise yeast will not work with these buns and are not recommended.

    homemade hamburger buns on a cooling rack

    Video: How to make homemade hamburger buns

    I think the one thing that tends to trip people up when making buns is the shaping of "the ball". It's quite understandable that someone might think that you just need to grab a piece of dough and form/squeeze it into a ball shape. In fact though, there is a bit of a technique to creating "a ball" with dough, that creates what's known as surface tension or tightness on the top of the ball. It's this tension that encourages the dough to rise higher, while also creating a lovely smooth top.

    The technique for forming the dough into buns is shown in this video. It's the easiest way I think and produces great results.


    1. Stretch the top to create a smooth top.
    2. Flip over and stretch the sides in towards the centre and pinch together.
    3. Do this all around the edges, until the sides are smooth, too.
    4. Flip the ball over, so your pinched part is down.

    Baking Tips

    • The first thing you need to know about this dough is that it is very moist and almost sticky when made as prescribed. To get the best (lightest) results, you want to avoid as best you can adding much more flour here. Add just the bare minimum you need to, so you can handle the dough.
    • This dough is also a slow riser, so be patient and allow it to rise for however long it takes to double etc. In a warm Summer kitchen, it will probably rise a little more quickly.
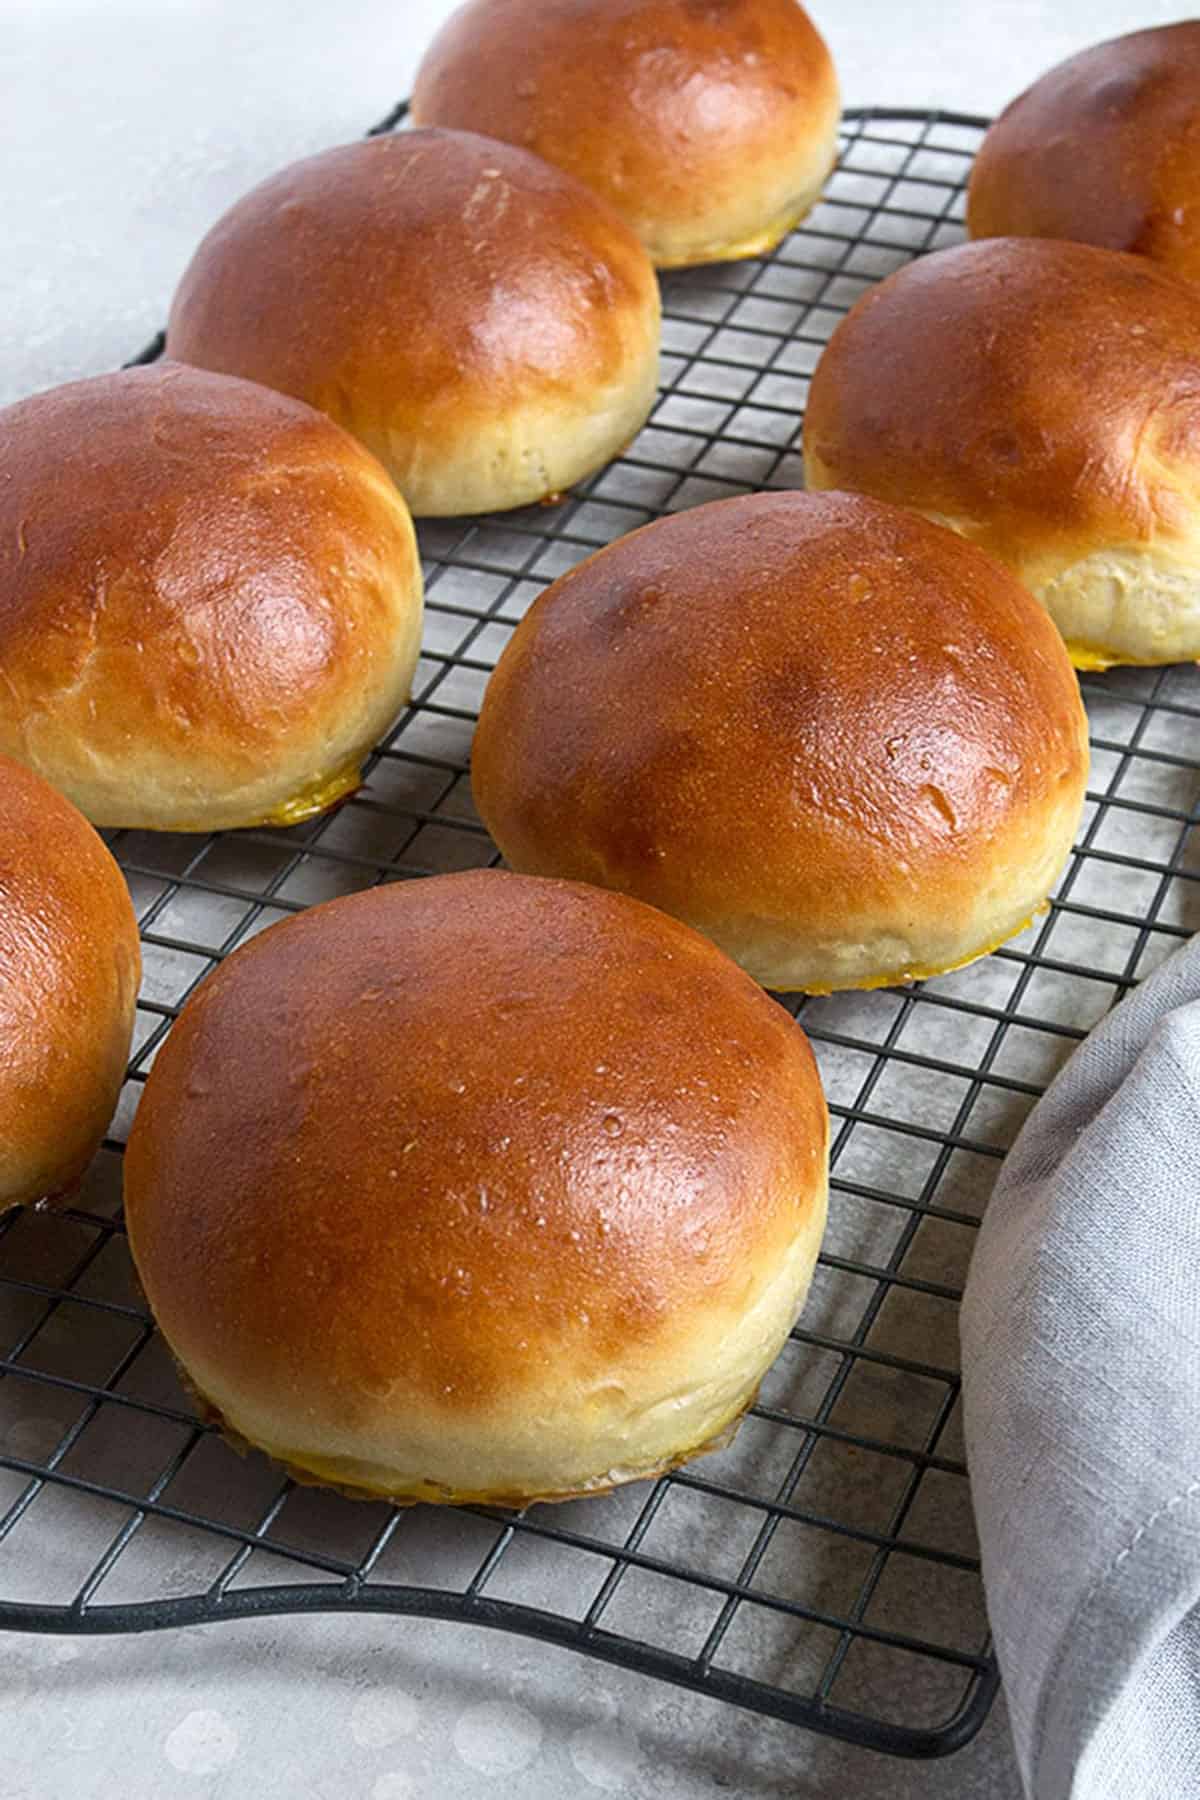
    • I like to weigh the whole dough before dividing into balls. I then divide the total weight by 8, to calculate the dough weight of each roll. Weigh them out separately and you will have 8 identically sized rolls!
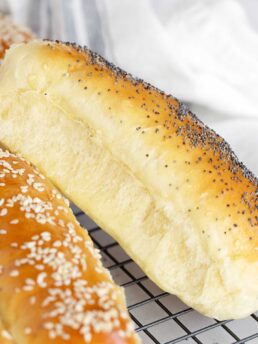
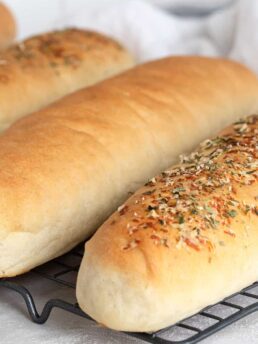
    • Right after egg washing the buns and just before popping them in the oven, top buns with sesame seeds, poppy seed or "everything" mix if you'd like to add some toppings to your homemade buns.

    homemade hamburger buns on cooling rack

    Top Tip!

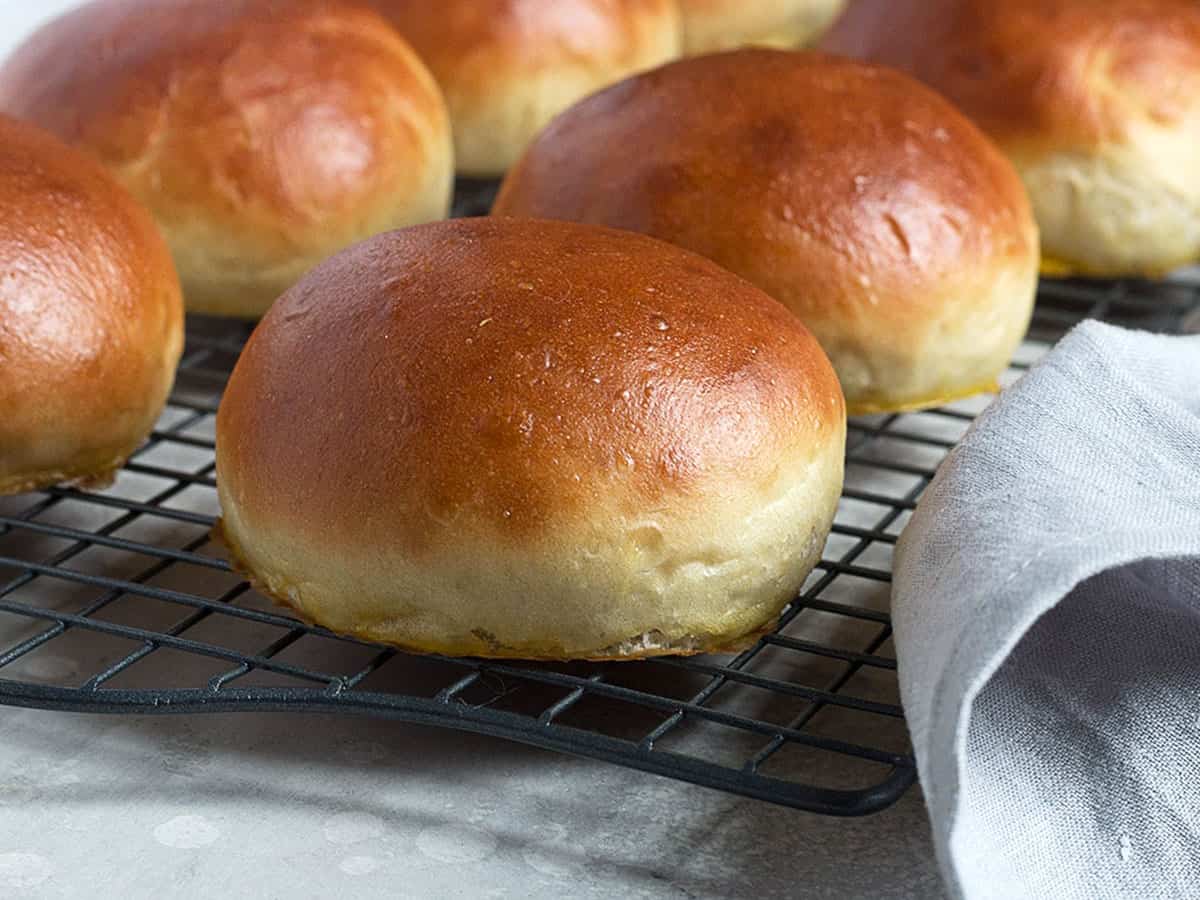
    Be sure to brush the egg wash on the dough evenly and thoroughly, being sure to get all around the bun and right to the bottom. Any bare spots left from your brushing will leave pale spots on the finished burger buns.

    Making ahead, storing and freezing homemade hamburger buns

    These are best enjoyed on the day they are made, but it is perfectly fine to make in the morning and enjoy for dinner.

    Store rolls in an airtight container, until needed, up to 24 hours. Freeze for longer storage.

    These buns freeze beautifully up to 2 months! Simply remove the buns from the freezer and thaw on the counter. It will only take a short time to thaw (30 minutes, or so).

    homemade hamburger buns on cooling rack

    Recipe

    homemade hamburger buns on cooling rack

    Simply Perfect Homemade Hamburger Buns

    Delicious, homemade hamburger buns recipe. Makes 8 buns. Freeze beautifully!
    Author: Jennifer
    5 stars from 70 ratings
    Print it Pin it + Collection Go to Collections Share by Text Share by Email
    Prep Time 20 mins
    Cook Time 15 mins
    Rising Time 3 hrs
    Total Time 3 hrs 35 mins
    Course Bread
    Servings 8 buns

    Ingredients
     

    • 1 cup water, warmed to about 105-110F
    • 3 Tablespoons milk, warmed slightly to lukewarm
    • 2 teaspoons active dry yeast or regular Instant yeast, not quick or rapid rise yeast
    • 2 1/2 Tablespoons white sugar
    • 1 large egg, beaten with a fork
    • 3 cups bread flour
    • 1/3 cup all-purpose flour
    • 1 1/2 teaspoons fine salt
    • 2 1/2 Tablespoons unsalted butter, at room temperature

    For egg wash:

    • 1 large egg
    • 1 Tablespoon water
    • Poppy or sesame seeds, optional
    Prevent screen from going dark

    Instructions
     

    • In a small bowl or 2-cup measuring cup, combine the warm water, warmed milk, yeast and sugar. Let stand until bubbly, about 5 minutes.
    • In a large bowl, whisk together the bread flour, all purpose flour and salt. Add the butter. Using your finger tips, rub the butter in to the flour mixture, making even crumbs.
    • Add the yeast mixture and the beaten egg to the bowl and using a dough scraper or silicone spatula, stir until a moist, sticky dough forms.
    • Using a silicone bowl scraper, scrape the dough on to a very lightly floured counter or work surface. At this point the dough is very moist and sticky and not really able to be kneaded as you traditionally would. You will be tempted to dust with flour resist the urge to start. Instead of traditionally kneading, use your dough scraper or silicone spatula to scoop up the dough and then slam it back on the counter. (Don't just drop it, slam it. It's therapeutic :) Use your scraper to turn it over a few times on the counter, then pick it up and slam it again. Repeat this slaming/turning action for a couple of minutes. You should find that it is a sticking to the counter a little less. If you feel it isn't progressing after a couple of minutes (is still super sticky), very lightly dust the counter with flour and turn the dough over it to flour very lightly (Not too much flour. Just a dusting). Continue doing the slam and turn action for several more minutes. At some point, after about 5 minutes or so of this routine, your dough should stop sticking to the counter. Though it will still be a quite moist dough, you should be able to form it into a ball. *If your dough is still sticking after 5-7 minutes of working it, dust with a tiny bit more flour, as needed, until it is no longer sticking, but is still nice and moist.
    • Shape dough into a ball and place into a greased bowl. Cover with plastic wrap and let rise until doubled, 1-2 hours. Note that this dough is a bit of a slow-riser. Allow it to rise until doubled, no matter how long that takes.
    • Line a large baking sheet with parchment paper and set aside.
    • Using a dough scraper, divide the dough into 8 equal pieces. (* I like to weight the dough ball and then divide that weight by 8, to get a weight for each piece. I then weigh out each piece to that weight, to get 8 exactly equal pieces. My last bake, the individual balls were 101g apiece. Yours may vary somewhat.)
    • If your dough is still too sticky at this point to form into balls, very lightly dust with a tiny bit of four.
    • Form each of the 8 dough pieces into balls (* See video above the recipe card on how to do this!). Place balls on parchment lined baking sheet about 2-3 inches apart. Cover loosely with a clean kitchen towel and let rise until doubled again, 1-2 hours.
    • Set a large shallow roasting pan of water on the lowest rack of the oven. Preheat oven to 400F, with a rack in center of the oven, as well.
    • When buns have doubled, beat remaining egg with 1 tablespoon water and brush the buns thoroughly. * Be sure to brush the entire bun, top and sides, right down to the pan, as any areas you miss will be pale-coloured once baked. If desired, you could sprinkle with sesame or poppy seeds at this point, as well. Bake, turning sheet 180 degrees halfway through baking, until tops are golden brown, about 15 minutes.
    • Immediately transfer buns to a rack to cool completely.

    Notes

    Buns are best used on the day they are baked. For making ahead, it's best to freeze as these buns freeze beautifully! Freeze in a freezer bag or container. Thaw in the container at room temperature.
    Be sure to read the "Baking Tips" included with this post, where I share some valuable tips, options, substitutions and variations for this recipe! I have also included a short video to demonstrate how to shape the dough into balls, for the nicest shaped buns.

    Nutrition

    Calories: 260kcal | Carbohydrates: 42g | Protein: 8g | Fat: 5g | Saturated Fat: 2g | Cholesterol: 62mg | Sodium: 462mg | Potassium: 89mg | Fiber: 1g | Sugar: 4g | Vitamin A: 200IU | Calcium: 22mg | Iron: 0.9mg

    Nutritional information provided for general guidance only and should not be relied upon to make personal health decisions.

    Course Bread
    Cuisine American, Canadian
    Never miss a new recipe!SIGN UP for email updates!

    Adapted from "Light Brioche Buns" by Jane Sigal as shared by the New York Times

    You might also like ...

    soft hamburger buns on cooling rack
    Soft and Squishy Hamburger Buns
    Perfect squishy and soft and hamburger bun recipe! The secret is a little potato and potato cooking water in the dough. These buns also make great soft sandwich buns!
    Jump to:
    • Key Ingredients
    • Video: How to make homemade hamburger buns
    • Baking Tips
    • Top Tip!
    • Making ahead, storing and freezing homemade hamburger buns
    • Recipe
    • You might also like ...
    • Save or share this recipe
    • Comments, Questions and Reviews
    Why you'll love this soft hamburger bun recipe There's a lot of ways to enjoy a hamburger and one of my favourites is with a...

    Read On →

    Get the Recipe
    www.seasonsandsuppers.ca

    Save or share this recipe

    More Rolls, Buns and Flatbreads

    • Classic Hot Cross Buns
    • Herb and Garlic Herb Naan Bread
    • Colicchio's Dinner Rolls
    • Seeded Pumpkin Bread Sticks
    PinShareTweetShares14k

    Meet the Author:
    Hi! I'm Jennifer, a home-cook of many years and a lifelong seeker of delicious food! I'm an equal opportunity eater. I enjoy eating all the foods!

    I love to share the classic recipes that I have enjoyed for years, as well as newer discoveries, that have become fast favourites.
    More about me here ...


    Seasons and Suppers is honoured to have been featured on these great sites ...

    graphic showing sites Seasons and Suppers has been featured on


    Tried this Recipe?
    You can leave a Recipe Rating by simply clicking on the stars in the Recipe Card above or if you like, you can leave a Comment and Rating in the comment section below! It's always helpful for other cooks to hear feedback on a recipe from someone who has tried it!

    You don't need to use your full name or even your real name when leaving a comment. You just need to be a real person :) Your email address will never be publicly displayed or shared.

    Reader Interactions

    Comments

    1. C Wolf says

      August 09, 2022 at 8:16 am

      5 stars
      These buns top all of the other recipes I have made and my family will only eat these now! Can I substitute the milk and butter with non-dairy products?

      Reply
      • Jennifer says

        August 09, 2022 at 9:30 am

        So glad to hear! You can certainly replace the butter with an equal amount of vegetable (or similar) oil. This swap may require a touch more flour over-all. I haven't tried non-dairy milk, but there is no reason it won't work. Both changes may have change the texture of the finished bun in some way. I can't say how much, as I haven't tried it myself. If you do, let me know how they compare.

        Reply
    2. Rebecca Walls says

      August 03, 2022 at 6:10 pm

      I only had a tbsp of yeast and otherwise filled the recipe. They are fluffy and beautiful buns. So happy with this recipe!

      Reply
      • Jennifer says

        August 06, 2022 at 2:10 pm

        Glad to hear, Rebecca :) Thanks so much!

        Reply
    3. Brenna says

      July 24, 2022 at 4:12 pm

      5 stars
      I’m obsessed with these, as are all the people I’ve shared them with! Thank you for such a perfect, easy-to-follow recipe. I actually started using this dough to make long brioche rolls for sausages or sandwiches as well. I get 4 buns and 6 rolls out of one batch. The rolls get shaped and scored, then baked for 12-13 minutes. I did the math out - I’m now spending $4 a month on rolls/buns for my 2-person household instead of $15, and none go to waste!

      Reply
      • Jennifer says

        July 24, 2022 at 7:09 pm

        So glad to hear, Brenna and yes, once you start making them, it is such a game changer :) Thanks so much!

        Reply
    4. Jacqueline says

      July 17, 2022 at 3:46 pm

      I tried these for the first time yesterday. They have a great texture (sturdy enough for hamburgers) and flavor. But mine did flatten out during cooking. So they are wide & flatter than a hamburger bun. What might I have done wrong?
      * I did increase the recipe size (to make 12 rolls). (Used the ingredient calculator provided on the website.)
      * I did use bread flour as recommended in recipe.
      * They doubled in size beautifully on the first rise.
      * As recommended, I weighed each individual roll before forming & the 2nd rise
      * They rose more on 2nd rise.
      * I did have water in oven for steam.
      Any input would be appreciated!

      Reply
      • Jennifer says

        July 17, 2022 at 3:53 pm

        Hi Jacqueline, it's always hard to nail down, but if I had to guess based on the information you provided, I would look at possibly over-proofed on the 2nd rise. You said "they rose more on the 2nd rise", which may suggest they rose too much (sometimes a warm, Summer kitchen can speed up that 2nd rise). Other than that, what yeast did you use? Using quick or rapid rise yeast could also cause an issue like this.

        Reply
    5. Steve says

      July 09, 2022 at 6:06 pm

      5 stars
      Thank you so much for having a website and recipe that is so convenient and well written. Thank you for not going on for pages about your grandmother’s hamburger buns and how much you loved eating them and spent 30 years researching how to duplicate them (or some other dumb story no one cares about).
      Thank you for embedding the video right into the screen so you can watch this as you’re reading the recipes.

      Very well done.

      Reply
      • Jennifer says

        July 09, 2022 at 6:43 pm

        Thanks so much, Steve :)

        Reply
    6. Debbie says

      June 19, 2022 at 4:00 pm

      5 stars
      Absolutely wonderful. Easy instructions. Delicious.
      And I LOVE the quantity changer. THAT'S PERFECTION.

      Reply
      • Jennifer says

        June 19, 2022 at 4:37 pm

        So glad you enjoyed them, Debbie :) Thanks so much!

        Reply
    7. Jenna says

      June 01, 2022 at 2:30 pm

      5 stars
      I’ve made these buns a handful of times and they are amazing. Partner refuses to buy store bought buns now, and would rather have burgers at home then out haha. I use vegan margarine and Just Egg as subs and it still works perfect ❤️

      Reply
      • Jennifer says

        June 01, 2022 at 6:50 pm

        So glad to hear, Jenna :) And good to know the vegan subs work well, too! Thanks so much.

        Reply
      • C Wolf says

        August 09, 2022 at 8:27 am

        What did you use as a milk substitute for your vegan version? Thanks!

        Reply
    8. Wanda says

      May 16, 2022 at 7:32 pm

      5 stars
      My husband is addicted to your honey whole wheat bread ! I've made it quite a few times now
      We love it ! Now today I'm trying your hamburger bun recipe , looks like another hit!!!!
      Question,,, can this bun recipe be doubled???
      Thanks From Northern Saskatchewan!!
      LOVE your recipes !

      Reply
      • Jennifer says

        May 16, 2022 at 7:37 pm

        Hi Wanda and so glad you all are enjoying the bread, too! And yes, you can absolutely double this recipe. These freeze so well, it's great to have a stock of them in the freezer for the Summer. Thanks so much!

        Reply
    9. Gail says

      April 10, 2022 at 3:37 am

      5 stars
      Amazing buns but I have to say the easiest way to shape them so they are equal is to flatten out the dough and cut them with a glass or donut cutter with the middle cutter removed. They seem to bake up better that way too

      Reply
      • Jennifer says

        April 10, 2022 at 10:50 am

        Hi Gail and glad you are enjoying the buns! What you describe is how I would cut dough for yeast donuts. It definitely is easy, but generally, for buns, you want to shape with some surface tension to get a nice "bun" shape and a good rise. I suspect the buns cut this way are flatter and wider (which is maybe how you like your buns :)

        Reply
    10. Mary says

      March 30, 2022 at 9:37 pm

      Hi Jennfier, Thank you for sharing this! These rolls were a huge hit and easy to make. Lots of "this is SOOO good". Glad to have come across your blog. Next to try is your "Oven or Slow Cooker Pork and Beans".

      Reply
      • Jennifer says

        March 31, 2022 at 11:31 am

        So glad to hear, Mary! Thanks so much :)

        Reply
    11. Mary says

      March 30, 2022 at 11:55 am

      Hi Jennifer, is the fine salt referenced in the recipe, fine sea salt?

      Reply
      • Jennifer says

        March 30, 2022 at 11:58 am

        Hi Mary, I only ever use fine sea salt myself, so that's what I've used here. I don't specify as I'm not sure there is a ton of difference in the finished buns if using either fine table salt or fine sea salt (though I stand to be corrected :)

        Reply
    12. Julie says

      March 13, 2022 at 8:58 pm

      Would it work to use my bread machine to make the dough and then shape/rise/bake?

      Reply
      • Jennifer says

        March 14, 2022 at 9:52 am

        Hi Julie, I don't know myself, as I don't have a bread machine. It's a very sticky dough to start, so I'm not sure how well bread machines do with that. Maybe someone has tried it and can weigh in for your.

        Reply
    13. Cheryl says

      February 16, 2022 at 4:37 pm

      5 stars
      Love this recipe for hamburger buns, I have made it several times and it never disappoints! Thank you for posting ❤

      Reply
      • Jennifer says

        February 16, 2022 at 7:00 pm

        So glad to hear, Cheryl :) Thanks so much!

        Reply
    14. Sarah says

      February 14, 2022 at 12:12 pm

      Hi! How do you best defrost these buns from frozen? Do you let them thaw in the freezer overnight? Or do you bake them in the oven again from frozen to warm them up? Or is there any other way you suggest?

      Reply
      • Jennifer says

        February 14, 2022 at 12:25 pm

        Hi Sarah, if you just set the frozen buns on the counter, they will thaw in 20-30 minutes, so I just take them out a little ahead of dinner. Once thawed, can re-warm them or toast them, just as you would any other hamburger bun.

        Reply
    15. Gaby says

      January 29, 2022 at 2:47 pm

      Hi! Thanks for the recipe! One question, have you frozen them before baking? would that work?

      Reply
      • Jennifer says

        January 29, 2022 at 6:34 pm

        Hi Gaby and no, I haven't frozen them before baking myself. In theory, it should work, but honestly, they freeze/thaw fabulously, I've never felt the need to do it any other way. If you try it though, let me know how it works out.

        Reply
    16. Connie says

      January 20, 2022 at 4:36 pm

      These buns were so good! I'm fairly new to breadmaking, but they were perfect. I've made them several times and they have spoiled us - no more of those from the supermarket!. Could I bake the dough in a loaf pan for sandwich bread? Is so, will it make one or two loaves, or maybe one loaf a a few rolls? Thanks!

      Reply
      • Jennifer says

        January 20, 2022 at 7:07 pm

        So glad you enjoyed them, Connie :) And yes, you could definitely make a loaf. It should make a 9x5 loaf or and 8x4 loaf and a couple of rolls.

        Reply
    17. Talie says

      January 08, 2022 at 11:02 pm

      5 stars
      These were delicious! I will definitely be making them again. The texture was incredible- soft but plenty of structure. Thank you

      Reply
      • Jennifer says

        January 09, 2022 at 10:35 am

        So glad to hear, Talie :) Thanks so much!

        Reply
    18. Lea says

      November 21, 2021 at 12:28 pm

      Thank you for this great recipe! Because I had lots of rye flour, I substituted in one cup of rye flour and only used 2 cups of bread flour, following the recipe otherwise. They turned out really great and my partner said he thought they were the best he'd ever tasted.

      Reply
      • Jennifer says

        November 21, 2021 at 6:42 pm

        Glad you enjoyed them, Lea :) Thanks so much!

        Reply
    « Older Comments

    Add a Comment, Question or Review Cancel reply

    Your email address will not be published. Required fields are marked *

    Recipe Rating


    This site uses Akismet to reduce spam. Learn how your comment data is processed.

    Primary Sidebar

    “One of the best Food Blogs in Canada.” - National Post

    Hi! I'm Jennifer. Are you are looking for simple, seasonal and delicious everyday recipes? Do you love classic, homey, comforting food, but with a modern, real food update? Good! Me, too!

    Learn more about me here →

    Trending Recipes

    • Simply Perfect 2-Banana Banana Bread
    • Mango Salad with Zesty Lime Vinaigrette
    • Extra Creamy Rice Pudding
    • Glazed Lemon Pound Cake Loaf
    • 15 Minute Spicy Udon Stir Fry
    • Authentic Canadian Poutine Recipe

    Spring Recipe Collections

    • Rhubarb Recipes
    • Celebrating Citrus
    • Maple Recipes
    • Spring Favourites

    Footer

    ↑ back to top

    Explore

    • About
    • My Amazon Shop
    • YouTube Channel
    • My Web Stories
    • Privacy Policy

    Newsletter

    • Sign Up! for free email updates of new posts and seasonal favourites from the recipe archives. It's sent just once a week and your email address is never shared or sold.

    Contact

    • Contact Me

    As an Amazon Associate I earn from qualifying purchases.
    This site uses Cookies to provide the best user experience. Learn more in our Privacy Policy.

    Copyright © 2022 Seasons and Suppers. All Rights Reserved.