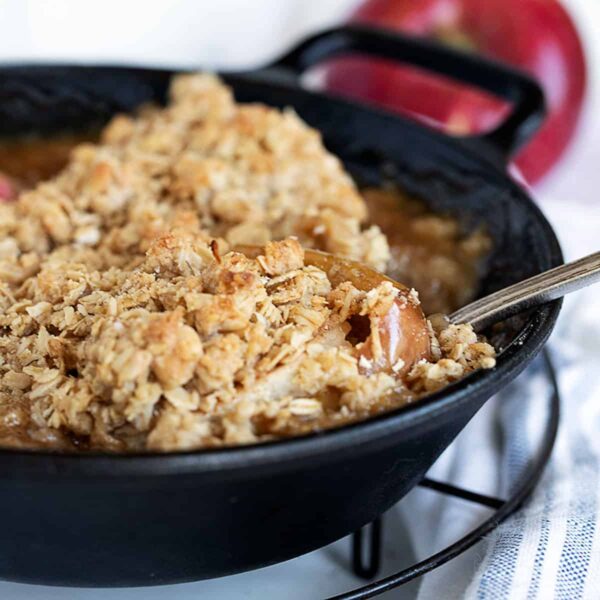
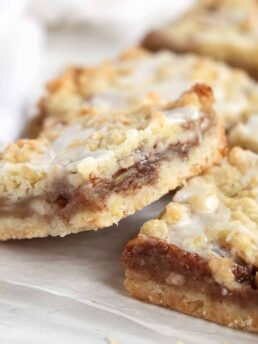
Baked apples meet apple crumble, with these delicious baked apples with an oatmeal crumble topping. Cooked with apple cider they are the perfect Fall dessert!
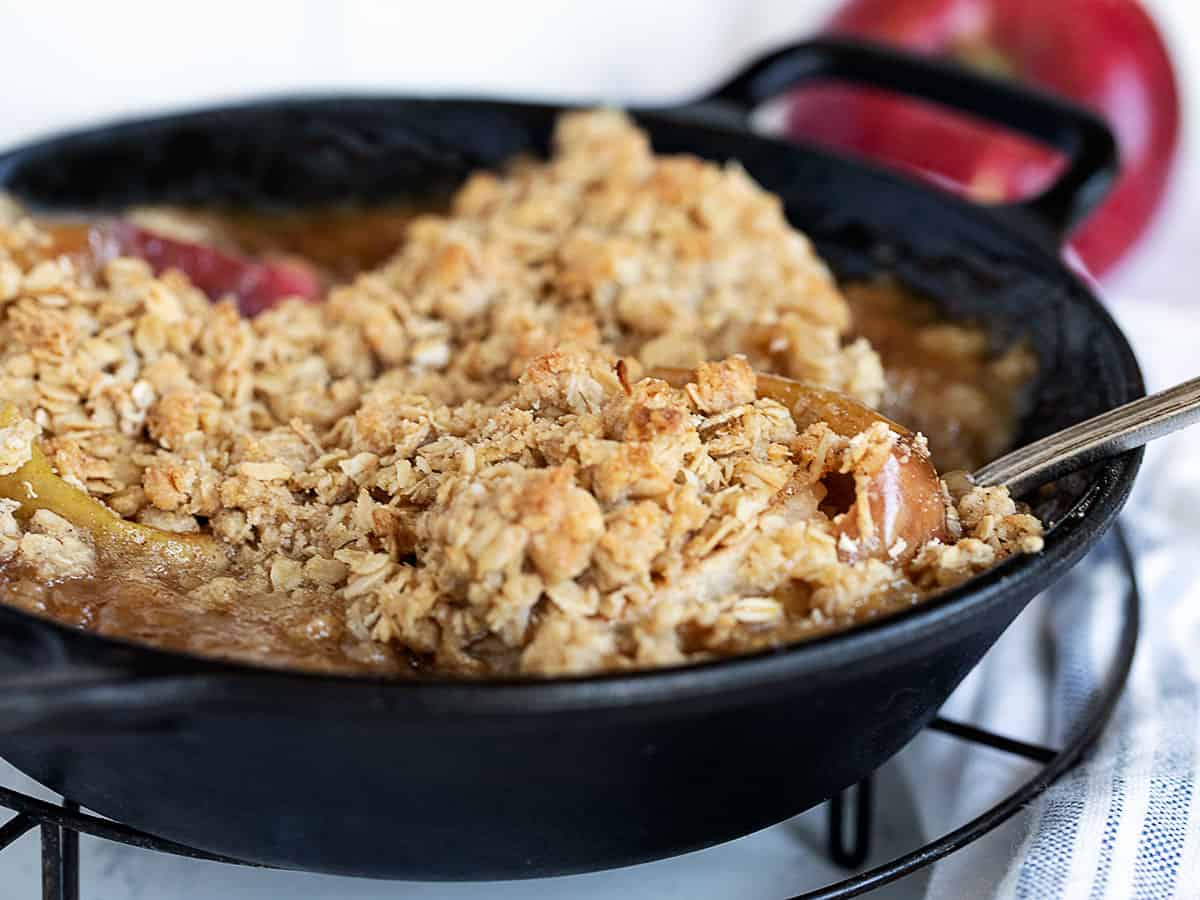
Baked apples with an oatmeal topping definitely checks all the boxes for great Fall comfort food! If you love baked apples and you love apple crumble (or apple crisp, as we tend to call it in Canada), then you’ll love them both together in one dish!
My favourite part of this dish is the use of some apple cider in the pan while the apples roast. The cider braises the apples and also reduces as the apples roast and cook into a full-of-flavour apple syrup, that combines with the crumble topping in the nicest of ways.
Best apples for baked apples
When it comes to making oven-baked apples, you’ll want to choose apple varieties that become tender and soft when cooked, but not mushy. Here are some of the best apple varieties for oven-baked apples:
- Granny Smith
- Fuji
- Pink Lady
- Gala
- Honeycrisp
When picking your apples, look for ones that are ripe and firm and that have symmetrical bottoms, so that they stand up straight and don’t tip over in the oven.
Ingredients and substitutions
A few notes about the key ingredients …
✓ Apple Cider – if you’re like me, you might already have a jug of apple cider in the fridge this time of year (or might like to :) If not, apple juice will work just fine here as well.
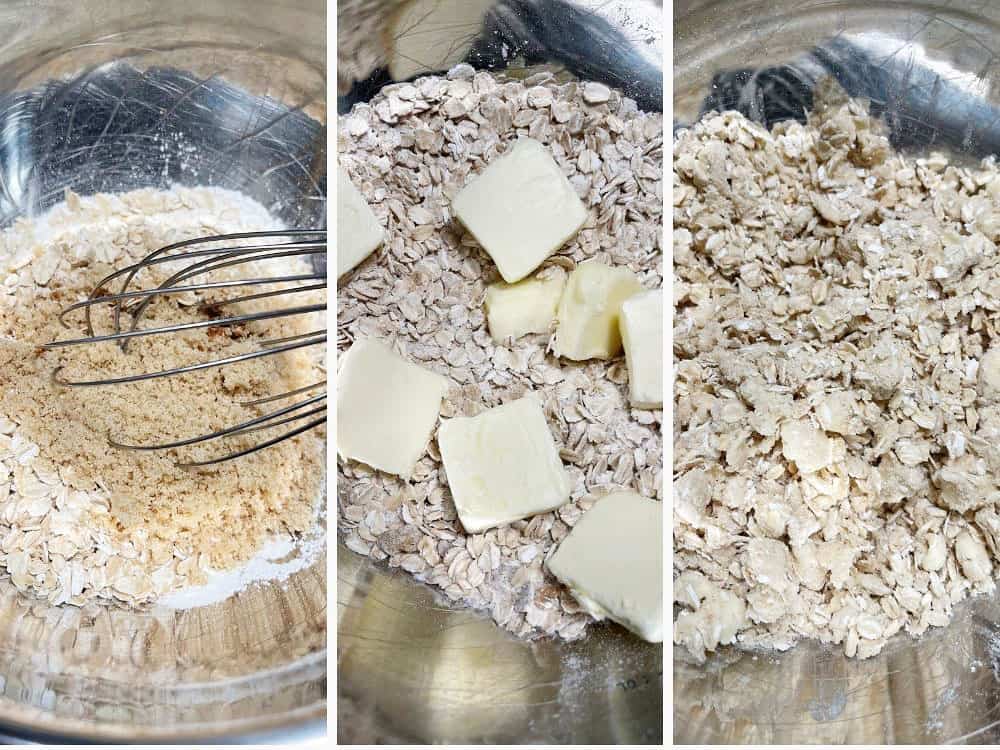
✓ Oats – Large-flake, old-fashioned rolled oats will give you the best results for the crumble, though quick oats will probably work here, as well.
✓ Maple Syrup – I always have maple syrup on hand, so it’s my syrup of choice for these apples. Honey or any other similar syrup will work just fine in place of the maple syrup.
How to make baked apples with oatmeal crumble
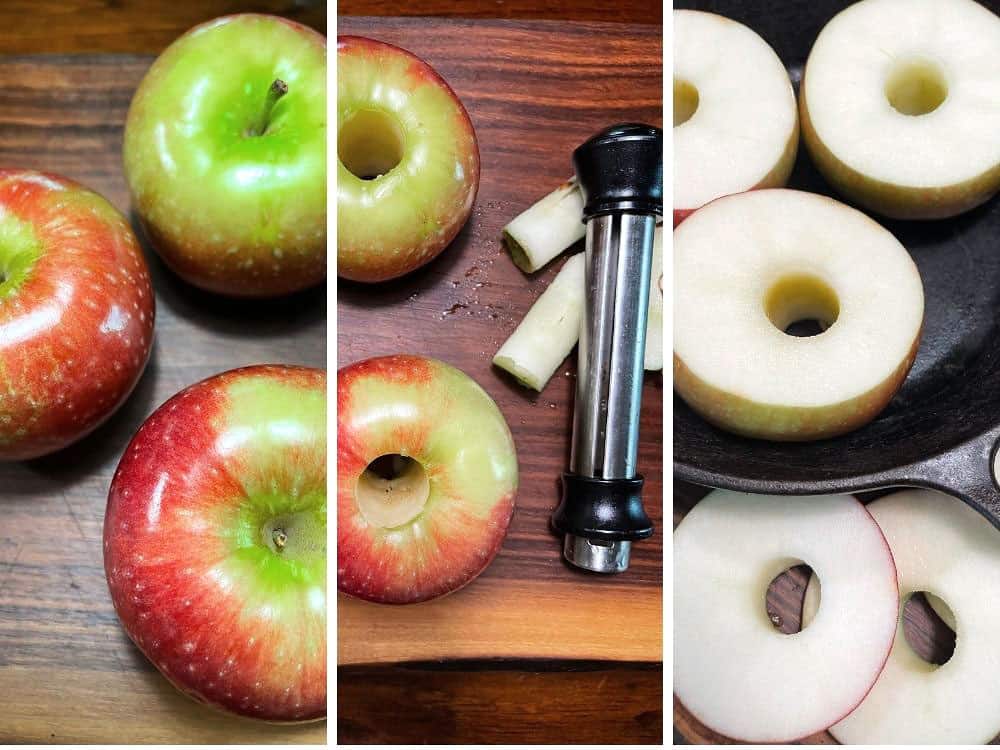
Step 1: Core your apples, the cut off the top 1/4 of the apple. Place into a baking dish just big enough to hold the apples with a little space in between.
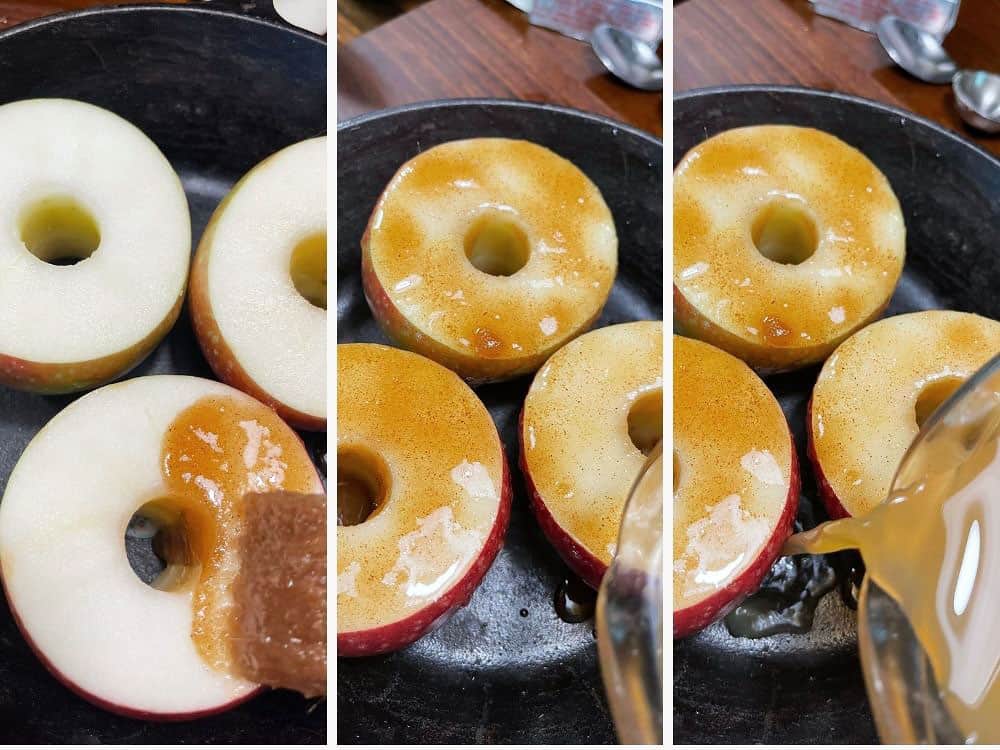
Step 2: Mix up simple melted butter, brown sugar and cinnamon paste and brush generously on top of the apples, letting it fall into the apple cavity as well. Pour the apple cider (or apple juice) into the baking dish. Pop them into the oven to roast until the apples soften slightly, about 20-30 minutes.

Step 3: While the apples are roasting, mix up the crumble mixture. Pop it into the refrigerator to chill until needed. Remove apples from the oven once the skin starts to separate from the apple flesh.
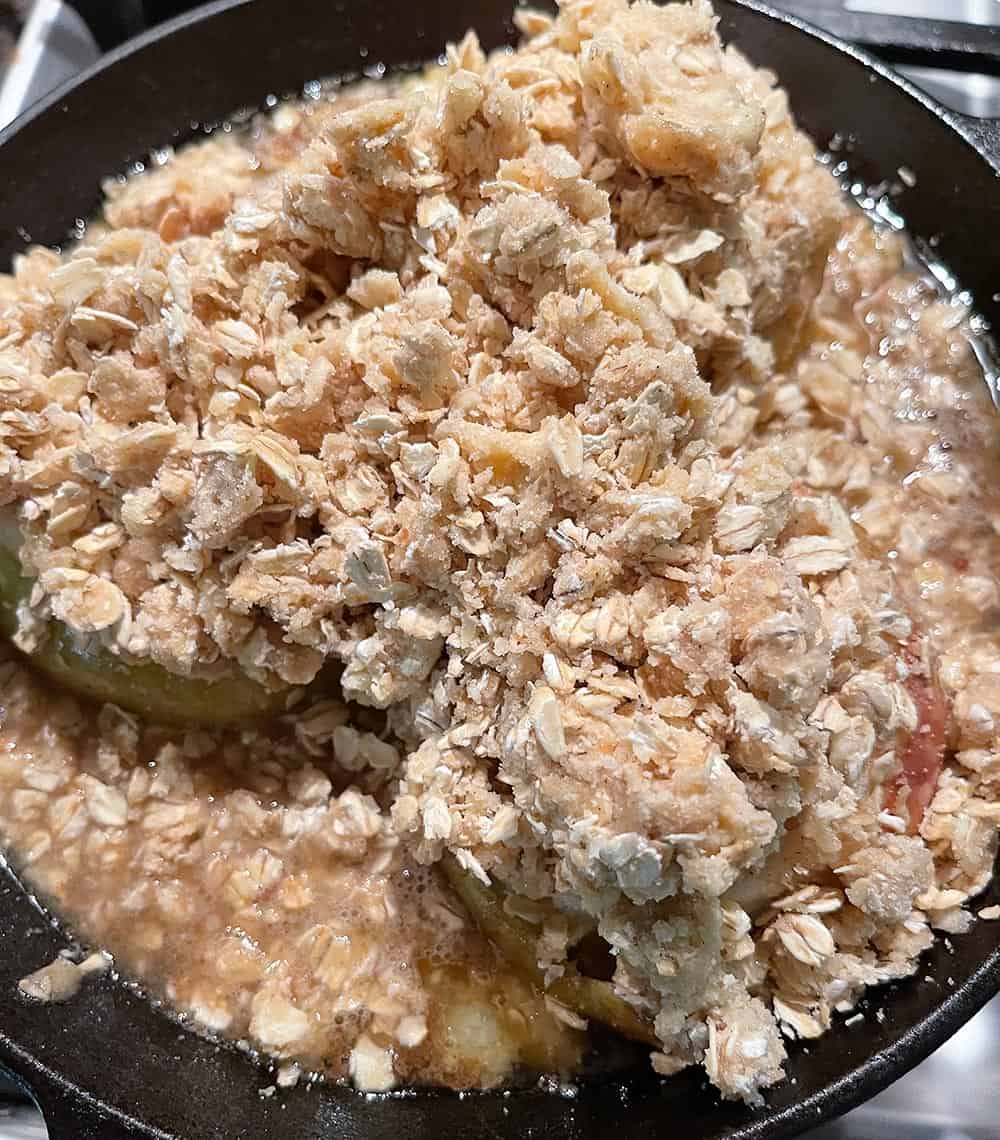
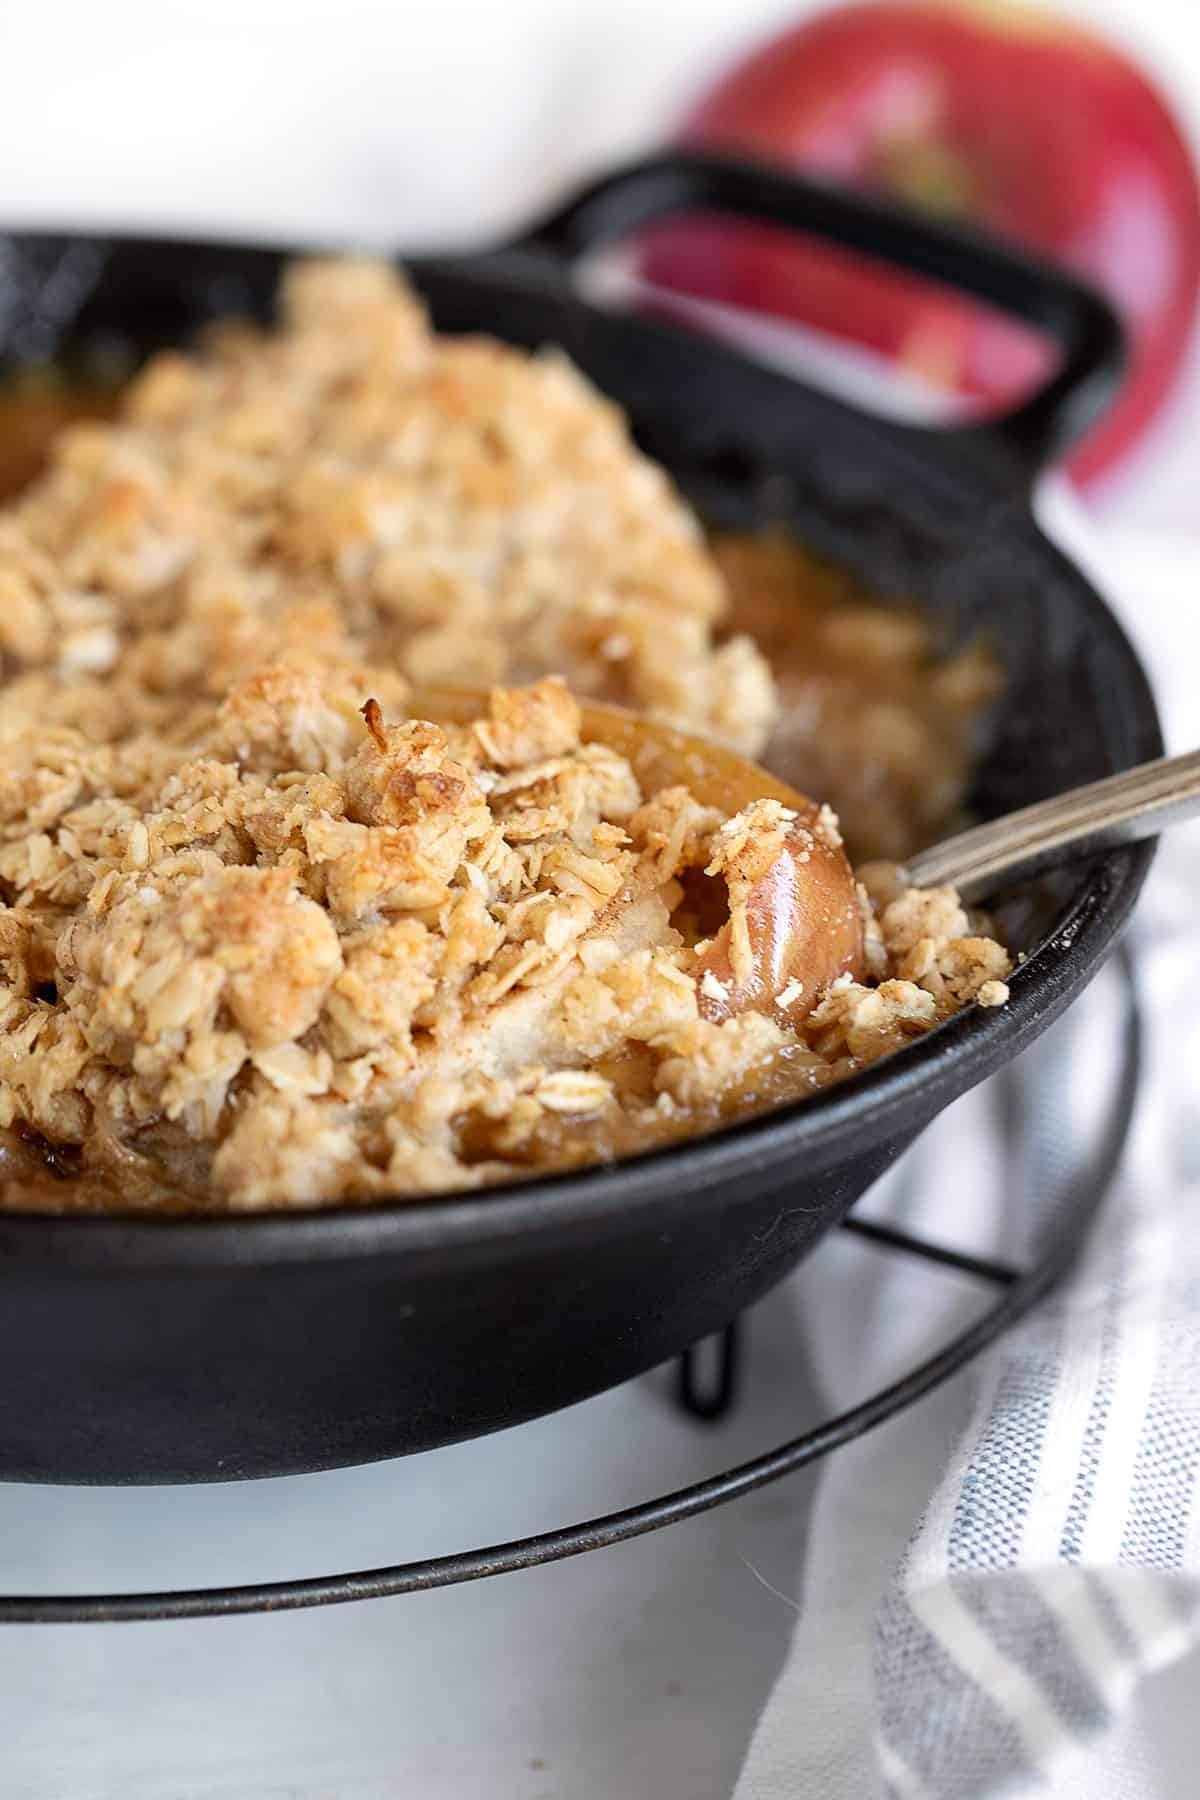
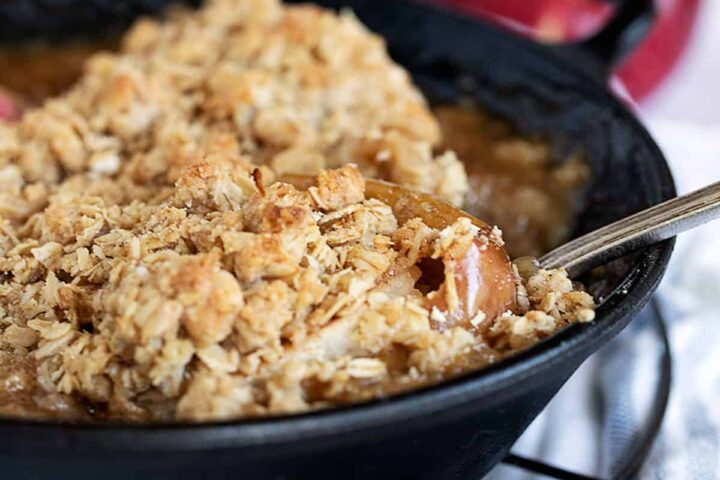
Put the crumble topping over the apples. Try to mound as much as you can on top of the apples, but it’s just fine if the excess falls around the apples, too. It will be delicious :) Return to the oven to bake for another 15-20 minutes, or until the topping is golden.
To serve, allow to cool slightly, then spoon the warm apples into a bowl, taking some of the extra crumble as well. Enjoy as is, or with some cream poured over to or add a scoop of vanilla ice cream.
Recipe tips!
- An apple corer is invaluable for baked apples, but if you don’t have one, the easiest way to remove the core is to cut a square around the core, from top to bottom, then just push that cut out piece out the bottom. A square is easier to cut than a circle :)
- Use a baking dish that is just large enough to hold your apples. Too big a dish, with too much surface area will results in a too thin layer of apple cider, that may cook dry and scorch. No matter what size pan you use, when you are checking your apples, be sure to check that there is a good depth of liquid on the bottom of the pan, as well.
- As noted in the recipe, apples will roast at different rates, so be prepared to check on them with some regularity while they are roasting. You can expect it will take somewhere between 20-30 minutes. Your apples will be ready for the topping when the apple skin separates from the apple fresh and slips down a bit. It may also start to crack or split a bit.
Making ahead and storing
These baked apples are best enjoyed freshly baked but could be made a few hours ahead and re-heated. Re-heat lightly covered with foil in a 350F oven until warmed through.
Store leftovers in the refrigerator for up to 2 days.
Want to save this recipe?
Enter your email and I’ll send it to your inbox. Plus, you’ll get great new recipes from me every week!
By submitting this form, you consent to receive emails from Seasons and Suppers.
You can unsubscribe at any time.
Get the Recipe: Baked Apples with Oatmeal Crumble
Ingredients
- 4 apples, *see Note 1
- 2 Tablespoons butter, melted
- 1 1/2 Tablespoons white sugar
- 1 Tablespoon brown sugar
- 1/8 teaspoon Kosher salt
- 1/4 teaspoon cinnamon
- 3/4 cup apple cider, or apple juice
Crumble Topping:
- 1 cup rolled oats, large-flake, old-fashioned
- 1/2 cup all purpose flour
- 1/4 cup brown sugar
- 1/2 teaspoon Kosher salt
- 1/4 teaspoon cinnamon
- 6 Tablespoons butter, cold
- 1 Tablespoon maple syrup, or honey
- 1/2 teaspoon vanilla
Instructions
- Preheat oven to 375F. (non-convection).
- Core apples with an apple corer or alternately, cut a square around the stem/core area, cutting from top to bottom, then push the cut section out the bottom and discard. Cut the top 1/4 of the apple off and discard. Place apples into a baking pan just large enough to hold them with a little space in between. (Too big a pan and the cider will cook off too quickly and may cook dry and scorch, introducing a bitter flavour to the dish).
- Mix together the melted butter, white and brown sugars and cinnamon. Brush on top of the apples and allow it to drip down into the apple cavity as well. Pour the apple cider into the pan. It should be at least 1/2-inch deep or more. If not, add a bit more.
- Place apples in oven and roast, uncovered, until the apples soften and the skin starts to separate from the apple flesh or crack, but the apples are still holding their original shape. This is usually 15-25 minutes, depending on the type of apple you use. I suggest checking at 15 minutes and going from there. Also make sure there is still liquid in the bottom of the pan. If not, add a bit more at this point.
- Meanwhile, prepare the crumble by whisking together the oats, flour, brown sugar, salt and cinnamon in a medium bowl. Add the cold butter and use a pastry cutter or your fingertips to cut or rub the butter into the dry mixture until you have an even crumb, with pea-sized pieces of butter. Add the maple syrup and vanilla and use a fork the stir and press the mixture until it is evenly moist and crumbly. Place into the fridge until needed. (You can make the crumble ahead and refrigerate covered, if you like.)
- When apples have softened, remove from the oven. Spoon the crumble over top of the apples, mounding it up as much as you can, then let the excess fall off between the apples. Use it all up.
- Return the apples with the crumble to the oven, INCREASE THE OVEN TEMPERATURE TO 425F and bake an additional 15-20 minutes, or until the topping is set and golden.
- Enjoy warm with cream poured over-top or with a scoop of vanilla ice cream.
Notes
- Granny Smith
- Fuji
- Pink Lady
- Gala
- Honeycrisp
More apple recipes to love!

Hi! I’m Jennifer, a home cook schooled by trial and error and almost 40 years of getting dinner on the table! I love to share my favourite recipes, both old and new, together with lots of tips and tricks to hopefully help make your home cooking enjoyable, stress-free, rewarding and of course, delicious!
looks delicious, but how thick should the rings be? I can’t tell by the pictures. Anxious to make this! Thanks
Hi Yolanda, it’s not cut into rings. It’s pretty much the whole apple minus the core and a bit cut off the top. Enjoy!
Just delicious! I made this with Northern Spy apples, no crumble topping, and pomegranate juice instead of apple juice. I heartily recommend trying it with pomegranate juice – the flavors really sang beautifully together!
Sounds delicious, Beth! So glad you enjoyed it :)
I can just smell this baking already Jennifer! Can’t wait to grab some apples! We’re going to LOVE this!
Thanks Mary Ann and yes, the smells are extra nice with the apple cider in this one :)
I bet this smells as good as it tastes!! This is such a perfect fall dessert, and I can’t wait to give it a try with some ice cream over top. :)
Thanks Dawn and it absolutely does!
I am absolutely loving this mash up!! I mean, it’s hard to go wrong with baked apples and a crispy, crumbly topping! Plus, I love how quick and easy the hands-on prep is! This is definitely a must make recipe for fall!!
Thanks Cheyanne and yes, this one comes together easily for sure :)
Such a great combination of baked apples and a crumble dessert. It definitely feels like fall but I would make it any time of the year.
Thanks Milena and yes, baked apples are an any time you feel the need kind of dessert :)