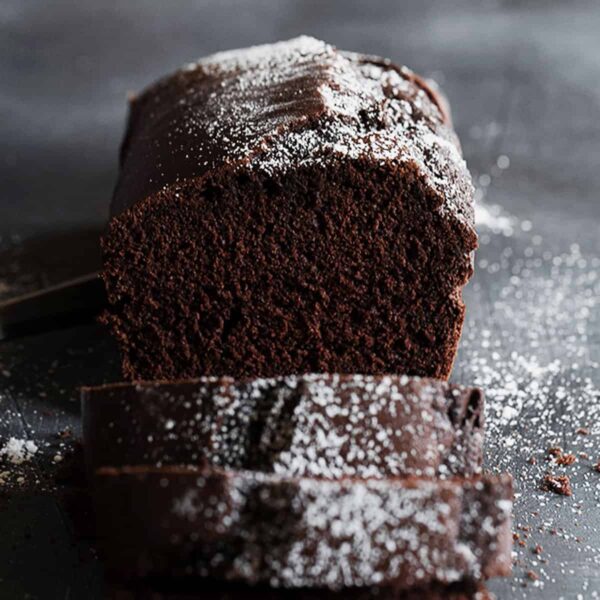
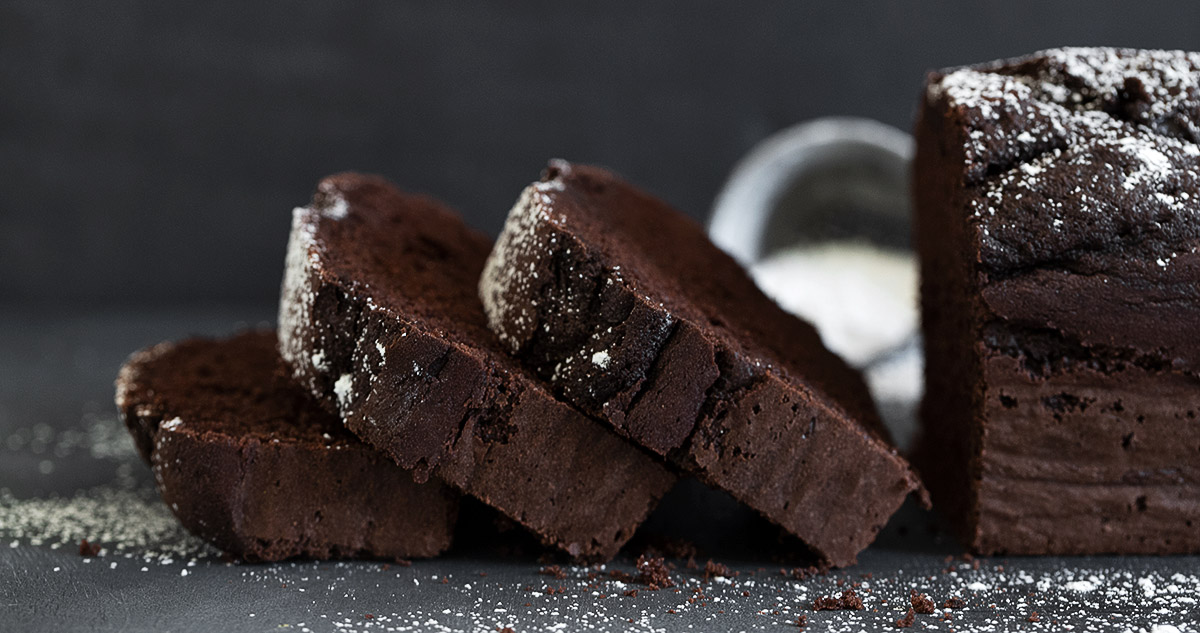
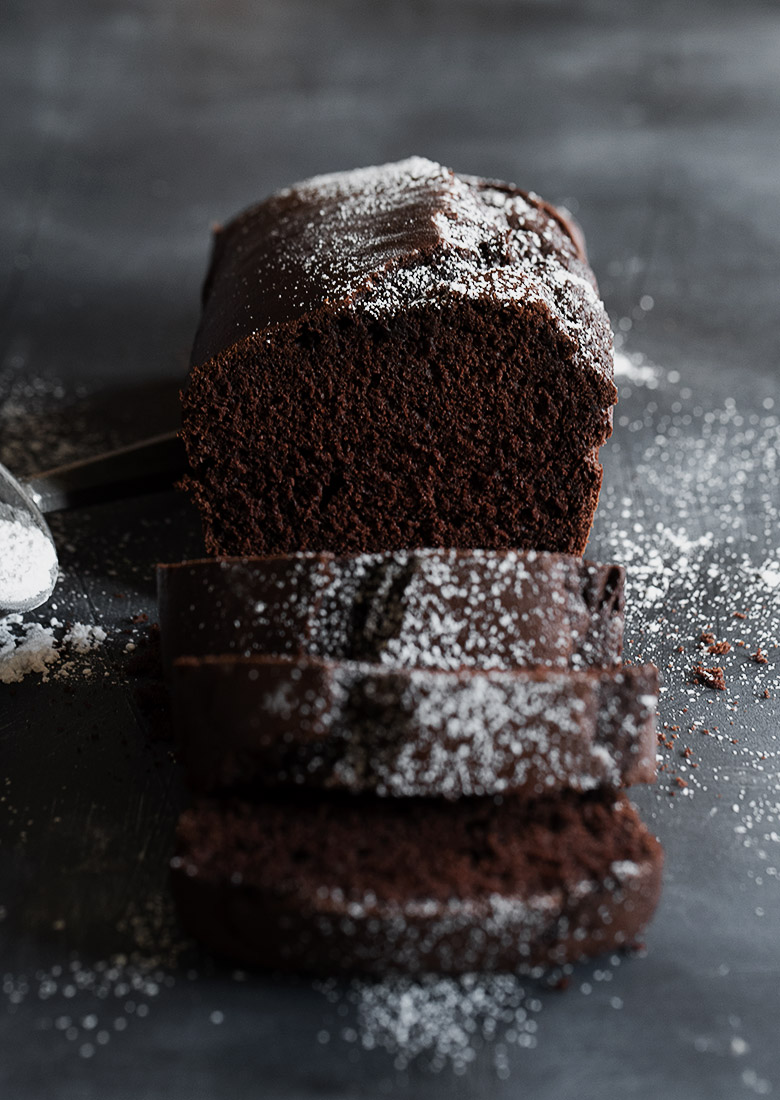
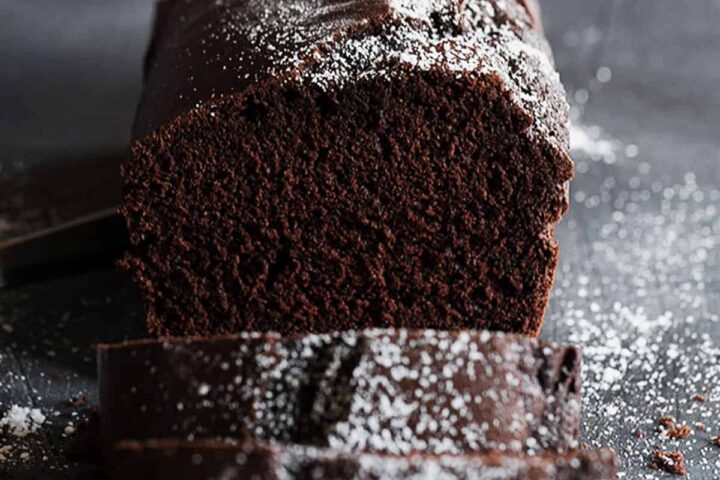
A beautifully light and moist chocolate pound cake loaf, with just the perfect amount of chocolate flavour. Enjoy a slice out of hand or slice, plate and top with fruit or ice cream (or both!)
I recently realized that I have a shocking lack of chocolate recipes on this site. One might think I’m not a fan, which couldn’t be further from the truth. I’m in regular need of chocolate therapy and as an enthusiastic baker, I can and do make that happen :)
When I’m looking for simple chocolate cake indulgence, I often turn to this simple chocolate pound cake loaf. No need for frosting. You can slice it and enjoy it out of hand, or take a slice and top it with fruit or ice cream or both. It’s beautiful texture and wonderful chocolate flavour make it a simply perfect chocolate treat.
This pound cake loaf originated as a pound cake recipe from Sarabeth Levine (of Sarabeth’s Bakery), that was baked in a tube pan. I prefer it in loaf shape, so I halved the original recipe, which is why the ingredient measurements are a little unusual. If you wish to enjoy it as a larger cake, just double the recipe and bake in a tube pan for about 1 hour.
Ingredients and Substitutions
A few notes about the key ingredients …
Whole Milk – whole milk is typically 3 – 3.5% butterfat and will make for the nicest crumb. In a pinch, lower fat 2% milk could be used, though it will slightly affect the crumb.
All purpose flour – unbleached flour is recommended, though bleached all purpose will work here. Unbleached all purpose flour makes for a lighter crumb.
Dutch-processed cocoa – *see the FAQ below, but Dutch processed cocoa powder is required for this cake.
Unsweetened chocolate – yes, it is only 1/4 oz. that is needed. It may seem negligible, but unsweetened chocolate is pure chocolate, so a little goes a long way.
Unsalted butter – unsalted is recommended, though salted butter will work with adjustment to the added salt.
See the “FAQ” section below for more advice on ingredient substitutions.
How to make this chocolate pound cake loaf
This is a visual summary of the steps to make this recipe. Always refer to the complete instructions in the Recipe Card below when making the recipe.
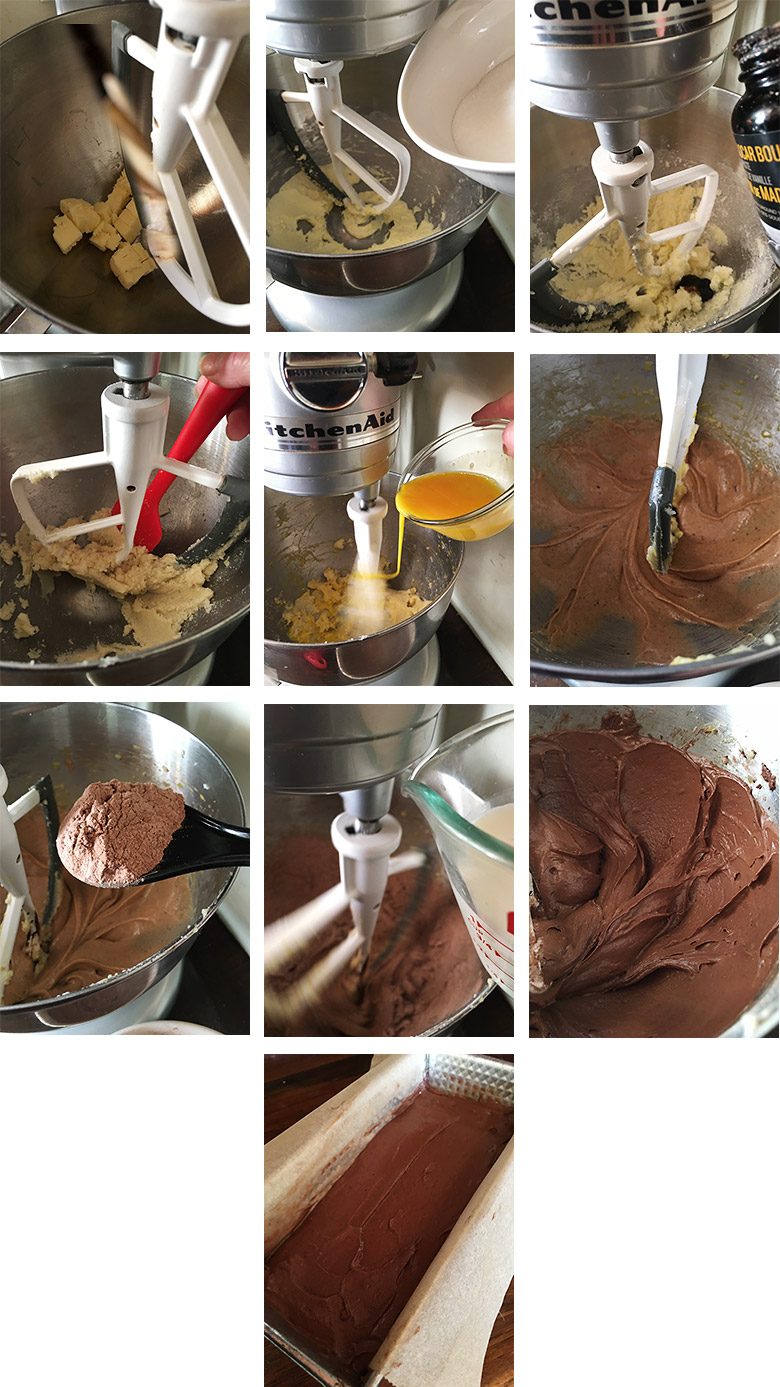
- Step 1: Add the cold butter cubes to your mixer or bowl.
- Step 2: Beat the butter until smooth, then gradually beat in the sugar.
- Step 3: Add the vanilla and beat in.
- Step 4: Scrape the bowl often and well!
- Step 5: Gradually add the eggs, beating in well.
- Step 6: Beat in the bit of melted chocolate.
- Step 7: Add the flour mixture, alternately with the milk.
- Step 8: Start with 1/3 of the flour, then 1/2 of the milk, another 1/3 of the flour, the remaining milk and then the remaining flour mixture.
- Step 9: Your batter should look rich, smooth and creamy.
- Step 10: Pour batter into your prepared loaf pan and smooth the top.
FAQ
- How do I know if my cocoa is Dutch-processed? You can generally find out by searching out the brand name, searching “Is (brand name) cocoa Dutch-processed?”. Here’s what I know for sure – Fry’s Cocoa, which is a popular supermarket cocoa brand here in Canada IS dutch-processed. Hershey’s Regular Natural Cocoa is not (the word “natural” on the container is a sure indication it is not Dutch-processed), but Hershey’s Special Dark IS dutch-processed.
- Can’t I just use my natural cocoa with this cake? I wish I could say you could, but this is a switch that isn’t a simple swap. It’s about baking chemistry, and acidic vs alkaline, and all sorts of baking science things I don’t really understand. And while I have never actually tried this recipe with natural cocoa to verify that it will have negative consequences, I would totally hate to see anyone waste precious ingredients and end up with a baking fail by using a different ingredient.
- Can’t I just use buttermilk instead of the milk and lemon juice? So yes, good catch! We are effectively making homemade buttermilk here, but with one important exception – the butterfat of the milk. Buttermilk is typically 1% butterfat. Whole milk is 3-3.5%. And yes, it makes a difference :)
- Is there a substitute for the lemon juice? I haven’t tested it, but I see no reason why an equal amount of distilled white vinegar wouldn’t work just fine here in place of the lemon juice.
- Is that 1/4 oz of unsweetened chocolate REALLY necessary? I have no idea. I’ve never made this cake without it. I always seem to have it on hand, so I just use it. I figure there was a reason for it to exist in the recipe to begin with, so why mess with it when the results are so lovely? That said, I suspect that you could omit here and still have a lovely cake.
- Can I use bittersweet or semi sweet chocolate instead? Again, I haven’t tested either of these. Maybe. It’s a very small amount of chocolate, so unsweetened will give you the most chocolate bang for your buck, for sure, as it is 100% chocolate. Bittersweet chocolate may be as little as 35% chocolate or semi sweet even less. Obviously, these will provide less chocolate flavour. That said, using bittersweet or semi-sweet probably won’t negatively affect the recipe other than that extra chocolate flavour.
- Do I really need to line the loaf pan with parchment? I have never made this cake without parchment, so I can’t really say for sure. It does pull away from the side of the pan quite well, but is quite soft when warm, so possibly prone to breaking. At the end of the day, there is really nothing worse than making a loaf of any sort and finding out at the end that you can’t remove it from the pan in one piece. That sucks!
- Can I make this recipe with nut-milk/soy milk/less sugar/no eggs/gluten free flour? While I totally respect different dietary choices, it is obviously impossible for me to test every recipe with the endless combination of substitutions that people might like to make. The best I can do is suggest that you rely on your own personal experience with using alternate ingredients in similar baking you have done in the past and see if you can apply it to this recipe. Results could be #fail with substitutions and I always hate to see anyone waste ingredients. You may want to consider seeking out a recipe specifically designed and developed for your particular dietary preferences.
Top tip!
This is one of those recipes where technique matters! And that isn’t to say this is difficult to make or needs special skills. It’s really just a case where details matter and following the directions will be rewarded.
- Having all your ingredients measured and at the ready really helps to avoid panic baking and errors.
- Be sure to read through the recipe instructions before starting.
- Pay attention to the recipe details, such as room temperature eggs and cold butter (and cutting it into small pieces).
- Set a timer for the suggested beating time as it’s hard to really guess how long something has been beating.
- And finally, as this is a relatively small amount of batter, you’ll want to have a spatula handy to regularly scrape down the bowl, paying special attention to that area at the bottom of the bowl under the beater, where unincorporated butter tends to hide.
Want to save this recipe?
Enter your email and I’ll send it to your inbox. Plus, you’ll get great new recipes from me every week!
By submitting this form, you consent to receive emails from Seasons and Suppers.
You can unsubscribe at any time.
Get the Recipe: Simply Perfect Chocolate Pound Cake Loaf
Ingredients
- 3/4 cup whole milk, 3 – 3.5% butterfat
- 1 1/2 teaspoons lemon juice
- 1 cup + 2 1/2 Tablespoons all purpose flour, unbleached flour recommended, spooned and levelled to measure
- 1/2 cup Dutch-processed cocoa, *see Note 1 below
- 3/4 teaspoon baking soda
- 1/4 teaspoon fine salt, omit if using salted butter
- 1/4 oz unsweetened chocolate, *see Note 2 below
- 5 Tablespoons unsalted butter, cold, cut into 1/2-inch chunks
- 3/4 cup white granulated sugar
- 1/2 teaspoon vanilla, or vanilla bean paste
- 1 1/2 large eggs, at room temperature *see Note 3 below
- Icing/confectioners’ sugar, for garnish
Instructions
- Take eggs out of the fridge to come to room temperature (25-30 minutes ahead).
- Preheat oven to 350F (not fan-assisted). with rack in centre of oven.
- Prepare an 8.5 x 4.5-inch or 4 x 9.5-inch loaf pan by spraying with cooking spray, then covering the bottom and sides with parchment paper, letting the parchment extend beyond the sides an inch or so. (If not using parchment, butter and flour the pan really well). *If you only have a 9×5-inch pan, it will work. Your loaf will be longer, wider and shorter, so expect that it will cook through more quickly and check it earlier.
- Measure out the milk. Add the lemon juice to the milk. Stir and let stand while you continue with the batter. (The lemon juice will cause the milk to curdle, so don't be alarmed later on when it's a bit chunky :)
- In a medium bowl, whisk together the flour, cocoa, baking soda and salt (omit added salt if using salted butter). Set aside.
- Melt the 1/4 oz of chocolate, either in the microwave for about 30-40 seconds or alternately heat about 1/2-inch of water in a saucepan, remove from heat, then place the chocolate into a ramekin and place the ramekin to sit in the water to melt it. *Make sure no water gets into the ramekin or the chocolate will seize. Stir the chocolate until smooth, then set it aside to cool to tepid while you continue with the batter.
- In a large bowl with an electric mixer or the bowl of a stand mixer fitted with the paddle attachment, beat the cold butter cubes on medium-high until smooth, about 1 minute. Gradually beat in the sugar. Once all the sugar is added, add the vanilla. Beat the mixture until very light in colour and texture, scraping down the bowl occasionally, about 4 minutes. Gradually beat in the eggs. Reduce the mixer speed to low. Beat in the cooled chocolate.
- Add the flour mixture alternately with the milk, beating well after each addition and scraping down the bowl between additions. (start with 1/3 of the flour, then 1/2 the milk, another 1/3 of the flour, remaining milk, then remaining flour).
- Pour batter into prepared loaf pan and smooth the top.
- Bake loaf in preheated oven for about 50 minutes for a 4×10-inch pan. *Baking time will vary for the 8×4 or 9×5-inch pans, so check and test often after about 45 minutes of baking. Test with a skewer in the centre. The tester should come out fairly dry and clean, with maybe a dry crumb or two on it. The sides of the cake should have pulled away from the side of the pan and the top should be puffed and cracked. The top will spring back when gently pressed with your finger.
- Cool the cake in pan for 10 minutes, then lift out of the pan by grabbing the parchment paper sides. Set onto cooling rack and gently remove the parchment to allow the loaf to cool completely. Store at room temperature, wrapped, for up to 2 days. Cake will also freeze well.
Notes
2. Yes, it really is just 1/4 oz! But unsweetened chocolate is pure chocolate, so a little goes a long way. I haven’t tested this recipe with bittersweet or semi-sweet chocolate. It should technically “work”, though the chocolate flavour will be reduced.
3. To get 1/2 an egg, break an egg into a small bowl and mix with a fork. Discard half of it, then add the other full egg to the bowl to get 1 1/2 eggs. Be sure to read the FAQ above the recipe card for more tips for making this recipe.
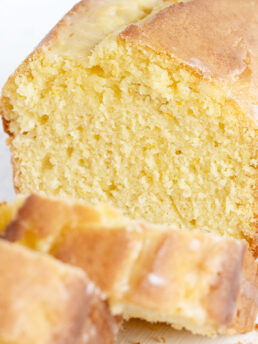
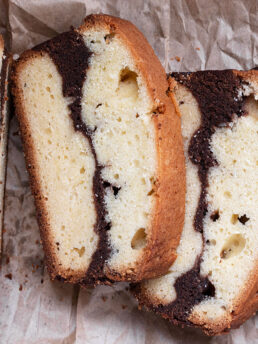
More pound cake loaf recipes to love!

Hi! I’m Jennifer, a home cook schooled by trial and error and almost 40 years of getting dinner on the table! I love to share my favourite recipes, both old and new, together with lots of tips and tricks to hopefully help make your home cooking enjoyable, stress-free, rewarding and of course, delicious!
This luscious pound cake is divine in every way! I wonder if the egg measurement might be in tablespoons of egg actually needed rather than 2 stirred up large eggs minus a quarter cup? Turned out my 2 large eggs together equaled .5 cups, which made me think, why not put in 1 egg? Since Jennifer said it was a half recipe, I am assuming it originally called for 3 eggs. I do understand the 1.5 eggs in the recipe, but was a bit afraid I wouldn’t put in enough, so I didn’t quite take out the full quarter cup and the cake turned out great! I’ve made chocolate pound cake in the past which was quite dry—good but dry. Thanks for this recipe I appreciate the attention to detail!
So glad you enjoyed it, Kate :) Thanks so much!
Made a double batch yesterday so we would have one for ourselves and could leave the other at the super bowl party host’s home. Everyone enjoy it very much, the chocolate flavors really hit the spot. I was thrown by some of the fractions of ingredients I’m used to seeing whole (eggs, Tbs) but did my best. Looking forward to enjoying through the week. Thanks for sharing this recipe with us!
Glad you enjoyed it, Marci. Thanks so much :)
I love that I happened upon your recipe at just the right moment in time. A dear friend is having a birthday & she wanted her favorite cake from our local bakery. Unfortunately due to the ongoing pandemic that bakery is unable to take orders right now. I wanted to see if there was a way to find a recipe that wouldn’t take me all day to make something from scratch & found your recipe online. So I think that I will try to make yours. I very much appreciate that not only have you provided a very detailed recipe with many tips & explanations, but additionally you have also taken the time to answer people’s questions. Many thanks & kudos to you.
Thanks so much, Carla :) This is a great cake, so I’m sure she will love it!
Jennifer you were right, I made it & she LOVED it, & so did I. It came out great. I even made it with Erythritol (a low glycemic sugar substitute that is Keto & Diabetic friendly. It is used at a little less than an equal measurement than sugar would be) as was requested by the birthday girl. I think that I will be making it again real soon. Heck, who needs to wait for another birthday to enjoy this excellent little cake. It is a bonafide hit! Bravo Jennifer!
So glad to hear, Carla :) Thanks so much!
Hi,
Is the 1/4 oz of chocolate correct? It seems like such a small amount.
Thanks,
Kelly
Hi Kelly and yes, it is correct and yes, it is a very small amount. It is unsweetened chocolate though, which is pure chocolate, so a little does go a long way :)
Well of course I don’t have all the correct ingredients but it looked so dang good, thought I would give it a go. Hersey’s Special Dark, 100% Cacao says on the can: OUR DUTCHED COCOA IS PROCESSED TO neutralize acidity etc. etc. So is it Dutch or a cute way of getting around it. Had to use dry milk, reconstituted-loss of butter fat. In the oven, will let you know
I think you will be ok. The “Special Dark” must be dutched. The regular Hersheys isn’t. Let me know how it works out :)
OMG Jennifer ! This pound cake was delicious. You’re right it’s Perfect ! Thank you
I know, right?! So glad you tried it and enjoyed it as much as I do :) Thanks!
It looks ultra chocolatey and so decadent! This would be wonderful with an evening cup of tea. And I really love the dark photos. It enhances the rich look of the pound cake!
Thanks so much, Leanne :)
I have to say this chocolate pound cake is wonderful. I just want to share a couple of thinks. Hershey’s cocoa works just fine, no problem there. I made my buttermilk using 1 tablespoon of white vinegar and lastly I added 2 tablespoons of espresso powder, it really brings out the chocolate. This will be a go to recipe. Easy and delicious.
So glad you enjoyed it Barbara :) Thanks!
So aptly named! ‘Simply perfect’ is accurate! Such a delicious decadent cake…a piece with a cup of strong black coffee sounds perfect to me!!
Thanks so much, Annie :)
This looks so yummy – love a pound cake that isn’t loaded with butter! One question/request – would it be possible to provide the weight measurements for baking recipes? For the cocoa powder, in particular, depending how you measured it the amount used could be vastly different – do you happen to know how much the weight is for that for this recipe?
Hi Carolyn, I added the weight measurements, but I haven’t verified them in my own kitchen. For the cocoa, I used the spoon and level method, just like flour.
I LOVE the way you bake Jennifer. Your recipes speak to me, and literally call me by name! This is one gorgeous cake and is going to be on my table asap! Pinned and printed :)
Thanks Tricia :) Enjoy!
Looks so dramatic and enticing! Definitely would say perfect:)
Yes, I don’t usually shoot dark, but this one seemed to demand it :) Thanks!
I’m just imagining seeing my fork sink into a slice of this. It looks delicious.
Thanks so much, Matt! It’s one of my favourite chocolate treats. Always hits the spot :)
Simply perfect, indeed! Looks so rich and chocolatey, Jennifer! Love to have a slice to kick off the weekend! Have a good one :)
Thanks Dawn and you, too!
My husband loves pound cake Jennifer. I make a vanilla one that I serve with ice cream and cool whip. He’ll love this chocolate version! Pinned!
Thanks Mary Ann and yes, this one is made for an ice cream/cool whip topping!
Hello perfection!! My husband is a chocoholic and absolutely loves chocolate pound cake!! But, it’s been ages since I made one for him. Yours truly does look perfect, so I can’t wait to make this and surprise him with it!! Yay!
Thanks Cheyanne and yes, I’m sure he will love this one. Classic chocolate cake :)