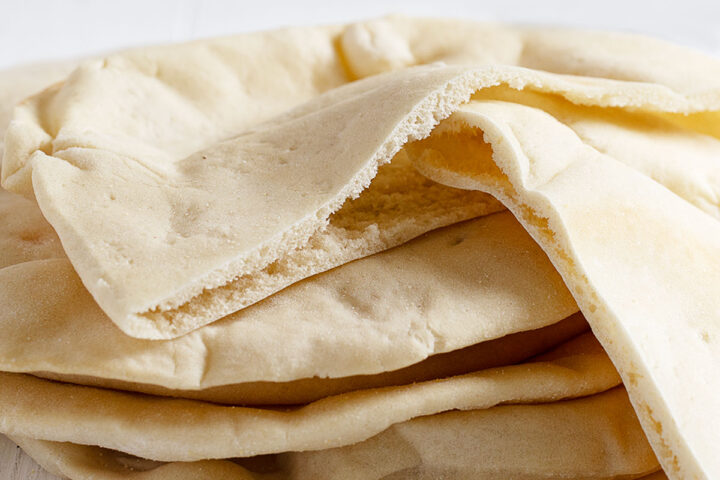
Learn hot to make traditional pita bread with pockets easily at home. Skip the store-bought as these are so easy to make at home and they freeze beautifully!
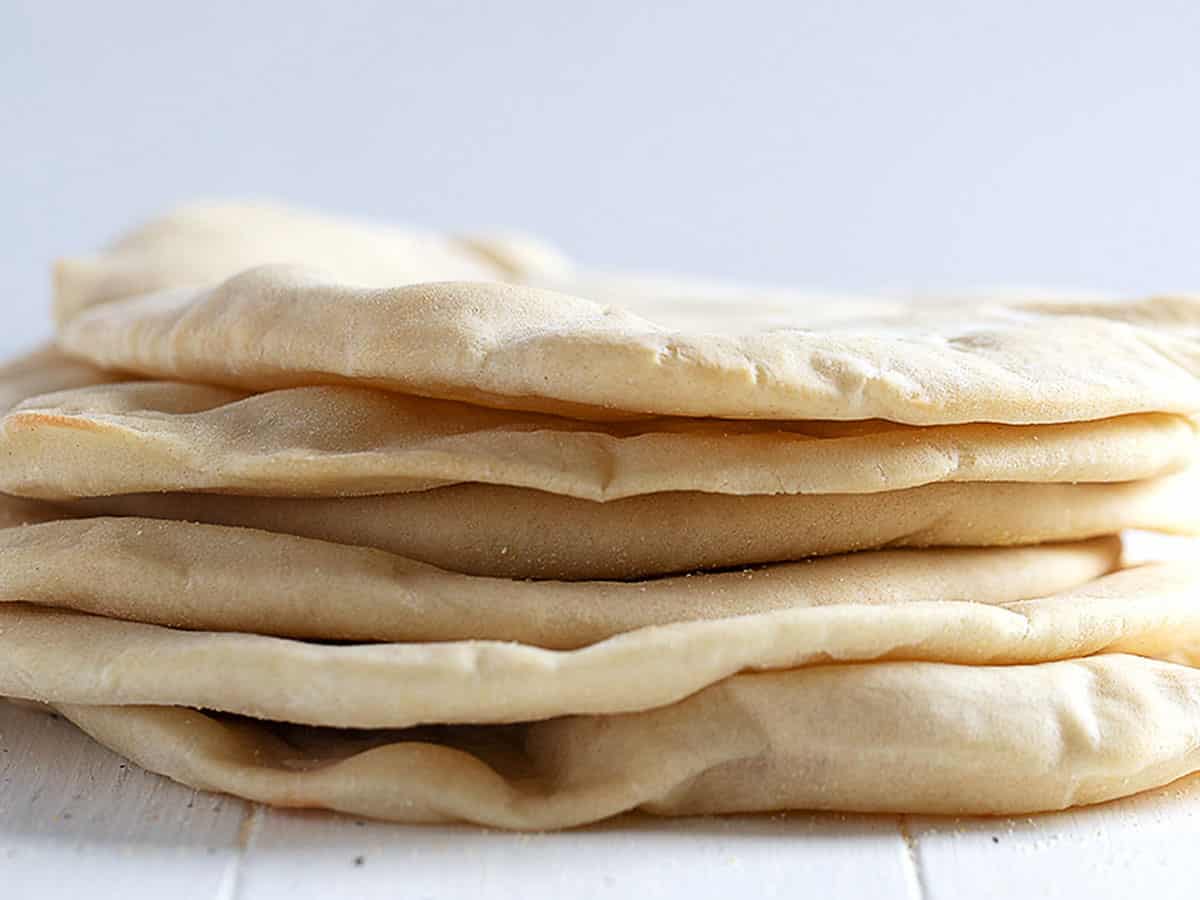
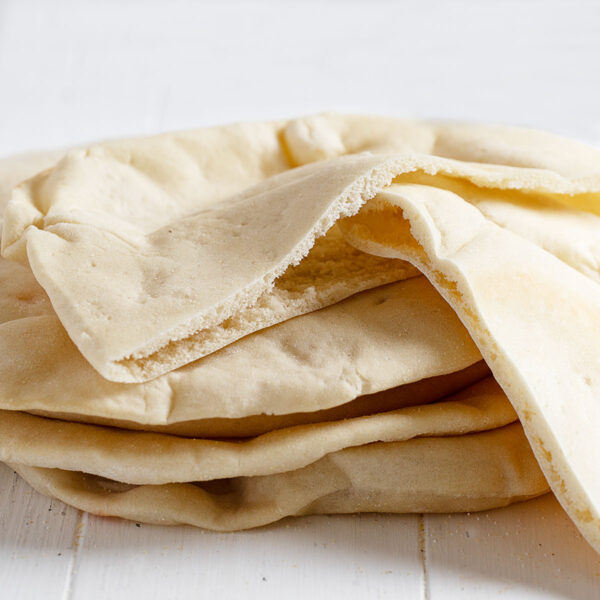
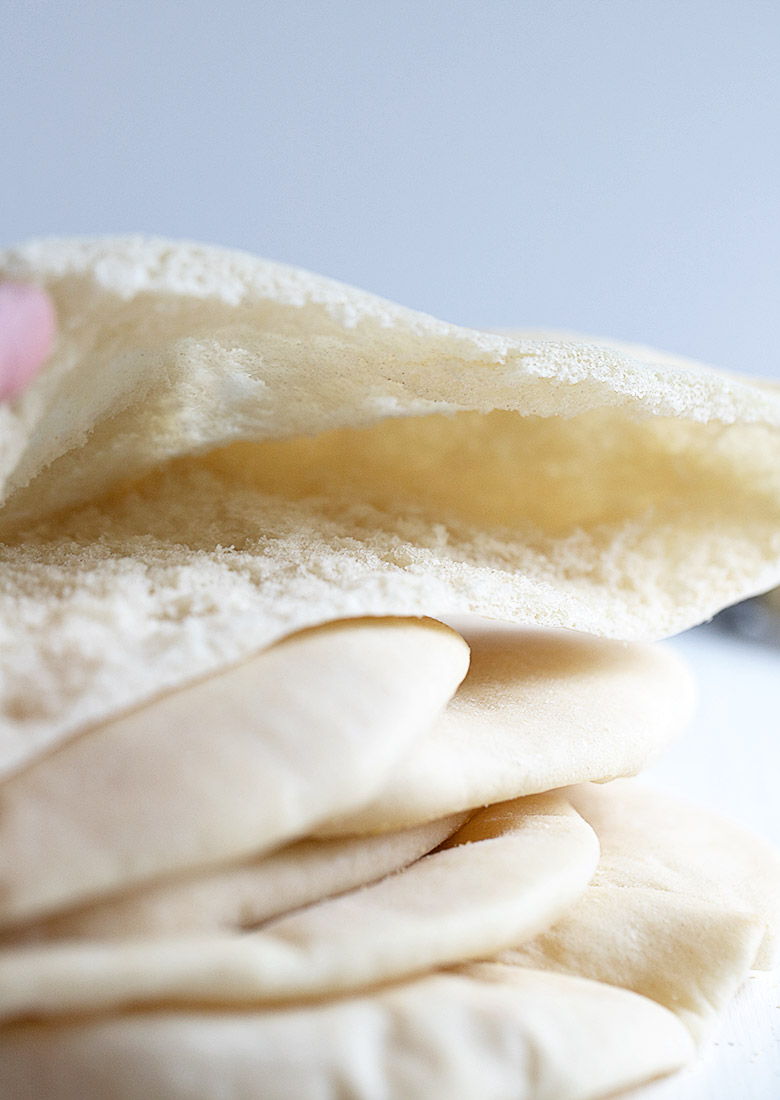
If you’re looking for a fun baking project, homemade pita bread fits the bill perfectly. These traditional baked pita breads are delicious! They puff up in the hot oven to produce a perfect pocket every time! It’s like magic :)
There is nothing difficult about making pitas at home. There are a number of “rests” in the process and the usual rising period, but most of the time is passive, hands-off time.
This recipe will yield 6 large pita breads. You can double the recipe if you like, but it makes the process of rolling/baking them off two at a time a bit more complicated. I find the smaller batch works nicely.
Ingredients and Substitutions
- Active dry yeast – or classic Instant yeast, such as SAF brand. Rapid or quick rise yeast is not recommended.
- Olive oil – or any cooking oil you have or prefer, such as vegetable or canola oil.
- All purpose flour – or you an replace up to 1 cup of the all purpose with whole wheat flour, as an option as well.
Step by Step Photos
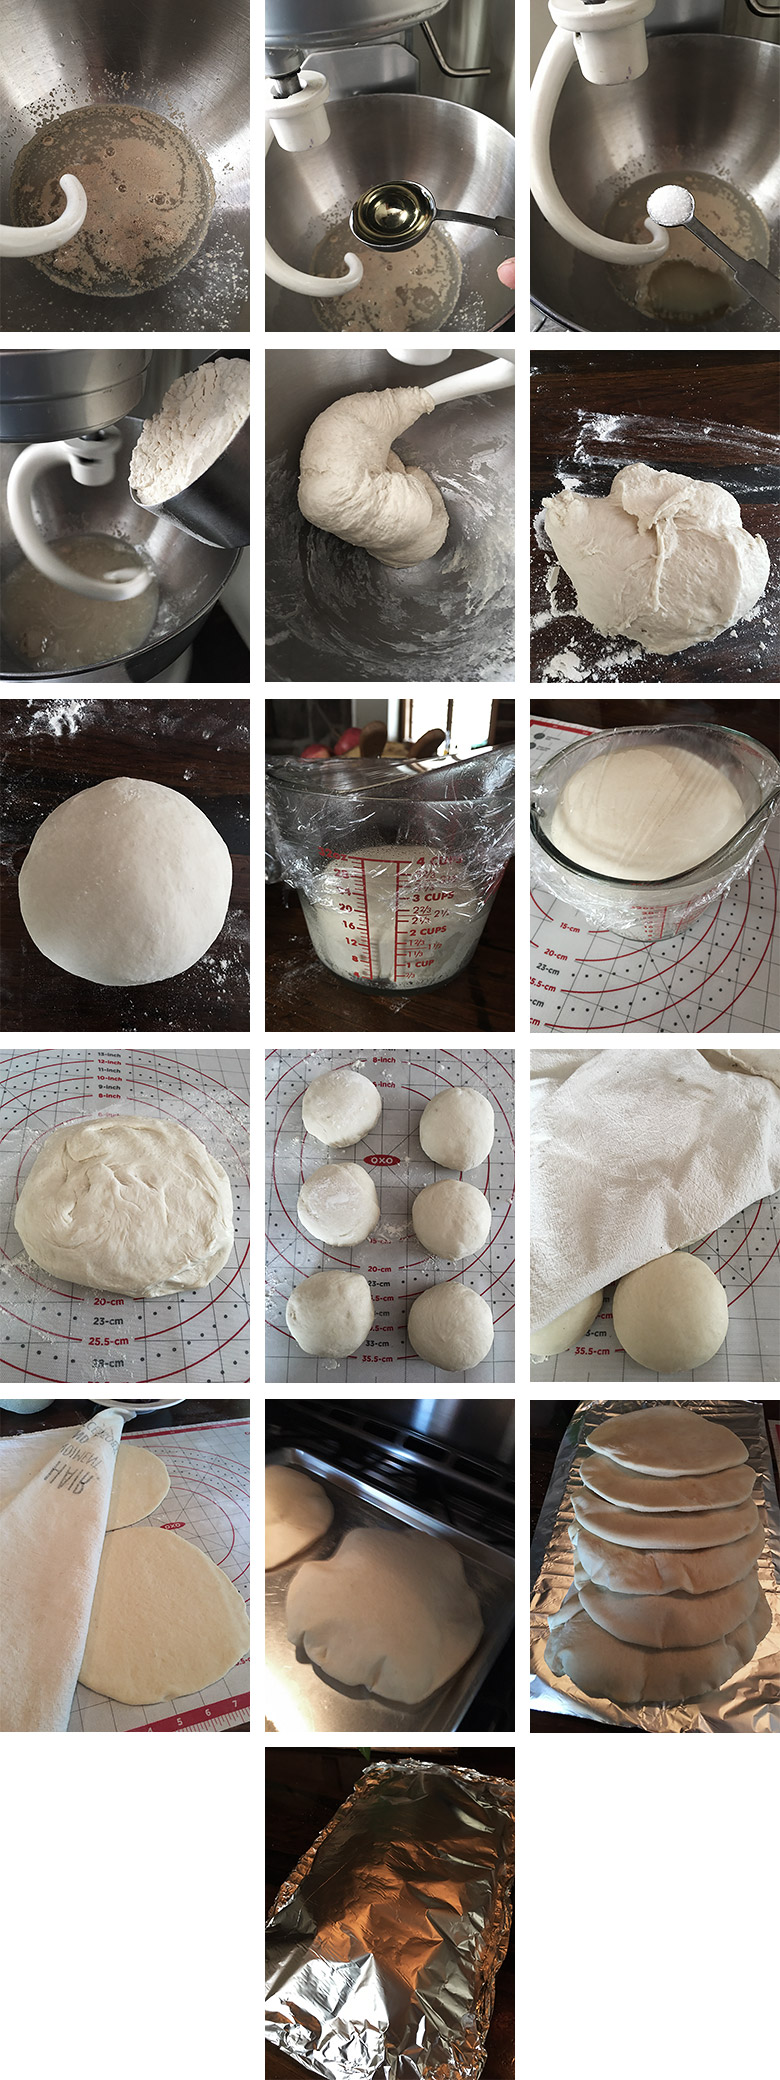
Make the Dough:
- Step 1: Add the yeast and a pinch of sugar to the warm water and let stand a few minutes.
- Step 2: Add the olive oil
- Step 3: Add the salt.
- Step 4: Add the first cup of flour.
- Step 5:Continue adding the flour until you have a nice, moist dough that wraps around the kneading hook and cleans the bowl in spots.
- Step 6: Remove the dough to a floured surface and knead for a few minutes.
Rise, Divide and Rest the Dough:
- Step 7: Form your kneaded dough into a ball (it should be nice and smooth!).
- Step 8: Place the dough into a greased bowl or large measuring cup.
- Step 9:Cover and let rise until doubled, about 60-90 minutes.
Roll, Rest and Bake:
- Step 10: Remove the risen dough to a floured surface, gently deflate and let rest 10 minutes.
- Step 11: Divide the dough into 6 equal pieces (I like to use my scale to do this, so they are exactly equal in size).
- Step 12: Cover the formed balls with a clean towel and let rest 30 minutes.
- Step 13: Roll the balls very thin (as thin as a flour tortilla – about 7-8 inches in diameter). Let the rolled dough rest another 30 minutes.
- Step 14: Bake off the rounds 2 at a time in a hot 500F oven for 5 minutes. They will puff up nicely but will deflate as they cool.
- Step 15: To keep your pitas from getting crispy as they cool, place them between two large sheets of foil as soon as they come out of the oven and and cover them with another sheet of foil.
- Step 16: Allow the pitas to cool completely inside the foil, transferring the baked pitas into the foil as soon as they come out of the oven.
Recipe Tips
- If you’d like a whole-wheat version, you can add up to 1 cup of whole wheat flour in place of a cup of the all purpose. As whole wheat flour absorbs liquid more fully, you may not need to add as much of the all purpose flour to get that moist, finished dough. Obviously, any addition of whole wheat flour will affect the texture, making it somewhat heavier.
- There are a lot of resting periods throughout this recipe, which are passive, hands-off times, but are important to do. Don’t rush the process. Refer to the recipe card often to make sure you’re resting as needed.
- In order to keep the classic soft pita texture, it’s important that you don’t let the pitas cool out in the air. They will get crispy, which isn’t what we want. Simply use two large pieces of foil – one under the pitas and one over – to keep them covered up as soon as they come out of the oven! If you don’t have foil a large, clean paper bag will work as well.
- When transferring your baked pitas to the foil, use tongs (they are hot and steam-filled!), but use a gentle touch, so you don’t puncture the pitas.
Ideas for Filling your Homemade Pitas
- Falafel – crispy, deep-fried chickpea or fava bean patties, often served with tahini sauce, hummus, and vegetables.
- Shawarma – thinly sliced, marinated meat, usually chicken, lamb, or beef cooked on a rotisserie. It is often paired with garlic sauce, pickles, and salad.
- Gyro – gyro features thinly sliced meat (typically lamb or beef) served with tzatziki sauce, tomatoes, onions, and lettuce.
- Hummus – A vegetarian option that includes a generous spread of creamy hummus along with fresh vegetables like cucumbers, tomatoes, lettuce, and onions.
- Grilled chicken – grilled or marinated chicken breast, accompanied by various condiments such as mayonnaise, mustard, lettuce, tomatoes, and pickles.
- Mediterranean-style tuna – tuna mixed with olive oil, lemon juice, olives, capers, and various herbs, creating a flavorful filling that pairs well with pita bread.
- Souvlaki – skewered and grilled meat, typically pork or chicken, served with tzatziki sauce, tomatoes, onions, and lettuce.
- Greek salad – featuring a mix of tomatoes, cucumbers, olives, feta cheese, onions, and a drizzle of olive oil and lemon juice.
- Shawarma-style vegetables – another vegetarian pita filling options, using grilled or roasted vegetables such as eggplant, zucchini, bell peppers, and onions, seasoned with Middle Eastern spices and served with tahini or garlic sauce.
- Breakfast pita – take the usual breakfast sandwich ingredients and enjoy them in a warmed pita.
Want to save this recipe?
Enter your email and I'll send it to your inbox. Plus, you'll get great new recipes from me every week!
By submitting this form, you consent to receive emails from Seasons and Suppers.
You can unsubscribe at any time.
Get the Recipe: Homemade Pita Bread with Pockets
Ingredients
- 2 1/4 teaspoons active dry yeast, or *see Note 1 for other options
- Pinch sugar
- 1 cup warm water, 110-115F
- 2 Tablespoons olive oil, or vegetable oil
- 1 1/4 teaspoons fine salt
- 3 cups all purpose flour, approximately *see Note 2
Instructions
- Add the warm water and a pinch of sugar to a large bowl or the bowl of a stand mixer fitted with a kneading hook. Scatter the yeast over-top of the water. Stir and let stand a few minutes. Add the oil and salt and 1 cup of the flour. Mix to combine well. Add the 2nd cup of flour and knead in well. Begin adding the 3rd cup of flour gradually, kneading in well between additions. Continue adding flour until you have a moist dough that wraps around the kneading hook and cleans the bowl in spots. Add as much flour as you need to get to that point.
- Remove the dough to a floured surface and knead for a minute or so, adding a bit more flour only if the dough is too sticky to knead. When you have a nice smooth dough form into a ball. Place dough into a greased bowl or measuring cup. Cover the bowl and let rise until doubled, about 60-90 minutes.
- Remove dough to a floured surface and gently deflate. Let the dough rest for 10 minutes. Divide the dough into 6 equal portions. (*I like to use my scale for this. First weight the entire dough ball, then divide that number by 6, to get the weight for each ball. Weigh out 6 equal sized balls). Form pieces into balls. Cover with a clean towel and let rest for 30 minutes.
- Working with 1 ball at a time, roll on a lightly floured surface until very thin (*think flour tortilla thin). Your round should be 7-8 inches in diameter. Dust a large baking sheet with cornmeal. Place the first 2 rolled rounds onto the prepared baking sheet. Continue rolling all the rounds, but leave the last 4 on your rolling surface, covered with a clean towel. Let all the rounds rest for 30 minutes.
- Preheat oven to 500F. with rack in the LOWEST position in your oven.
- After the 30 minutes rest, bake the two rounds on the baking sheet for 5 minutes. Do not open the oven door before the 5 minutes is up! After 5 minutes, remove from the oven, then using tongs, remove them to your sheet of foil and immediately cover them with another sheet of foil. Add a bit more cornmeal to the baking sheet, then transfer the next 2 rounds to the baking sheet and bake them in the same way. Again, immediately transfer to the foil and cover. Re-dust the baking sheet again with a bit more cornmeal and transfer/bake the last two rounds. Transfer to the foil and cover with foil. Allow the pitas to cool under the foil until completely cooled. Enjoy immediately, stored in an airtight container or well-wrapped and stored at room temperature or wrap well and freeze up to 1 month. Frozen pitas will reheat in a moderate oven in 10-15 minutes.
Notes
More Homemade Baked Goods to Try!
Hi! I’m Jennifer, a home cook schooled by trial and error and almost 40 years of getting dinner on the table! I love to share my favourite recipes, both old and new, together with lots of tips and tricks to hopefully help make your home cooking enjoyable, stress-free, rewarding and of course, delicious!
I Ike the recipe, but 5 minutes is too long in my oven. I found that it worked better to use a hot pizza stone, bake for 2 minutes, lightly spray with water, and then bake for 2 more minutes. The spray helps it to rise and separate.
I forgot to give it a rating. Definitely five stars!
Glad you enjoyed them, Richard :) Thanks!
I have yet to make homemade pita bread Jennifer! I’m adding this recipe to my baking list. Can’t wait to try it.
It’s a fun little baking project, Mary Ann :) Thanks!
Your pockets are incredible! What an amazing recipe. Can’t wait to try this. We usually make a whole wheat version but these are a must try! Pinned :)
Thanks so much, Tricia :)
I’m really looking forward to making these! They look amazing! However, can I make the dough in a bread maker using the dough setting?
Hi Shawna and possibly. I’ve never used a bread machine, so I have no experience to share. It’s a standard dough, maybe a little on the moist side, but if you have had success going that route, it should work the same.
Hubby and I have been enjoying all sorts of wraps and sandwiches lately, even for dinner with a side. This homemade pita bread would be so awesome to try! It looks perfect, Jennifer :)
Thanks Dawn and yes, we often have sandwich and salad for dinner, as well :)
Homemade everything is always so much better than store-bought, especially when it comes to bread (plus the smell of it baking is fantastic, right?!)! It’s been entirely too long since I made pita bread and I’m not sure I would even remember where to start, so this recipe is much needed! Your pita bread looks absolutely perfect!! I can’t wait to try this!!
Thanks Cheyanne and yes, I love these. Lighter than store-bought and perfect for sandwiches :)
You truly have mastered pita bread! I am excited to give this recipe a go, possibly gyros tomorrow – still have some roasted leg of lamb in the freezer we couldn’t eat around Easter so I can simply focus on the pita while the meat is thawing. They look so light!
Thanks Milena :) It’s a fun little baking project and absolutely perfect for gyros!
I’m going to try your recipe my mom used to make Syrian bread when I was a kid and she would put it in a clean pillow case when it came out of the oven so good with butter on it! Can’t wait to try your bread!
A clean pillow case is a great option, too! Enjoy :)
When I go to Costco, I stock up on pitas. We sometimes stuff them with sandwich fixings, but mostly we use them for pita pizzas. I’d love to try making my own. They look so fresh and I bet they would make a nice base for pizzas!
Thanks Leanne and yes, they would!