
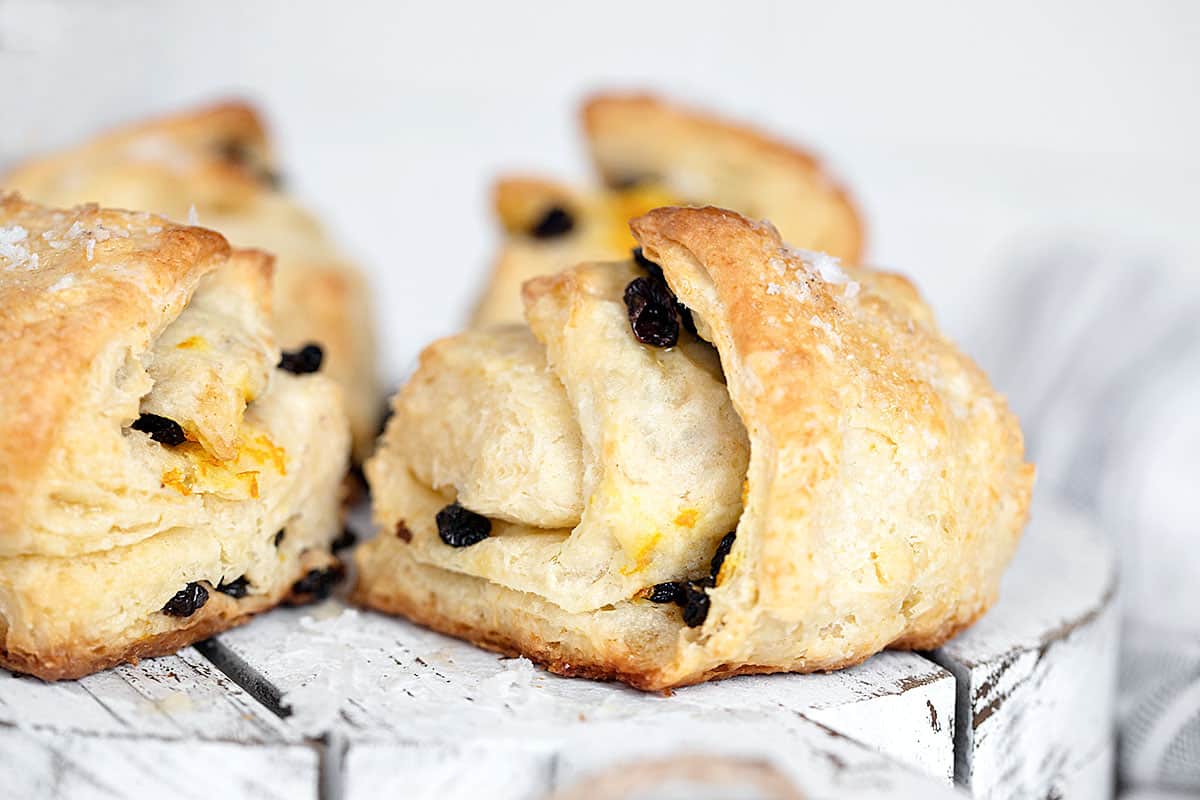
Delicious traditional Irish scones, studded with currants and flavoured with a touch of orange zest. Crispy, tender, flaky, buttery, sweet and salty, all in one perfect bite!
If you’re looking for a scone that just checks all the great scone boxes, then you’ll love these Irish scones! These are rustic scones, that will have a mind of their own as they bake, with each one baking up in a bit different shape. They’re perfectly imperfect :) It also means there is no need to deal with biscuit cutters or re-rolling scraps. Simply slice and bake.
These Irish scones have a wonderfully crispy bottom (thanks to the butter) and a beautifully crisp and flaky top. Inside, enjoy the tender, buttery crumb, with the currants and orange zest. The topping of both sugar and salt brings the wonderful flavour contrast and of course, the combination of currants and orange is just always delicious.
This small-batch scone recipe produces 4 beautiful scones, that can be enjoyed fresh when they are at their best. Since they come together quickly and easily, making them in smaller batches is the way to go.
Ingredients and substitutions
A few notes about the key ingredients …
All-purpose flour – all-purpose (or plain) flour is all you need here and is recommended. Using other flours (such as bread or cake) requires adjustments to the liquid amount, so unless you are sure you know how to make those adjustments and what the results of using a different flour will be, stick with the all-purpose :)
Milk – whole (3-3.5% b.f.) milk is recommended, for best results. Lower (or higher) fat milk or cream is an option, but will affect the finished texture and flavour to some degree, with higher fat cream producing a richer scone and lower fat producing a less rich scone.
Buttermilk can be used, but you need to make some alterations to the recipe! I have noted the alterations needed in the Notes section of the Recipe Card.
I haven’t tested this recipe with non-dairy milk, but I suspect it would work, though with some effect on the flavour and possibly the texture.
Currants – currants are a classic addition to Irish Scones, but if you only have raisins on hand, opt for the darker raisins (such as Thompson) and maybe roughly chop them. Currants are quite small, which works well in these scones, as they don’t add too much bulk, so trying to duplicate the size would be a good idea.
Orange Zest – I have always been smitten with the flavour combination of raisins (or currants) and orange, so I love to add some orange zest to the mix. It is totally optional though and you can certainly just omit it, if you prefer.
Salt – for the topping, go with a flaky salt, such as Maldon’s, if you have it on hand. While not flaky, Fleur de Sel is always a good choice for a finishing salt. Coarse Kosher salt will also work, but use a lighter hand. Finally, if fine salt is your only option, go ahead and add a bit with a very light hand.
How to make Irish Scones
This is a visual summary of the steps to make these scones. Always refer to the complete ingredient list and instructions in the Recipe Card below when making the recipe.


- Whisk together the flour and baking powder then add the cold butter cubes.
- Use a pastry cutter to cut the butter into the flour mixture, then add the milk mixture.
- Add only as much of the milk mixture as needed to create a moist dough.


- Remove the dough to a floured work surface.
- Press or roll the dough into a rectangle.
- Spread some butter onto the dough, then scatter the currants and orange zest overtop.


- Start folding the dough as directed in the recipe card.
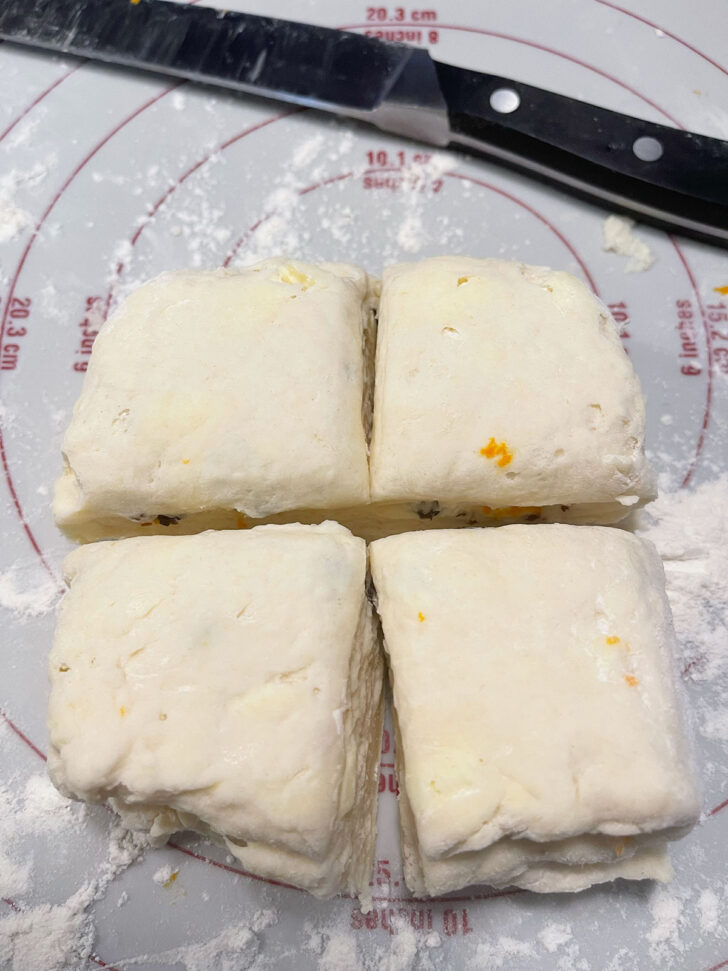
- Cut the dough into 4 squares.
- Place the squares onto a parchment-lined baking sheet, brush with milk and sprinkle with sugar before baking.
Scone making tips
Should scone dough be dry or wet? – the perfect scone dough is neither wet nor dry, but just moistened. If the dough is slightly sticky in the bowl, a little flour on the work surface will easily remove the stickiness. If it seems dry in the bowl, add a bit more liquid (milk or cream generally), in small increments, until the dough is just moist.
Don’t over-work the dough – the less you handle the dough, the better, so don’t over-work or over-roll the dough.
Keep it cold – you never want the butter in scones to get warm and softened, as cold butter in the oven produces steam, which produces flaky scones. So work quickly and get the scones right in the oven. If you feel it got a little warm, stick the baking tray with the scones into the freezer for 5-10 minutes before baking.
Cut scones with a quick, confident slice with a sharp knife! – a swift cut, straight down, with a sharp knife or cutter will help to preserve the layers. When using a round cutter, again, straight down quickly and don’t twist. This ensures the sides don’t get sealed. You want the steam to be able to escape out the sides to make the flaky layers.
Brush only the top of the scones – when brushing the top of the scones, whether with milk or egg, be careful to brush just the top of the scones and don’t allow any of the liquid to drip down the sides of the scones. The moisture on the side will cause the same issue as the above re-cutting, in that it will seal up the sides and not allow steam to escape out the sides.
Recipe tip!
I personally love the crispy bottom on these scones, but if don’t, bake them with doubled-up baking sheets to lessen the bottom browning.

Making ahead, storing and freezing
Scones are at their best freshly baked, but these will keep in an airtight container for about 48 hours. They will lose their crispiness as they sit.
You can freeze baked scones for up to 2 months. You could also freeze the unbaked scones and bake them from frozen, allowing extra time to bake.
Want to save this recipe?
Enter your email and I’ll send it to your inbox. Plus, you’ll get great new recipes from me every week!
By submitting this form, you consent to receive emails from Seasons and Suppers.
You can unsubscribe at any time.

Get the Recipe: Irish Scones
Ingredients
- 1/2 cup (125 ml) whole milk, cold (see Recipe Notes for using Buttermilk instead of milk)
- 2 Tablespoons granulated white sugar
- 1/2 teaspoon Kosher salt, reduce to 1/4 tsp if using salted butter
- 1 1/2 cups (180 g) all-purpose flour
- 1 1/4 teaspoon baking powder
- 5 Tablespoon (70 g) unsalted butter, cold and cut into 5-6 pieces
For filling:
- 1 Tablespoon unsalted butter, at room temperature
- 1/4 cup currants
- Orange zest, about 1 tsp or to taste
For topping before baking:
- Milk, for brushing tops
- Coarse or regular sugar, such as turbinado or demerera
For topping after baking:
- 2 Tablespoon (28 g) unsalted butter, melted
- Flaky salt, such as Maldon’s or Fleur de Sel
Instructions
- *You will need 8 Tablespoons (1/2 cup, 1 stick or 113g) of butter total to make a single batch. Note that 5 Tbsp will be used cold, 1 Tbsp will be used at room temperature and the final 2 Tbsp will be melted. So remember to set aside the 1 Tbsp of butter to soften ahead a bit. If you forget, you can microwave it very, very briefly to soften it enough to spread. Try not to melt it though.
- Preheat oven to 375F (regular bake/not fan assisted). Line a rimmed baking sheet with parchment paper and set aside. (Make sure to use a rimmed baking sheet, as there will be butter in the pan that needs to be contained.)
- In a medium bowl or a 2-cup measuring cup, stir together the milk, sugar and salt until the sugar and salt is dissolved. Set aside.
- In a large bowl, whisk together the flour and baking powder. Add the pieces of cold butter and use your fingertips to rub the butter into the flour mixture, until you have an even crumb with butter pieces no larger than pea-sized. Add the milk mixture to the bowl and use a fork to stir together until all the flour is moistened. The dough should be fairly moist and maybe a tiny bit sticky, but not overly sticky or wet.
- Remove the dough to a lightly floured surface. If the dough is sticking to your surface or your hands, add a dusting of flour to the dough. Using a rolling pin, roll the dough into a 7×8-inch rectangle. Spread the dough with the piece of softened butter. scatter with the currants press them down into the dough a bit with the palm of your hand. Sprinkle with orange zest, if using. Fold the dough from the 7-inch end, folding like a letter by folding the top down over the centre and then folding the bottom up to cover the first fold. Finally, fold the dough in half crosswise, folding the right side over the left. *Refer to the Step-by-Step photos above this Recipe Card if the folding instructions aren't clear to you.
- Using a rolling pin, gently roll the dough block into a 4×4-inch square and use a knife to lightly score the top into four even pieces. (Again, refer to the Step-by-Step photos if needed). Using a very sharp knife, make one swift, confident stroke to cut the scones into 4 pieces. Place the pieces onto a parchment-lined baking sheet, several inches apart. Brush the top of the scones with milk and sprinkle with coarse or regular sugar.
- Bake scones in preheated oven for 25-30 minutes, or until golden brown and puffy.
- Once out of the oven, drizzle with a bit of melted butter and sprinkle with coarse salt flakes. Remove scones to a wire rack to cool to just warm or to room temperature. The texture of scones is better once they are allowed to cool.
Notes
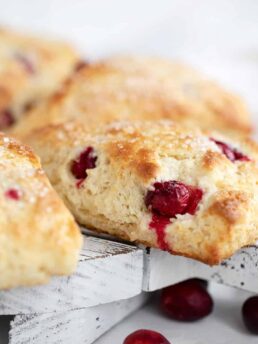
More scone recipes to love!


Hi! I’m Jennifer, a home cook schooled by trial and error and almost 40 years of getting dinner on the table! I love to share my favourite recipes, both old and new, together with lots of tips and tricks to hopefully help make your home cooking enjoyable, stress-free, rewarding and of course, delicious!
A lot of bakers/cooks featured in You Tube videos will say things like “This is so good I make it every day.” And I just roll my eyes and think, ‘yeah right’! Until I baked these Irish Scones and guess what…I did bake them every day for a week because they were that good and everyone loved them and kept asking for them. I took a break after week one and I’m not making them daily but very regularly. I followed the recipe exactly and they are amazing…thank you for sharing!
I’m so glad you are enjoying them, Jojo! Thanks so much :)