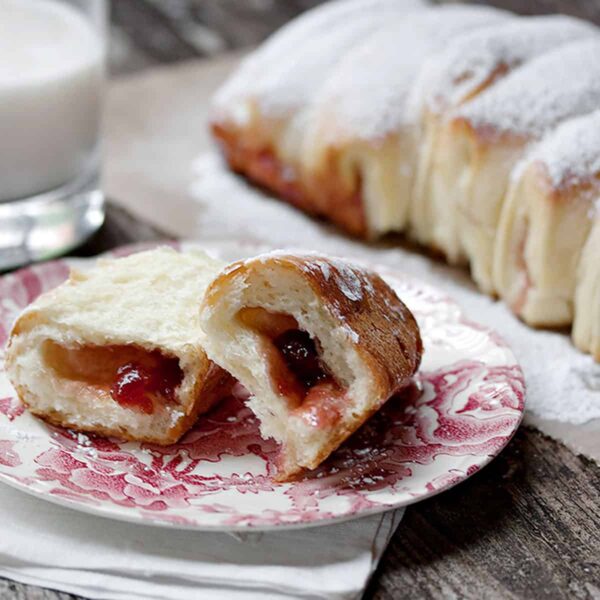
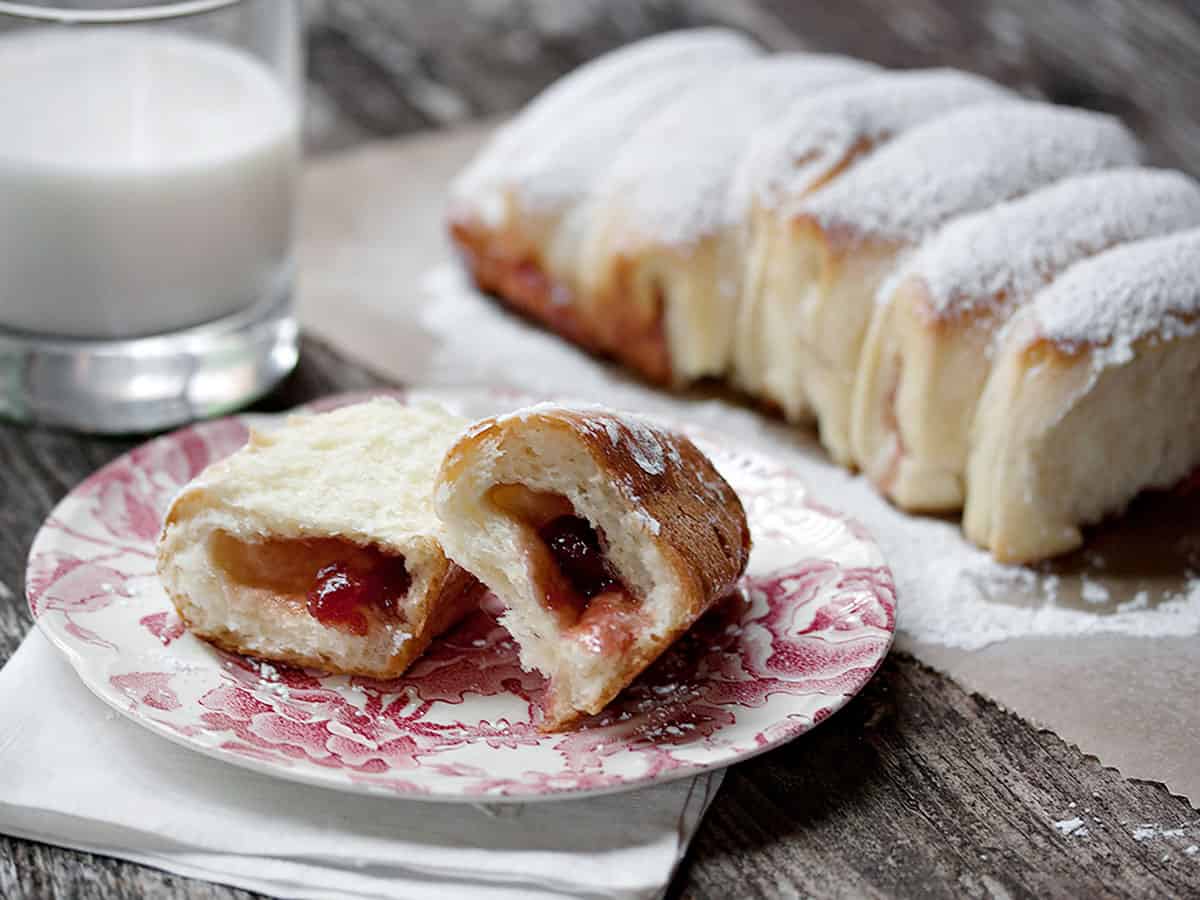
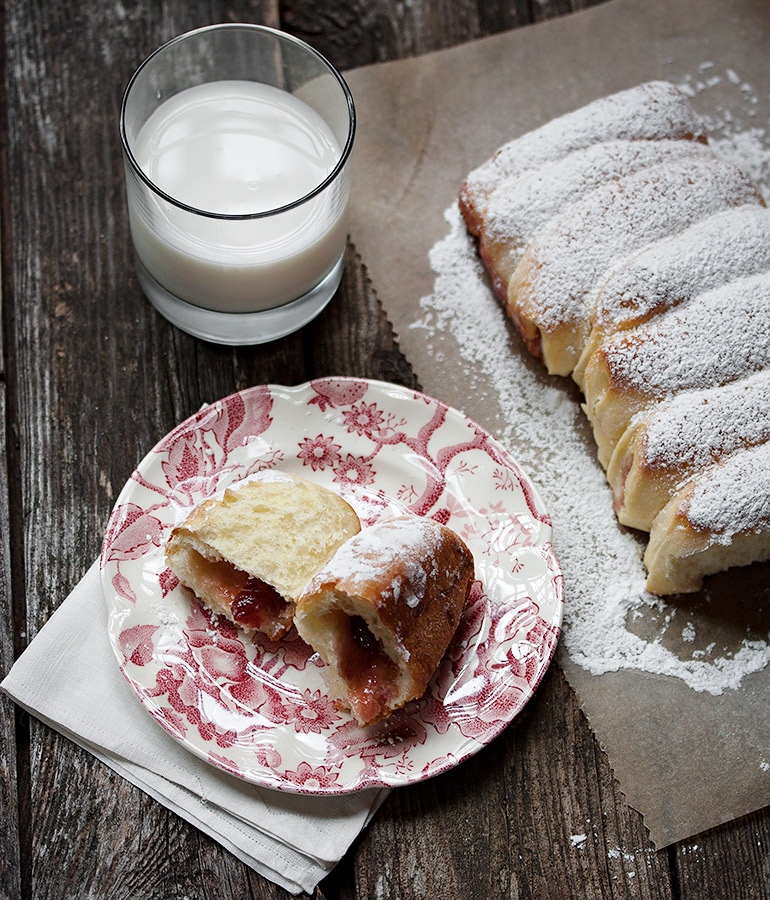
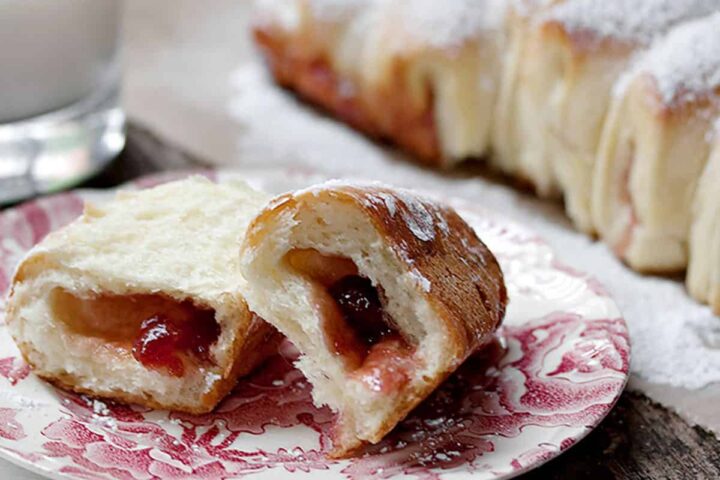
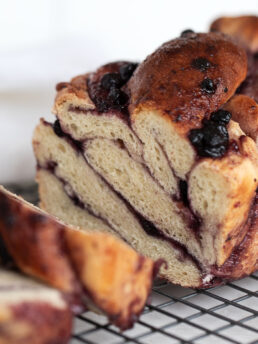
Jam-filled buns meet pull-apart bread in this delicious raspberry jam bread! Filled with jam and baked up pull-apart style in a loaf pan.
This recipe will make two loaves of 8 “buns”, so you could use a different kind of jam in each one, if you like. I have to tell you though, few jams can compete with raspberry in these buns (the cherry jam ones were surprisingly underwhelming). I recommend raspberry jam. Trust me.
Ingredients and Substitutions
Jam – while you can use any jam, there are few jams that can compete with raspberry jam when combined with fresh bread. You can use homemade or store-bought jam for these buns. The only tip I’d have is to make sure that whatever jam you use, it’s thick. These buns are a cinch to shape and the dough handles beautifully, but add runny jam to the mix and you’ll quickly have a bit of a mess.
Cake flour – I know not everyone has cake flour on hand regularly, so if you don’t, it’s not worth going out to buy some just for this bread. Simply replace with more all purpose flour.
Yeast – you can start this bread with Active Dry Yeast or Instant Yeast. I have included instructions for both.
Orange Zest – the orange zest adds a lovely flavour note, but if you don’t have fresh orange on hand, simply omit.
Recipe Tips
Don’t skimp on the icing sugar. It does add the sweet in such a lovely, jelly-donut kind of way. I powdered the whole loaf for my photos, but it’s probably best to powder each piece as your eat it or the entire loaf just before serving. If your powder disappears as they sit, just add some more.
Want to save this recipe?
Enter your email and I'll send it to your inbox. Plus, you'll get great new recipes from me every week!
By submitting this form, you consent to receive emails from Seasons and Suppers.
You can unsubscribe at any time.
Get the Recipe: Raspberry JamBread
Ingredients
- 2 1/4 cups all-purpose flour, sifted
- 1/2 cup cake flour, sifted
- 1 1/2 teaspoon instant dry yeast or Active Dry Yeast
- 1/4 teaspoon salt
- 2 Tablespoons white sugar
- 1/2 teaspoon orange zest, optional
- 1 cup milk , scalded (instructions below) and cooled to lukewarm
- 1 whole egg + 1 egg yolk
- 1/2 teaspoon vanilla
- 1/4 cup vegetable oil
- 1/2 cup thick raspberry jam
- 1 egg, for egg wash
- powdered sugar
Instructions
- Scald the milk: In a small saucepan, heat the milk until steaming and small bubbles form around the edges (not quite to the boil). Remove from heat and let cook to lukewarm. **If using Active Dry yeast, once the milk has cooled to 105F, add the Active yeast, stir and let stand 5 minutes. Add this yeast mixture below when milk is specified.
- Butter or spray two 9-inch by 5-inch loaf pans and set aside (you can use 8x4, if that's all you have. It will be a little tight lengthwise, but it should work).
- In the bowl of a stand mixer (or a large bowl), combine both flours, yeast, sugar, and salt. Add the lukewarm milk, eggs, vanilla, vegetable oil (and the orange zest, if using). Mix then knead by hand, or using your mixer. Mix until the dough is smooth but slightly sticky. Add more flour as needed. The more moist your dough is, the more tender your bread will be, so only add enough flour to bring the dough to a point where it can be kneaded (it should be moist, but shouldn't stick to your hands). Place the dough in an oiled bowl, cover with plastic wrap and let it rise in a warm place until doubled in size, about 1 hour.
- Turn the dough out onto a lightly floured surface and roll out into a rectangle about 16 inches by 16 inches. It should be about 1/2 inch thick. Using a pastry cutter, a pizza cutter, or a knife, cut the dough into 4-inch x 4-inch squares. You'll have 16 squares.
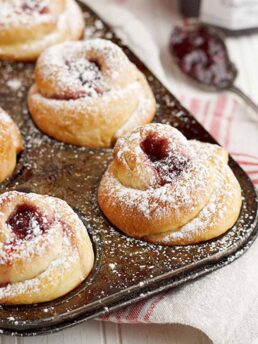
- Using your index finger, make a small indentation in the centre each square. Place about 1 tsp. of jam in the centre. (*Don't over-fill or you'll quickly have a jammy mess on your hands :) To shape, pick up each piece of dough and pinch the opposite sides together, until it's well sealed. Pinch the sides as well, making sure that all edges are sealed, or your jam will leak out as it cooks. The dough should be sticky enough so that it sticks together well. Note: if you'd like to use two different flavours of jam - one for each loaf - fill 8 rolls with one kind of jam and the other 8 with another kind.
- Repeat these steps until all rolls are made. Place 8 rolls side by side into one of the prepared loaf pans, with the seams down. Repeat with the other 8 rolls in the other pan. Cover loosely with plastic wrap and set to rise another 20-30 minutes. They will rise a bit more.
- Preheat oven to 350° F.
- Before putting in the oven, brush the rolls with an egg wash (1 well beaten egg).
- Bake them for about 22 - 25, until nice and golden brown and they sound hollow when tapped.
- Allow to cool for about 10 minutes in the pan, then run a knife around the edges and remove loaf to a cooling rack to cool completely. Once cooled, serve sprinkled with a generous amount of powdered sugar.
More Jam Bread Recipes to Love!
Hi! I’m Jennifer, a home cook schooled by trial and error and almost 40 years of getting dinner on the table! I love to share my favourite recipes, both old and new, together with lots of tips and tricks to hopefully help make your home cooking enjoyable, stress-free, rewarding and of course, delicious!
Hi
I just made this recipe right now. It is wonderful !! As matter fact, I did cheating kneading by hand instead, I did make by Bread machine. It came out so~~~~soft and very uncontrolling material ,but I just adding more flour and a little bit kneading by hands. After that, I did as same as your recipe followed , put Jam ( actually I using Strawberry Jam) on center and sealed and make double sized raised dough (this problem also fix because I was extending raised up dough time for 1.5 hours !! on bread proof oven , but nicely came out double size !! ) Any way, I was so satisfied after everything done and baked. First I was it is so make worry about dough was sticky and everywhere. But it is so delicious . Next time I ‘m going try to using typical American Favorite way to Strawberry and Peanuts butter. Thank you !
Hi Yuri. So glad you enjoyed the bread. You’ll want to always remember that the amount of flour is always just a “suggested” amount and never exact. Everyone’s flour has different amounts of humidity, depending on the type and where it is stored. So for every bread, you may need more or less than the recipe suggests. I just keep adding flour until the dough is the proper consistency, regardless of the recipe.
Thank you for your reply !
After made this on next day, we are only 3 family members , so we couldn’t eat finishing them all for one day.
Breads are getting hard, so I did sliced this bread and toasted with Peanut butter on it .
It is sooooo good !
Thank you again !!
Sounds great! :)
You’re welcome. Enjoy!
Hi! I’d Like to know why do you use cake flour, why is is diffent from all purpose flour? Thanks! I really want to try this recipe but I don’t have cake flour….
Hi Anada, Cake flour is lower protein (softer), so it helps to make a softer, lighter crumb. You can skip it and just use all-purpose (may need to tweak the amount a bit and your crumb won’t be quite as light), or you could “make your own” cake flour by measuring out the 1/2 cup amount but using all purpose flour. Remove 1 Tbsp. of the flour and replace with 1 Tbsp. of cornstarch. Sift together and use in the recipe. Hope that helps.
Thank you!! I am trying it right now! :) Love from Veracruz, Mexico.
If I had to pick 2 favorite ingredients they would be raspberries and bread. This reminds me of the fresh ones my dad used to pick for my morning breakfast. When I try this recipe I will surely remember him. Thank you!
I agree, Jules. Raspberries and bread where meant to be together :) Enjoy!
What a terrific recipe!!! I need to break out the yeast and give these a try!
Hope you get a chance to try it. You won’t regret it ;)
This is the first time I make bread, and let me tell this is the bomb! Everybody in my house was crazy, I had to bake twice. One question, can I prepared the dough a day before?
Glad you enjoyed it! I haven’t tried it, but I suspect you could refrigerate dough overnight, and let it rise slowly in there. In the morning, take out, shape and allow to do it’s second rise before baking (will take a bit longer as the dough is cold, so will need to warm up before it will start to rise again). If you try it, let me know how it works out.
You’re totally right — that is the same recipe i had Pinned! :)
I didn’t comment on these earlier but WOW you made them look so beautiful! My mom gifted me a jar of her wonderful homemade raspberry jam…. and now i know what i will do with it :) i saw a recipe for something similar on Pinterest a while ago, but I trust your recipe much more! thanks! :)
Thanks Sophie. It’s probably the same buns I linked to above. I saw them on Pinterest originally as well and just kept coming back to them until I had to try them. They were every bit as good as I imagined. Just made way more than I needed, so I adapted to a smaller batch and more of a pull-apart than a bun. They will do your mom’s jam proud :)
My grandma makes me butchy (or Kolaches) every christmas! This will definitely tide me over until then!
It will, for sure. The flavours are exactly the same. Only the shape is a little different (and I made a smaller batch, because I can’t trust myself with a large batch of these :)
WOW, looks amazing :) Love your blog
Thanks!
I have one thing to say. WOW. These look so delicious. They remind me of a breakfast treat I used to have as a child. Your photos capture their beauty so well. Amazingly beautiful. Your work consistently amazes me.
Thanks so much Heather. I appreciate your visits.
Great blog, wonderful pictures. Love to follow you.
Thanks:)
Hi! I just came across this pin & I’m really wanting to
make this for breakfast. Thank you for putting
this up! I have a question for you..do you know how I can
achieve this with only mini loaf pans? I don’t
have regular size.
Hi vee. I’d just put one or two of the formed buns into each hole of the pan
Isn’t it wonderful the way our taste buds adapt so quickly?! This is absolutely beautiful…but due of an unhealthy doughnut addiction, I’m a bit partial to raspberry and yeasted doughs. :D
Lovely photos!
Thanks so much, Valerie. As a fan of the jelly donut myself, I can tell you that this bread comes darned close to the satisfaction from a donut (without the frying :)
Wow ! This looks like such a light, pillowy bread and it’s relatively “healthy” too ;)
I was wondering if you recommend using a specific type of milk? i.e. does fat content matter? What do you think about subbing in nondairy almond milk?
Hi Stephanie, the bread is really light and fluffy. As for milk, I usually have whole milk around (3.5%), so that’s what I use. That said, I’d certainly give it a try with almond milk if you’re trying to avoid dairy. I imagine you could also just use water in place of the milk. I bake a lot of breads with just water as the liquid. If you try it, let me know how it worked.