

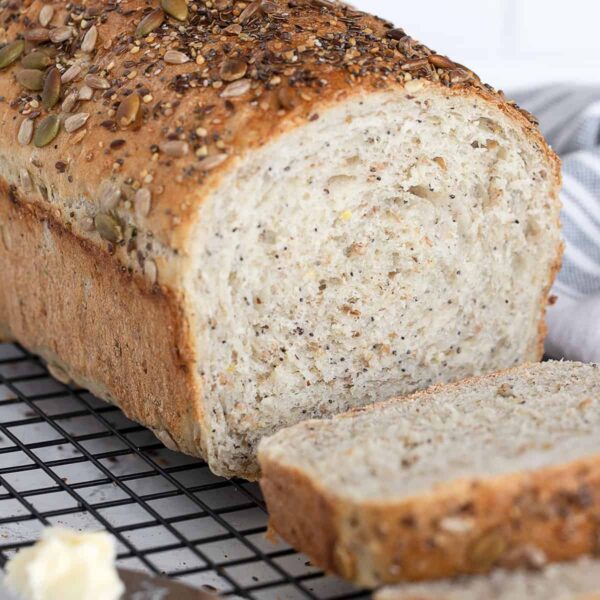
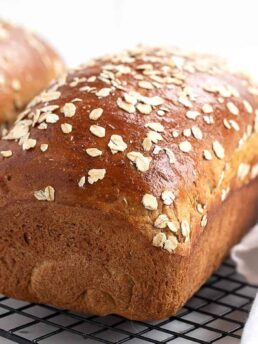
This light and fluffy multigrain bread recipe has become my go‑to everyday sandwich loaf. Made with multigrain cereal and a crunchy seed topping, it bakes up soft enough for sandwiches and toast, but still delivers all the hearty flavour and goodness of whole grains. If you’re looking for a reliable, homemade multigrain sandwich bread you can make on repeat, this simple multigrain bread is a great place to start!
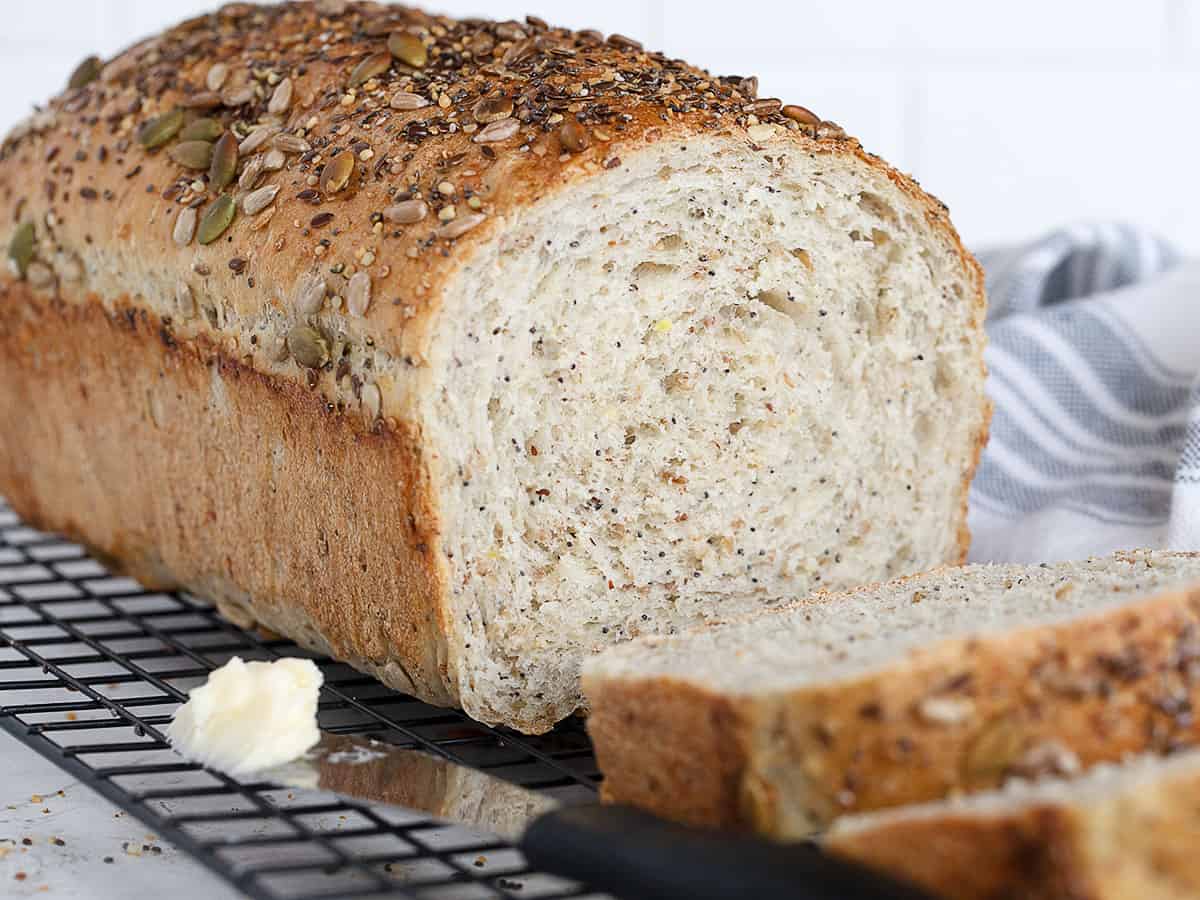
Multigrain bread recipe: at a glance
- This easy multigrain bread recipe is ready in about 2 1/2 hours, including rising time (fast-rising, so it’s ideal for weekly baking!)
- Uses pantry-friendly multigrain cereal mix and other simple ingredients for great flavour and texture.
- Makes a soft, sliceable light multigrain sandwich loaf perfect for toast and everyday slicing.
- Readers have successfully used different multigrain cereals, swapped in whole wheat flour, and added dried fruit or nuts, so you can easily tailor this loaf to your taste
- This detailed multigrain bread recipe includes all my best tips, step‑by‑step photos, and an overnight rise option.
Why this multigrain recipe works
- It starts with a soaked multigrain cereal for flavour and moisture, so the loaf stays soft.
- It uses just enough flour and a relatively quick rise for a light, fluffy crumb.
- Includes clear timing and internal temperature cues so you avoid dense or gummy loaves.
- Flexible base dough you can adapt with seeds, nuts, or dried fruit without extra adjustments.
What readers are saying …
Hundreds of readers have made this loaf, with many calling it their new “everyday bread” for breakfast and sandwiches.
“I have been searching for an earthy loaf of multigrain bread for a very long time. I love to bake and have been doing so for over 40 years. I’ve made many loaves of bread by many authors and cookbooks. Nothing wowed me till I made this loaf. The directions and video were perfect and easy to follow. This was THE BEST homemade loaf of bread!! My husband loved it and said it was better than our fancy favorite bakery.” – Cheryl
“Love this recipe! This is my go to for multigrain bread. Also gave it to a friend in Newfoundland, Canada and it’s her favourite also. Bread from the store/supermarket is a thing of the past. Thank you.” – Madeline
- Multigrain bread recipe: at a glance
- Why this multigrain recipe works
- What readers are saying …
- Ingredients and substitutions
- Homemade multigrain cereal mix
- How to make this multigrain bread recipe: at a glance
- How to make multigrain bread: step-by-step photos
- How to make multigrain bread: video
- Recipe tips!
- Multigrain bread recipe FAQ
- Troubleshooting this multigrain bread recipe
- Overnight refrigerator rise option
- Storing and freezing multigrain bread
- Get the Recipe: Light and Fluffy Multigrain Bread
- More bread recipes to love!
Ingredients and substitutions
A few notes about the key ingredients …
Cereal mix – This loaf uses a multigrain cereal mix, which is generally used to make a hot cereal when combined with hot water or milk. Using a multigrain cereal mix in this multigrain bread recipe is the easiest way to pack a variety of whole grains into every slice. These mixes are 100% whole grains, with no added sweeteners, so steer away from the commercial flavoured oatmeal mixes, etc.
This multigrain bread recipe works with most unsweetened multigrain hot cereals you’ll find in the grocery store.
Here are some suggestions based on your location …
In Canada: Look at Bulk Barn for 7‑grain or 12‑grain cereal. Grocery store options include Bob’s Red Mill 7‑grain, 8‑grain, 10‑grain, or 12‑grain cereals, Rogers porridge mixes, Quaker Super Grains Hot Cereal or Red River Cereal.
US and beyond: I believe Bob’s Red Mill 7, 8, 10 or 12-grain cereal is widely available and suspect the Quaker Super Grains may be as well. Beyond that, my best advice is to browse the hot cereal/oatmeal section at the grocery store or the natural foods section and see what you can find. If you really can’t find something, see below for a homemade multigrain cereal mix.
All-purpose flour – for the lightest loaf, use all-purpose flour. I prefer unbleached all-purpose flour. You can also use bread flour if you like, though you may need a little less than specified. If you want to add some whole-wheat flour to the loaf, you can replace up to 1 cup of the all-purpose flour with whole wheat flour, though your loaf will not be as light and fluffy as the original with this change.
Vegetable oil – Using oil in yeast breads helps create the soft and light texture. It is also good for anyone wanting a vegan yeast bread. That said, you can certainly replace the oil with an equal amount of melted and cooled butter.
Homemade multigrain cereal mix
If you can’t find a pre-mixed multigrain cereal mix, you can mix up your own with a combination of any of the following whole grains: rolled oats, quick oats, steel-cut oats, quinoa, flaxseed meal, flaxseed, sesame seeds, oat flakes, rye flakes, barley flakes, cracked wheat, wheat bran, oat bran, millet, buckwheat.
How to make this multigrain bread recipe: at a glance
To make multigrain bread, soak multigrain cereal, mix it with yeast, oil, flour, honey, salt and seeds to form a soft dough, let it rise, shape it into a loaf, proof again, then top with seeds and bake until golden.
- Soak the multigrain hot cereal in boiling water until cooled to lukewarm.
- Stir in the yeast and oil, then add flour, honey, salt and seeds to form a soft dough.
- Knead until smooth, then cover and let rise until doubled.
- Gently deflate, shape into a loaf and place in a greased loaf pan.
- Let rise again, then brush with egg wash, sprinkle with seeds and bake until golden and cooked through.
- Cool completely on a rack before slicing for sandwiches and toast.
How to make multigrain bread: step-by-step photos
This is a visual summary of the steps to make this bread. Scroll down to the Recipe Card below for the complete list of ingredients and instructions.
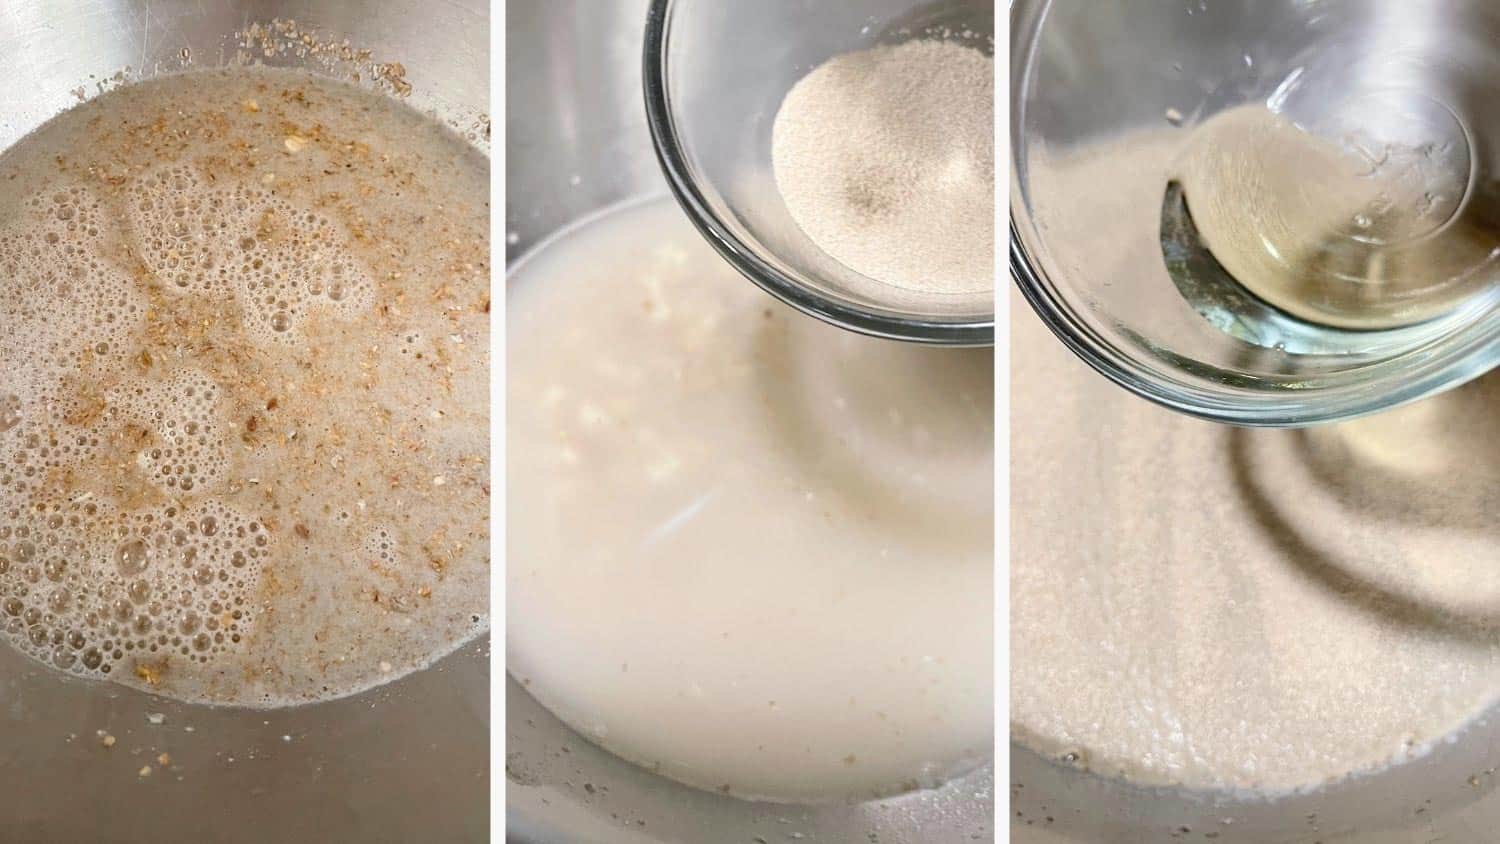
Step 1: Start by soaking the multi-grain cereal mix in boiling water for about 20 minutes, or until it cools to just lukewarm. Since this dough can start with any number of multigrain cereal mixes, it may absorb the water differently. You may find you have less water in the bowl than shown here after it sits for 20 minutes. That’s ok :)
Be sure your cereal mix has cooled to just lukewarm before adding the yeast, or you could kill the yeast before you get started. Test with an instant-read thermometer if you have one and make sure it’s about 105F. Otherwise, test with your finger. It should be lukewarm and not feel hot at all. Add the yeast and stir to combine. If using Active Dry Yeast, let stand 5-10 minutes before proceeding.
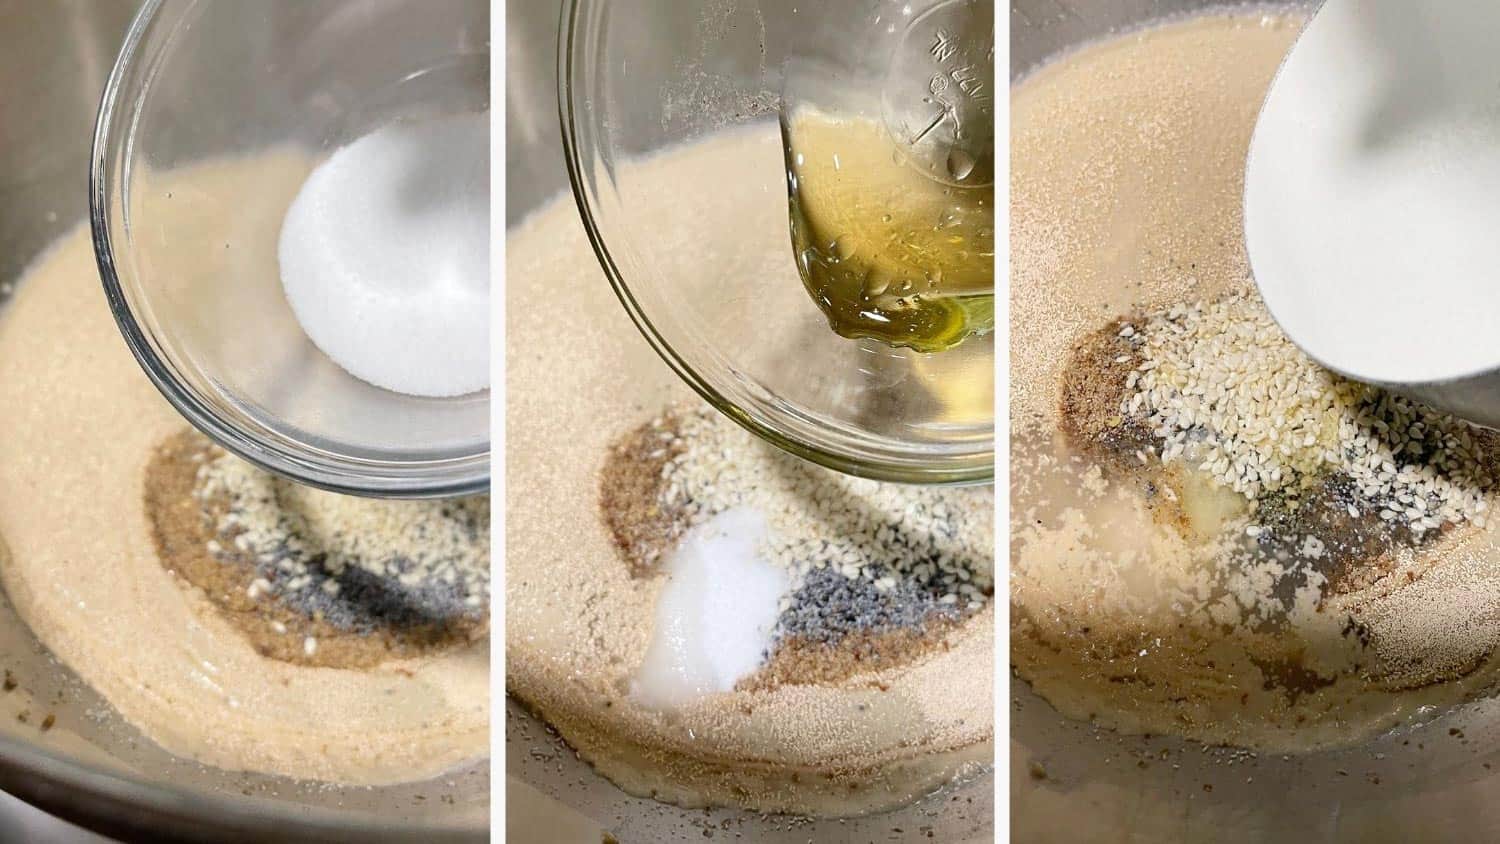
Step 2: Add the oil, honey and salt. If you’d like to add-in some extra seeds at this point, go ahead. I added sesame seeds, poppy seeds and ground flax seed here. This is optional.
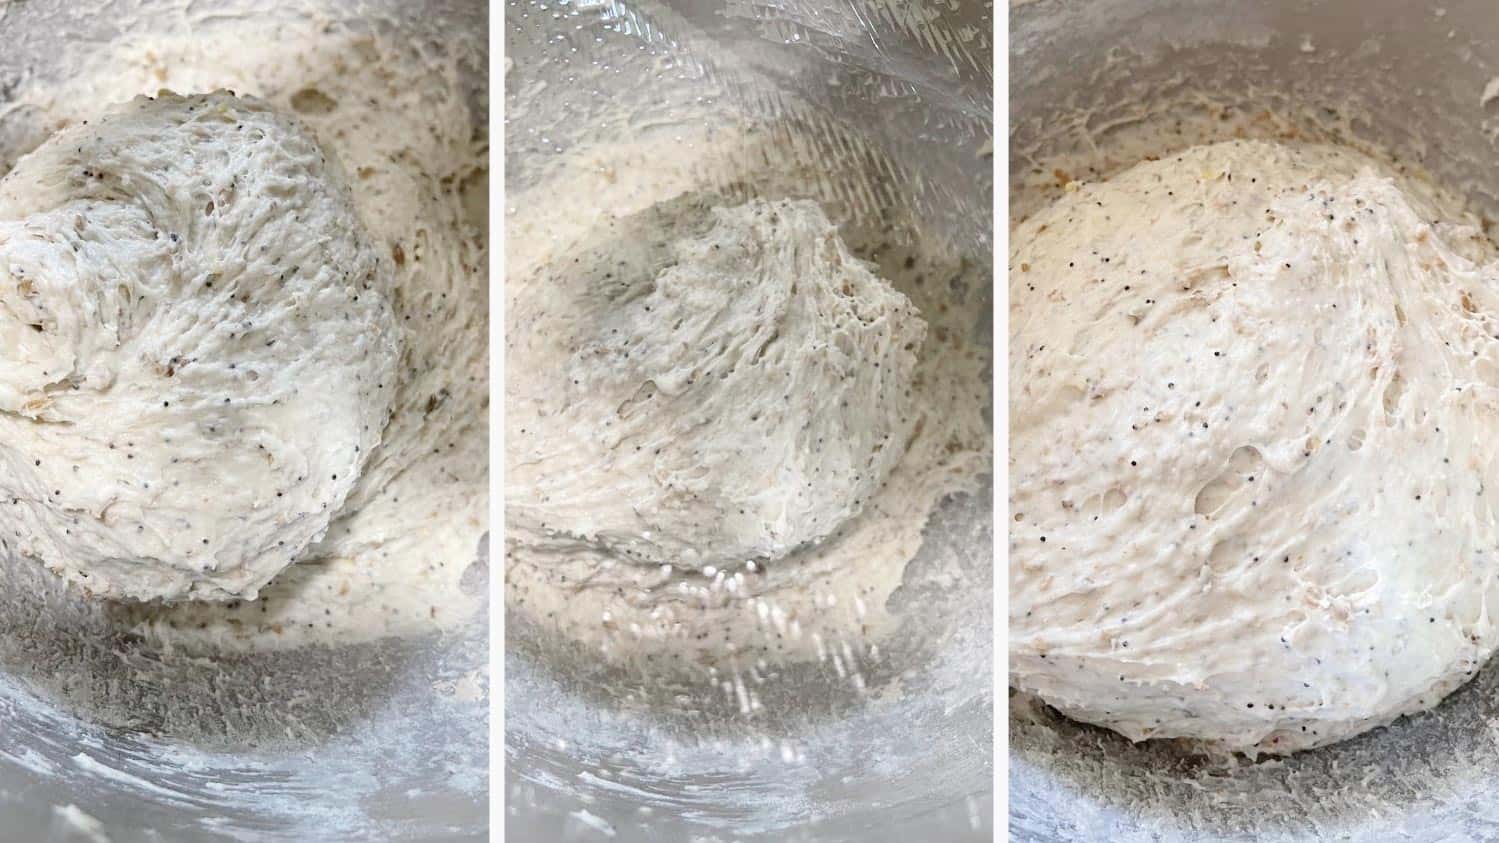
Step 3: Begin adding the flour to the bowl, kneading in as you go. Thee secret to a light and fluffy loaf is to not add too much flour! In the photo above, you’ll see that the dough with the 4 cups of flour added is loose and wet. Yours may be a little less loose, depending on the cereal mix that you used, but it should be very moist at this point. That’s what we want. You may be tempted to add more flour, but resist the urge to add it at this stage.
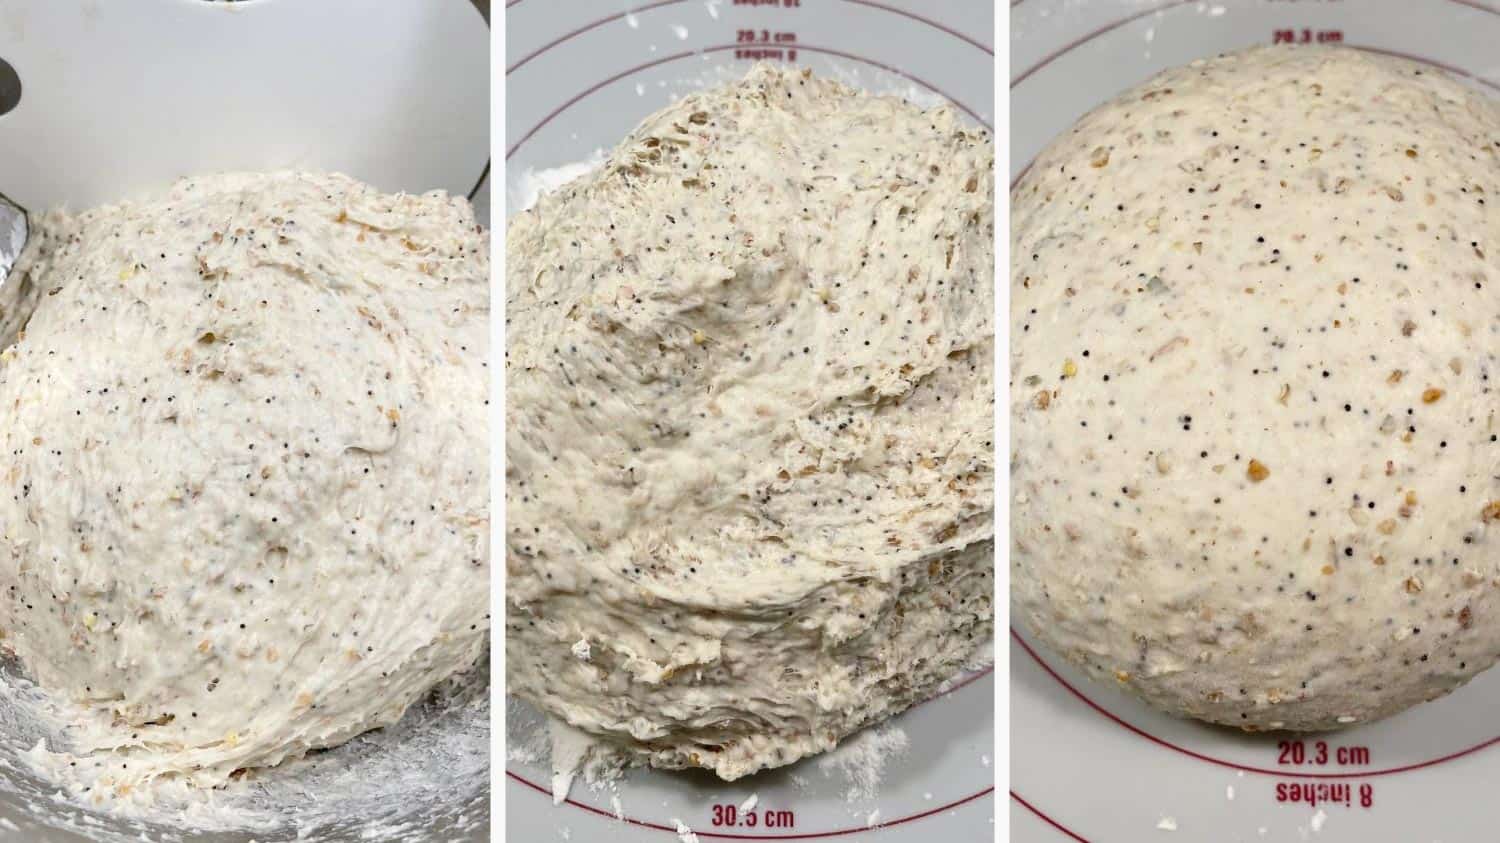
Step 4: Remove the dough to a floured work surface and add a bit more flour, as needed, only if the dough is sticking to your hands or the work surface. Form the dough into a ball.
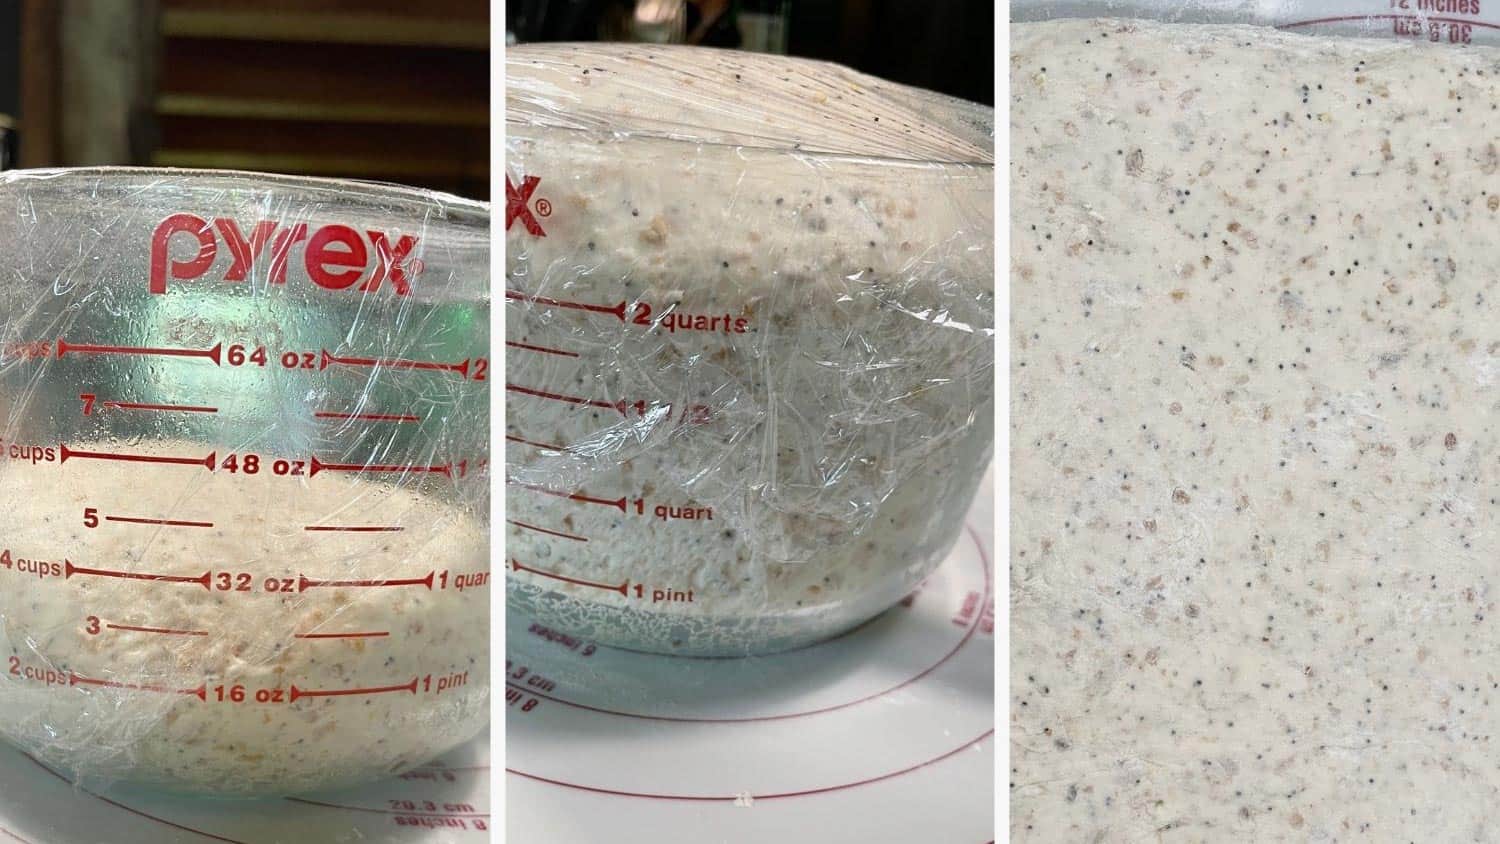
Step 5: Set the dough into a greased bowl or large measuring cup. Cover tightly with plastic wrap and set to rise until doubled in size. This bread is a FAST RISER! Don’t wander far and keep a good eye on it. This 1st rise shown here was only about 40 minutes. Be sure you just allow the dough to rise until doubled and no more.
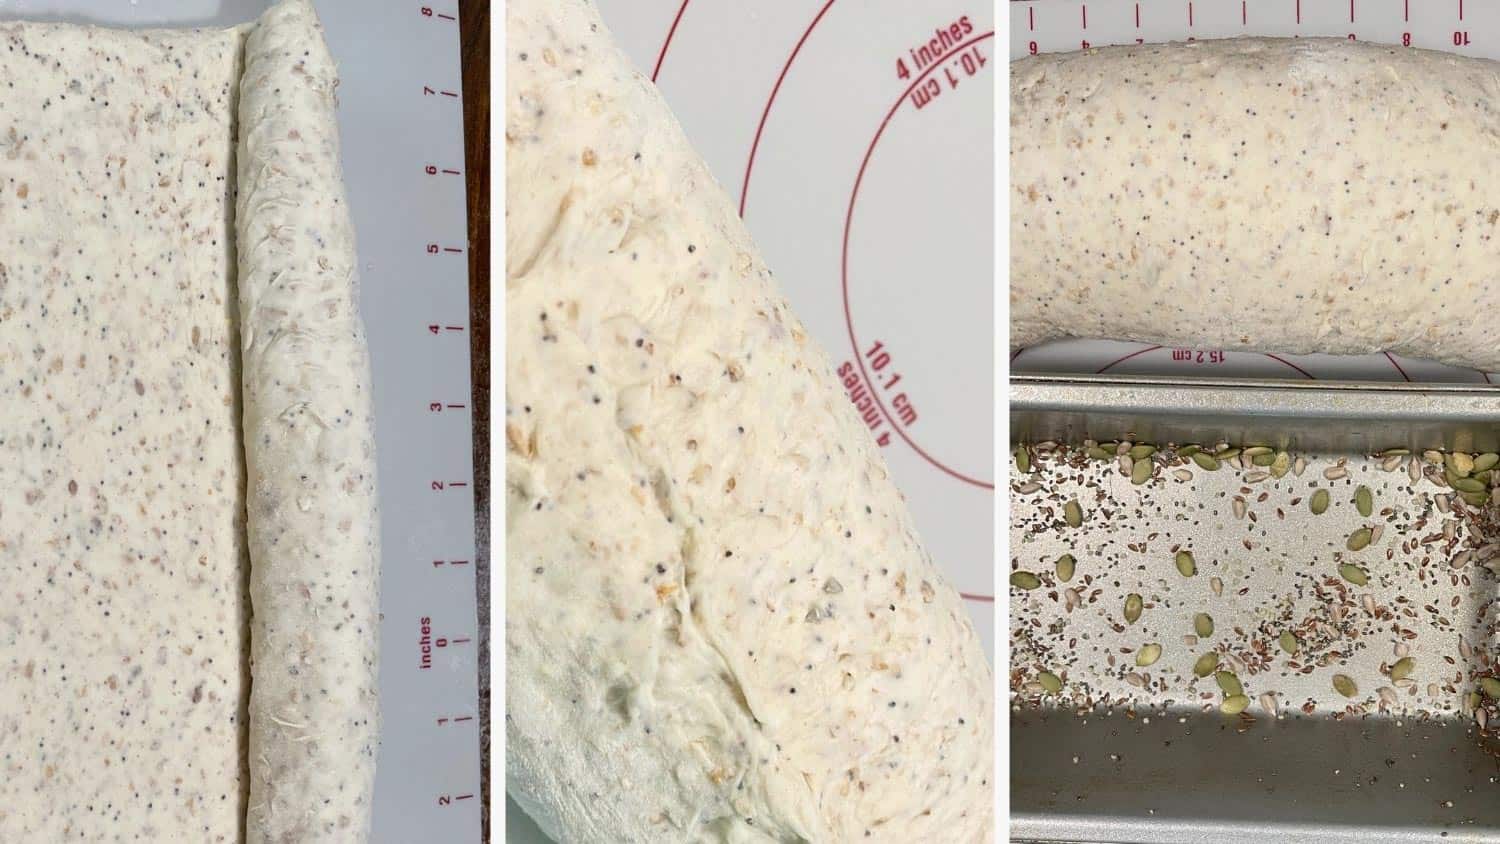
Step 6: Remove the dough to a lightly floured work surface and roll the dough out into a rectangle, then roll up jelly-roll style. Pinch the season together. Grease a loaf pan (or pans, depending on what size loaves you are making). Sprinkle some seeds into the pan, if you like.
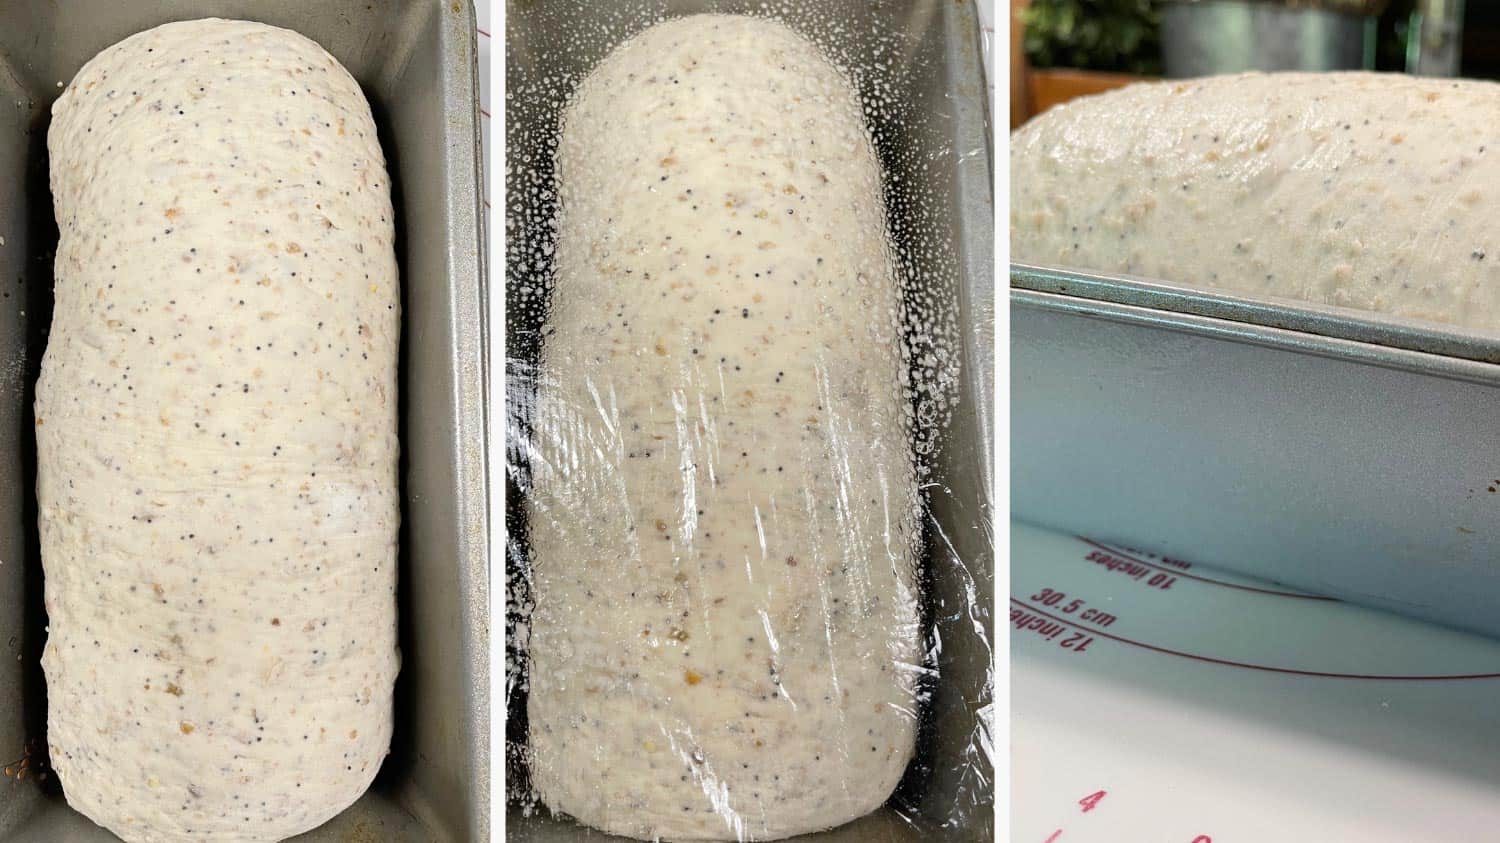
Step 7: Set the rolled dough into the prepared baking pan. Spray some plastic wrap with cooking spray and cover the pan (greased side down). Allow to rise until doubled in size, about 25-30 minutes, but may be less! In a 9×5-inch pan, it should crest the pan by about 1 1/2-inches in the centre.
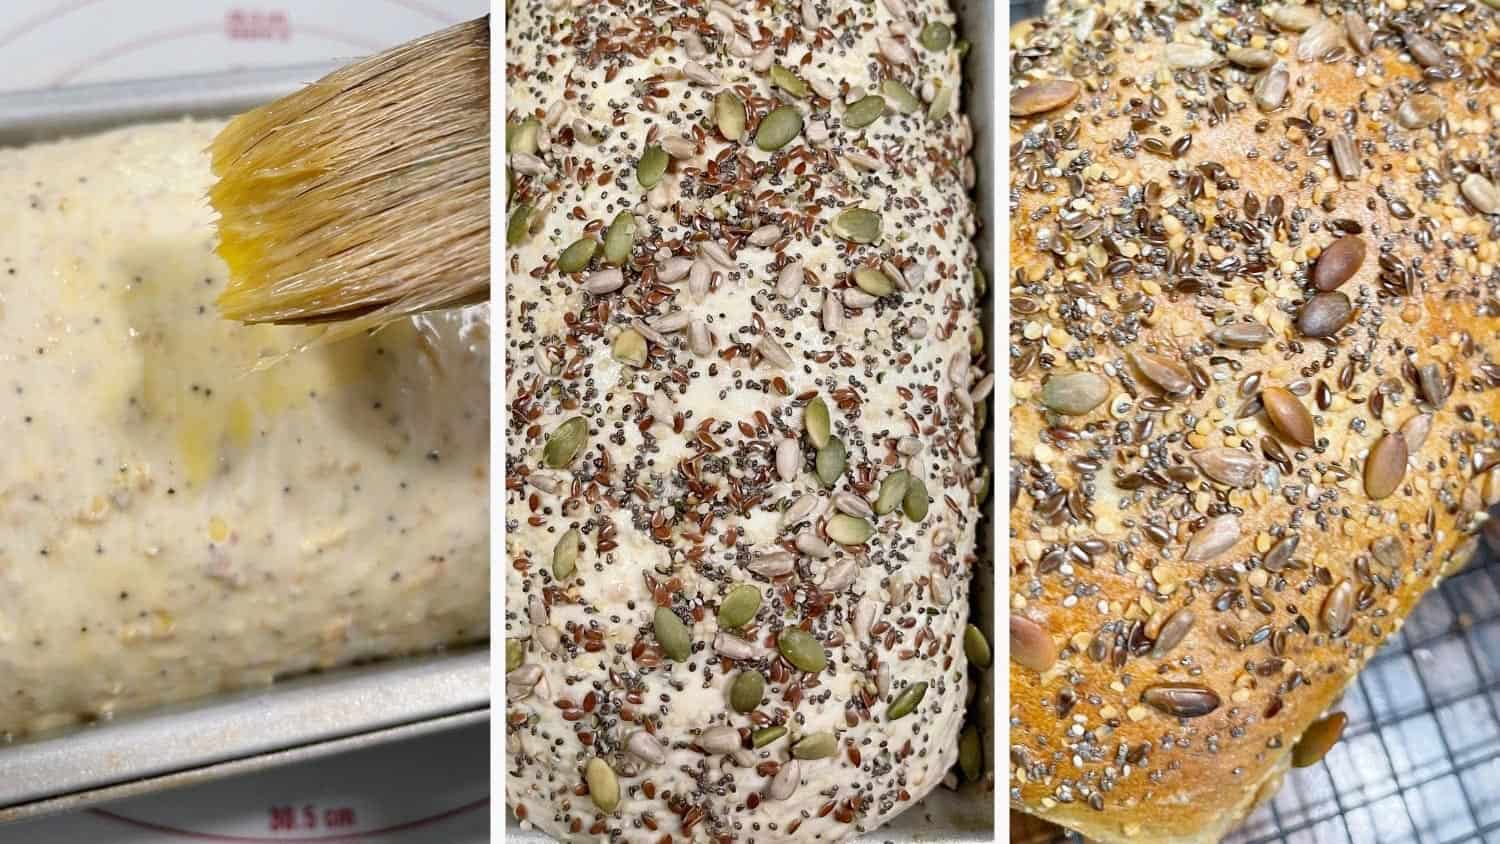
Step 8: When the loaf has risen, brush the top of the load with the egg wash and sprinkle with seed mix. This bread tends to brown quickly, so have a sheet of aluminum foil handy and be sure to cover the top loosely with a sheet of aluminum foil after about 18-20 minutes of baking to keep the top from over-browning. Baking the loaf in the lower third of the oven (one rack position down from the centre) helps to slow the browning a bit.
The early browning can also make the loaf look done before it is. A large 9×5-inch loaf like this will need a total of 40-45 minutes in the oven to bake through. An instant read thermometer is invaluable here to test the loaf for doneness. Bake until the internal temperature is 195-205F (I aim for about 200F).
How to make multigrain bread: video
Recipe tips!
- For the lightest, fluffiest loaf – avoid adding too much flour. After you’ve added the 4 cups of all-purpose flour, the dough will seem quite loose and wet. Avoid adding more flour in the bowl or mixer, but instead, transfer it to the counter and add a bit more flour there, if needed.
- The seed topping is optional – While I love the seed topping on this bread, you can easily skip it if you prefer. Leave it plain, do the egg wash only for a shiny finish, or do an egg wash and some rolled oats on top instead.
- Make as two smaller loaves – You can make this bread as one large 9×5-inch loaf or as two shorter, smaller 8 1/2 x 4 1/2-inch loaves. Note that baking time will be less for the 8×4 loaves. Refer to the Recipe Card below for some guidance.
- Avoid overbrowning – If you go the 9×5 loaf route, be warned that it does take time to bake through but will look quite done before it actually is. I cover the loaf with foil after about 20 minutes and then continue to bake the full 45 minutes. If you have an instant-read thermometer, you can take out the guesswork. You’ll want your loaf to be at least 195F internal temperature before you take it out. I aim for about 200F.
Multigrain bread recipe FAQ
I don’t have a bread machine to test this, but I suspect it would work just fine, with the following caveats. First, this recipe makes a big loaf, so I think the larger 2lb bread machine would probably be needed. Secondly, you would need to soak the cereal and grains outside of the bread machine, let them cool, then proceed to add the soaked grains to the bread machine with the other ingredients.
This bread can be vegan if made with brown sugar (instead of honey) and by using water to brush the top instead of the egg wash.
Yes, you can, but be careful with doubling this recipe as the dough is quite bulky and doubling may put too big a strain on a stand mixer.
This multigrain bread recipe can be used to make great soft multigrain rolls for sandwiches or burgers. Divide the dough into 8 to 16 evenly sized pieces, depending on the size of rolls or buns you want. Form the dough pieces into smooth balls, and rise and bake on a baking sheet. I would reduce the oven temperature to 400F and watch closely. Depending on the size of the rolls, they will probably bake in 10-20 minutes. Bake to an internal temperature of 200F.
Replacing all of the all-purpose flour with whole-wheat flour will result in quite a dense loaf (without other changes). You can easily swap out 1 cup of the all-purpose flour with 1 cup of whole-wheat flour, with only small changes to the finished loaf. The loaf will be slightly denser, but still soft enough for sandwiches. If you’d like to add even more whole-wheat flour, you can experiment with increasingly more and more whole-wheat flour, but at some point, you’ll start moving away from the “light and fluffy” texture.
I have not tried it myself, but readers report that a 2.2 lb (13.6″×5.4″×4.7) Pullman loaf pan worked nicely (with the lid on).
Troubleshooting this multigrain bread recipe
If your loaf is dense, you likely used too much flour or replaced too much of the all-purpose flour with whole wheat flour. Over‑proofing can also create a dense loaf, as it has over-risen and collapsed. Only rise until just doubled.
If the top of your loaf is too dark, bake lower in the oven and/or tent with foil earlier. You can also reduce the heat to 400°F and extend the bake slightly.
If the bread is gummy inside, it probably needed more bake time. Aim for an internal temperature of about 200°F. A gummy loaf can also result if you slice into a hot loaf. Be sure to let the bread cool fully before slicing.
Overnight refrigerator rise option
You can prepare the bread through to shaping and placing in the loaf pan, then immediately cover and refrigerate overnight or up to 12 hours. In the morning, simply remove from the fridge and allow to rise on the counter for about 1 hour before baking or until it has risen sufficiently as shown above.
Storing and freezing multigrain bread
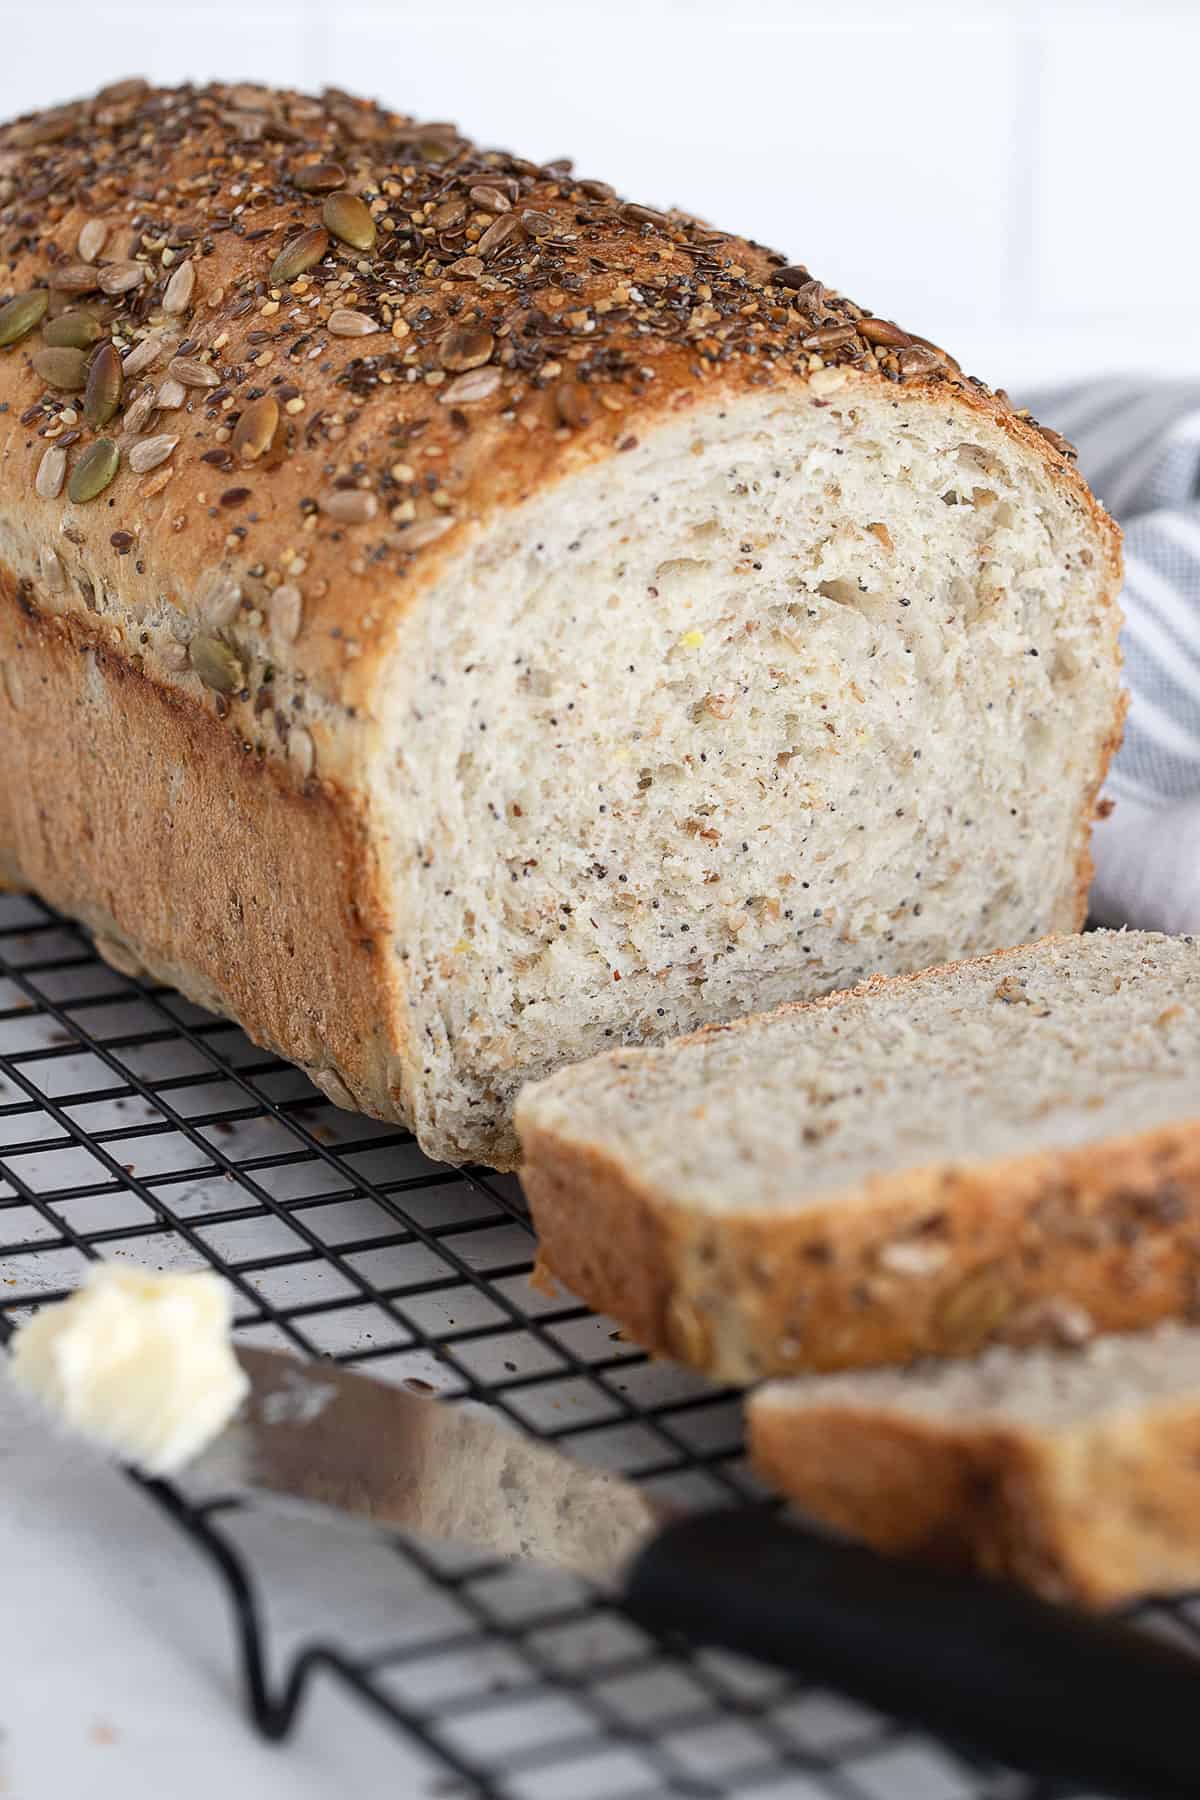
You can store this bread for several days at room temperature, stored in an airtight container.
This bread will also freeze well, tightly wrapped, for up to 3 months.
You can also freeze the shaped loaf right after placing it in the loaf pan (before the 2nd rise). I like to freeze in the loaf pan, then once solid, wrap the frozen dough log tightly and store only the dough in the freezer up to 3 months. When ready to bake, remove the frozen dough log, unwrap, place in a greased loaf pan, cover with plastic wrap and thaw at room temperature for 4-5 hours, or until thawed and risen. Bake as usual.
Want to save this recipe?
Enter your email and I’ll send it to your inbox. Plus, you’ll get great new recipes from me every week!
By submitting this form, you consent to receive emails from Seasons and Suppers.
You can unsubscribe at any time.
Get the Recipe: Light and Fluffy Multigrain Bread
Ingredients
Basic Multigrain Bread Dough:
- 1/2 cup (120 ml) multi-grain cereal, such as 7, 10 or 12-grain cereal *see Note 1 below
- 2 cups (454 ml) boiling water
- 2 1/4 teaspoons (7 g) active dry or instant yeast, (not rapid or quick rise yeast)
- 1 Tablespoon (15 ml) vegetable oil, or other neutral tasting cooking oil, or melted and cooled butter
- 1 Tablespoon (15 g) honey, or light or dark brown sugar
- 1 1/2 teaspoons (9 g) fine sea salt
- 4 cups (480 g) unbleached all-purpose flour , spooned and levelled *see Note 2 below
OPTIONAL Add-ins *See Note 3 below
- 1/3 cup raisins or dried cranberries
- 1/4 cup raw pumpkin or sunflower seeds, chopped
- 1/4 cup nuts (pecans, walnuts etc), chopped
- 2 Tablespoons mixed small seeds, poppy, sesame and/or flax seeds
Egg Wash:
- 1 large egg, mixed with 1 Tbsp water (or alternately, just water, for a vegan loaf, though seeds may not stick as well).
Topping Seed Mixture:
- 2 teaspoons (10 ml) sesame seeds
- 2 teaspoons (10 ml) flax seeds
- 2 teaspoons (10 ml) poppy seeds
- Raw pumpkin and or sunflower seeds, optional
Instructions
- Place multigrain cereal in a large bowl or the bowl of a stand mixer fitted with a kneading hook. Pour boiling water over, then let stand until mixture cools to between 105°F. and 115°F. for active dry yeast or to about 120F for Instant yeast, about 20 minutes. *Don't rush it. If your mixture is too hot, it may kill your yeast. A thermometer is handy here to make sure of the temperature before adding the yeast.
- Sprinkle yeast over cereal mixture. If using Active Dry Yeast, allow to stand for 5-10 minutes before proceeding. Add 1 cup of the flour, the oil, honey (or brown sugar) and salt and stir until smooth. Gradually mix in the remaining flour, incorporating any of the optional add-ins during the mixing. Once all the flour is added, you'll have a moist dough that may also seem a bit loose. Resist the urge to add more flour at this point. Cover the bowl with plastic wrap and let rest 15 minutes. The grains will absorb more of the moisture during the rest period.
- Turn the dough out onto a floured surface. Knead a few minutes until smooth and elastic, adding more flour, as needed, if it's sticking to your hands or the work surface.
- Oil a large bowl or measuring cup. Add the dough to the bowl, then flip over the ball of dough so the oiled side is up. Cover bowl with plastic wrap and let rise in warm spot until doubled in size. **Don't wander far. This bread is a quick riser and may double in as little as 35-40 minutes. It may take longer. The important thing is to make sure it rises only until doubled, no matter how long that is.
- Prepare the Seed Mixture by stirring together all the seeds in a small bowl. Set aside.
- When dough has doubled in size, remove to a work surface and gently deflate dough by pressing down the dough.
- Grease one 9×5-inch loaf pan or two 8×4-inch loaf pans. Sprinkle a bit of the seed mixture into the pan (or divide between two pans), if you like. For 8×4-inch loaves, divide the dough into two equal-sized pieces. For a 9×5-inch loaf, leave as one piece. Roll the dough out into a rectangle about 10 inches wide and 18 inches long for a 9×5 loaf, or 9×16-inch rectangles each of the two 8×4 loaves. Roll up jelly rolls style, starting with the short side, then pinch seams together. Place rolls seam side down into prepared loaf pan(s).
- Cover the loaves with a clean kitchen towel or greased/sprayed plastic wrap and let rise until doubled in size, about 25- 30 minutes.
- When the dough is nearing risen, preheat oven to 425F. (regular bake/non-convection), with rack positioned just below centre (a little lower rack position, one down from centre, will help to keep the top of the bread from browning as quickly).
- Before baking, brush the top of the loaf with the egg wash and sprinkle the top with the remaining seed mixture. Use the palm of your hand to press the seeds into the top of the loaf slightly to help them stick.
- Bake in preheated 425F oven for 18-20 minutes, then cover the top loosely with a sheet of aluminum foil to prevent over-browning. Bake a further 20-25 minutes for a 9×5 loaf or 10-15 minutes for 8×4 loaves, or until golden and crusty and have an internal temperature of 195-205F when tested with an instant-read thermometer. *Bread will look done, even when it isn't cooked through. The large 9×5 loaf will need the full 40-45 minutes in the oven to be cooked through.
- Remove from oven. Run a knife around the edges of the pan and immediately remove to a cooling rack to cool. Allow to cool completely (or almost completely) before slicing to avoid a gummy bread.
- Store bread well wrapped at room temperature for a couple of days, or freeze for longer storage. This bread will freeze well for up to 2-3 months or more.
Notes
Watch how to make it
More bread recipes to love!


Hi! I’m Jennifer, a home cook schooled by trial and error and almost 40 years of getting dinner on the table! I love to share my favourite recipes, both old and new, together with lots of tips and tricks to hopefully help make your home cooking enjoyable, stress-free, rewarding and of course, delicious!


I live at 6500 feet and I’m having a hard time finding a bread recipe that doesn’t fall apart when I slice it. I want to try this recipe but what changes, if any, should I make.
Hi Dawn, I live at 800ft, so I have absolutely no experience baking at altitude. I did find this online that might be helpful if you haven’t discovered it yet – https://www.wheatmontana.com/content/high-altitude-baking-how-make-your-recipes-work-mountains
Great information. Thank you so much. I’m going to give it another try.
Hi Jennifer,
I love your recipe! Simple and not sweet. I just made it but it ended up a bit on the heavy side. The bottom is almost burned and the top hasn’t even browned yet. I’m using an 8×4 inch loaf pan. My oven can’t reach 425F (220C). Can you help me?
Hi Mel, on the “heavy side” is almost always under-risen, meaning you didn’t let it rise enough. In some cases, it can be over-risen, to the point where the yeast is spent and it collapses. In either case, you need to look at the rise. As for the oven, I’m not sure how to help with that. It sounds like your oven may have an issue.
Ive been making plain white bread for the last few weeks as I’m new to break making. I found this recipe and made it today and it turned out fab! I couldn’t find 7 grain cereal so I used a low sugar muesli with seeds and nuts in it, added extra linseed and poppy seed too, as well as a cup of wholemeal flour. My gosh, it was fab!!! Thank you so much for the recipe!!!
So glad you enjoyed it, Charlotte :) Thanks!
Hi Jennifer,
Thanks for the lovely recipe, first time it came out wonderful. The top crust is chewy and hard, what should I take care next time please. It is cooked well inside.
Glad you enjoyed it! For a softer top crust, brush with milk instead of water before adding the seeds and baking. Also, while baking, cover top loosely with a sheet of foil as soon as the top is lightly golden. That should help :)
Made this bread last week. The recipe made 2 fluffy tasty loaves. We love it. I have been looking for a “tasty” multi-grain bread recipe for a long time that excluded whole wheat flour. This bread is delicious.
I love multigrain breads but loath, and I mean loath, the taste whole wheat with a passion, to me it smells musty and tasty disgusting, haha.
I am making this bread again today.
Thank you for this recipe Jennifer. Have a wonderful day.
Darlene
NOVA SCOTIA
Hi Darlene! I am right there with you on the taste and smell of whole wheat bread :) I know I should eat it. I just can’t. That’s how this bread came to be. So glad you enjoyed it. Thanks!
This is easily my favorite bread recipe ever to be written! In comparison to other grain breads this is much simpler and easy to follow. I used honey as suggested which was great. I also mixed sunflower seeds into the seed mixture which was fabulous.
The actual mixing process was quite simple and made kneading almost unnecessary. In total I added about 3 cups of flour. It also slices incredible well. I had 4 slices last night.. this is dangerous! Thank you so much for the recipe it is now a staple in my house.
So glad you are enjoying it, Tyler :) It is a staple here, as well. It just hits all the right notes for me for an everyday bread. Thanks!
The greatest loaf ever! It is now “on the menu”in my home.
So glad to hear, Elissa! Thanks :)
Hi, i’m from Indonesia and i dont know what to use to subtitute for the 7 grains cereal, could you help and give me subtitutes for the 7 grains cereal? Thank you so much ??
Hi Deasy, 7 grains cereal is just a mixture of grains, intended to be eaten as cereal with boiling water. You could just search out the usual ingredients (grains) in these cereals and make your own mixture of some or all of them. That is probably the easiest route.
Just made your bread this weekend – it turned out perfectly! I doubled the recipe and have never had a sandwich bread dough proof so well, and the hot cereal makes it light and springy but still maintains a lovely crispy crust. Will definitely be making again.
So glad to hear, Maggie! Thanks :)
Love this bread! I’ve been making it every weekend for several weeks now and it’s the perfect breakfast bread. I’ve substituted up to half of the flour with whole wheat flour, although I do find the texture of the bread isn’t as nice as with the all-purpose flour. I have found that I’ve had to extend the bake time somewhat as the first couple loaves were slightly underdone at the centre – I make the 9×5 loaf and I now bake for 30 minutes uncovered and another 20-25 minutes covered and it comes out perfectly.
So glad you are enjoying this bread Rachel! Thanks :)
My dough was elastic but very sticky and didn’t hold shape enough to roll into a cylinder. Should I have added more flour? I’m using a bread machine but I do check the dough ball. But I’m new at this so I have a hard time determining if it’s right or whether it needs more flour or more water! Thanks!
Hi Kelly and yes, if your dough won’t hold it’s shape and is very sticky, it definitely needs more flour. When it comes to bread, I always treat the flour amount as “approximate”. It will never be exact, as it can vary by humidity, type of flour etc. So never hesitate to add more than the recipe says, until your dough is moist, soft and elastic, but not sticky or crumbly. I always tell people to form into a ball and run your hand over it. It should feel like a baby’s bottom. Hope that helps :)
This bread is AWESOME. I made a goal for myself to start baking my own bread and started with this one and am so glad that I did, it turned out SUPER well. Glad I decided to double the recipe! Super awesome instructions and easy to follow recipe. Thanks for sharing!
So glad you enjoyed it, Lizzie :) Thanks!
Could I use fresh yeast ?
Hi Debbie and yes you could. Beyond that, I have no advice, as I have never used fresh yeast myself. As I understand it though, you just need to adjust (increase) the amount of yeast. The amount you would use for a standard single loaf would work.
Thanks so much for the quick reply…I decided to stick with your recipe and went and got the instant yeast. It’s in the oven baking right now and so far it looks amazing.
Enjoy!
The bread tasted great but didn’t seem as fluffy as yours and the middle pulled back away from the crust from all sides when cutting…. any tips?
Hi Domiinique, A couple of things can cause this. First, it may have been under-kneaded and lacked the structure to stay together. Or if you feel you kneaded it really well, it could have been over-proofed (left too long to rise). Don’t give up. Try again with attention to those two things and see if that helps :)
Can you substitute 12 gain flour for the 7 grain cereal. If so how much would you put in?
Hi Julie, not exactly. The 7 grain cereal is just grains. No flour. That said, you could use the 12 grain flour, but you would need to decrease the flour portion of the recipe somewhat accordingly. Hope that makes sense :)
This bread is delicious!!! This was the i rat loaf of bread I ever tried to make and it came out okay but not perfect! I just made a second batch and am in love!! They look beautiful and taste amazing! Thank you for sharing this recipe and having such knowledgeable information available for newbies!!
So glad to hear, Sophia :) Thanks!
Hi! I’ve never actually replied or left a comment online like this before but, I’m excited to do so. I’m living in Nicaragua and new to this bread making thing. I couldn’t find poppy seeds or pumpkin seeds but went ahead and so glad I did! I’ve made it three times now and the second and third time added in the dried cranberries. Absolutely delicious! I love this recipe and the whole idea of making bread. I added a little rolled oats along with the sesame and flax seeds to the top of the loaf before baking to give it that multigrain look. Thanks for sharing this recipe! I look forward to enjoying this again and again and will look for more from you as well. Thanks again! Spence
So glad to hear, Spencer! And yes, this bread is very adaptable and always seems to come out nicely. Thanks!