For this easy overnight sandwich bread, you simply need to mix the dough and then pop it into the refrigerator to rise. Shape, rise and bake off anytime the next day (or within four days).

If you find fitting homemade bread into your schedule tricky, this bread is for you! It takes just 15 minutes to mix the dough, and then it goes right into the refrigerator, where it is happy to hang out until you get to it.
When ready, simply shape into loaves and let rise in the pans for 3-4 hours before baking. Enjoy fresh, warm homemade bread when you want it!
Ingredients and substitutions
A few notes about the key ingredients …
Bread flour – I recommend bread flour for the best results. Unbleached bread flour is the best option, but bleached bread flour is fine as well. You could use all-purpose flour in a pinch, though you may find you need to add a bit more flour on the counter if the dough is sticky.
Instant yeast – I only use Instant yeast for bread making, specifically SAF Red Instant Yeast. It comes in a large package that I empty into a jar and keep in my freezer. It lasts forever and can be used directly from the freezer. Plus, Instant yeast can be added directly to the flour. No need to proof in water! I highly recommend it!
That said, if you only have Active Dry yeast, refer to the Recipe Card instructions for how to use it in this bread. Do not add Active dry yeast directly to the flour. It will need to be proofed in the lukewarm milk.
How to make overnight sandwich bread
This is a summary of the steps to make this bread. Always refer to the Recipe Card below for the full ingredient list and instructions.
You can make this bread by hand or with a stand mixer. I am showing the stand mixer method here. Instructions for making by hand are included in the Recipe Card.


- Add the flour, instant yeast, sugar and salt to the bowl of a stand mixer fitted with the paddle attachment. Mix together briefly. NOTE! Active Dry yeast cannot be added directly to the flour. Refer to the instructions in the Recipe Card for how to use and add Active Dry yeast.
- Add the egg, oil and lukewarm milk to the flour mixture and mix together for a couple of minutes with the paddle attachment.
- Remove the paddle attachment, scrape down the bowl and attach the kneading hook.


- Knead the dough for 4 or 5 minutes. The dough should clean the bowl or mostly clean the bowl. It may look a little sticky in the bowl, but don’t add any more flour to the bowl. You can add a bit more on the counter if needed.
- Remove the dough to a floured work surface and knead the dough for 1 minute. Only add additional flour if the dough is sticking to the work surface or to your hands.
- The dough should be smooth and moist. Form into a ball.


- Grease a large bowl. Add the dough ball to the bowl top (round) side down, then flip it over in the bowl, so the top of the dough is oily. Cover the bowl tightly with plastic wrap and place immediately into the refrigerator. Refrigerate at least overnight or it can be left in the fridge for up to 4 days.
- When ready to shape the loaves, remove from the refrigerator and deflate the dough.
- Weigh the dough and divide it evenly into two pieces. My dough is typically around 1400g (give or take) so each piece of dough is around 700g (give or take). If you don’t have a scale, do your best to divide the dough into two equal-sized pieces.


- Grease two 8 1/2 x 4 1/2 inch loaf pans.
- Press the dough ball out into a rough rectangle, about 6 inches wide and 8 inches long. (The cold dough will be firm so use the heel of your palm to press it out into shape.)
- Fold the two corners closest to you in, then begin rolling the dough tightly up, jelly-roll style.


- Roll the dough tightly, pressing the dough roll into the base with your fingertips with each roll.
- Pinch together the seam and pinch the ends together as well.
- Place the rolled dough into the greased loaf pans.


- Spray some plastic wrap with oil and place overtop of the loaf pans. Leave on the counter at room temperature to rise. Depending on the temperature of your kitchen, this can take anywhere from 2 1/2 hours to 4 hours. In my 72F kitchen, it is typically 3 1/2 hour.
- The risen dough should fill the pan and rise above the pans by 1 1/2-2 inches.
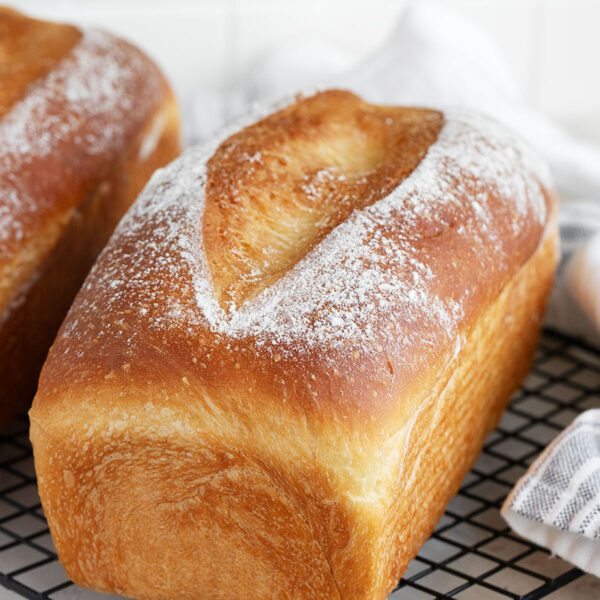
- If desired, flour and slash the dough before baking. This is not necessary, but does make for pretty loaves.
Recipe tips!
- The rising time before baking can and will vary from kitchen to kitchen, depending on how cold your fridge is (so how cold the dough is) and how warm your kitchen is. Count on 3 to 3 1/2 hours for rising and then 40 minutes baking time. Add in some cooling time (you never want to slice hot bread!) and you want to take your dough out of the fridge 4 to 4 1/2 hour before you want to eat it.
- I like to use a sharp paring knife to slash the dough. For a perfect slash, make one fast, confident slash across the top. If you try to cut it slowly, the dough will stick and become jagged.
- As noted above, allow the bread to cool for at least 1 hour before slicing. If you slice hot bread, it will create a gummy loaf.
- This recipe will make two loaves of bread. You could halve the recipe and make only one loaf, but bread freezes beautifully, so it is perfect to keep one out and freeze the second loaf for later. You could also keep one and gift one! If you only have one loaf pan, you can divide the dough into two pieces and return one piece to a covered bowl in the refrigerator and bake it off later.
- If you only have the larger 9×5-inch loaf pan(s), make one 9×5 loaf of about 900g and you can use the additional dough to make a few rolls, as well.
Making rolls or buns with this dough
You can use this dough to make rolls or buns. Simply divide the dough into roughly 55g portions for dinner rolls or 85g portions for hamburger or hot dog buns. Rise in the pan after shaping until doubled. Brush with egg wash before baking. Bake at 400F for 12-18 minutes.
Top tip!
If you want to make your bread-baking life much easier, invest in a kitchen scale and use it to weigh out your ingredients and divide the dough into two equal-sized pieces. A kitchen scale can be bought for about $20 and is an invaluable tool.

How to store and freeze homemade bread
Once the bread is cooled, place into a plastic bag and close it up tight. Store at room temperature to use within 3 days.
For longer storage, wrap the bread well once cooled and freeze for up to 3 months. You can also slice the bread, freeze and take slices from the freezer as you need them. Thaw a frozen loaf at room temperature in the wrapping.
Want to save this recipe?
Enter your email and I’ll send it to your inbox. Plus, you’ll get great new recipes from me every week!
By submitting this form, you consent to receive emails from Seasons and Suppers.
You can unsubscribe at any time.

Get the Recipe: Overnight Sandwich Bread
Ingredients
- 6 1/4 cup (794 g) bread flour, spooned and levelled *see Note 1 below
- 1 Tablespoon (9 g) Instant yeast, *see Note 2 below for using Active Dry yeast
- 2 teaspoons (14 g) salt
- 5 1/2 Tablespoons (78 g) white granulated sugar
- 1 3/4 cups (425 g) lukewarm milk, about 95F
- 6 Tablespoons (85 g) vegetable oil, or melted butter
- 1 large egg
Equipment
- 2 8 1/2 x 4 1/2 inch loaf pans
Instructions
- This bread can be made by hand or with a stand mixer. The instructions below are for using a stand mixer. If making by hand, mix the dough in a bowl with a spoon for about 2 minutes, then remove to a floured work surface and knead about 5 minutes, adding additional flour only if the dough is sticking to your hands or the work surface.
- Tip! Use of a kitchen scale is highly recommended for the best and most consistent results!
- Place the bowl of the stand mixer on a scale and weigh out the flour, instant yeast, salt and sugar in the bowl (or measure and add to bowl). Place the bowl on the mixer fitted with the paddle attachment. Use the paddle attachment to mix up the flour mixture.
- Warm the milk to lukewarm and add to the flour mixture along with the oil and egg. Use the paddle attachment to mix on the lowest speed for about 2 minutes. Remove the paddle attachment, scraping any dough on the paddle back into the bowl. Scrape down the sides of the bowl as well. Place the kneading hook on the mixer.
- With the kneading hook in place, knead the dough at Speed 2 on a Kitchenaid mixer for about 5 minutes. The dough should clean the bowl and should be soft and a bit tacky, but not sticky. Don't add any additional flour to the bowl. You can adjust on the counter if needed.
- Remove the dough to a lightly floured work surface. Knead the dough for about 1 minute, only adding additional flour if the dough is sticking to your hand or the work surface. For the dough into a ball.
- Spray a large bowl with cooking spray. Place the dough ball into the greased bowl top round-side down, then flip the dough ball over so the round side is up and is covered in the oil from the bottom of the bowl. Cover the bowl tightly with plastic wrap and immediately place into the refrigerator.
- Refrigerate the dough at least 12 hours or up to 4 days.
- When ready to bake, remove the dough from the refrigerator. Deflate the dough and place it onto a scale to weigh the total weight of the dough. This is typically in the 1400g range. Divide the dough into two equal pieces (typically around 700g). For the two dough pieces into balls.
- Spray two 8 1/2 x 4 1/2 inch loaf pans with cooking spray and set aside.
- Flip the dough balls upside down (so the smooth side is down). Using the heel of your palm, press the dough into a roughly 6-inch wide by 8-inch long rectangle.
- Tip! If these instructions are unclear, refer to the step-by-step photos above this recipe card. Fold the two corners closest to you in about 1/4 of the way, then roll the dough up tightly starting from the end you turned in. With each roll, use your fingertips to press the bottom of the roll into the base as you roll. When you reach the end, pinch together the seams and pinch the ends as well. Your dough roll should be roughly 8-inches long at this point. Place into prepared loaf pan, then repeat with the other dough ball.
- Spray a large piece of plastic wrap with cooking spray. Place overtop of the two loaf pans with the sprayed side down.
- Allow the dough to rise in the pan until the dough fills the pan and crests the pan by 1 1/2-2 inches. This can take anywhere from 2 1/2 – 4 hours, depending on how cool the dough was to start with and the temperature of your kitchen. In my 72F kitchen, this typically takes about 3 1/2 hours.
- When the dough is about risen, preheat the oven to 350F (non-convection).
- Prior to baking, you can flour and slash the loaves if you like. Use a fine mesh strainer to dust the loaves with flour, then use a sharp paring knife to make one swift and firm slash across the top of the loaf.
- Bake the loaves for 20 minutes, then rotate the pans front to bake and left to right and bake for another 20-25 minutes or until the loaves are golden brown and are at least 185F internal temperature.
- Remove the loaves from the oven and immediately remove the loaves from the pans to a cooling rack. Cook at least 1 hour before slicing.
Notes
Adapted from a Peter Reinhart recipe
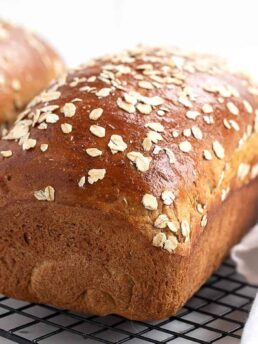
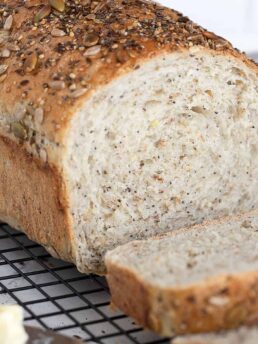
More sandwich bread recipes to love!

Hi! I’m Jennifer, a home cook schooled by trial and error and almost 40 years of getting dinner on the table! I love to share my favourite recipes, both old and new, together with lots of tips and tricks to hopefully help make your home cooking enjoyable, stress-free, rewarding and of course, delicious!
Hello,
I’ve just reached the point where the dough is in the fridge! I’m going to wait 2-3 days for the flavour to develop.
When I need to let it rise for the 3-4 hours can it go in the oven with the light on for warmth or is it best to leave it covered on the counter? I’m looking forward to trying this bread. Easy prep which is nice. Thank you!
Hi Linda, assuming that your kitchen is at an average temperature, there is no need to use the oven/light. I know it’s not very warm in the oven, but I think there is always a risk of drying out the top of the bread, which can affect the rise and the finished bake. I always rise my bread on the counter with greased plastic wrap, to keep the top of the loaf from drying. It might take a little bit longer, but I’m patient :) Enjoy!
Thank you. Good advice. Bread making is an adventure so all the tips are appreciated!
Bread making is an adventure! Three days in the fridge four hours to rise. Looked perfect! Then I did the confident slash across the top and it deflated like a balloon! 🤦♀️. I used a sharp knife and not my lame so I suspect that was my mistake. I’m baking it any way and staring a new batch because I think I’ve found the loaf I want to keep. I’ve tried many recipes but this one just feels right! Ever upwards and onwards!
If a bread deflates when slashed, it’s definitely over-proofed, either in the fridge or on the counter. This one has a lot of yeast, so maybe 3 days in the fridge is too long? Or possibly 4 hours on the counter was too long. I might backtrack and try it as an overnight rise first and see if that cures it, then go from there.
My kids said it almost had a croissant taste to it. They loved it!
So glad to hear, Amanda :) It definitely has extra flavour from the overnight chill. Thanks!
Hi Jennifer!
If I don’t want to bake both loaves on the same day, am I able to weigh the dough once mixed and place each half in their own oiled bowl, then bake one loaf after overnight and then the other loaf 3 days later?
Hi Patti and yes, the extra dough can sit in the fridge up to 4 days. Enjoy!
Wonderful! Thank you for the quick reply Jennifer and I hope you and yours have a very Merry Christmas!
Thanks, Patti and to you as well!
Hi,
First – Thank you for all your delicious recipes. :)
Second – Can I replace the white flour (1 to 1) with whole wheat flour?
Regards,
G
Hi Guy and thanks so much :) As to the question of whether you can replace the white flour with whole wheat, the short answer is no. The longer answer is that 100% whole wheat breads are tricky. Or at least trickier to make as they tend to be quite dense without some modifications to the basic bread recipe. That said, you could experiment with replacing some of the white flour with whole wheat without too much modification. I would start with 40% whole wheat and see how that goes. You could then bump it up to 50%, but I wouldn’t go much further with this recipe. In both those cases, as whole wheat flour will absorb more moisture, you would need a bit less whole wheat than specified for the white flour to get the right dough texture. I actually have a great 100% whole wheat bread recipe. I will post it! It is specially formulated to deliver a nice fluffy bread with whole wheat flour. Hope that helps :)