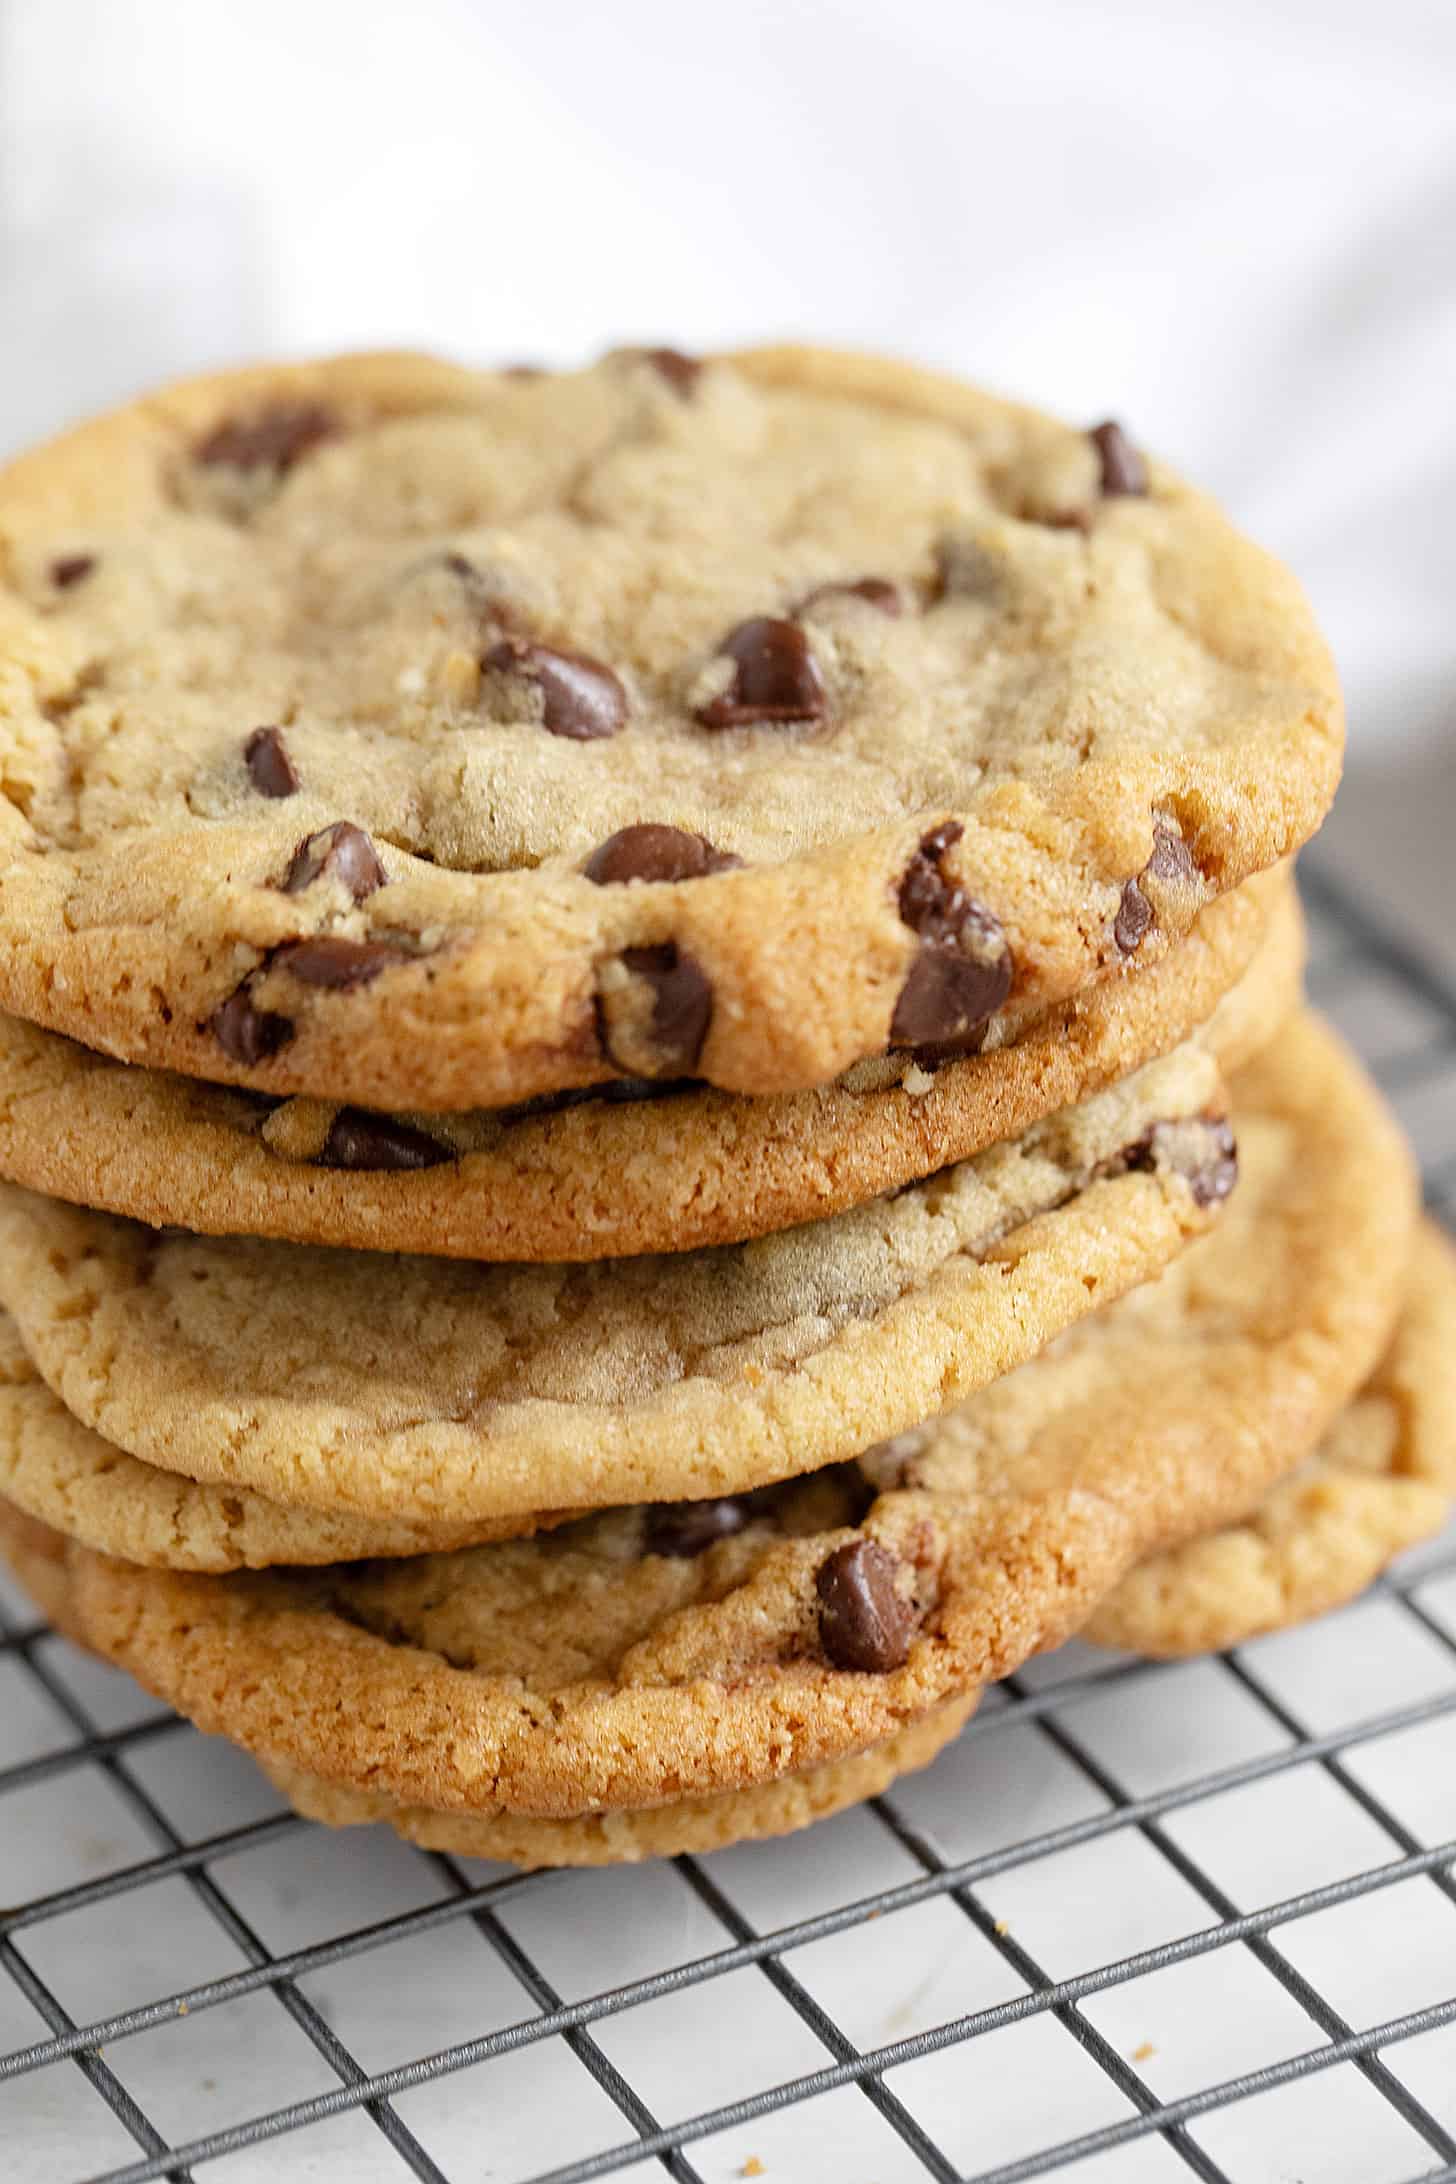
These fabulous brown butter chocolate chip cookies are everything you expect and want from a classic chocolate chip cookie! With the added nutty flavour of browned butter and a touch of ground oats, these cookies have quickly become my go-to chocolate chip cookie recipe.

There are a lot of reasons to love these brown butter chocolate chip cookies! You’ll love the nutty flavour from the browned butter and also from the special ingredient … ground oats. The flavour is fabulous and the texture is perfect. It’s everything I want from a classic chocolate chip cookie!
Ingredients and substitutions
A few notes about the key ingredients …
Chocolate Chips – Any semi-sweet chocolate chips will work here. Use what you have or prefer.
Butter – Unsalted butter is highly recommended as the butter will be browned and unsalted butter just browns better. That said, if you only have salted butter on hand, it will work, though it may be trickier to judge the colour as it tends to be foamier as it cooks. Also remember to reduce the added salt in the cookies as directed if using salted butter.
Quick-cooking oats – In this recipe, quick-cooking oats will be processed down into a powder/flour before using. As quick-cooking oats are smaller to begin with, it’s a shorter trip :) If you only have large-flake, old-fashioned oats on hand, process some down to the size of quick-oats first, then measure out the required amount, then process again to the powder/flour stage. This way you’ll be using the appropriate amount.


- You’ll start these cookies by browning the butter in a saucepan on the stovetop. Melt the butter oven medium heat and allow it to cook, stirring or swirling the pan so you can see the colour change.
- The foaming will eventually reduce and the colour will start moving toward a golden colour. This is when I like to reduce the temperature just a bit, so the browning doesn’t happen too quickly and end up scorching. Keep cooking and swirling the pan continuously so you can see the colour clearly.
- As soon as the colour changes from golden to amber, remove it immediately to a bowl to stop the cooking. The browned butter will need to cool for about 30 minutes before you can proceed with the recipe.


- While you are waiting for the browned butter to cool, you can process the oats. Weigh or measure out the quick oats.
- Add to a food processor or blender.
- Process the oats until they are processed down to a powder/flour consistency.


- Add the processed oats to a bowl with the flour, baking soda and salt. Whisk together and set aside.
- Once the browned butter has cooled, add the brown and white sugar and whisk together until smooth.
- Whisk in the egg and vanilla until smooth.


- The batter should be smooth and light at this point.
- Add the flour/oats mixture to the batter and use a spatula to fold it in, mixing just until the flour is no longer visible.
- Fold in the chocolate chips. Cover the bowl and refrigerate for 30 minutes.


- Once the dough has chilled for 30 minutes, form into 55g/3 Tbsp balls.
- Set the balls onto a parchment-lined baking sheet, cover and refrigerate for at least 1 hour or for up to 48 hours.
- To bake, place 6 balls onto a parchment-lined baking sheet with about 4″ between each ball. Bake. If baking multiple batches, allow the baking sheet to cool completely before baking another batch. You can also freeze the remaining dough balls for up to 3 months to bake off on demand.
Recipe tips!
- Browning butter is like a game of chicken. You want to cook it long enough for it to develop the wonderful nutty browned flavour and a deep amber colour, but not so long that it scorches the milk solids and introduces a bitter flavour to the butter. I find reducing the temperature from medium to medium-low as the butter nears browning gives a larger margin-of-error and helps to avoid over-browning.
- Don’t forget to take the eggs out of the fridge ahead so they are at room temperature when they are added to the dough.
- Don’t skip the refrigeration times as they are critical to achieving the perfect finished texture in these cookies.
- While warm chocolate chip cookies are always tempting, I find these cookies (and most chocolate chip cookies) develop more flavour once they have cooled and sat for a bit. You can always re-warm them in the microwave later!
Top tip!
I do a lot of baking and I will always maintain that cookies are the trickiest bake! The reason for this is that there is a delicate balance between the flour and butter ratio and if it is a bit off, cookies can easily fail. Too much flour and cookies won’t spread properly. Too little flour and they’ll spread too much and be thin and greasy.
The remedy for avoiding these cookie fails is simple. If you use a scale to measure the ingredients, you will have consistent cookie results each and every time. A kitchen scale is easily my most used and most valuable kitchen tool.

Making ahead, storing and freezing
Once the dough is formed into balls, it can sit in the fridge for up to 48 hours before baking off, so these are perfect for making ahead.
I love to bake off 6 cookies after the 1 hour of refrigeration and then I will freeze the remaining dough balls to bake off on-demand. The cookie dough can be frozen for up to 3 months, though I prefer to use them within 2 months, which generally isn’t a problem :) Allow just a bit more baking time if baking the cookies from frozen.
Want to save this recipe?
Enter your email and I’ll send it to your inbox. Plus, you’ll get great new recipes from me every week!
By submitting this form, you consent to receive emails from Seasons and Suppers.
You can unsubscribe at any time.

Ingredients
- 3/4 cup (165 g) unsalted butter, *see Note 1 below
- 3/4 cup (70 g) quick-cooking oats, *see Note 2 below
- 1 cup + 1 Tablespoon + 2 teaspoons (140 g) all-purpose flour, spooned and levelled *see Note 3 below
- 1 teaspoon baking soda
- 3/4 teaspoon kosher salt, reduce to 1/2 tsp if using salted butter
- 3/4 cup (150 g) light brown sugar, packed
- 100 g (100 g) white granulated sugar
- 1 large egg , at room temperature
- 1 large egg yolk, at room temperature
- 2 teaspoons vanilla extract
- 1 1/4 cup (225 g) semisweet chocolate chips
Equipment
- Food processor or blender
Instructions
- Tip! For perfect cookies each and every time, use a kitchen scale and weigh out the ingredients using the weight measurements provided.
Brown the butter:
- Place the butter into a medium saucepan. Melt the butter over medium heat, then continue cooking, stirring regularly until the butter starts to turn golden and smell a bit nutty. Reduce the heat under the pan slightly and continue cooking, swirling the pan continually to assess the colour and to avoid the milk solids on the bottom of the pan scorching. When the mixture changes from golden to amber, remove from heat and immediately pour into a clean bowl. Allow the browned butter to cool for 30 minutes.
Mix the dry ingredients:
- Add the oats to a blender or food processor and blend until finely ground and powder-like. Transfer the oats to a medium bowl. Add the flour, baking soda and salt and whisk to combine well. Set aside.
Mix together the dough:
- When the browned butter has cooled, (it shouldn't be hot but it's ok if it's a bit warm) add the brown sugar and white sugar. Whisk together until smooth. Add the egg, egg yolk and vanilla and whisk again until smooth.
- Add the oat-flour mixture and use a spatula to stir together just until no flour is visible. Fold in the chocolate chips.
Chill the dough (do not skip or skimp!):
- Cover and refrigerate until dough is firm enough to scoop, about 30 minutes.
Refrigerate the dough balls (do not skip or skimp!):
- Line baking sheet with parchment. Divide dough into 55g (3 Tbsp) mounds and place on the baking sheet. Cover the dough a chill in the refrigerator until completely firm, at least 1 hour or up to 48 hours.
Bake the cookies:
- Preheat oven 350F (non-convection) Transfer 6 portions of the cookie dough from the refrigerator to a large parchment-lined baking sheet. Space them well apart as they will spread. (4 inches between dough balls is ideal.)
- Bake in the preheated oven for 12-14 minutes. The cookies will look a little undercooked at that time, but trust that they will continue to cook on the pan and don't over-bake. (13 minutes is perfect in my oven for crispy around the edges and chewy in the centre. You could bake the extra minute if you prefer crispier cookies). Cool the cookies on the baking pan for 5 minutes then transfer them to a cooling rack. **If baking multiple batches allow the baking sheet to cool completely between batches.
- The dough balls can be refrigerated for up to 48 hours or can be frozen for up to 3 months. If baking from frozen allow a bit more baking time.
Notes
-
- Browning butter is like a game of chicken. You want to cook it long enough for it to develop the wonderful nutty browned flavour, but not so long that it scorches the milk solids and introduces a bitter flavour to the butter. I find reducing the temperature from medium to medium-low as the butter nears browning gives a larger margin-of-error and helps to avoid over-browning.
-
- Don’t forget to take the eggs out of the fridge ahead so they are at room temperature when they are added to the dough.
-
- Don’t skip the refrigeration times as they are critical to achieving the perfect finished texture in these cookies.
-
- While warm chocolate chip cookies are always tempting, I find these cookies (and most chocolate chip cookies) develop more flavour once they have cooled and sat for a bit. You can always re-warm them in the microwave later!
Adapted from the Stardew Valley Cookbook
Hi! I’m Jennifer, a home cook schooled by trial and error and almost 40 years of getting dinner on the table! I love to share my favourite recipes, both old and new, together with lots of tips and tricks to hopefully help make your home cooking enjoyable, stress free, rewarding and of course, delicious!


Browning the butter and refrigerating the dough is totally worth the extra time in adding extra flavour to these cookies! My only regret? Not making a double batch!
So glad you enjoyed them Barb and I agree :) I’ve been keeping the dough balls in the freezer and baking them a couple at a time. They are just as lovely after freezing! Thanks!