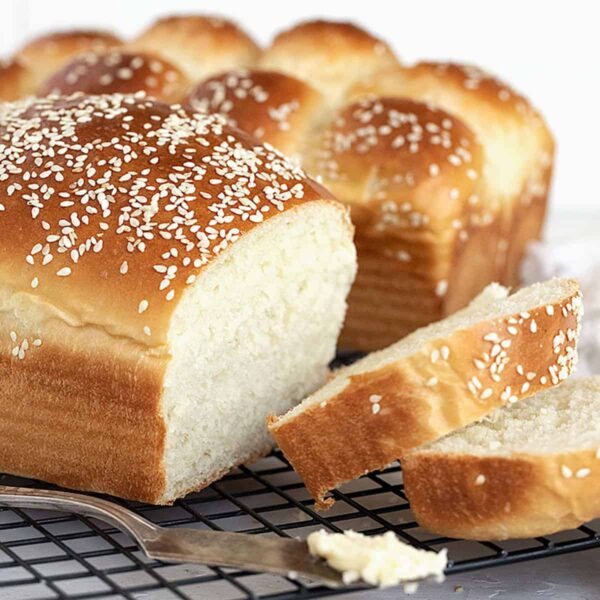
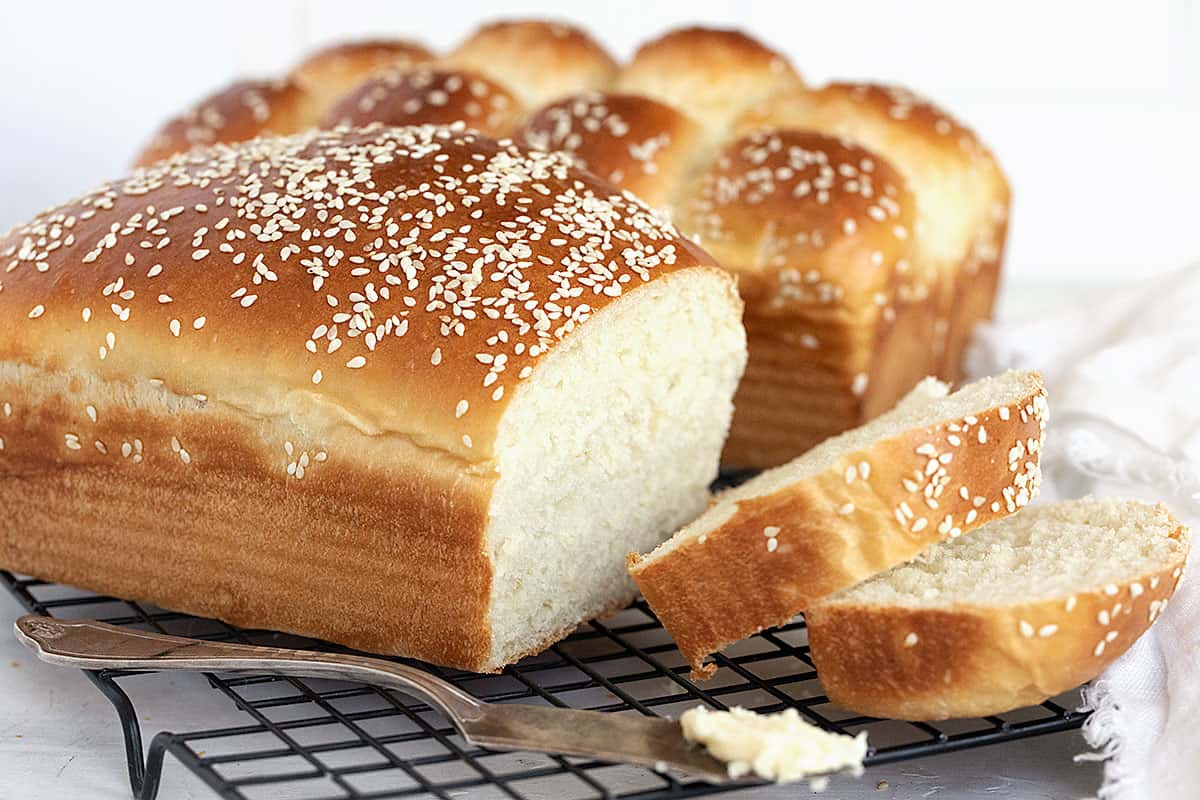
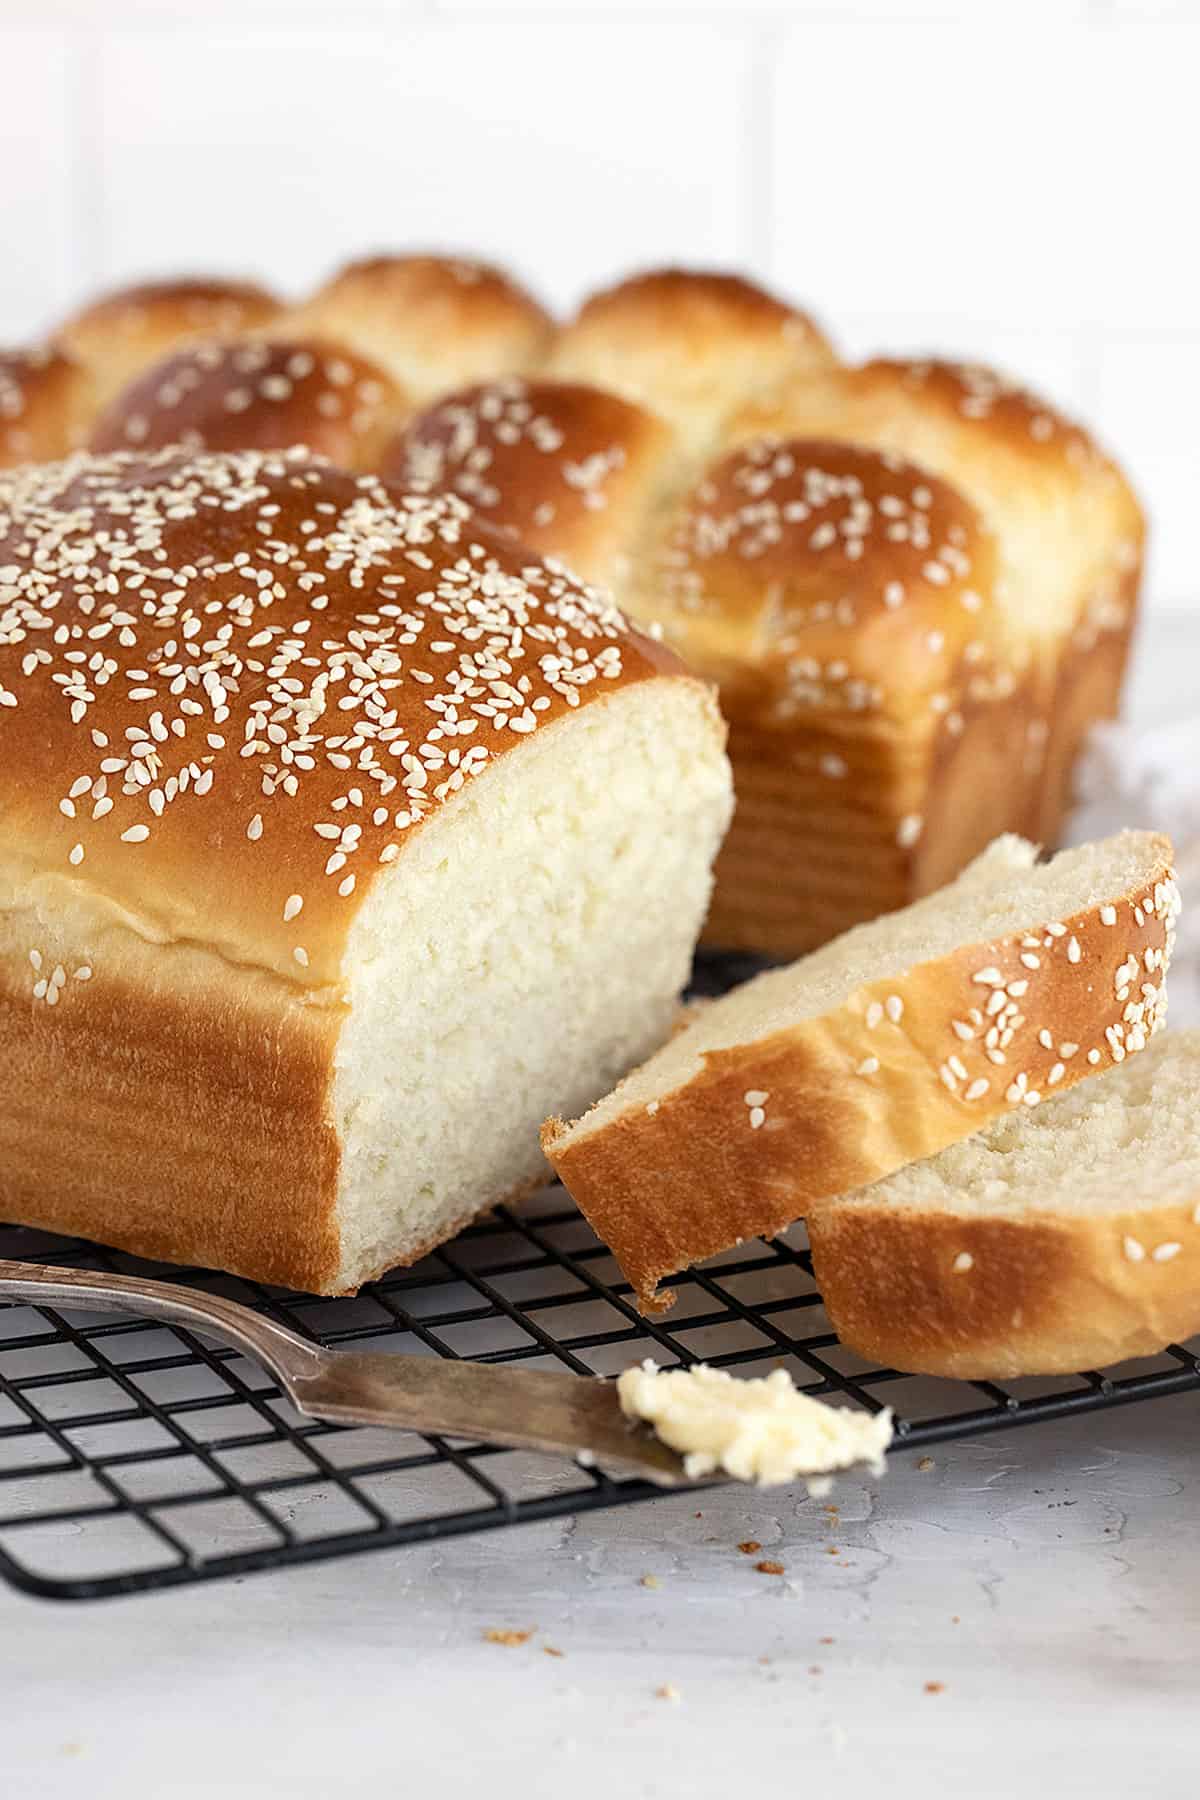
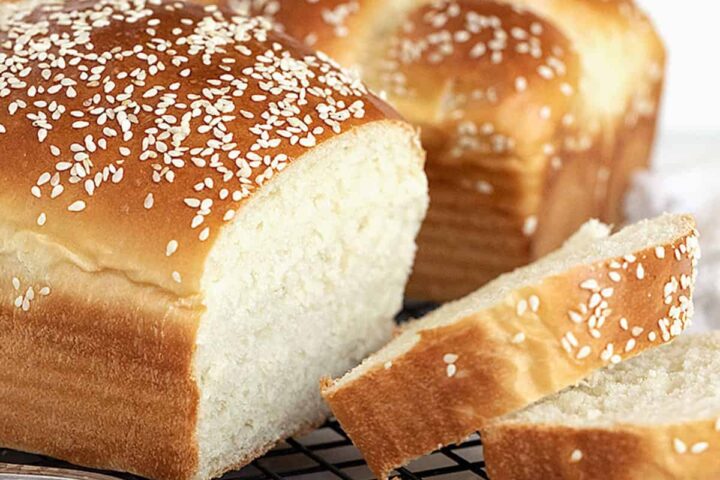
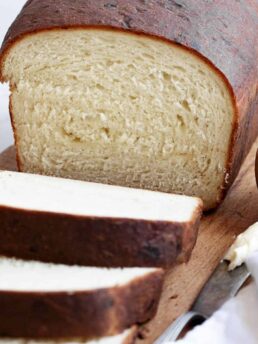
Homemade buttermilk bread has a slightly tangy and rich flavour and a wonderful soft crumb. Make as loaves or try a loaf and a loaf of pull-apart rolls.
Why you’ll love this buttermilk bread recipe!
- Bread with buttermilk has a lovely, very lightly tangy flavour! The buttermilk also helps to produce a wonderfully soft white bread.
- This is a great recipe for using up leftover buttermilk! This recipe uses 1 1/2 cups of buttermilk.
- You can bake once and get two loaves, a loaf and a pull-apart roll loaf or just make a bunch of rolls. These freeze beautifully, so use one and pop the other in the freezer for later.
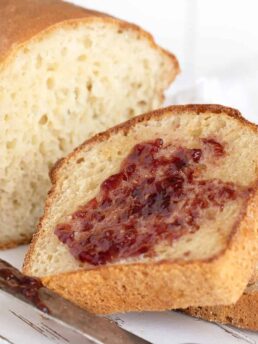
- This bread is excellent eaten out of hand with butter, to use for sandwiches and makes great toast, too. The pull-apart rolls are a great side for soups and stews.
Ingredients and substitutions
Buttermilk – there are times when make-you-own buttermilk is fine, but this bread probably isn’t one of them. Wait until you have real buttermilk on hand to make this bread, for best results.
Instant Yeast – this is the regular Instant Yeast (such as SAF Brand) and not quick or rapid-rise yeast. I only use SAF Brand Instant Yeast and I highly recommend it. It is easily available online (Amazon and more).
I believe you can adapt this recipe to use Active Dry yeast if that’s your only option, though I haven’t tested it with this recipe. You will need to make some changes for Active Dry yeast. I have provided some details for this in the Recipe Card below.
Flour – unbleached bread flour is recommended, for best results. You could also use bleached bread flour or bleached or unbleached all-purpose flour, but the resulting loaf may have a slightly different consistency and you may need to use a bit more flour overall if using all-purpose flour.
Step-by-step photos
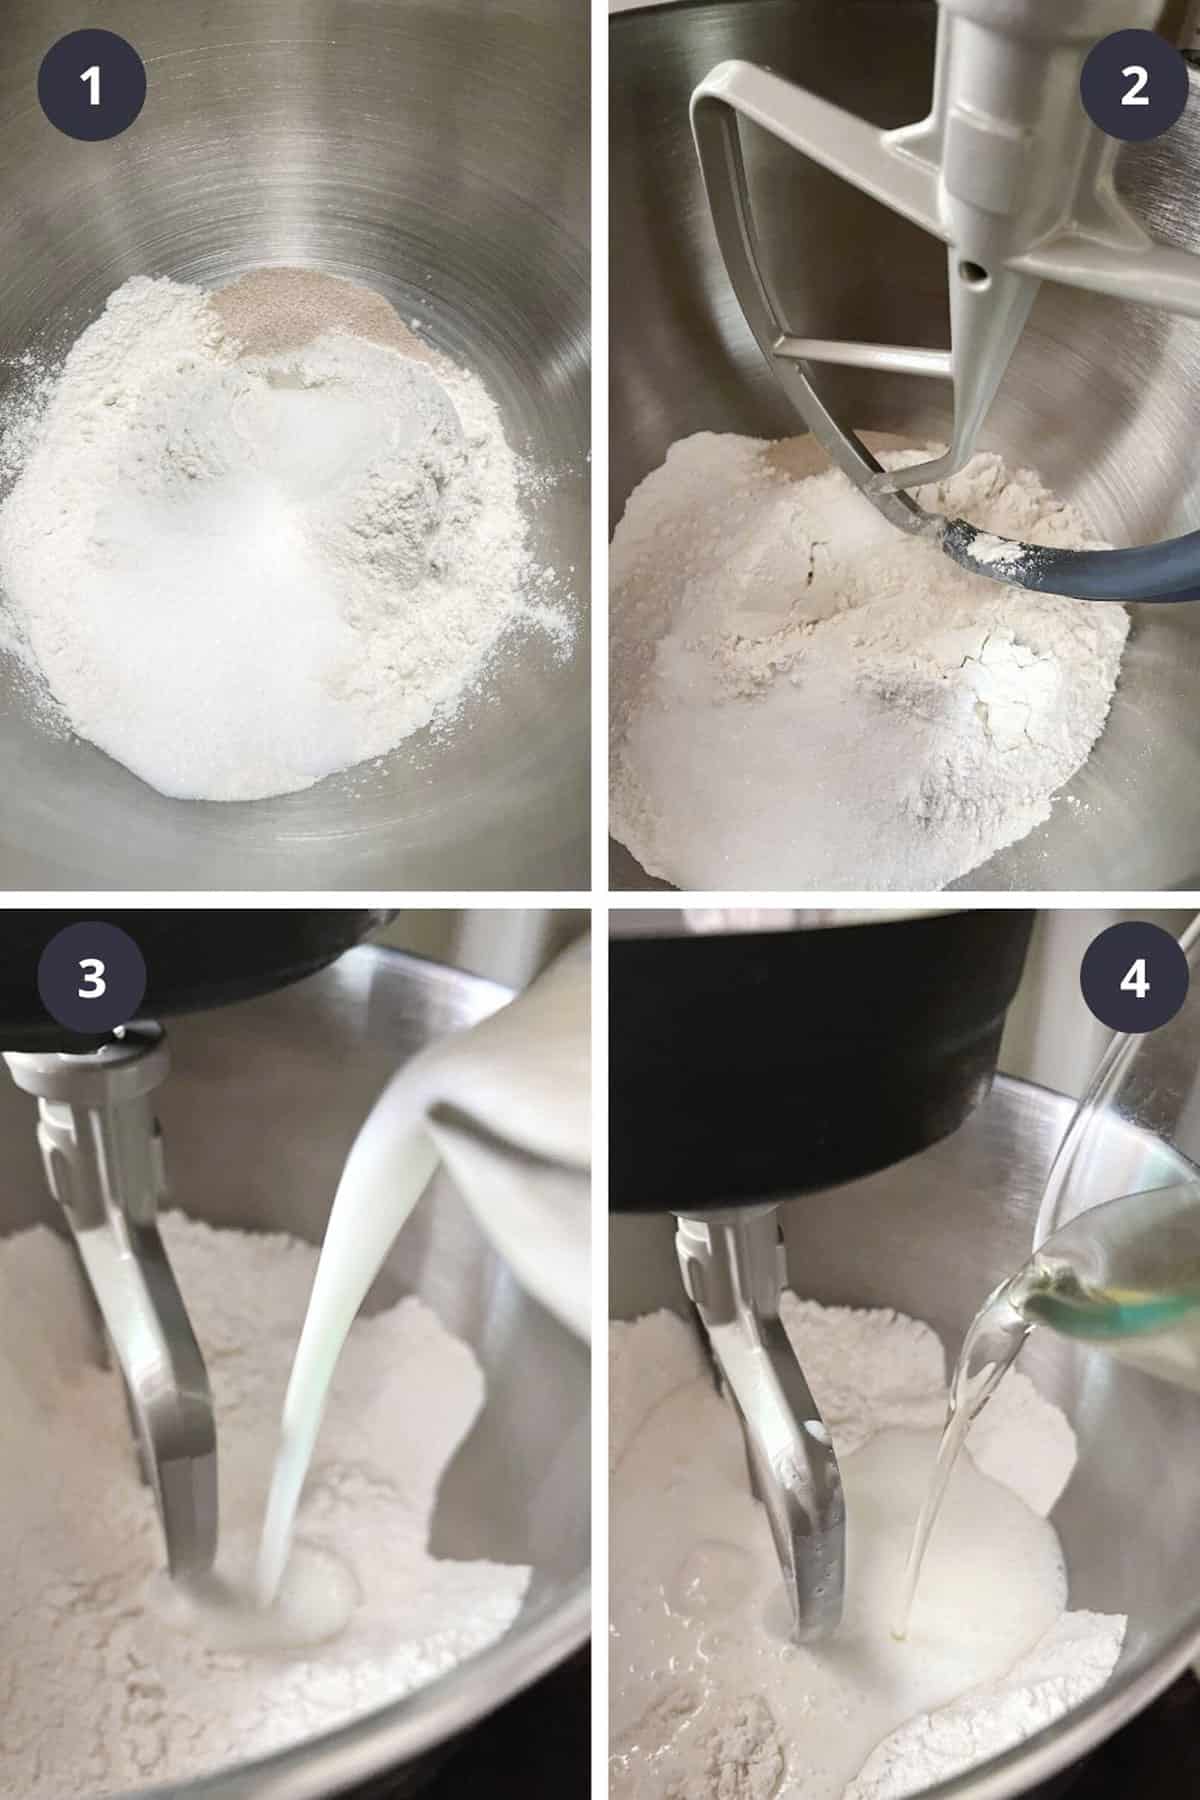
- Add about 3/4 of the flour, yeast, sugar and salt.
- Use the paddle attachment to stir together.
- Add the room-temperature buttermilk.
- Add the oil.
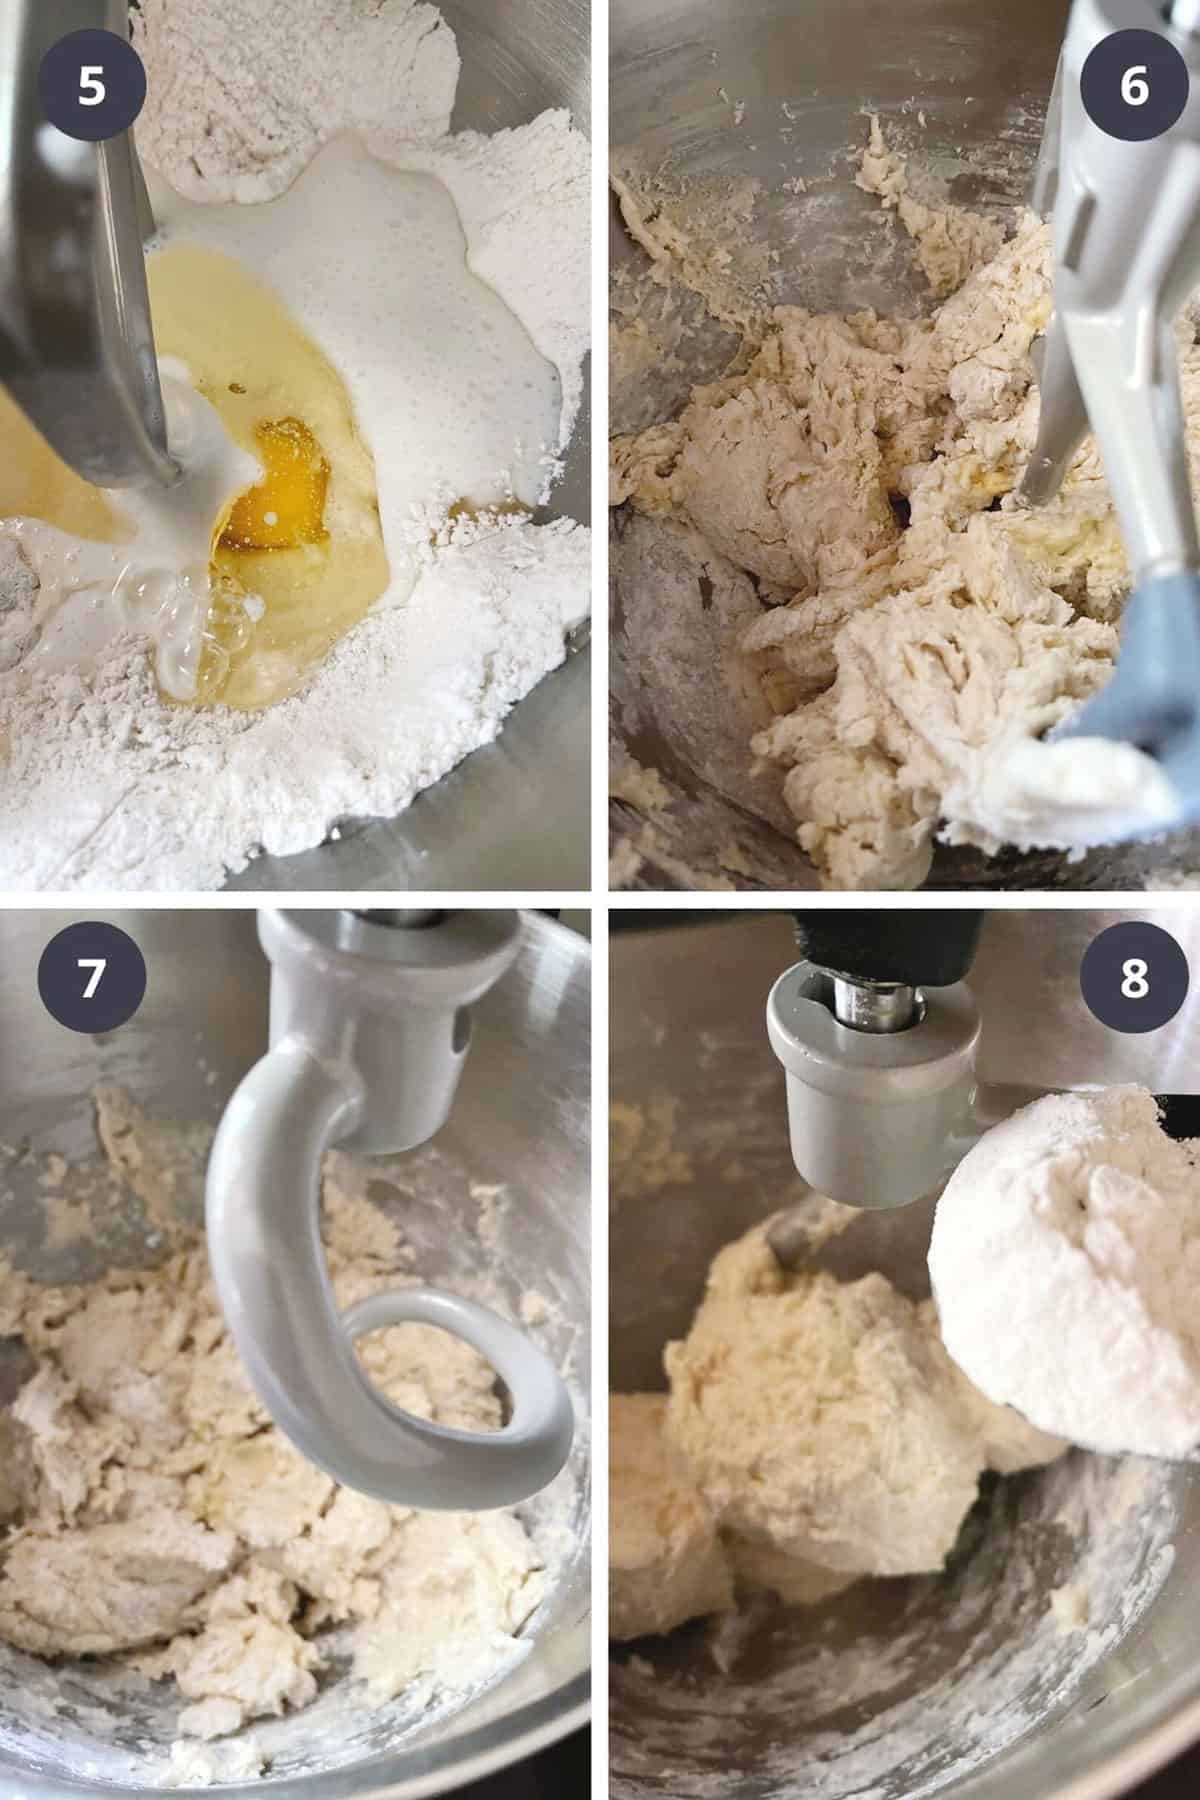
- Add the egg.
- Use the paddle attachment to mix until moistened, then allow the dough to rest in the bowl for about 20 minutes.
- Switch to the kneading hook.
- Knead in the remaining flour.
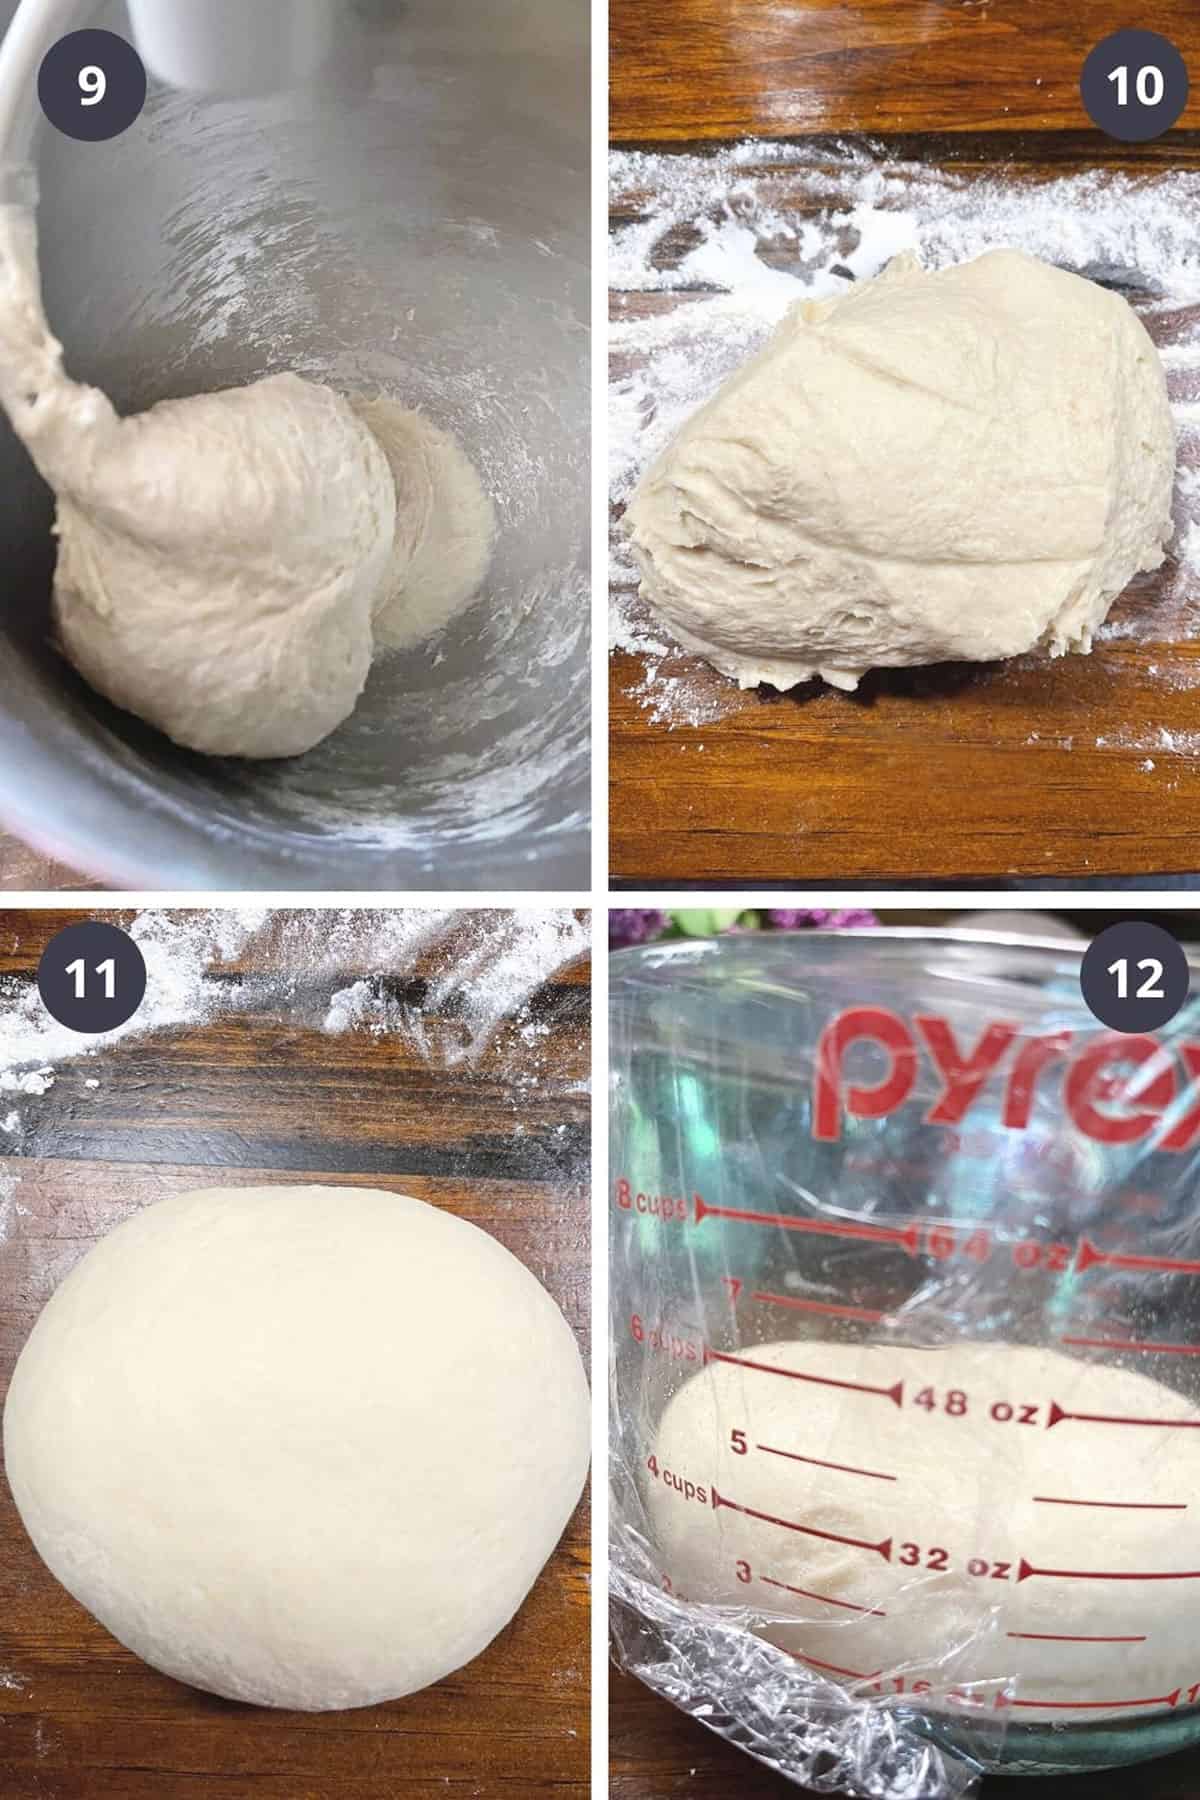
- Knead for about 5-6 minutes, or until you have a slightly sticky dough that wraps the kneading hook.
- Remove dough to a floured work surface and knead, adding more flour as needed if it is sticking to your hands or the work surface.
- Form dough into a ball.
- Place into a greased bowl or measuring cup, cover and let rise until doubled.
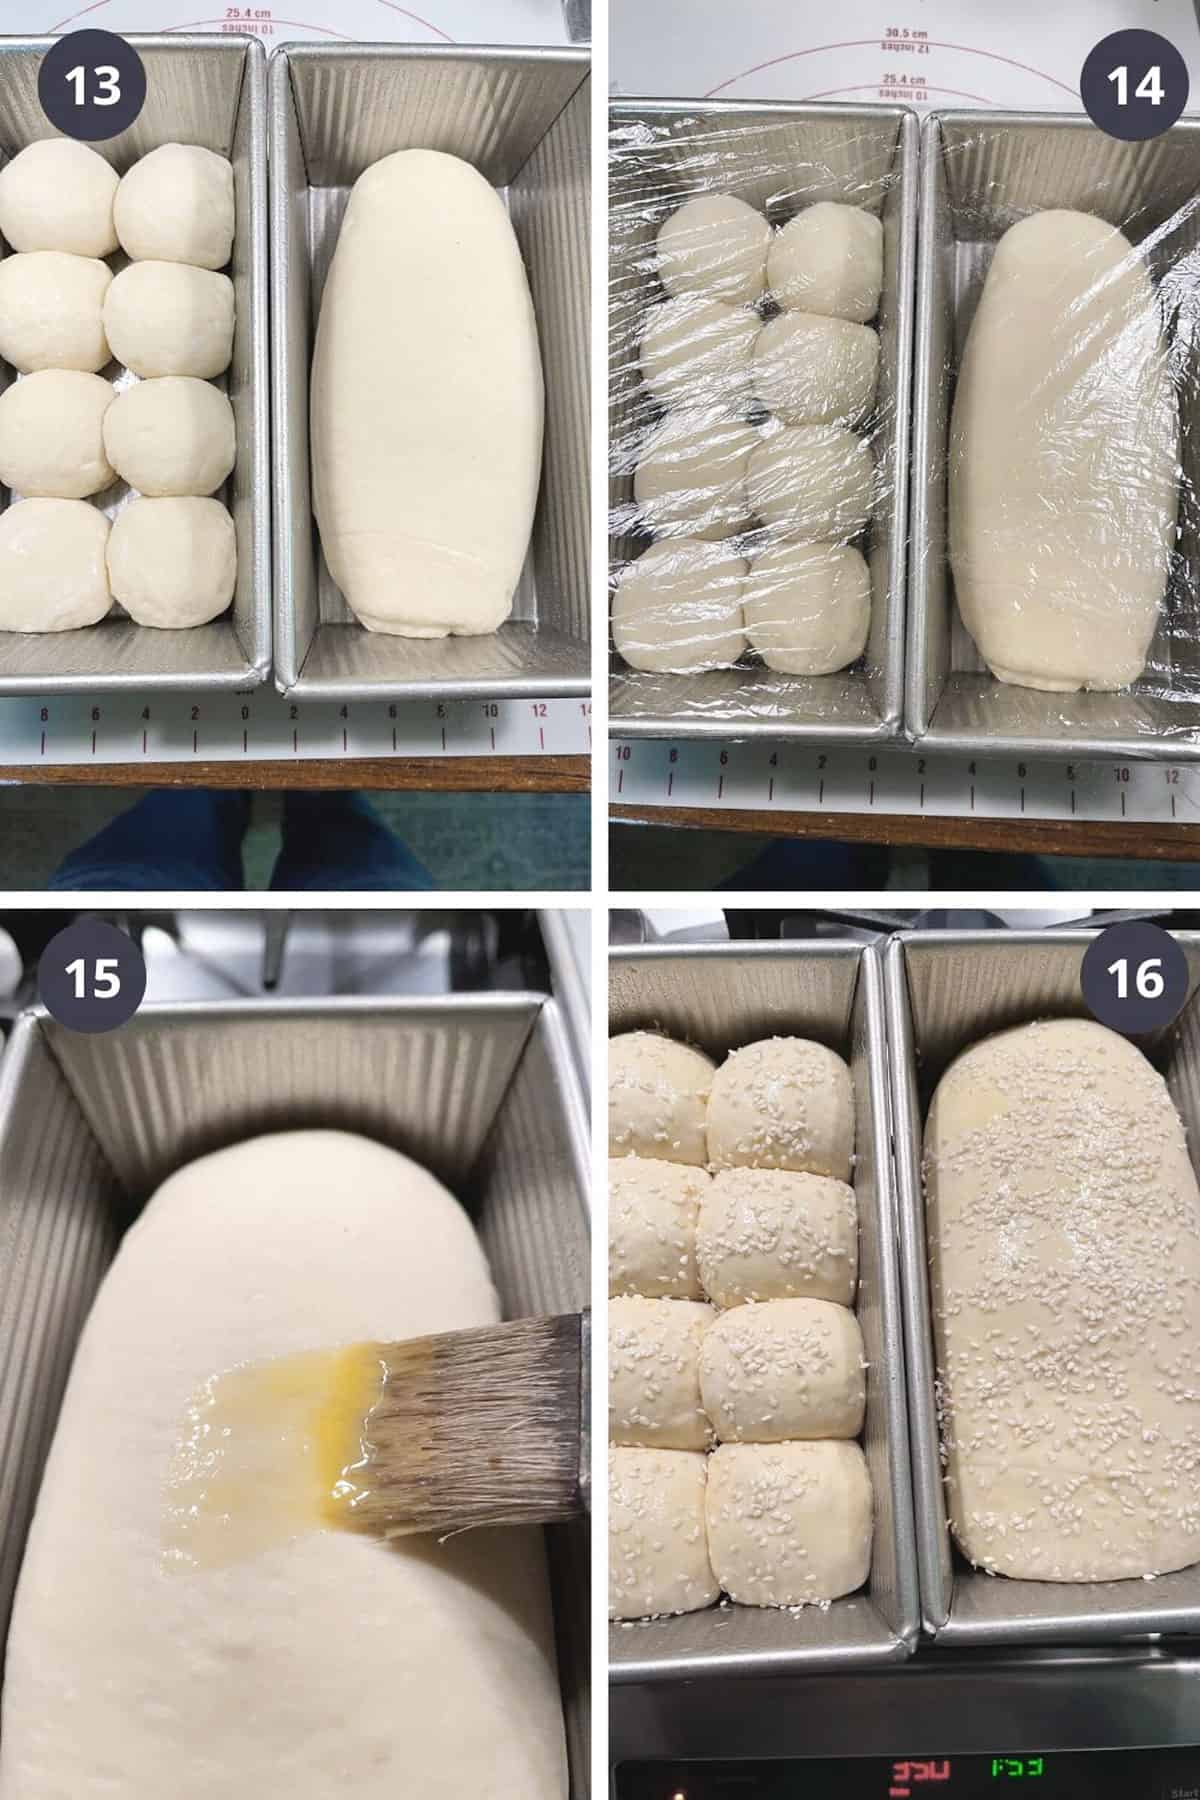
- Form bread into loaves, roll loaves or one of each.
- Cover and let rise until doubled.
- Before baking brush with egg wash.
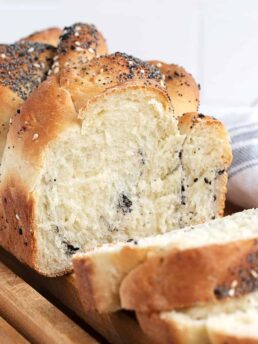
- Sprinkle with sesame or poppy seeds, if you like.
Recipe Tips
- Be sure to take your buttermilk out of the fridge well ahead, so it can come to room temperature. I don’t recommend heating buttermilk, as it curdles too easily.
- Rapid or Quick Rising yeast is not recommended, as it is a yeast that is specially formulated to create bread more quickly. When using quick-rise yeast, it is recommended to replace the first rise with a short 10-minute rest. As such, if you follow this recipe with a classic, two-rise period, you will probably find your quick-rise yeast will poop out before the loaf gets in the oven. And while you can just do the short 10-minute rise, you will find your resulting loaf will not have the texture and flavour of a classic two-rise loaf.
- This recipe will make two smaller loaves. You can portion the dough 50/50 or maybe 60/40, using the 60% to make a little large loaf and then a smaller roll loaf. For free-form rolls, divide the dough into 8, 10 or 12 pieces, depending on how large a roll you want. You could also bake the 8 rolls in a small cast-iron skillet or 8-inch round cake pan.
- I don’t have a bread maker, but I believe it should adapt well to a bread maker using the white bread setting.
Top Tip!
Buttermilk yeast dough can be notoriously slow rising, as the buttermilk is added at room temperature, so the lack of a warm liquid slows the rise. Pack your patience with this one and plan on up to 1 1/2 – 2 hours per rise (3-4 hours of total rising time). That said, rise times vary depending on the temperature of your kitchen and the time of year, so trust what you see in terms of doubling and not the clock.
Want to save this recipe?
Enter your email and I’ll send it to your inbox. Plus, you’ll get great new recipes from me every week!
By submitting this form, you consent to receive emails from Seasons and Suppers.
You can unsubscribe at any time.
Get the Recipe: Buttermilk Bread (or Rolls)
Ingredients
- 4 cups (520 g) unbleached bread flour, *see Note 1 below for all purpose flour usage guidance
- 2 teaspoons Instant yeast, *see Note 2 below for Active Dry Yeast usage guidance
- 3 Tablespoons white granulated sugar
- 1 1/2 teaspoons fine salt
- 1 1/2 cups (375 ml) buttermilk, at room temperature
- 1/4 cup (60 ml) vegetable oil, or melted and cooled butter
- 1 large egg
For brushing before baking:
- 1 large egg
- 1 teaspoon water
For topping before baking:
- Sesame or poppy seeds or a dusting of flour, optional
Instructions
- Take the buttermilk out of the fridge well ahead and set on the counter to come to room temperature before you begin the baking temperature. Cold buttermilk will greatly extend the rising time. It is not recommended to try to warm buttermilk, as it curdles very easily.
- In a large bowl or the bowl of a stand mixer fitted with the paddle attachment, add about 3 cups (400g) of the flour, yeast, sugar and salt. Mix together with a spoon or the mixer paddle. Add the room temperature buttermilk, oil (or melted and cooled butter) and egg. Using a spoon or the paddle attachment, mix on low speed until well combined and all the flour is moistened. Remove the paddle attachment and cover the bowl with a clean tea towel. Let stand 20 minutes in the bowl.
- Switch to the kneading hook and gradually add the remaining 1 cup (100g) flour and knead in for about 5 minutes, until you have a sticky dough that wraps around the kneading hook, but doesn't clean the bowl or the bottom of the bowl. Remove the dough to a floured work surface and knead for several minutes, adding a small bit of additional flour only if needed to prevent the dough sticking to your hands or the work surface. Form dough into a bowl.
- Place dough ball into a greased bowl or measuring cup. Cover with plastic wrap and let rise until doubled, anywhere from 1-2 hours (or a bit longer if the buttermilk was still a bit cold when you started). Be patient. Allow it to rise until just doubled, however long that takes.
- Remove dough to a lightly floured work surface.
- For two loaves: Divide the dough evenly into two equal pieces (I like to weigh the dough, then calculate half and weigh out two exact weight pieces). Grease two 8×4-inch metal loaf pans. Take one of the dough pieces and press into an oval shape, roughly 9-inches long and about 4 inches wide. Pull the long sides of the oval towards the centre and pinch together well. Flip over so the smooth side is up and place into a prepared loaf pan. Repeat with the other piece of dough.
- For a one loaf and one loaf of rolls: Divide dough in half (as above) or alternatively, you can divide 60/40, using the large portion for a loaf and the smaller portion for the loaf of rolls. For the loaf, shape as detailed above for two loaves and place into a greased 8×4-inch metal loaf pan.
- For the rolls, divide the dough piece into 8 equal pieces (I like to weigh the dough and divide by 8 and then weigh out the 8 equal pieces). Take one of the 8 dough pieces and form into a ball by stretch the dough piece out until smooth, then flipping it over and pinching up the sides and pinching together. Flip over and place into an 8×4-inch loaf pan. Repeat with the remaining dough pieces, arranging them in the loaf pan in 4 rows of 2, as shown in the step by step photos above.
- For two roll loaves: Divide into 16 equal pieces and arrange between two 8×4-inch loaf pans, with 8 in each pan in 4 rows of two.
- For free-form rolls: Rather than place into a loaf pan, arrange the dough balls several inches apart on a parchment-lined baking sheet.
- For all, cover with plastic wrap or a clean tea towel and allow to rise until just shy of doubled in size. *This can take as little as 20-30 minutes for free-form rolls or 1-2 hours for loaves or roll loaves. Be patient and let it rise as long as it needs to almost double in size.
- Preheat oven to 400F (regular bake/not fan-assisted).
- Brush the tops of the loaves or rolls with the egg mixed with water and if desired, sprinkle with sesame or poppy seeds. Alternatively, you can leave plain (no egg wash) and dust with a bit of flour.
- When ready to bake, REDUCE THE OVEN TEMPERATURE TO 350F (or 375F for free-form rolls) and place the loaves in the oven. Bake about 35-40 minutes for loaves (or 15-20 minutes for free-form rolls), rotating the pans front to back halfway through baking. Bake until the loaves are deep golden and reach about 205F internal temperature.
- Remove from oven and immediately remove from pans and place onto a wire cooling rack to cool completely.
- Bread and rolls freeze beautifully up to 3 months!
Notes
More bread recipes to love!

Hi! I’m Jennifer, a home cook schooled by trial and error and almost 40 years of getting dinner on the table! I love to share my favourite recipes, both old and new, together with lots of tips and tricks to hopefully help make your home cooking enjoyable, stress-free, rewarding and of course, delicious!
This was delicious!! I WILL be making it again. And nowhere near as complicated as it sounded.
So glad to hear Olga :) Thanks so much!
I made this using my 2 lb. capacity bread maker. I gently warmed the buttermilk and added the active dried yeast I had on hand and let that sit for 10 minutes. Added the yeast mixture to the bread pan first and the remaining liquid ingredients ,followed by the dry ones and it came out perfectly.
I’m so glad it worked out so well, Sandy! Thanks so much :)
Absolutely delicious! This bread was so so good. I did a mix of rolls and loaf. Was easy and worth every step and proofing time. We had with butter last night along with stew. I went to bed dreaming of a simple toast with breakfast but my partner made the brilliant call this morning of making grilled cheese today with it – cannot wait to try. Will definitely be making this again! Thank you!
I’m so pleased you enjoyed it, Megan :) Thanks so much!
Made this buttermilk bread today – I swear it’s the most beautiful bread I’ve ever eaten 😍 Thank you for this recipe 🙂
I’d left it overnight in the fridge and it became lovely with little bubbles 🙂
I’m so pleased you enjoyed it, Anodita :) Thanks so much!
I made butter today and used the buttermilk for this recipe. Amazing rolls! Little pillows of heaven.
Sounds lovely, Katie! So glad you enjoyed it :)
This a lovely dough that results a fantastic bread. I’m going to try in my 9x 4 Pullman next time. How much dough by weight do you think I should put in that pan?
So glad you are enjoying this bread, Kim! For the Pullman with this particular bread, I think somewhere in the 750-800g range dough weight range would be good.
I accidentally made my roll balls too big & got distracted with work so I made Hamburger buns but my goodness were they good! This is my new go to recipe!
I love happy accidents! So glad you enjoyed them, Delaney. Thanks so much :)
I keep returning to this recipe because I like using buttermilk and my rolls come out the best with this recipe!
I so glad you are enjoying it, Diane :) Thanks!
Best bread recipe ever! I’ve tried a bunch of bread recipes and this one is by far the best. This bread does not get dense the next day like the others I’ve tried. Thank you so much for making my guys very happy!
So glad you enjoyed it, Pam :) Thanks so much!
Could I use a 13x4x4 Pullman pan for this
Hi Pam, you could, but the total dough amount might be a little too much, even for the large Pullman. That said, you could weigh it and use what you need and makes some rolls or something with the extra.
I like to use my bread maker to make dough. Would it work for this recipe?
Can this be mixed by hand? I don’t have a stand mixer and don’t want to buy one . The recipe sounds delicious.
Hi Kim and yes, this one can definitely be mixed by hand as it’s not a sticky dough. Simply work in flour by hand as you knead, until you have a moist, smooth dough and then proceed with the recipe. Enjoy!