

My Dad’s recipe for traditional British-style Christmas shortbread cookies. Make them early to allow them to age for the best flavour!
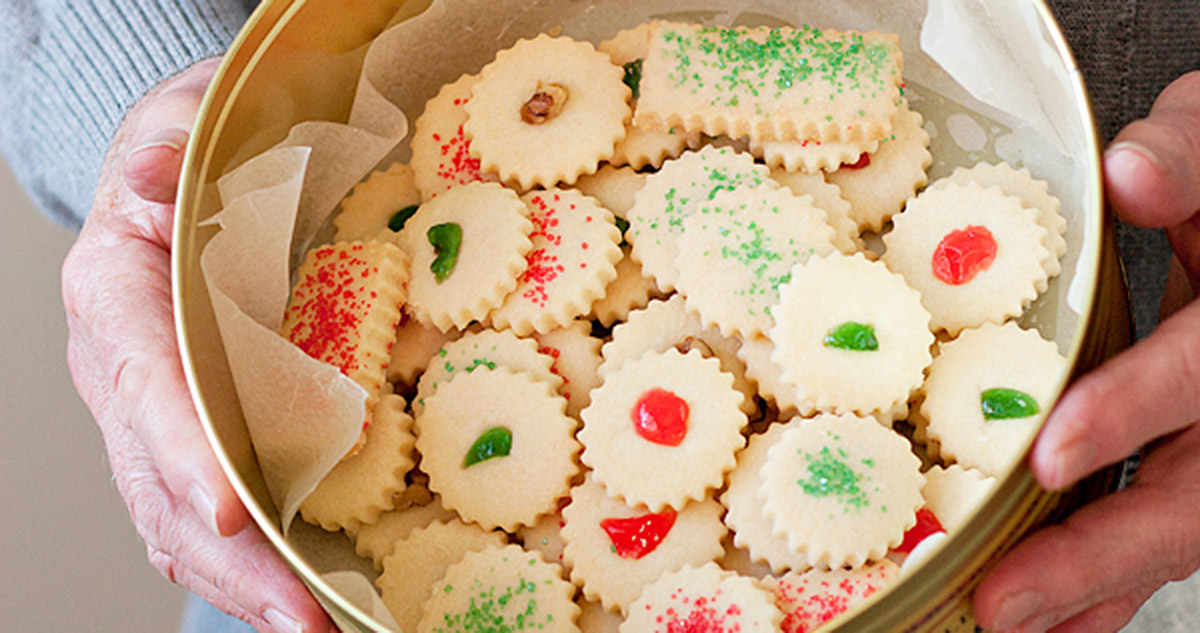
Today I’m sharing my Dad’s Christmas Shortbread Cookies recipe, which he makes every year in early December, then tucks away for holiday treats throughout the season.
For many years, my now 80-year-old Dad has taken care of baking the Christmas shortbread. He bakes them up in early December and lets them age for a few weeks until Christmas. This year, I asked if I could come by and document the annual shortbread cookie making and post about it here. He looked slightly terrified, so I promised to only photograph his hands :)
My Dad didn’t retire until he was 76, so he didn’t have a lot of time for cooking over the years. Since retiring, though, he’s turned into quite the baker. I clearly inherited both my sweet tooth and my baking ways from him.
In memory of my Dad
May 7, 1933 – December 6, 2025
How to make Christmas shortbread cookies: step-by-step
This is a visual summary of the steps to make this recipe. Scroll down to the Recipe Card below for the complete list of ingredients and instructions.
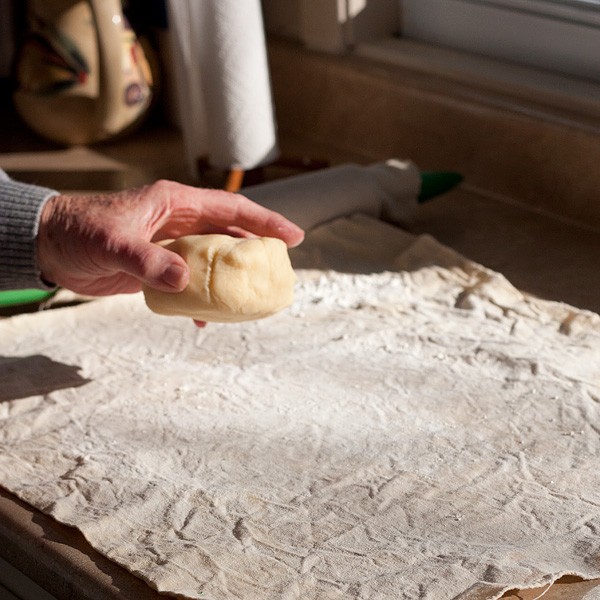
Step 1: Mix together the dough and chill in the fridge for 30 minutes. Place the dough onto a lightly floured work surface.

Step 2: Roll the dough out with a rolling pin to an even 1/4-inch thickness.
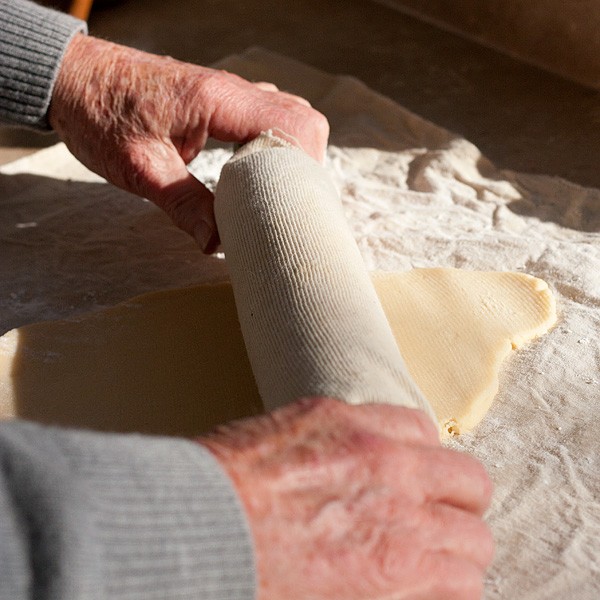
Step 3: Be sure the dough is as even as possible, so the cookies will bake evenly.

Step 4: Use a cookie cutter to cut cookies out the rolled dough.
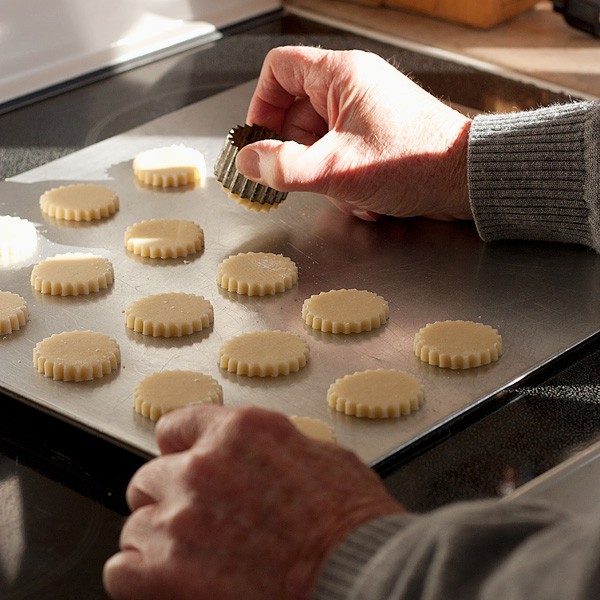
Step 5: Place the cut cookies onto a baking sheet, about 1-inch apart.

Step 6: Decorate the cookies with pieces or red and green glacé cherries.
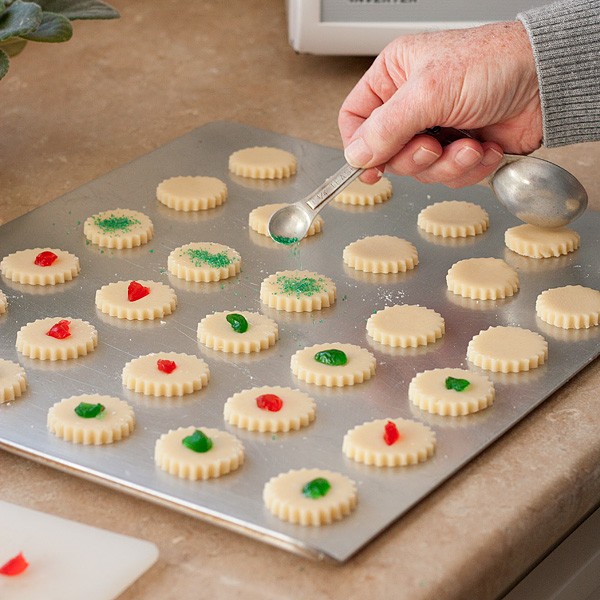
Step 7: Decorate with red and green coloured coarse sugar.

Step 8: Place the tray of decorated shortbread cookies into the freezer to chill before baking.
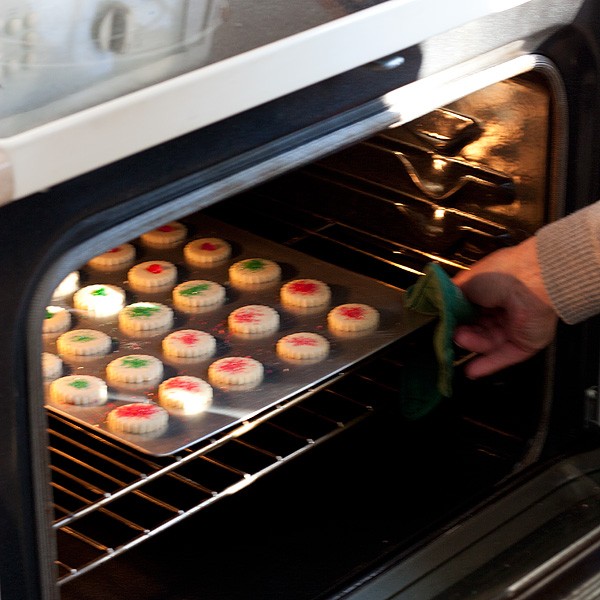
Step 9: Bake the chilled cookies.

Step 10: Remove the baked cookies to a cooling rack to cool completely. Transfer to a cookie tin and allow the cookies to age in the tin for at least 1 week or up to 4 weeks.
Recipe tips!
- My Mom swears by this cloth-covered rolling pin and cloth rolling sheet. It allows you to use only a little flour for rolling out the dough. The less flour for rolling, the better for these cookies, as you can re-roll your scraps and cut more without introducing more flour into the dough.
- My Dad gets the dough out of the cutter by hitting the side of his hand on the pan until the dough drops out of the cutter and onto the baking sheet. This ensures that the cut shape stays perfect.
- Traditional toppings for Christmas shortbread are glacé cherries, in red and green (cut into quarters) or red or green sugar sprinkles. They make for a festive plate of cookies. You can also use a walnut piece or blanched slivered almonds. Once the cookies are cut and topped with cherries or sprinkles, they are put into the freezer on the cookie sheet for 10-15 minutes to chill again before baking. This helps them hold their shape well.
Top tip!
This type of shortbread cookie needs to age to develop flavour! In fact, if you eat a cookie right after baking, you might just declare they taste simply of flour. Aging these cookies in a cookie tin for at least a week or up to 4 weeks will allow the beautiful flavour to emerge!
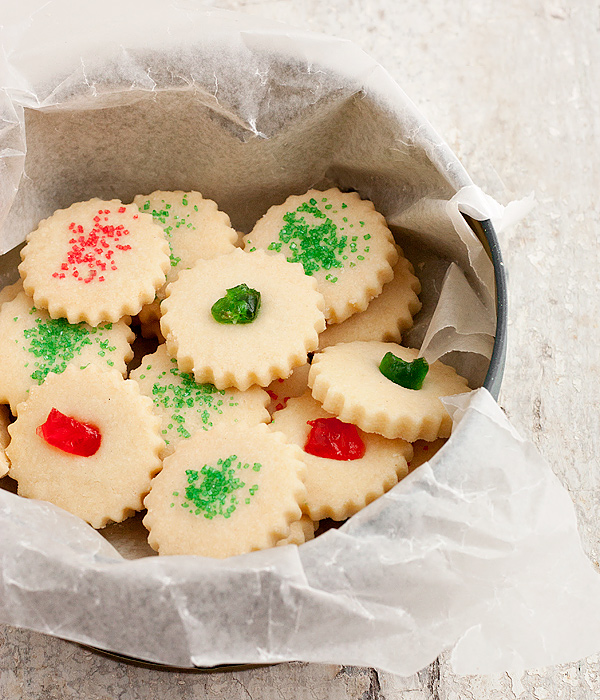
And here are his beautiful finished cookies. I can attest to the fact that they were delicious, since generous sampling was undertaken ;) Thanks, Dad, for sharing your cookie recipe and your kitchen!
Making ahead, storing and freezing
Making ahead is required for these cookies, as they need to age to develop flavour. At least a week is needed, though you will notice considerable improvement in flavour after 3 or 4 days. You can store the baked cookies up to 4 weeks in an airtight metal cookie tin.
Unbaked shortbread cookie dough can be chilled in the refrigerator for up to 3 days or frozen as shaped disks/logs for up to 3 months before baking. You can also freeze the cut but unbaked cookies to bake later for up to 1 month.
Store baked shortbread in an airtight metal tin rather than a plastic container to better maintain texture and flavour. Line the cookie tin with waxed or parchment paper. You can freeze the baked cookies in a cookie tin as well.
Baked shortbread cookies can be frozen for 3 to 6 months. Thaw them on the counter before serving.
Want to save this recipe?
Enter your email and I’ll send it to your inbox. Plus, you’ll get great new recipes from me every week!
By submitting this form, you consent to receive emails from Seasons and Suppers.
You can unsubscribe at any time.

Get the Recipe: Dad’s Christmas Shortbread Cookies
Ingredients
- 1 cup (226 g) butter, At room temperature. You can use salted or unsalted butter. If using unsalted butter, you can add 1/8 tsp. fine salt with the flour if you like, but you don't need to.
- 3 Tablespoons cornstarch
- 1/4 cup white granulated sugar
- 1 3/4 cups (220 g) all-purpose flour, spooned and levelled (important!)
Instructions
- In a large bowl or the bowl of a stand mixer with the paddle attachment, beat the 1 cup butter (At room temperature. You can use salted or unsalted butter. If using unsalted butter, you can add 1/8 tsp. fine salt with the flour if you like, but you don't need to.) until light, 2-3 minutes. Stir in the 3 Tablespoons cornstarch and 1/4 cup white granulated sugar. Gradually add the 1 3/4 cups all-purpose flour (spooned and levelled (important!)), mixing until a soft dough forms. (Dad mixes his by hand and shared that sometimes you have to ditch the spoon and just get your hands in there to form the dough). Form the dough into a ball and wrap tightly with plastic wrap. Refrigerate for about 30 minutes to chill.
- On a lightly floured surface, roll your dough 1/4-inch thick. Take care to ensure that your dough is rolled as evenly as possible, so that cookies will bake evenly. Using a cookie cutter, cut shapes and place them onto an ungreased baking sheet. You can re-roll your scraps and cut more, as well. Once your cookies are cut, top with quartered glacé cherries, coloured coarse sugar or nuts.
- Place the cookie sheet with cookies into the freezer for 10-15 minutes. (You can also freeze the cut dough in freezer bags once solid on the cookie sheet for up to 2 weeks and bake later or as needed.)
- Preheat the oven to 275°F (regular bake setting – adjust as needed for convection/fan-assisted baking) with the rack in the centre of the oven. Bake for about 30 minutes for cookies that have been lightly chilled. If cooking from frozen, they may take up to 45 minutes. Watch closely to avoid over-baking! Cookies should be firm but shouldn't brown at all, even around the edges. They really just dry as they bake.
- Allow the cookies to rest briefly on the cookie sheet, then transfer to cooling racks to cool completely. Once cooled, transfer the cookies to a wax- or parchment-paper-lined metal cookie tin. Allow the cookies to age in the cookie tin for at least 1 week or for up to 4 weeks. These cookies keep well and get better with age, so the longer they age, the better they'll be!
Notes
More Christmas cookie recipes to love!


Hi! I’m Jennifer, a home cook schooled by trial and error and almost 40 years of getting dinner on the table! I love to share my favourite recipes, both old and new, together with lots of tips and tricks to hopefully help make your home cooking enjoyable, stress-free, rewarding and of course, delicious!


I’m going to try these tonight! They look amazing! Just like my grandma used to make :)
Thanks for sharing!
Enjoy, Theresa! Just remember that shortbread like to “age” a bit, so if you can wait, put them in a tin for a week or so for best flavour.
these cookies look exacly like the ones my mom made at Christmas time. she is no longer with us,and I never got her recipe, so I am hoping these might just be them will let you know. also what is this cloth for the rolling pin called and where would.. I get one
Hi Teresa. I hope these cookies might be it! You can get the cloth at Amazon. Just search “rolling pin cover and cloth”. They are inexpensive, often less than $10.
Jennifer, what a beautiful memory you have created – it would be great to scrapbook. I’m just wondering about the cloth cover for the rolling pin and the one to roll on. What kind of cloth is it? Where do you get it? Shortbreads are my all time favorite cookies. As a matter of fact our dough is in the fridge chilling as we speak. I was looking for different ways to decorate them when I cam across your dad’s recipe. Thanks so much for sharing and thank him for letting us see the special hands of a dad. (Mine is in a nursing home and today he gave me alittle hand painted box he made with his hands.) <3
Thank you so much, Gail and what a wonderful gift from your Dad! As for the cloth covered rolling pin, that’s my Mom’s (and Dad’s too, I guess :) If you google, you’ll find lots of them. Here’s one on amazon.com – http://www.amazon.com/Regency-Pastry-Cloth-Rolling-Cover/dp/B000I1YFHK As I said in my post, my Mom swears by them and honestly, they looked to work pretty well.
Enjoy your shortbread and a very Merry Christmas to you and your family.
Question, I tried making these tonight, and the dough wouldn’t stay firm enough to roll. I put half back I’m the fridge, and the other half are in the oven now (I just made balls and flattened) Did I do something wrong?
Hi Amie. Hard to say. Could be too little flour (depends how you measure) or your butter was too soft. Try popping the rest of the dough in the freezer for a bit, then rolling out sprinkling well with flour.
I am going to try this recipe tonight. Your Dad is quite a tidy baker, thanks to both of you for the post!
Thanks Kelly and yes, I was impressed by how neat my Dad’s baking is. I clearly didn’t inherit that from him. I’m a totally messy baker :) Enjoy the cookies.
Deeeelicious! I’ve never made them before so I am quite happy, even if mine are much uglier than your Dad’s lovely cookies. I made buttercream frosting and now I don’t want to share! Thanks to you & your Dad!
This recipe reminds me of my grandmother and how she made them every year. I will be surprising everyone with these beauties this year and can ‘ t wait to see the reaction lol
Merry Christmas to you and your family and thanks for the post .
Thanks so much, Mark. Enjoy and Merry Christmas to you, as well!
It’s a cold and snowy day here…making these this afternoon with my lil girl!
What a great way to spend a snowy afternoon. Enjoy the cookies and your special time making them :)
What a warm post…the cookies look amazing :) ela
Thanks so much, Ela. They were delicious!
Such a special post to see one of your family’s traditions! Your dad is an excellent baker and has skilled hands. The cookies are just gorgeous! I’m sure I could not make them as pretty as his. My mother always had a cloth cover for her rolling pin, too, and the cloth surface for rolling out cookies or pie crusts. I liked the gentle texture it left on tops of cookies at Christmastime. Thanks for sharing!
Thanks Sophie. My Dad turned out to be a natural. I don’t think I would do as well baking while someone hovered with a camera documenting my every move. It was fun to capture and share it. They are yummy little cookies :)
hi, quick question, can I use cornflour instead of corn starch? Are they the same?
Hi. Yes cornstarch and corn flour are the same.
his cookies look absolutely perfect!
Thanks so much, Yelle.
These cookies look yummy! I love the idea of a post with your daddy as the chef, so cute & cool! I hope I get my daddy to pose for me once, first I must teach him how to cook ;)!!
Thanks Tesei. You could do a teaching dad to cook post :)
Great idea!!!!
Awww, I love this post! And such a great recipe for the holidays!
Thanks, Chung-Ah (and for sampling before the holidays ;)
Beautiful shortbread and so festive for the holidays! P.S. I was at my grandma’s for Thanksgiving last week, and she swears by the cloth covered rolling pin and rolling sheet too. Maybe she is on to something! :)
Thanks Laura. Yes, I’m thinking I should look for one of those cloth covered pins!
What beautiful cookies! Wish I could have one right now.
Thanks Melanie. Would be great to be able to share virtually :)