A delicious Jalapeño Popper Cheese Bread, with all the flavours of jalapeño poppers … in bread form!
I love jalapeño poppers. Anytime I am anywhere where they are served, I will order them up. Truth is though, I’m not likely to undertake filling, breading and deep frying a jalapeño at home any time soon. I’m guessing they’re fiddly little things to make.
That said, I’m definitely not the least bit averse to stuffing my bread with cream cheese, jalapeño and cheddar though. Not one little bit :) It was meant to be that jalapeño poppers and cheese bread should come together in my kitchen at some point in time.
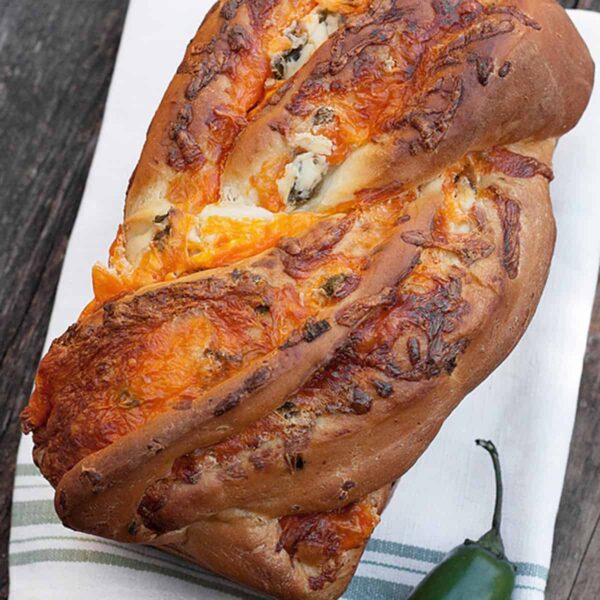
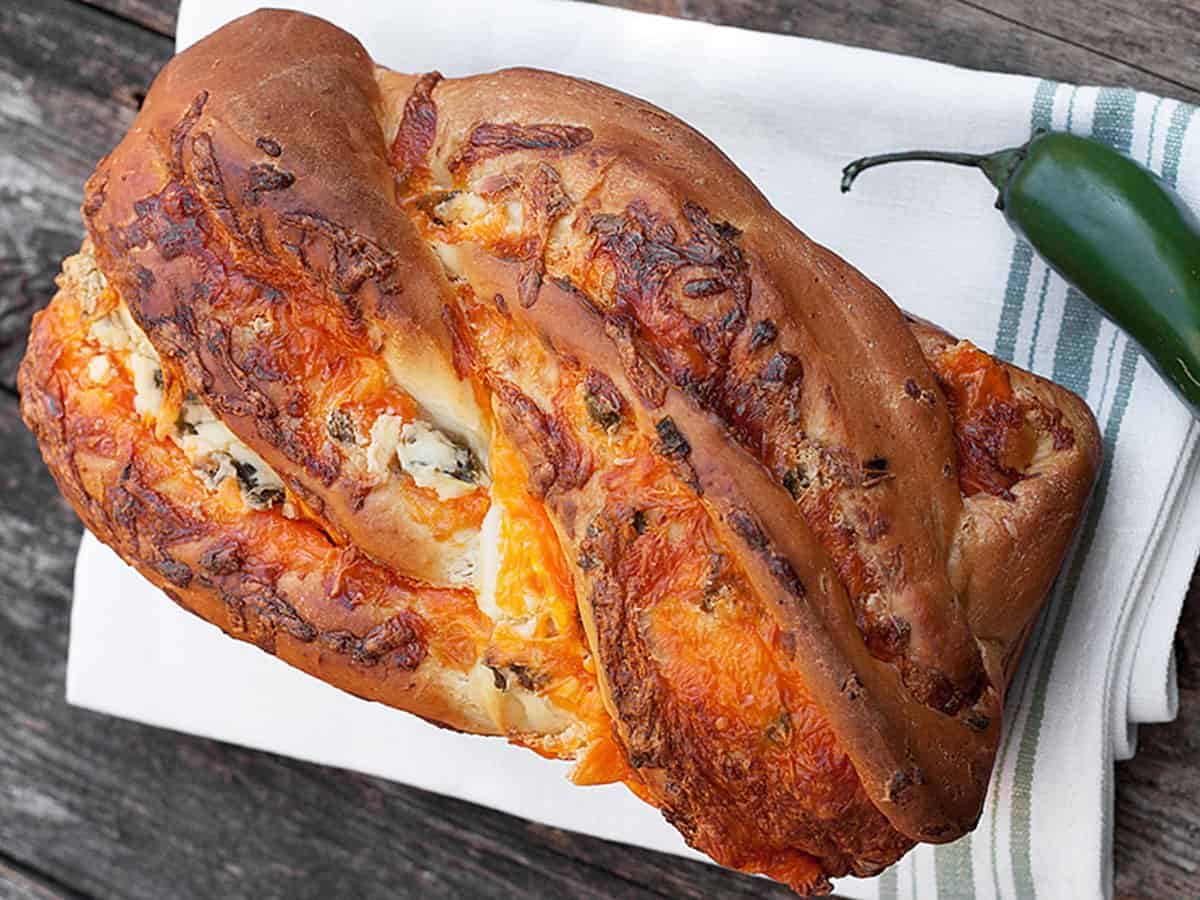
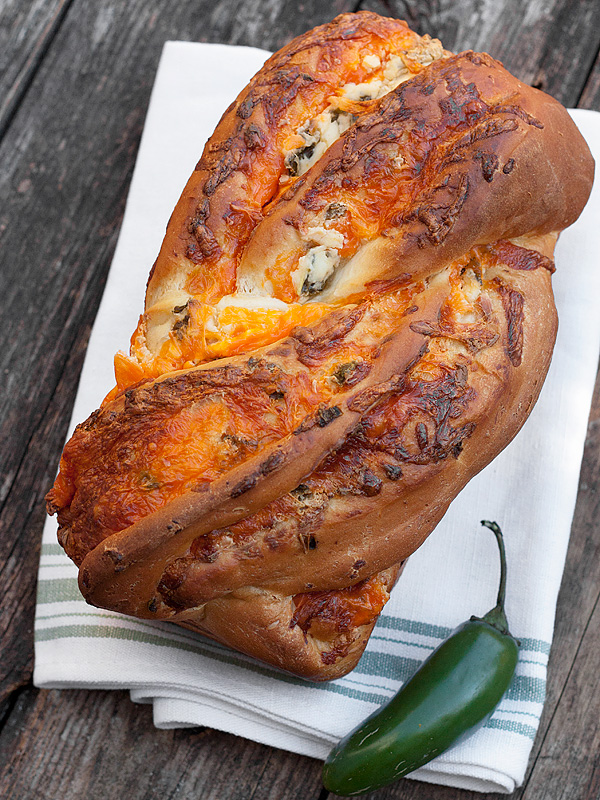
The finished bread has great creamy veins of spicy cream cheese and cheddar flowing through it and peeking out of the top. It is a jalapeño popper … in bread form.
So what we have here is my favourite soft cheese bread recipe, filled with cream cheese that’s mixed with diced, roasted jalapeños and cheddar cheese. Roasting the jalapeños is key. Raw jalapeños have surprisingly little flavour once mixed with other ingredients. And besides, to truly capture the flavour of jalapeño poppers (that are fried), you need to cook the jalapeños, right?
Ingredients and Substitutions
Bread Flour – while bread flour is recommended for the best texture, you can use all purpose flour if you don’t have bread flour on hand. You may need to use slightly more all purpose flour to bring the dough together.
Instant Yeast – I love to use Instant yeast, specifically SAF Instant Yeast. If you only have Active Dry yeast on hand, you can adapt the recipe to work with Active Dry yeast. See the Recipe Card for how to.
Jalapeños – start with fresh jalapeños.
Recipe Tips
- This bread is great out of hand, with butter, toasted, as a sandwich bread or try it for a killer grilled cheese (because more cheese is always good!). This bread is a great side for chili or soup dinners, too.
- Sometimes I will pan sauté the diced jalapeño, then let cool before adding to bread. It makes a nice roasted jalapeño flavour.
- The twisting shape of the bread ensures that the loaf bakes up without holes or gaps and with the filling evenly distributed throughout the loaf. Despite the shaping, it bakes up in to a solid and very sliceable loaf. If you roll this one up jelly-roll style, you will probably find large holes/gaps where the filling meets the dough. It will still be delicious, but less sliceable.
Want to save this recipe?
Enter your email and I'll send it to your inbox. Plus, you'll get great new recipes from me every week!
By submitting this form, you consent to receive emails from Seasons and Suppers.
You can unsubscribe at any time.

Get the Recipe: Jalapeño Popper Cheese Bread
Ingredients
- 6 1/2 cups unbleached bread flour, (can use all purpose if that’s all you have)
- 2 teaspoons fine salt
- 5 Tablespoons white granulated sugar
- 1 cup lukewarm water, about 95 F.
- 1 cup + 2 Tablespoons milk or buttermilk, lukewarm
- 1 1/2 Tablespoons Active Dry or Instant yeast
- 1/4 cup melted butter, or vegetable oil
Filling:
- 8 oz cream cheese, at room temperature
- 5-6 large jalapeño peppers, halved, cored and seeded
- 1 1/2 cups cheddar cheese, shredded
Instructions
- Preheat oven broiler. Place halved jalapenos, skin side up into oven, about 6 inches below the broiler and broil until the skins of the jalapenos are blistered and blackened in spots, about 10 minutes. Remove from oven and place into a paper or plastic bag and place in the refrigerator for about 15 minutes. Remove and carefully peel away the skins with the edge of a knife. Discard skins and dice jalapenos. Set aside.
- In a mixing bowl or the bowl of a stand mixer fitted with the kneading hook, combine 5 cups of the flour, the salt and sugar together.
- In a large measuring cup or bowl, combine the water and buttermilk and whisk in the yeast until dissolved. Add this mixture, along with the melted butter, to the dry ingredients. Mix by hand or with a dough hook, until the mixture is combined, about 2 minutes. Let the dough rest for 5 minutes.
- Continue mixing the dough, adding more flour in 1/4 cup increments, as needed, until the dough becomes soft, smooth and tacky, but not sticky. The dough should wrap the kneading hook and clean the bowl.
- Transfer the dough to a lightly floured surface and knead for a couple of minutes, then form dough into a ball. Place the dough in a lightly oiled bowl, cover with plastic wrap and allow to sit at room temperature until doubled in size (about 60-90 minutes). (*Tip: I like to use an 8-cup glass measuring cup, so it’s easy to see when it’s doubled by the markings).
- Grease two 8-inch by 4-inch loaf pans and set aside. In a large bowl, stir the cream cheese until smooth and creamy (I like to pop into my stand mixer and stir with the paddle attachment). Fold in 1/3 cup of the diced jalapenos until evenly mixed through the cream cheese. Set aside.
- Divide the dough into 2 equal pieces. Dust each with a bit of flour and then, using a rolling pin, roll into a rectangle approximately 10 inches wide and 16 inches long.
- Spread 1/2 of the cream cheese/jalapeno mixture evenly over the dough (spreading out almost to the edges). Sprinkle with 1/2 of the remaining diced jalapeno, 1/2 of the shredded cheddar and lightly press the cheese down onto the cream cheese with the palm of your hand. Starting with the shortest side, roll the dough up jelly-roll style and pinch the seam together.
- Using a sharp knife, cut the roll of dough down the centre, lengthwise. Rotate each piece so that the cut sides are facing upward and place them side-by-side. Pinch together the farthest end. Keeping the cuts sides facing upwards as much as possible, place the right-side piece over the left-side piece. Straighen it up and then repeat, pinching together the end closest to you. If any cheese escapes, just place it back on top. Using a bench scraper or spatula, carefully lift the dough into the greased loaf pan. Repeat with the other dough log, then cover both with a greased piece of plastic wrap and allow to rise until the dough rises to about 1-inch above the side of the pans in the middle.
- Preheat oven to 350°F (regular bake setting/not fan assisted) Bake for 45-50 minutes total, but after 25 minutes of baking, rotate pans front-to-back in the oven and loosely cover with a piece of aluminum foil if necessary (if bread is already well-browned), to prevent the top from over-browning. Bread should reach about 185° internal temperature in the centre.
- Remove the bread from the oven and allow to cool in the pans for a couple of minutes. Run a sharp knife around the edge of the bread and carefully remove the loaves to a cooling rack. Allow to cool for 1 hour before slicing.
Notes
More Jalapeño Bread Recipes to Love!


Hi! I’m Jennifer, a home cook schooled by trial and error and almost 40 years of getting dinner on the table! I love to share my favourite recipes, both old and new, together with lots of tips and tricks to hopefully help make your home cooking enjoyable, stress free, rewarding and of course, delicious!
Do you use a glass or metal baking pan? I’ve found it sometimes makes a difference so I want to ask since I have both!
Hi Sarah, I always use a metal pan to bake bread. I find bread just bakes better in metal.
Absolutely delicious!!! 👏 😍
I kept jalapeno seeds in the peppers as I wanted more heat. Great bread 🍞 and super soft. Careful it’s hard to stop eating! 😆
So glad you enjoyed it, Brooke! Thanks so much :)
This is a delicious recipe! I finished making this late last night. I woke to find 1/2 of a loaf gone. My daughter, who rarely eats bread, had eaten it. She lives jalapeño poppers and now loves this bread!! I have made several types of cheese bread with similar basic bread dough and though they said to use a 8×4 pan but I could never find one. Finally found them and used it for this recipe. It was nice to have more crusty top as it rose quite nicely over the edges. Thanks for such a tasty recipe!!
So glad to hear, Debbie :) Thanks so much!
Delicious! Have made more than once…my poppers have bacon, so I add some sprinkled bacon in as well! Forgot to twist last time, still looks fabulous!
You can never go wrong with bacon :) So glad you are enjoying it, Liz. Thanks so much!
I make this nearly every week for my dad, I have some too but he eats more bread than me in general but I LOVE this recipe. I skip the cream cheese and I use extra hot jalapenos that are in a jar so I skip the salt in the recipe since the jalapenos are pickled. Anyway 100% recommend this recepie it’s great for sandwiches!!!
So glad to hear, Ciara :) Thanks so much!
Hi, Jennifer. This looks delicious. Curiously, the instructions only use 1/3 of the jalapenos. Can you clarify when to add the remaining 2/3? I’m looking forward to making this tomorrow. Thanks!
Hi Gavin and sorry, it should be scatter over the cream cheese mixture and before the shredded cheese. I have updated the instructions to reflect that. Thanks for pointing that out!
Thanks for getting back to me so quickly! This recipe is absolutely delicious! I’m definitely making this again.
So glad to hear! Thanks :)
I’ve made this twice for baseball tailgate parties; it disappears in minutes! Is there a published version with weights instead of volume?
Hi Patricia, I just updated the recipe card with the metric measures. You’ll find the link to toggle between the two recipe versions in red at the very bottom of the recipe card.
Jennifer, thank you so much for your lightning-fast response; that is enormously helpful! The two times I’ve made this, I did one loaf as directed here and modeled the other after your herb/parmesan Soft Cheese Bread and filled it with pesto, a bit of chopped basil and parmesan…delicious. The first time both came out perfectly shaped; the second time they took on odd alien tentacled forms in the oven and had to be coaxed back into loaves for the last 20 minutes of baking. Amazingly, that worked. Maybe I didn’t roll or twist tightly enough? I have dough rising right now for two more loaves; we’ll see what happens :-)
I’ve had that happen before, Patricia! I make this bread so often, sometimes I think I’m not always paying as close attention to what I’m doing :) I love your pesto addition!