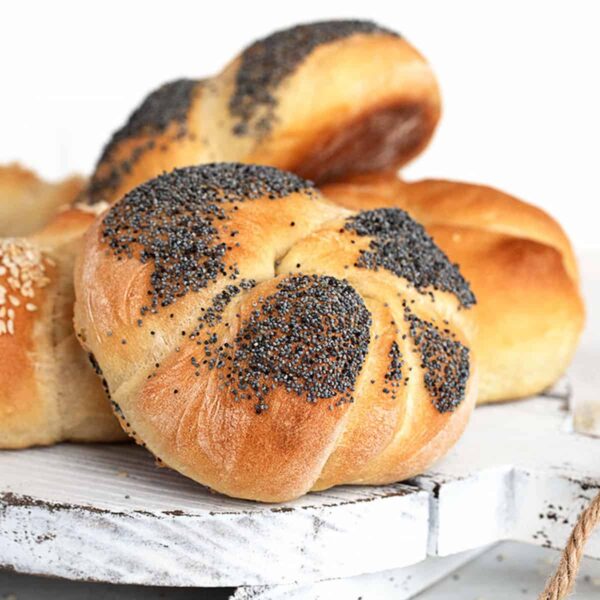
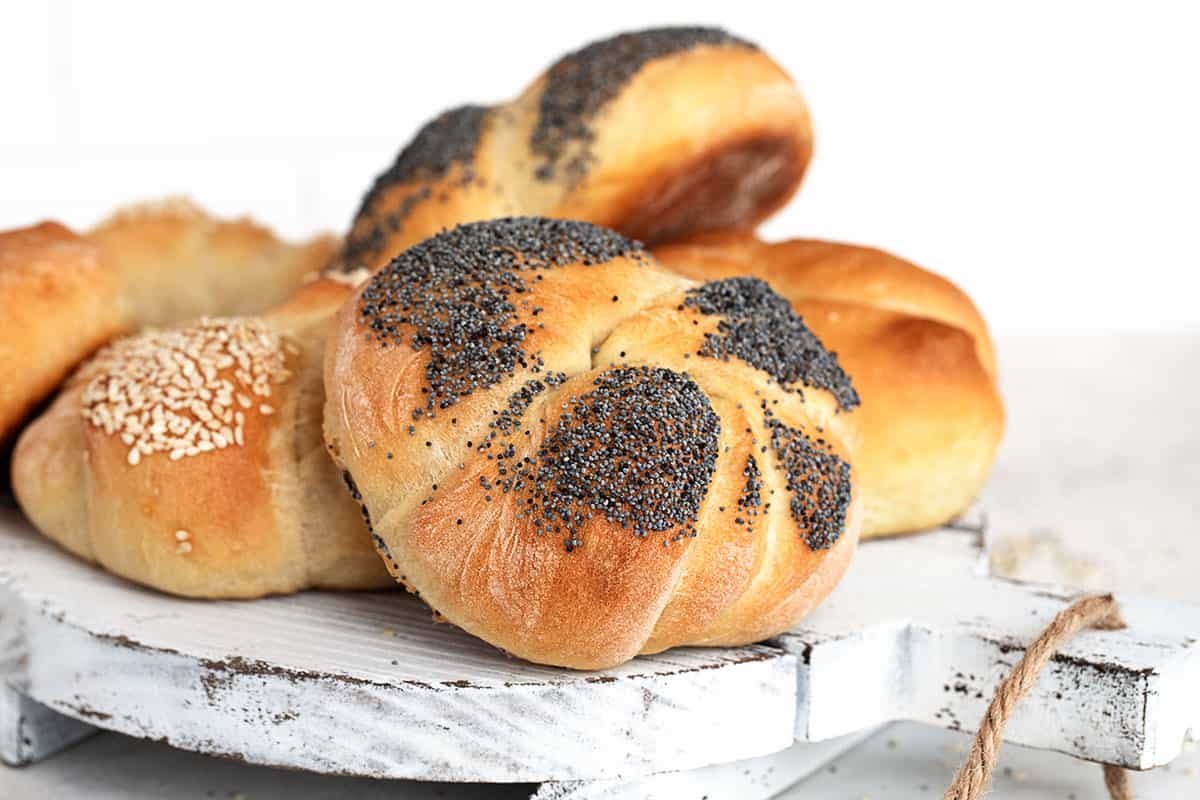
Learn how to make homemade Kaiser rolls, with this tried and true Kaiser roll recipe and step-by-step photos and video demonstration of how to shape Kaiser rolls, without a stamp!
I have had homemade Kaiser Rolls on my baking bucket list for a long time, but I was determined to do so without using a Kaiser roll stamp (not that there’s anything wrong with that, if you prefer. I just wanted the challenge of learning how to hand-shape Kaiser rolls).
This small batch recipe makes only 6 rolls, but you can certainly double, if you want more. As they don’t freeze well for a long period of time, I prefer to just make a smaller batch, more often.
I’ve also included photos and video direction on how to shape Kaiser rolls here. Don’t be intimidated though! Shaping Kaiser rolls is very easy. It just isn’t always easily understood through words :)
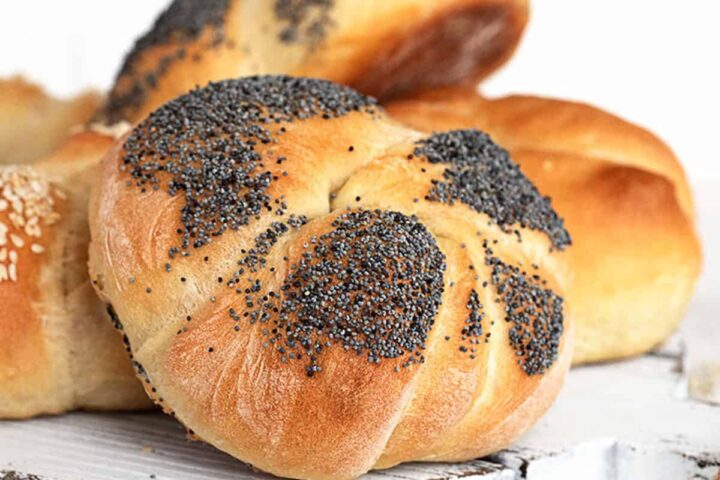
What makes it a “Kaiser” roll? Kaiser is German for “Emperor” and the shaping on the top is meant to somewhat resemble a crown.
Ingredients and Substitutions
Yeast – Regular Instant Yeast (such as SAF Brand) is recommended. Active Dry Yeast will work, though it will need to be proofed in water to activate it. See the Recipe Card for instructions on how to adapt the recipe for Active Dry Yeast. Quick or rapid-rise yeast has not been tested with this recipe, so is not recommended.
Bread Flour – bread flour is recommended for best results. If you only have all purpose flour, it will still work, though you may need to use a bit more flour and the resulting rolls with have a slightly different texture.
Step-by-Step Photos
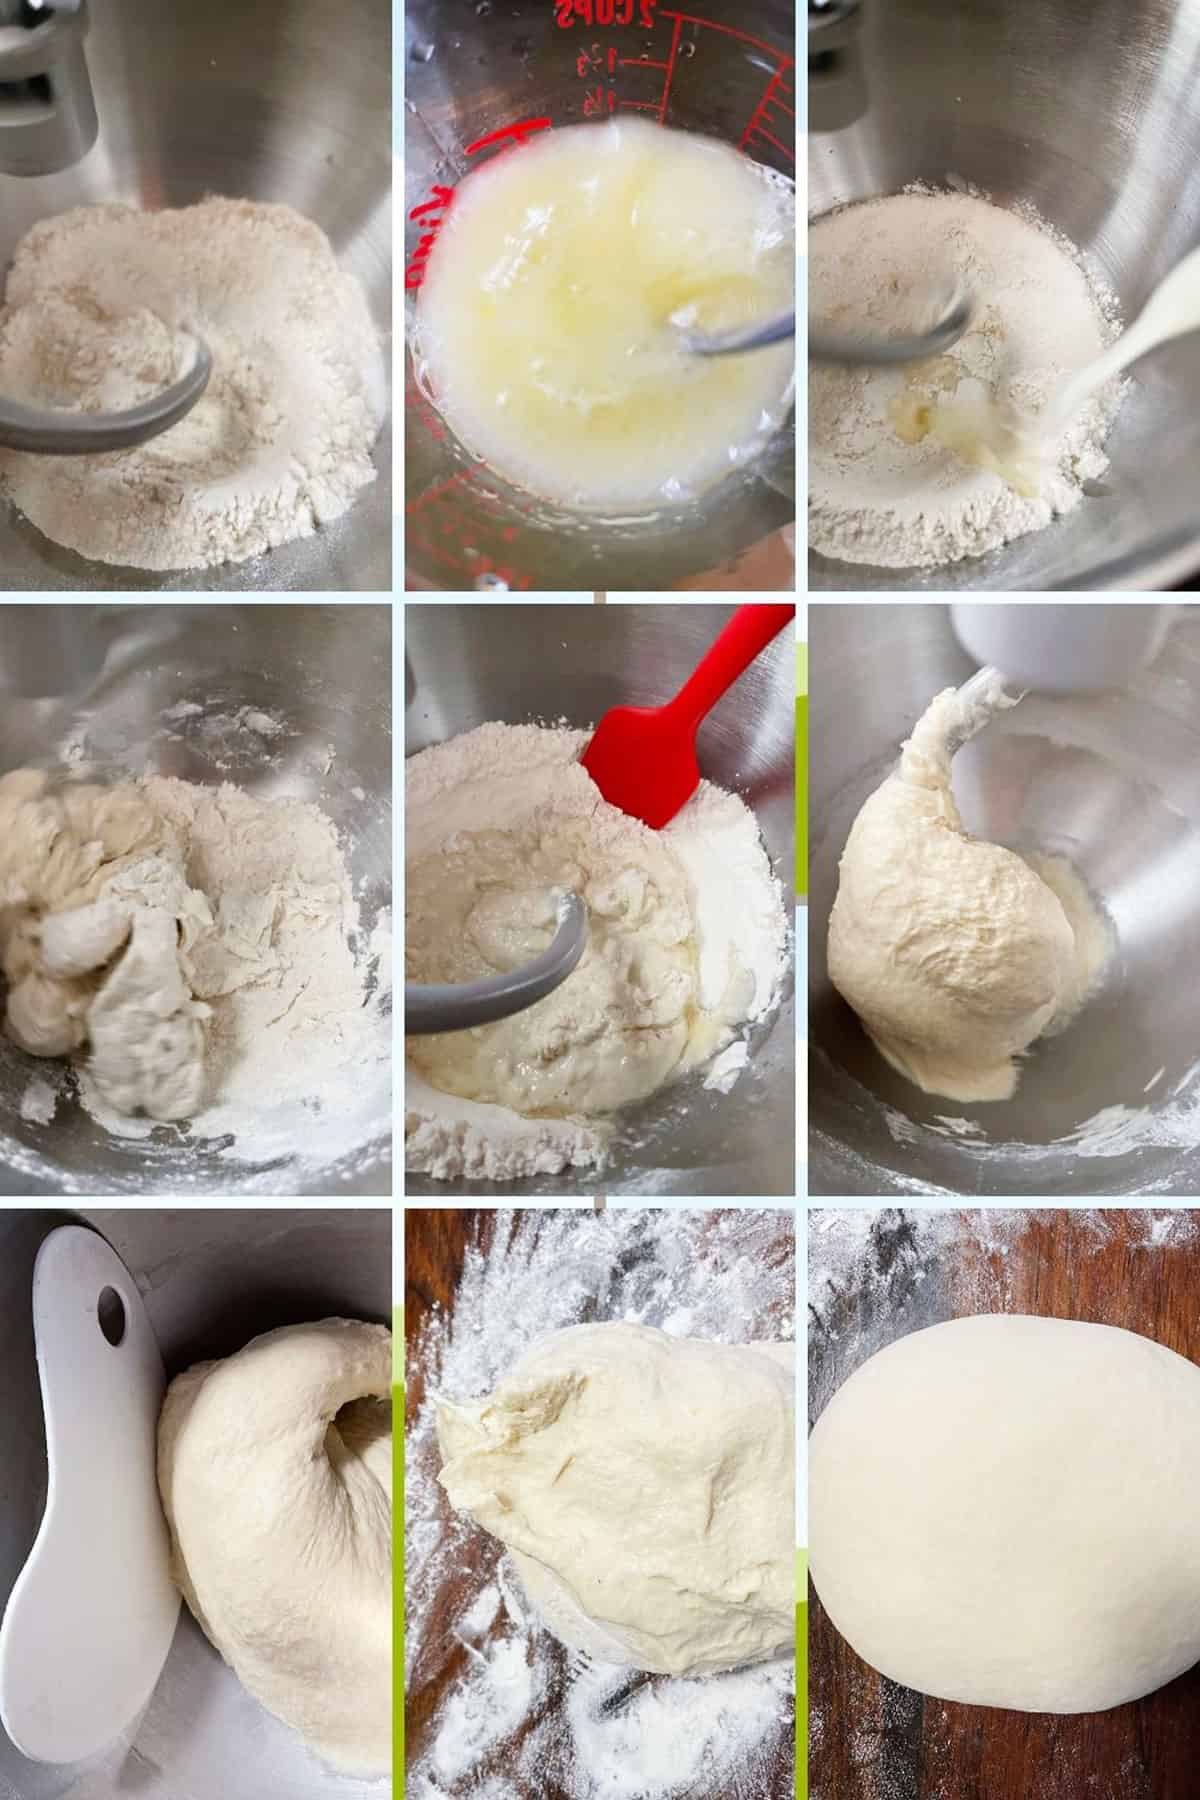
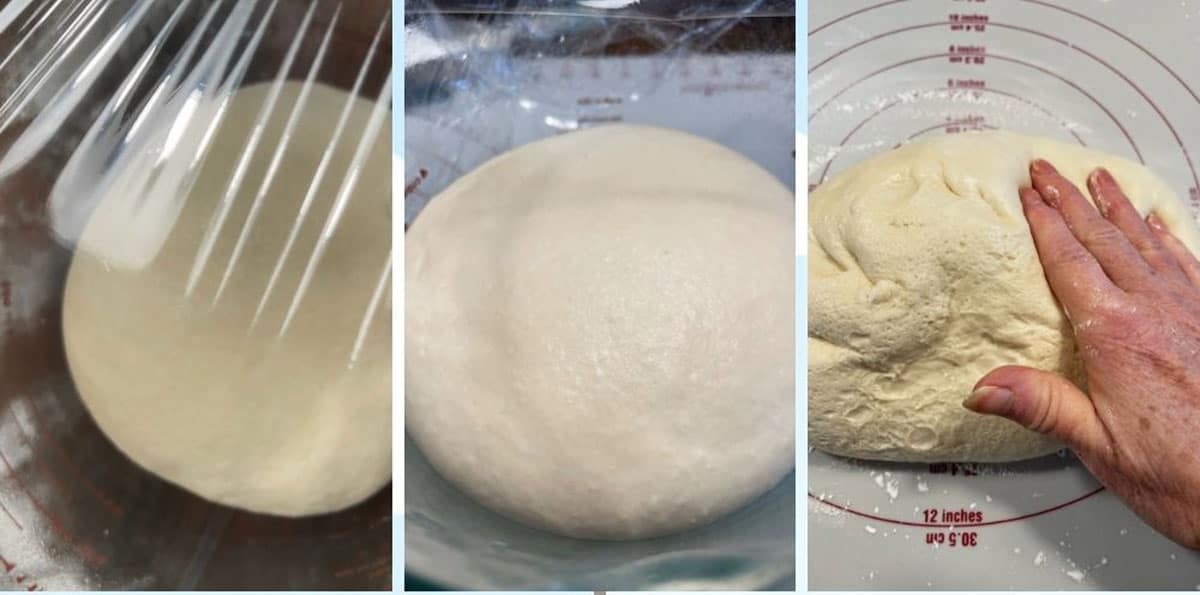
Mix the dough: Mix the dough together. Knead briefly on a floured work surface. Form into a ball. Place into a greased bowl. Cover with plastic wrap and allow to rise until doubled. Remove to a floured work surface and gently deflate the dough.
How to Shape Kaiser Rolls
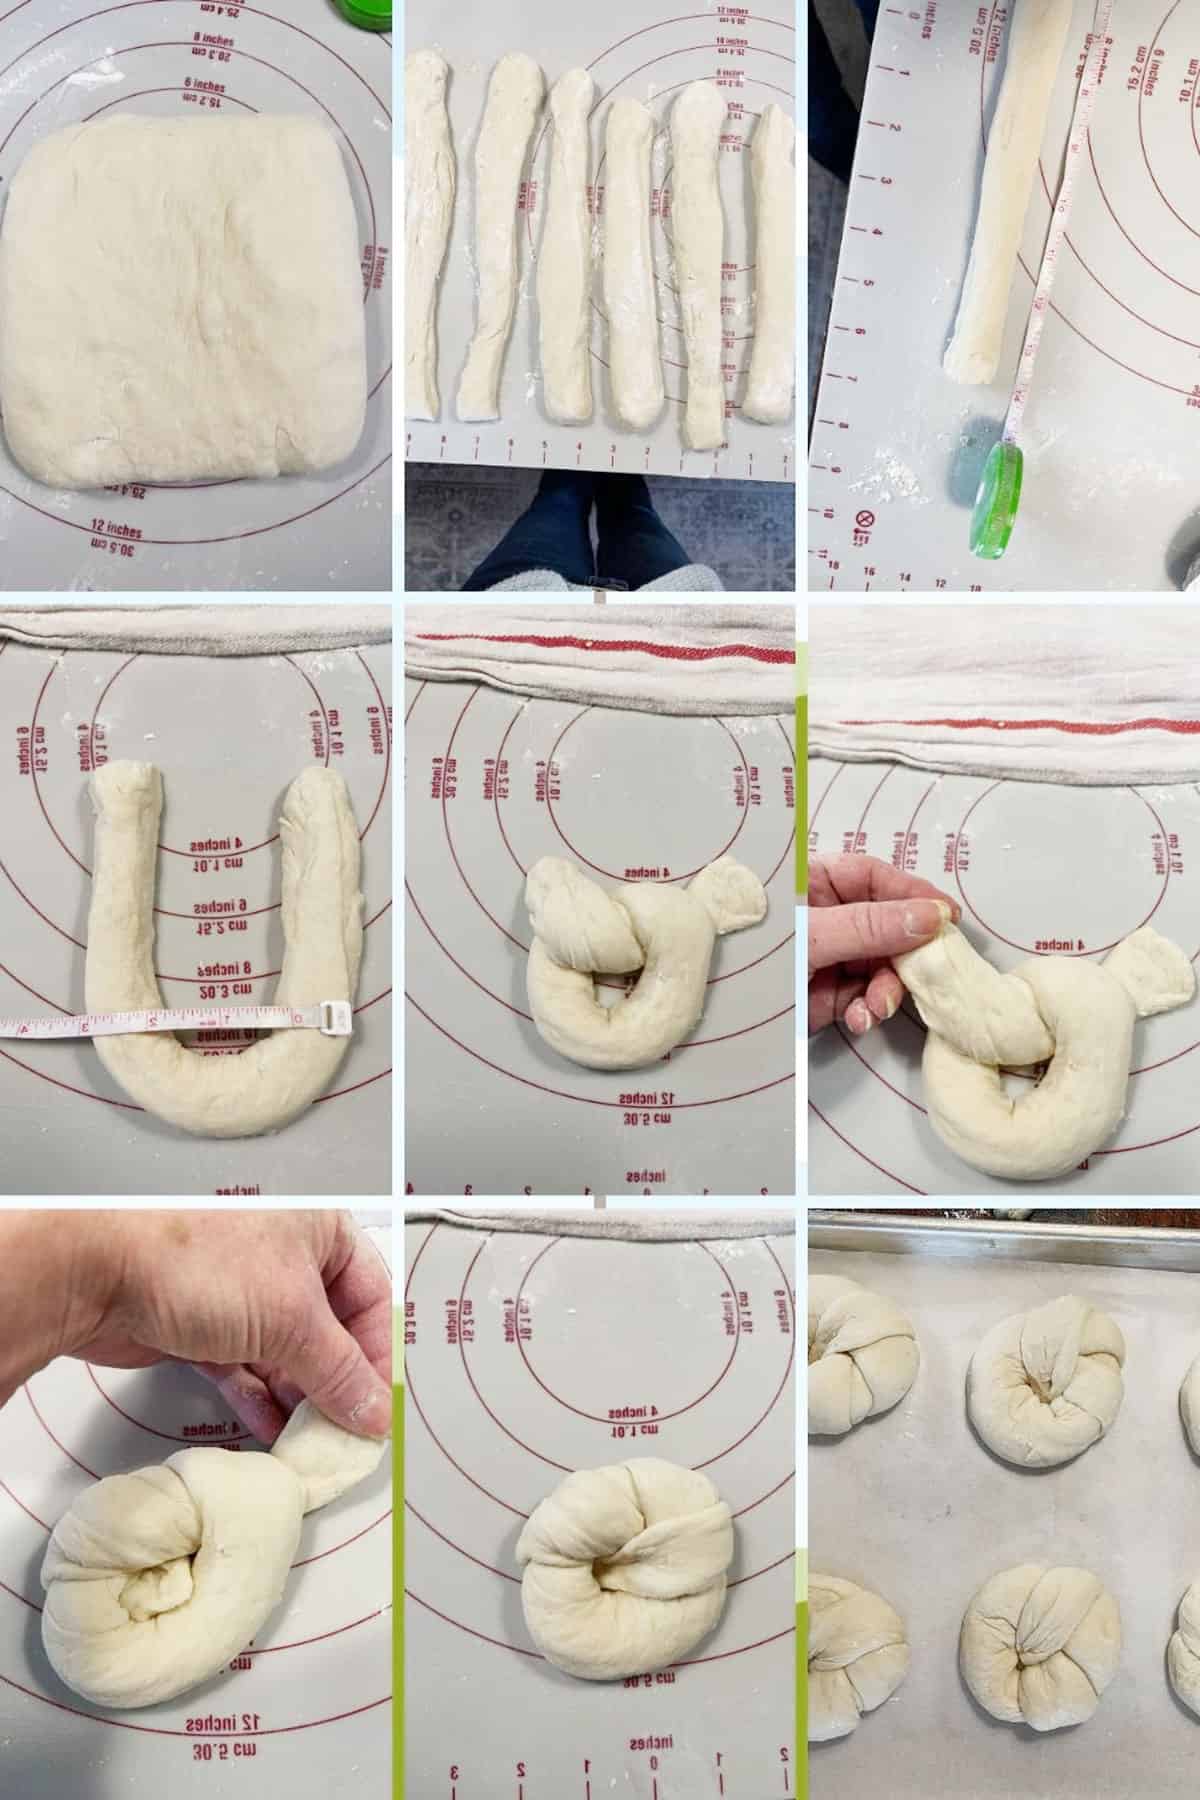
- Pat dough into a 6×6-inch square.
- Use a pizza cutter or sharp knife to cut into six 1-inch strips.
- Working with one strip at a time, roll/stretch the strip until it is 14-inches long.
- Form the strip into a “U” shape, with the bottom of the “U” being about 2-inches wide.
- Tie dough rope into a single knot, leaving a bottom loop about 1 1/2-inches diameter and the tails extending out a bit.
- Take the tail that is laying OVER the loop, stretch to lengthen slightly and direct it under the loop and up through the centre of the loop slightly.
- Take the tail that is coming up from UNDER the loop, stretch a bit to lengthen and wrap it over and then down the centre of the loop, meeting up with the end of the other tail. Pinch the two ends together.
- Jiggle the formed round back and forth a a bit to close the centre and adjust the shaping evenly.
- Place formed rolls onto a parchment-lined baking sheet, cover with a clean tea towel and allow to rise until doubled and puffy.
Notes:
Depending on how you tied the knot, your knot may be opposite of what is shown here. It always works the same way though. The tail that is under the loop goes over and the tail that is over the loop goes under.
Still not clear? Scroll down to watch the video of how to shape Kaiser rolls!
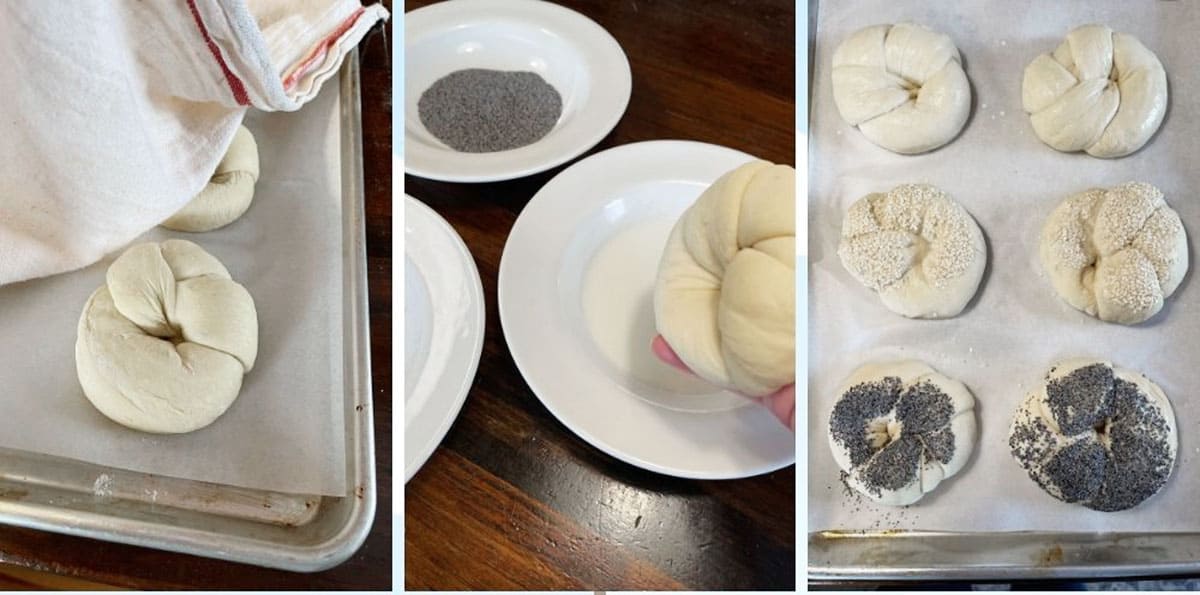
Topping Kaiser Rolls: If you would like to top your Kaiser rolls with seeds, before baking, dip the top of the rolls into milk, then press into poppy seeds or sesame seeds (or seed topping of your choice).
Video: How to Shape Kaiser Rolls
Recipe Tips
If you have a kitchen scale, use the weight measurements for best results. If you don’t have a scale, start with 2 1/2 cups of the flour and add the remaining flour in small increments, adding only as much as needed to get the dough to the described consistency, as shown in the Step-by-Step photos.
The dough will be sticky in the bowl, but once removed to a floured surface and kneaded with a bit of additional flour, the stickiness will disappear quickly. Only add as much flour as needed to make it kneadable, though, to keep the nice light texture of the dough.
When cutting and rolling the dough, don’t be afraid to sprinkle a little flour, as needed, to keep the dough from sticking.
If doubling the batch, bake at the same time on two baking sheets in the upper and lower third of the oven, switching their position halfway through baking.
Kaiser Topping Options
- Poppy seeds
- Sesame seeds
- Everything seed mix
- Dried onion and/or garlic flakes
- Egg wash, for shiny kaiser rolls
- Dust with flour, for rustic rolls
- Brush with milk, for soft crust rolls
Making ahead, storage and freezing
Kaiser rolls are best on the day they are baked, but will keep reasonably well another day, stored at room temperature.
Kaiser rolls can be frozen. Simply wrap each roll in foil, then place into an airtight container or freezer bag up to 1 month. To use, simply remove as many as you need from the bag and set on the counter, where they will thaw in about 30 minutes.
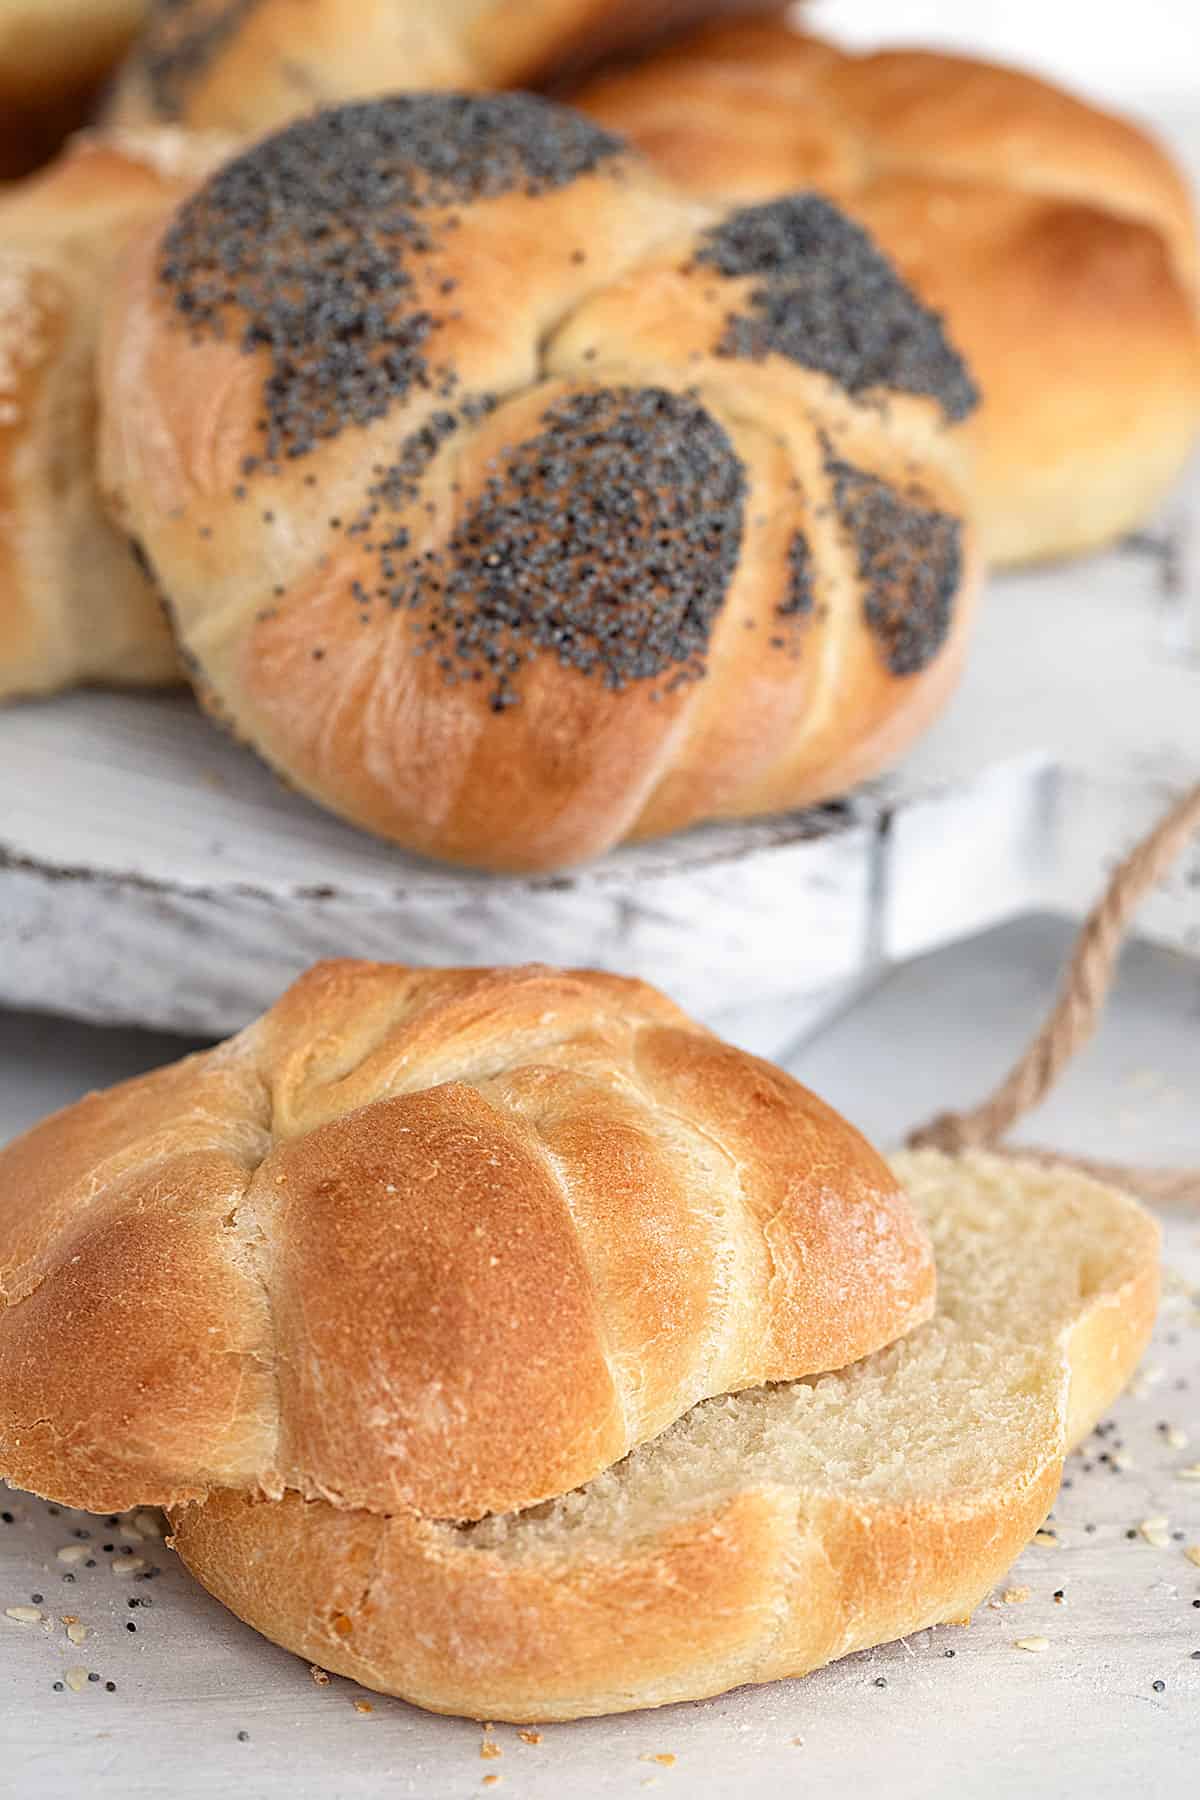
How to use Kaiser Rolls
Kaiser rolls are perfect for sandwiches or enjoy plain or toasted as a side for soup or stews. I think they make a darned good hamburger bun, too!
Want to save this recipe?
Enter your email and I'll send it to your inbox. Plus, you'll get great new recipes from me every week!
By submitting this form, you consent to receive emails from Seasons and Suppers.
You can unsubscribe at any time.
Get the Recipe: Kaiser Rolls
Ingredients
- 380 g bread flour, about 3 cups, measure with the spoon and level method
- 2 teaspoons Instant yeast, such as SAF (not rapid-rise) *see Note 1 below for how to use active dry yeast
- 1 - 1 1/4 teaspoons fine salt
- 227 g water, 8 fl.oz/1 cup, at room temperature
- 1 Tablespoon vegetable oil, or canola or other neutral oil
- 1/2 large egg, at room temperature *see Note 2 below
- 2 teaspoons white granulated sugar
Optional Topping:
- Milk
- Poppy seeds and/or sesame seeds
Instructions
- Heads Up! If doubling the recipe using the "2X", the cup measurements for the flour and water listed in the ingredient notes will NOT automatically double, so be sure to make that calculation manually. The gram measurements will double, as expected.
- *If you aren't using the weight measurement to weigh your flour, hold back about 1/2 cup from the bowl to start, then add as much as needed later, until you get to the desired dough consistency. If you need to use Active Dry Yeast, please see Note 1 below for directions on how to use it with this recipe, as you cannot add Active Dry yeast directly to the flour.
- Weigh out the flour and add to the bowl of a stand mixer Add the Instant Yeast and salt to the flour and using a kneading hook, mix until combined.
- In a small bowl or measuring cup, weigh or measure the water amount. Add the oil, egg and sugar and stir to combine.
- Add the water mixture to the bowl with the flour and kneading at low speed, scraping down excess flour from around the edge until well combined, about 2 minutes. Increase the speed on the mixer one notch and allow to knead 4-5 minutes. Assess the dough. We are aiming for a dough that is a bit sticky, but that wraps the hook and cleans the sides of the bowl. There should be a round of dough sticking to the bottom of the bowl about 2-3 inches in diameter (refer to the Step-by-Step pictures above this recipe card to see what my dough looked like in the bowl when I stopped mixing it). If you have lot of sticky dough at the bottom or the dough hasn't cleaned the sides of the bowl, add more flour, a small bit at a time, until you get there.
- Remove the dough to a well-floured work surface (a silicone dough scraper works well for this job). Start kneading the dough, bringing in a bit more flour, if needed, so the dough doesn't stick to your hands or the work surface. For the dough into a ball, place into a greased bowl, cover with plastic wrap and let rise until doubled in size, about 60-90 minutes (my dough took 75 minutes, in a cooler, Winter kitchen).
- Line a large baking sheet (or two sheets if doubling the recipe) with parchment paper and set aside.
- Remove the dough to a lightly floured work surface and gently deflate. Using your hands, pat the dough into a 6x6-inch square (or 12x6 if making a double-batch). Using a pizza cutter or a sharp knife, cut the dough into 6 (1-inch) strips, separating and removing the strips from the dough mass as you go (the cut lines can fill back in if left unseparated for too long). Roll the strips in a tiny bit of flour if they are sticking to your work surface at all.
- *If the shaping directions aren't clear, please scroll up above this Recipe Card, where there are Step-by-Step photos, as well as a video that demonstrate the shaping process.
- Working with one strip at a time (and covering the remaining strips with a towel while you work), roll/stretch the dough into a 14-inch long rope. Form the rope into a "U" shape, with the bottom of the "U" closes to your and about 2-inches wide. Tie the dough into a single knot, leaving a loop about 1 1/2-inches in diameter and with the tails extending about 1-inch beyond the loop. Take hold of the tail that is laying over the loop and stretch it slightly to lengthen a bit. Direct the tail under the loop and up through the centre of the loop slightly. Take hold of the other tail, that is under the loop, and stretch it slightly to lengthen a bit. Bring the tail over the loop and down through the centre of the loop, to meet up with the other tail end. Pinch the two tail ends together. Use the palms of your hands to jiggle the shaped dough back and forth a bit and refine the shape back into a circle, closing any hole in the centre of the loop. Remove the shaped dough to a parchment-lined baking sheet, spacing several inches apart then repeat with the other strips of dough. (For a double batch, use two baking sheets).
- When all the rolls are formed, cover the baking sheet with a clean tea towel and let rise until almost doubled and puffy, about 30-45 minutes (mine here took 40 minutes).
- Preheat oven to 350F (regular baking/not fan-assisted), with rack positioned in the centre of the oven for a single batch, or in the upper and lower thirds of the oven for a double batch.
- If topping rolls, right before baking, pour a little milk into a wide-shallow bowl, with the milk being only about 1/2-inch deep. Add any seeds you want to use to shallow bowls, as well. Gently pick up the rolls and dip the top of the roll into the milk, then press into the seeds. Return to baking sheet and gently re-shape, if needed.
- If you are not topping your rolls with seeds, you can brush the tops of the rolls with milk before baking, for a soft crust, or with an egg wash (1 egg mixed with 1 Tbsp water), for a shiny roll or simply dust with flour if you like, for a rustic roll.
- Bake rolls in preheated for 30-34 minutes, or until deep golden brown. *If making a double batch, place baking sheets in upper and lower positions and switch positions half way through baking.
- Remove from oven and immediately transfer to a wire rack to cool completely. Keep at room temperature in an airtight container for 2 days or in the refrigerator up to 5 days. To freeze, wrap rolls in foil and then freeze in a freezer bag or container for up to 1 month.
Notes
Watch how to make it
Hi! I’m Jennifer, a home cook schooled by trial and error and almost 40 years of getting dinner on the table! I love to share my favourite recipes, both old and new, together with lots of tips and tricks to hopefully help make your home cooking enjoyable, stress-free, rewarding and of course, delicious!
Amazing Kaiser rolls!! I made them in a bread machine and turned out dough to form rolls
So glad to hear, Michele :) Thanks so much!
This was easy and tasted like the Rolls in a Bakery on Long Island.
So glad to hear, Joe :) Thanks so much!
Have made Kaisers before, but this is great.
Love that this recipe is for 6 rolls and works out very well. So often halving or quartering a baking recipe doesn’t work out…..
This recipe is excellent; thank you very much for sharing.
So glad you enjoyed them :) Thanks so much!
These were a hit with my family! I made them to try to recreate a sandwich from our favourite deli, and everyone loved them. I ended up adding more flour during the mixing. I topped them with everything bagel seasoning. Thanks for the recipe.
So glad to hear, Karen :) Thanks so much!
Kaiser rolls have been always my favorite for any kind of sandwich or burger Jennifer! These look like they came right from the bakery! Bet they’re delish!
Thanks MaryAnn and yes, I have always loved a nice Kaiser roll, too, so I was determined to try my hand at them :) I loved the results and will definitely be making then on the regular!