

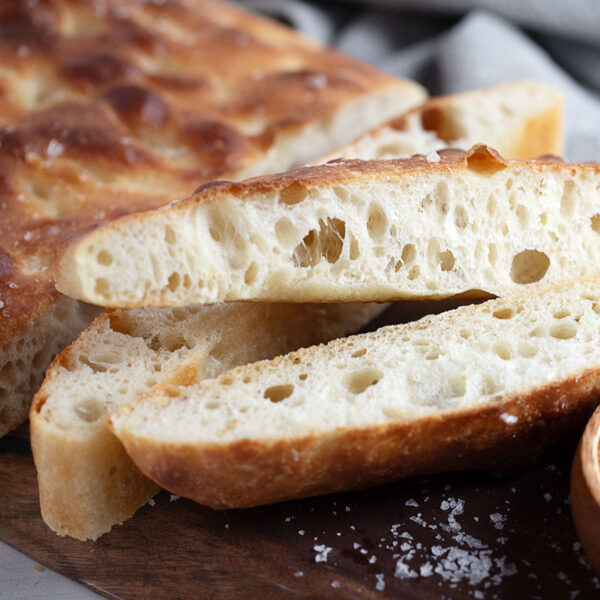
This easy overnight focaccia bakes in a 9×13-inch pan and delivers a thick, airy crumb, crisp olive-oil edges and plenty of flavour from a slow refrigerator rise. Make the dough the day before, then proof, dimple and bake it when you’re ready. No special bread-making skills or stand mixer required.
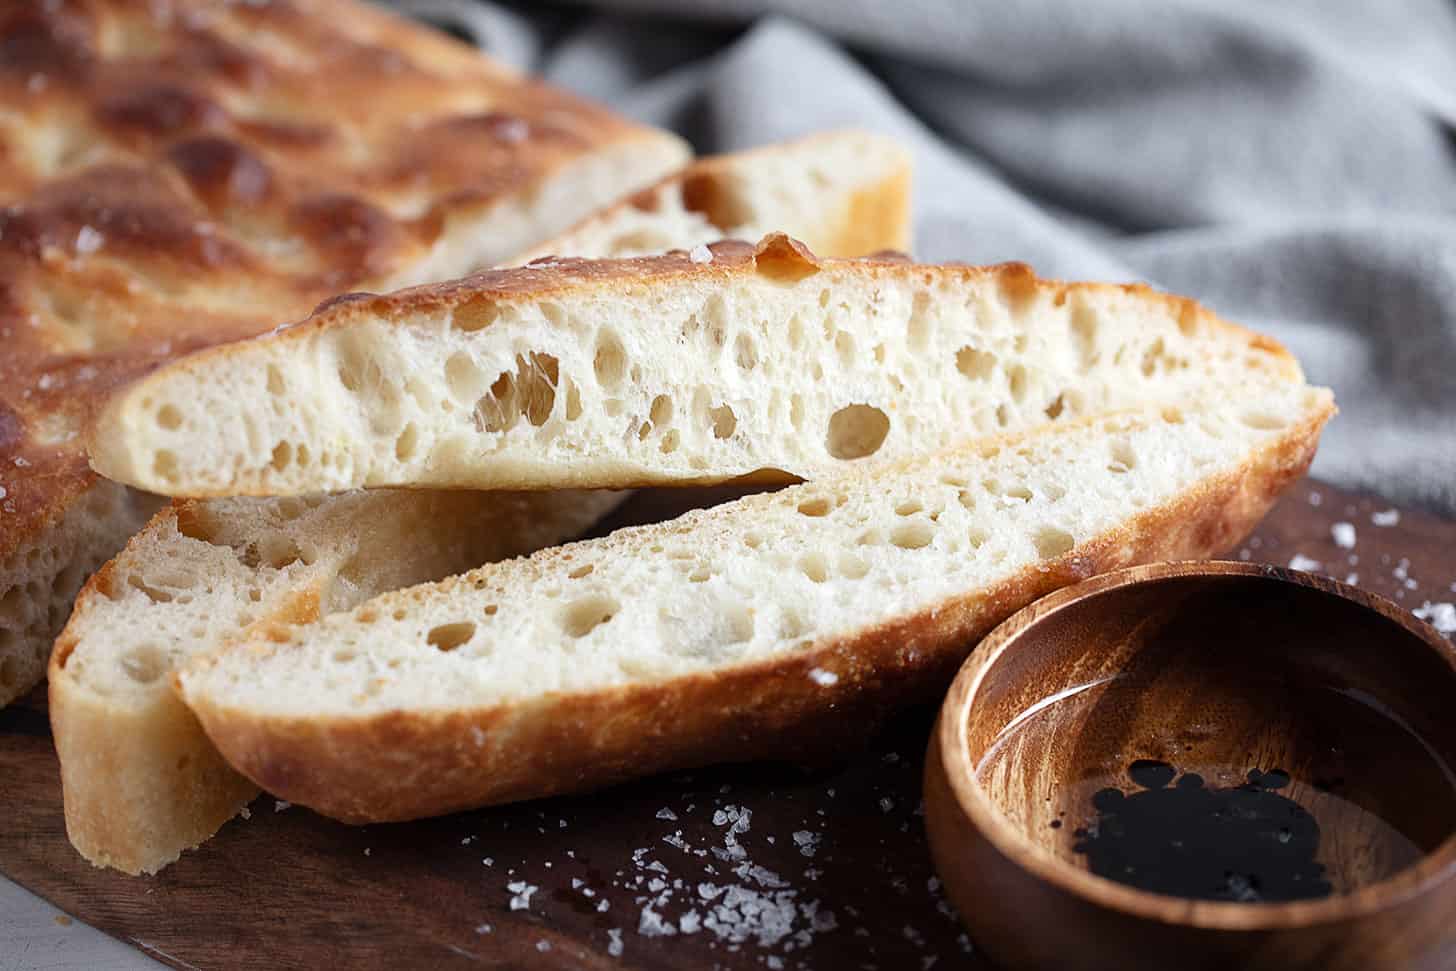
Overnight Focaccia: at a glance
My go-to focaccia recipe, for a perfect 9×13-inch slab, ideal for slicing and serving alongside soup or salads or to enjoy as focaccia sandwiches or to use for focaccia bruschetta. Plan on about 1 hour of active hands-on work, 12–24 hours in the refrigerator, and 2 1/2–3 hours to proof before baking.
Time commitment: 1 hour on Day One (hands-on). 12-24 hours of refrigeration (hands-off), 2-3 hours of rising time on Day Two (hands-off) before a short 25- 30-minute bake. (The focaccia dough can stay in the fridge up to 48 hours, if needed!)
Equipment: Any 9×13-inch baking pan will work for baking this focaccia. A stand mixer is handy when working with high-hydration (wet) doughs, but this focaccia dough can be mixed with just a bowl, a spoon and a few extra “stretches and folds” to build the gluten in the dough.
Skill level: Focaccia is one of the best breads for beginners. It requires no intensive kneading, no special shaping, and no tricky scoring with a razor blade—just simple ingredients, a baking pan, and your fingertips.
Ingredients and substitutions
A few notes about the key ingredients …
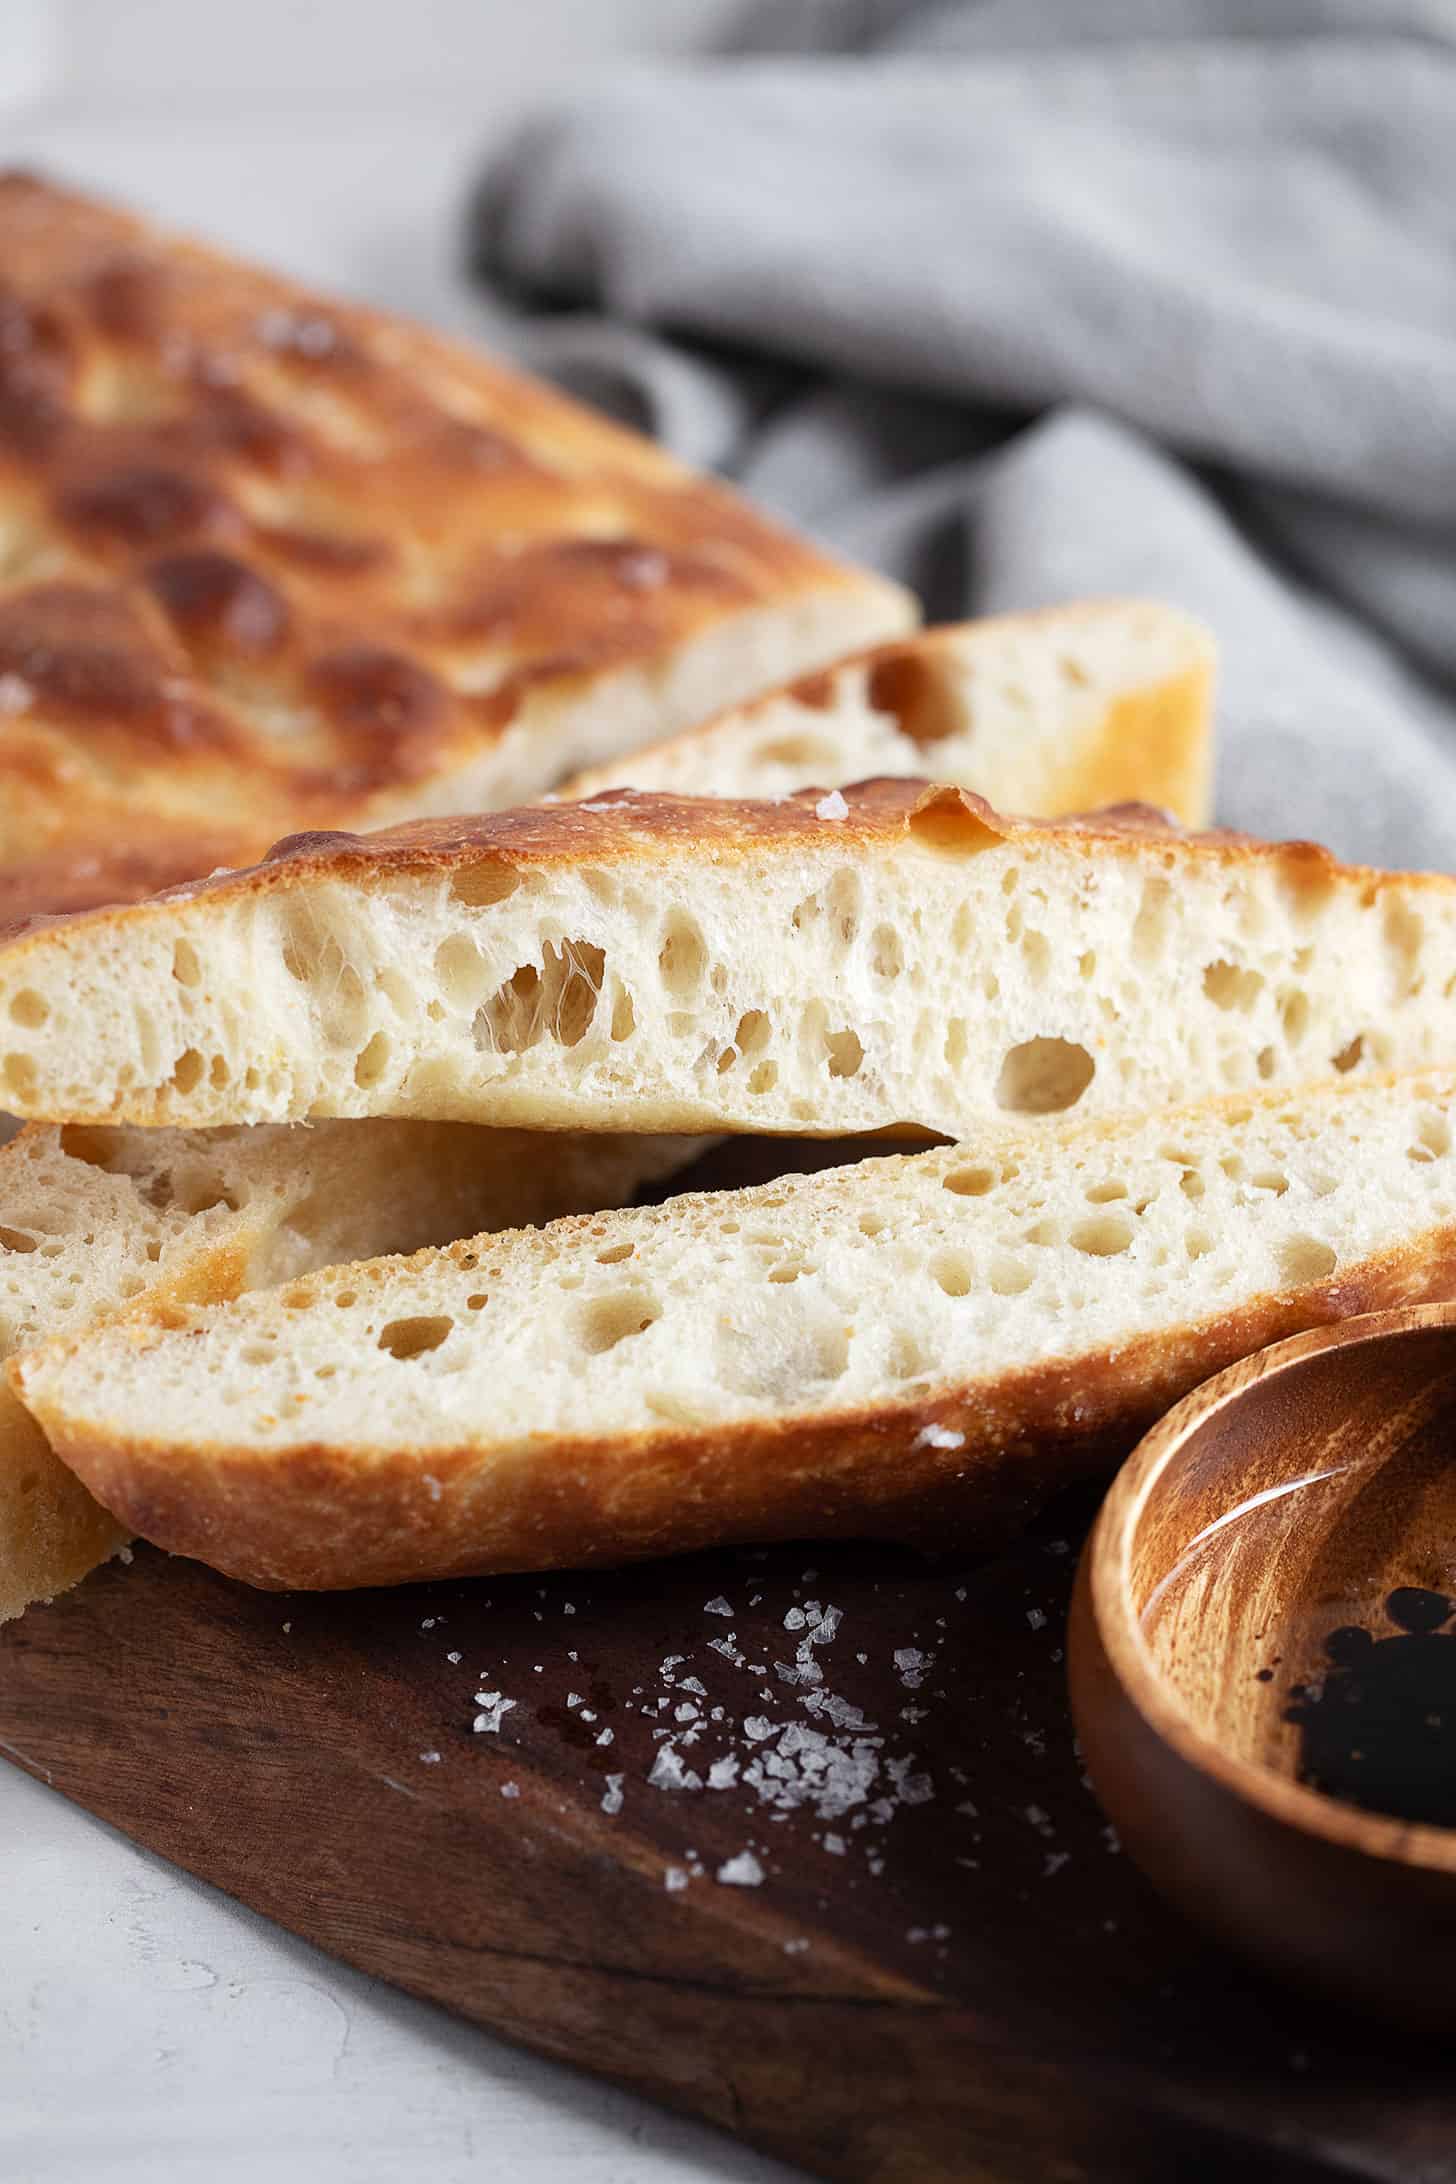
Bread flour: Bread flour is highly recommended for focaccia. Using bread flour for focaccia provides a higher protein content, which in turn creates stronger gluten formation, which is perfect for handling the high-hydration focaccia dough. It’s also perfect for trapping gas bubbles for an airy crumb and a chewier texture.
While you can make focaccia with all-purpose flour, there will be a compromise in the finished texture of the focaccia. It may have a less airy crumb, smaller air bubbles, less chewiness, and a slightly more fragile texture compared to using bread flour.
Yeast: Instant yeast is the best choice for focaccia, as it performs especially well with cold fermentation. Active dry yeast would be fine if that’s all that’s available.
Equipment and pan options
A stand mixer is a great way to work with high hydration and sticky does like focaccia dough. If you don’t have a stand mixer, a large bowl and a sturdy spoon will work for mixing together the dough.
For the 9×13-inch pan, the best options are a short-sided bakers slab (like I’ve used here) or a quarter sheet pan. The sides should be a minimum of 1 1/4 inches. Alternatively, opt for a higher-sided 9×13-inch metal, ceramic or glass baking/cake pan or casserole dish.
How to make overnight focaccia: step-by-step
This is a visual summary of the steps to make this recipe. Scroll down to the Recipe Card below for the complete list of ingredients and instructions. These photos show mixing the dough in a stand mixer, but instructions for mixing in a bowl are in the Recipe Card.
- Mix up the dough.
- Let rest for 30 minutes.
- Do a series of “stretch and folds” every 15 minutes for one hour.
- Cover the dough and refrigerate for 12-24 hours.
- Add the dough to an oiled baking pan.
- Let it rise 2-4 hours.
- Bake and enjoy!
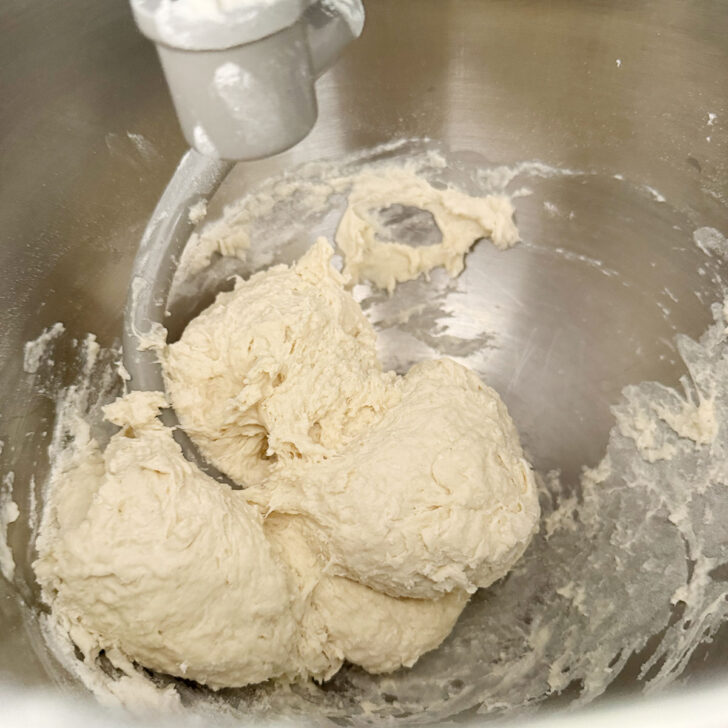
Step 1: Mix together the flour, water and yeast mixture until well combined and a shaggy dough forms.
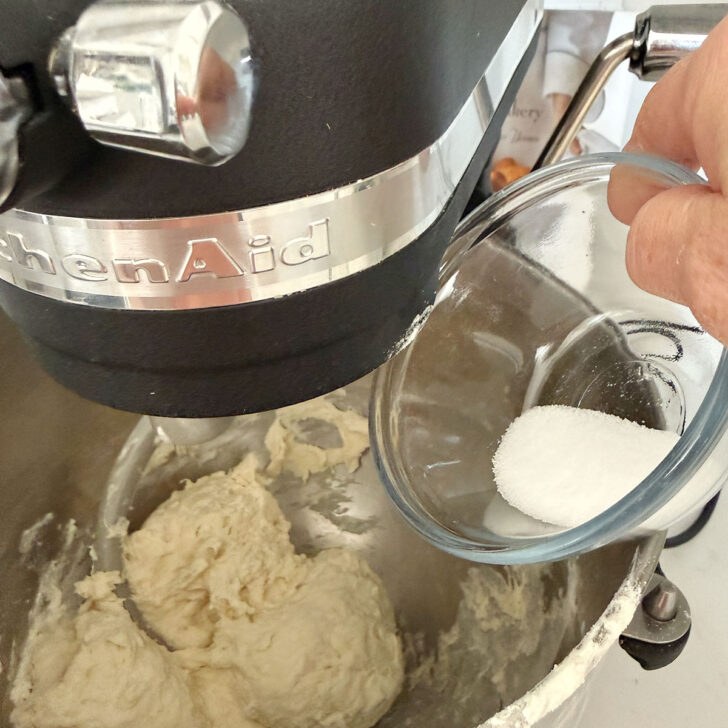
Step 2: Mix in the salt and allow the dough to mix for a few minutes.
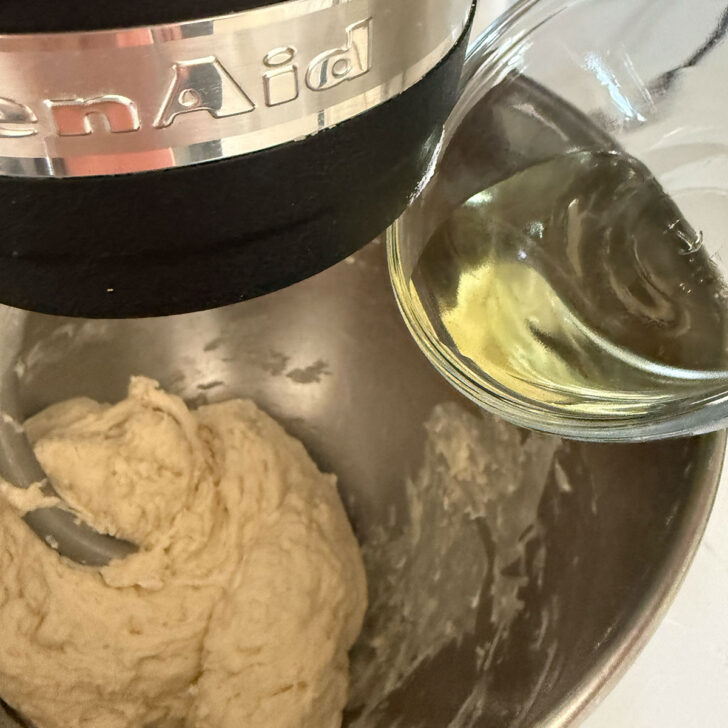
Step 3: Add the olive oil and mix in until well incorporated.
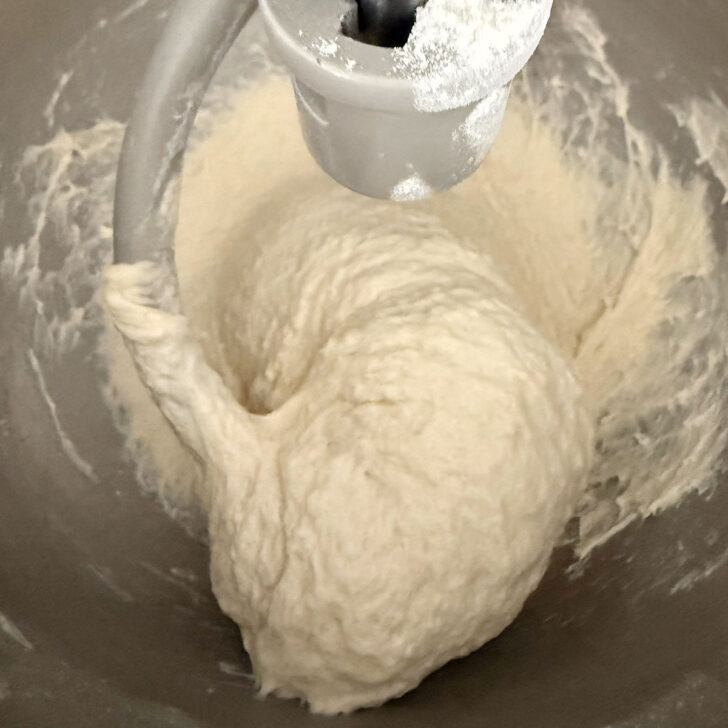
Step 4: The finished dough will be wet and sticky. Cover the bowl with a tea towel and let it stand 30 minutes.
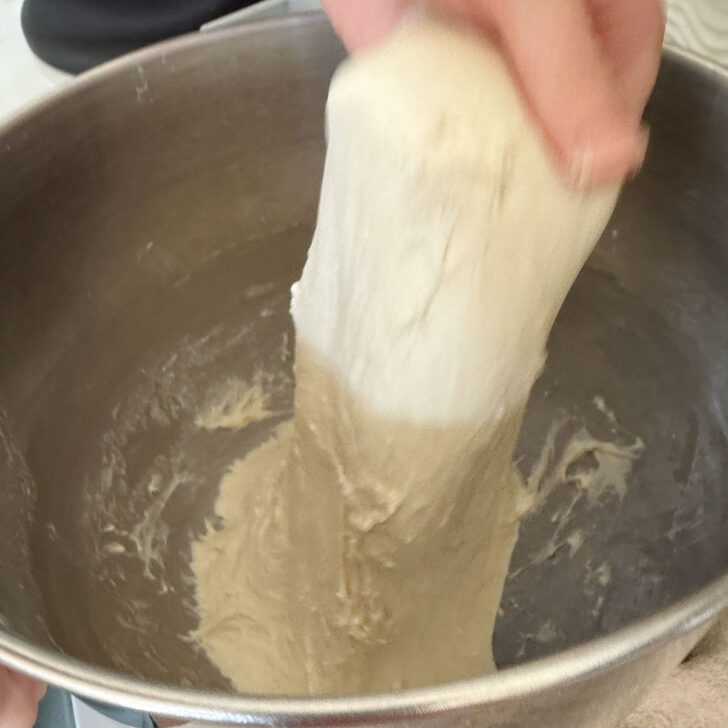
Step 5: Start doing a series of “stretch and folds” every 15 minutes for 1 hour (4 times).
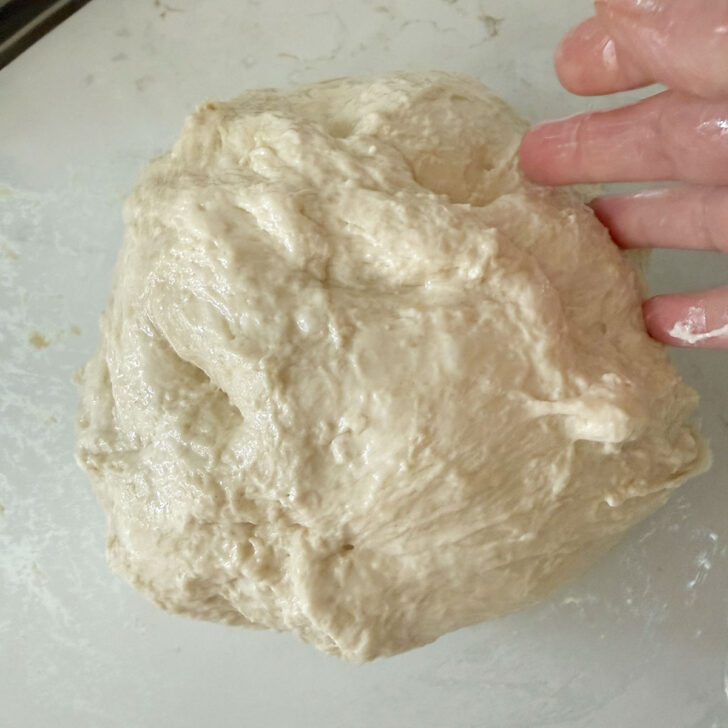
Step 6: Transfer the dough to a well-oiled bowl. Cover with a lid or doubled-up plastic wrap and refrigerate 12-24 hours.
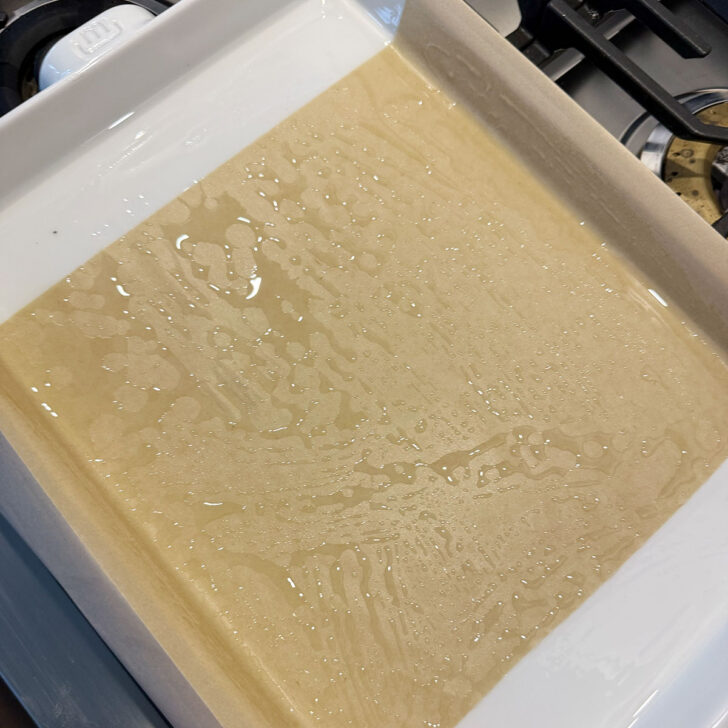
Step 7: When ready to bake, oil the baking pan and lay a strip of parchment across the middle. Oil the parchment as well.
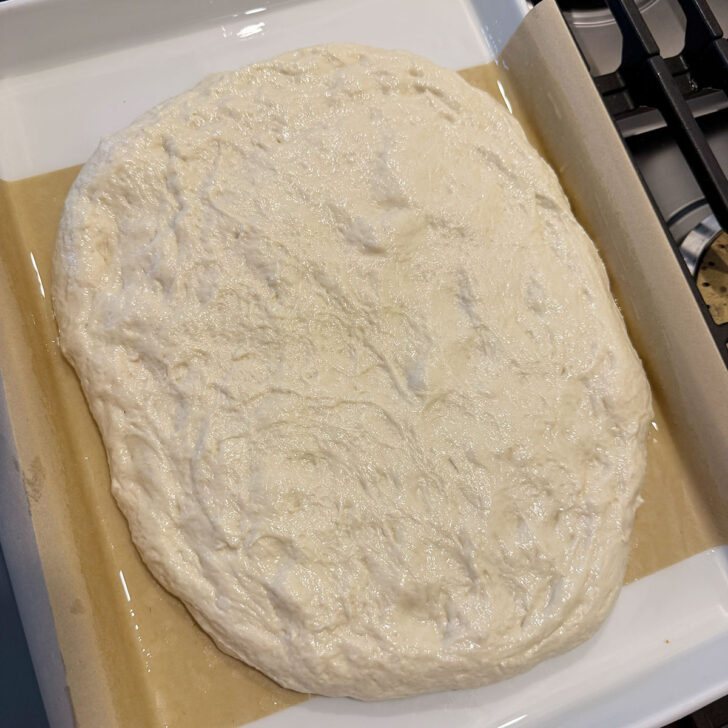
Step 8: Add the cold dough to the prepared pan.
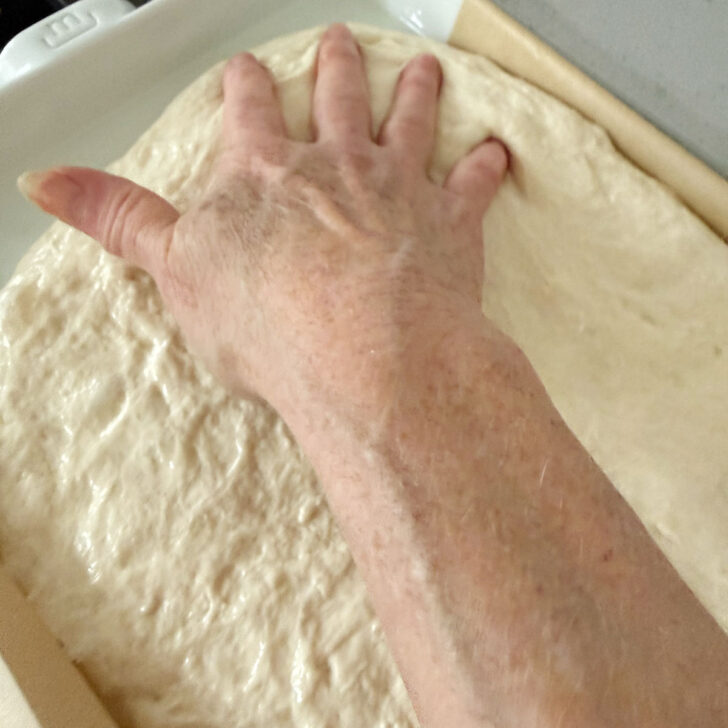
Step 9: Gently stretch the dough out in the pan a bit. Don’t force it. It’s ok if it doesn’t fill it completely.
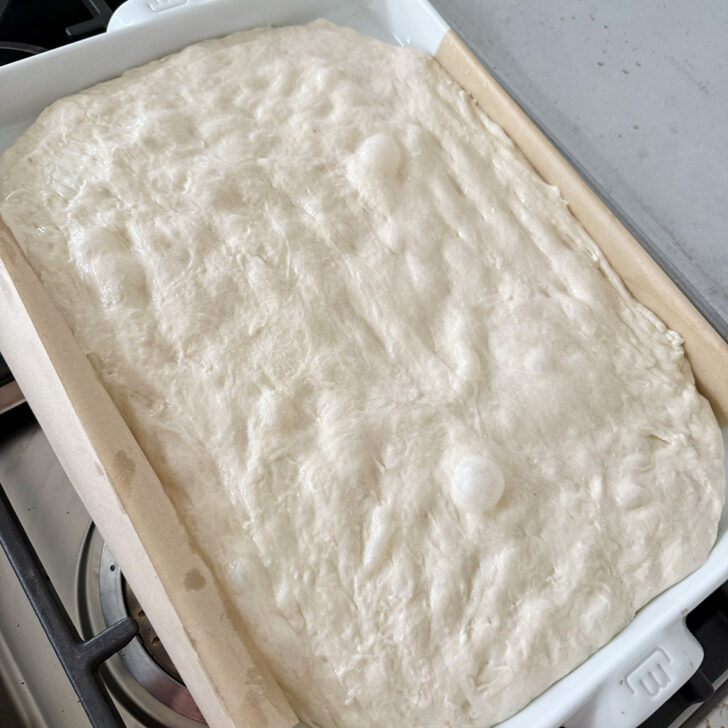
Step 10: Allow the dough to rise in the pan for 2-4 hours at room temperature.
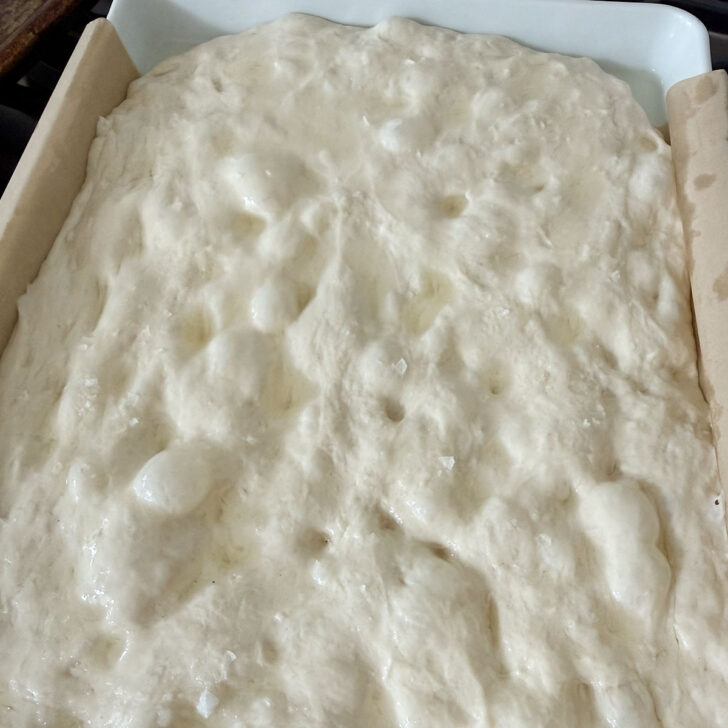
Step 11: Drizzle the top of the dough with olive oil and dimple with your fingertips before baking.
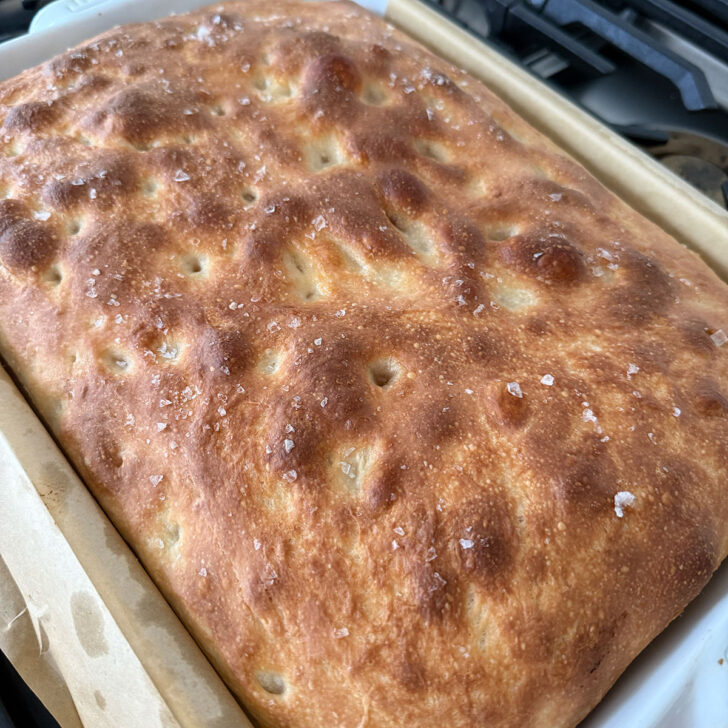
Step 12: Bake and enjoy!
Tips for making overnight focaccia
- Sticky Dough: This focaccia dough has a high water content (70% hydration), meaning it looks very wet and sticky. This is normal and necessary for the airy texture, but it can feel alarming to first-time bakers. Keep a bowl of water handy and dip your hands in the water before grabbing the dough to avoid sticking.
- Keep the dough moist: Be sure to coat the dough well with olive oil before refrigerating. Ideally, using a container with a lid (rather than a bowl and plastic wrap) will work best to keep the dough from drying out.
- Patience with Rising: While the active work takes only about 10-15 minutes, the dough needs time to rest, chill and rise, for the best results. Your patience will be rewarded!
- Trim for sandwiches: If you plan to use the focaccia for sandwiches, consider trimming an inch or so off the slab of focaccia around all sides. This leaves just the thickest centre part, with nice clean-cut edges. Keep the trimmings, cut into cubes and use for dipping!
Overnight focaccia: FAQ
Yes, all-purpose flour will work for this recipe, though a direct swap will slightly affect the overall hydration of the dough. Bread flour absorbs more water, so using all-purpose flour will produce a bit wetter dough. Consider reducing the water slightly as detailed in the Recipe Card.
No. This focaccia dough can be mixed up in a bowl with a spoon and some elbow grease.
Yes, focaccia is perfect for beginner yeast bakers, as it doesn’t require traditional kneading or shaping.
Let the mixed dough rise at room temperature until doubled, about 1.5 to 2 hours. Then proceed with the recipe. The second rise will take about 30 – 90 minutes depending on kitchen temperature.
Yes, you can add toppings to the focaccia right before baking. Classic toppings include rosemary leaves, flaky salt, caramelized onion, olives or cherry tomatoes.
No, you should avoid leaving high-hydration dough out at room temperature overnight. The yeast will work too quickly, causing the dough to over-proof, turn sour, and collapse into a dense puddle.
It’s best to refrigerate this focaccia dough no longer than 48 hours, for best results. Leaving it beyond 72 hours risks exhausting the yeast, causing the dough to deflate during baking
If the characteristic finger indents vanish, the dough was likely under-proofed or dimpled too early. Dimpling should be the very last step right before the dough goes into the oven.
Bakers frequently grease the pan with a layer of room-temperature butter before adding the olive oil, which prevents sticking and fries the bottom of the crust. Placing the pan directly onto a preheated baking stone on the lowest oven rack also helps
This usually happens because the dough was either too cold when it went into the oven, or the yeast was old and inactive. Ensure the dough looks visibly puffy, jiggly, and covered in surface bubbles before baking.
No. Focaccia can be mixed up, set to rise and baked the same day. The advantages of overnight-risen focaccia are fuller flavour, chewier texture and a deeper crust colour, so mixing and baking on the same day will reduce those advantages.
Yes! I’ve used a 9×13 ceramic pan here. Glass will work just fine. Do note that ceramic and glass are more prone to sticking. The parchment strip and ample oil will prevent a lot of sticking, but if you like, brush the pan with butter before adding the oil, to further reduce the possibility of sticking.
Whole wheat flour significantly changes both the hydration of the dough and the texture of the finished bread. It would certainly be denser and less bubbly. You’d be best off seeking out a recipe specifically developed to use whole wheat flour.
Yes, this focaccia will work perfectly for sandwiches. I suggest trimming the about 1-inch all around, which will leave just the thickest part with nice clean edges, for pretty and thick sandwiches.
Love focaccia sandwiches? Check out my focaccia sandwich recipe!
Storing, reheating and freezing overnight focaccia
When it has completely cooled, transfer it to an airtight bag or vessel and store it at room temperature for up to 3 days. Otherwise, freeze it for up to 3 months.
Reheat focaccia in a 375F oven. Lightly mist or sprinkle the focaccia with water or a bit of olive oil, wrap it loosely in foil and bake for 8-12 minutes. To re-crisp the crust, open or remove the foil during the last couple minutes of heating.
Ways to enjoy overnight focaccia
- Serve warm slices alongside soup or salad.
- Slice and cube and serve with olive oil and balsamic vinegar, for dipping, as a nice appetizer.
- Spread slices with garlic butter, herbed goat cheese, or olive tapenade
- Slice and use as a base for focaccia bruschetta.
- Use for focaccia sandwiches.
- Top a square with extra cheese, sauce, or pepperoni and bake until bubbly
Want to save this recipe?
Enter your email and I’ll send it to your inbox. Plus, you’ll get great new recipes from me every week!
By submitting this form, you consent to receive emails from Seasons and Suppers.
You can unsubscribe at any time.
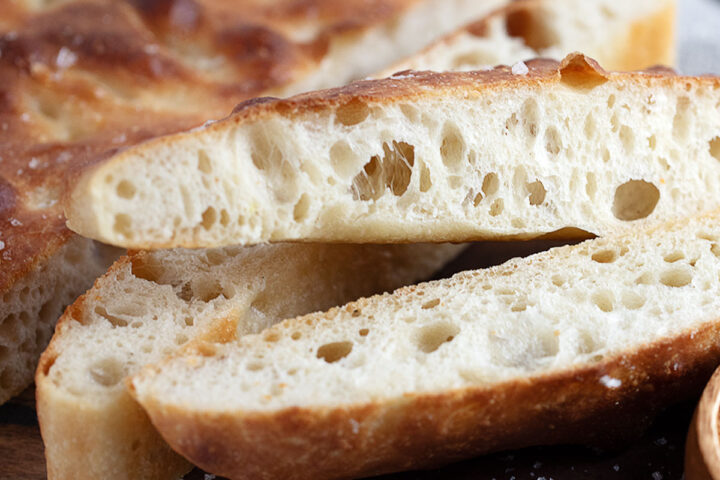
Get the Recipe: Overnight Focaccia (9×13 Recipe)
Ingredients
- 350 g (1 1/2 cups) lukewarm water, about 105F
- 1/2 teaspoon instant or active dry yeast
- 500 g (4 cups) bread flour, *see Note 1 below for all-purpose flour
- 10 g (1 1/2 teaspoons) fine sea salt
- 25 g (2 Tablespoons) extra virgin olive oil, plus extra for greasing the pan and topping before baking
Instructions
- Dissolve the 1/2 teaspoon instant or active dry yeast in the 350 g lukewarm water (about 105F) and let it stand for 5 minutes until slightly foamy. (Instant yeast doesn't require proofing in water, but it is perfectly fine to do so anyway.) In a large mixing bowl or the bowl of a stand mixer fitted with the kneading hook, add the 500 g bread flour (*see Note 1 below for all-purpose flour) and the yeast and water mixture. Stir or mix together on Speed 2 until the flour is incorporated into a shaggy dough with no visible flour. Add the 10 g fine sea salt to the dough and stir or knead in with the mixer for a few minutes. Add the 25 g extra virgin olive oil (plus extra for greasing the pan and topping before baking) and stir or knead in with the mixer for a few more minutes. Cover the bowl with a tea towel and let stand for 30 minutes.
- Perform a series of stretch-and-folds every 10-15 minutes for one hour to improve the texture of the dough and develop gluten. The dough should feel smoother and stretch more easily after the stretches and folds. Grease a bowl with olive oil. Scrape the dough into the oiled bowl. Drizzle the top of the dough with olive oil and use your hand to spread it over the top of the dough to completely coat with olive oil. Cover the bowl with a lid or with two layers of plastic wrap and refrigerate overnight – 12-24 hours (or up to 48 hours, if needed).
- Remove the refrigerated dough from the fridge. The dough should be a bit bubbly and should have expanded, but not necessarily doubled. Generously oil a 9×13-inch baking tray or pan with 2 Tablespoons of olive oil. Place a strip of parchment paper across the middle of the pan (about 6-7 inches wide), overhanging the sides of the pan slightly, and oil the parchment paper as well. (The parchment strip forms handles so the bread releases easily from deeper pans.) Using a spatula or a dough scraper, gently release the dough from the bowl and transfer it onto the tray. Gently stretch the dough out to fill the pan by about 60-70%. Let the dough proof for 2 1/2-3 hours or until the dough is puffy and bubbly in spots. The dough should wobble when the pan is gently shaken and show bubbles beneath the surface. (You can also test the dough for readiness by poking gently with a fingertip. It is ready if it springs back slowly and leaves a small, visible dimple. If it springs back fast, it needs more time. If it stays sunken, it may be over-proofed.)
- Preheat your oven to 425F (Regular bake setting; adjust as needed for convection or fan-assisted ovens), with the oven rack in the middle of the oven. Drizzle about 2 Tablespoons of olive oil all over the focaccia. Using your fingertips, press deep dimples all over the dough, working from the centre to the corners and gently stretching the dough to fill the ends and corners, if needed. Sprinkle with flaky sea salt, if desired.
- Place the focaccia and bake for 22-25 minutes, or until it is a deep golden brown and crispy on top. If you have an instant-read thermometer, bake until it reaches 200-210F internal temperature. Remove from the oven and immediately drizzle 1-2 tbsp extra virgin olive oil for extra flavour. Let it cool slightly, then remove to a cooling rack. Slice into squares and serve warm or allow to cool completely.
- Once cooled, store the focaccia well-wrapped at room temperature for 2-3 days. Refresh the focaccia in a 350F oven for 8-10 minutes before serving. For longer storage, wrap well and freeze for up to 3 months.
Notes
- Sea salt and rosemary
- Cherry tomatoes and basil
- Garlic and olive oil
- Caramelized onions and thyme
- Olives and oregano
Recipes to use overnight focaccia


Hi! I’m Jennifer, a home cook schooled by trial and error and almost 40 years of getting dinner on the table! I love to share my favourite recipes, both old and new, together with lots of tips and tricks to hopefully help make your home cooking enjoyable, stress-free, rewarding and of course, delicious!


Can the focaccia be made with whole wheat flour?
Hi Klara, whole wheat flour significantly changes both the hydration of the dough and the texture of the finished bread. It would certainly be denser and less bubbly. You’d be best off seeking out a recipe specifically developed to use whole wheat flour, rather than trying to adapt this one.