This skillet artichoke spinach dip is perfect for entertaining! With the bread rolls and the dip all in one skillet, it’s great for feeding a crowd.

I have always thought of the holiday season as a once-a-year excuse for indulgence, decadence and excess (cheese :). And in that spirit, I humbly offer up this skillet of warm cheese-topped bread and creamy, cheesy artichoke spinach dip. And you can make this skillet of goodness with a loaf of frozen, pre-made bread or roll dough (thawed) or make your own dough with the recipe below.
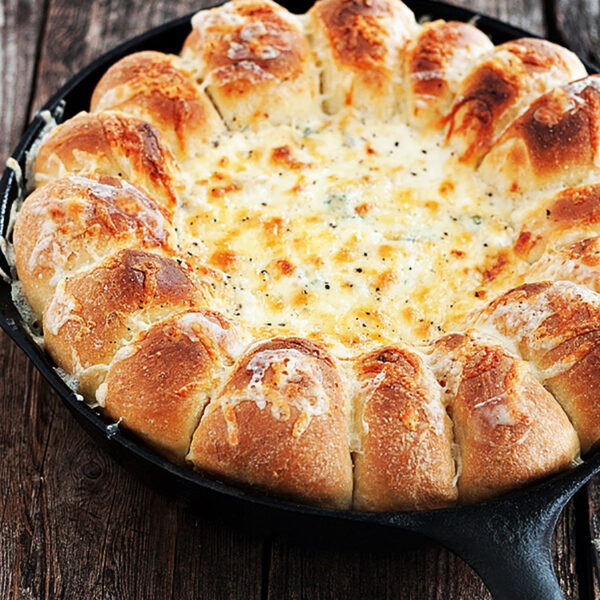
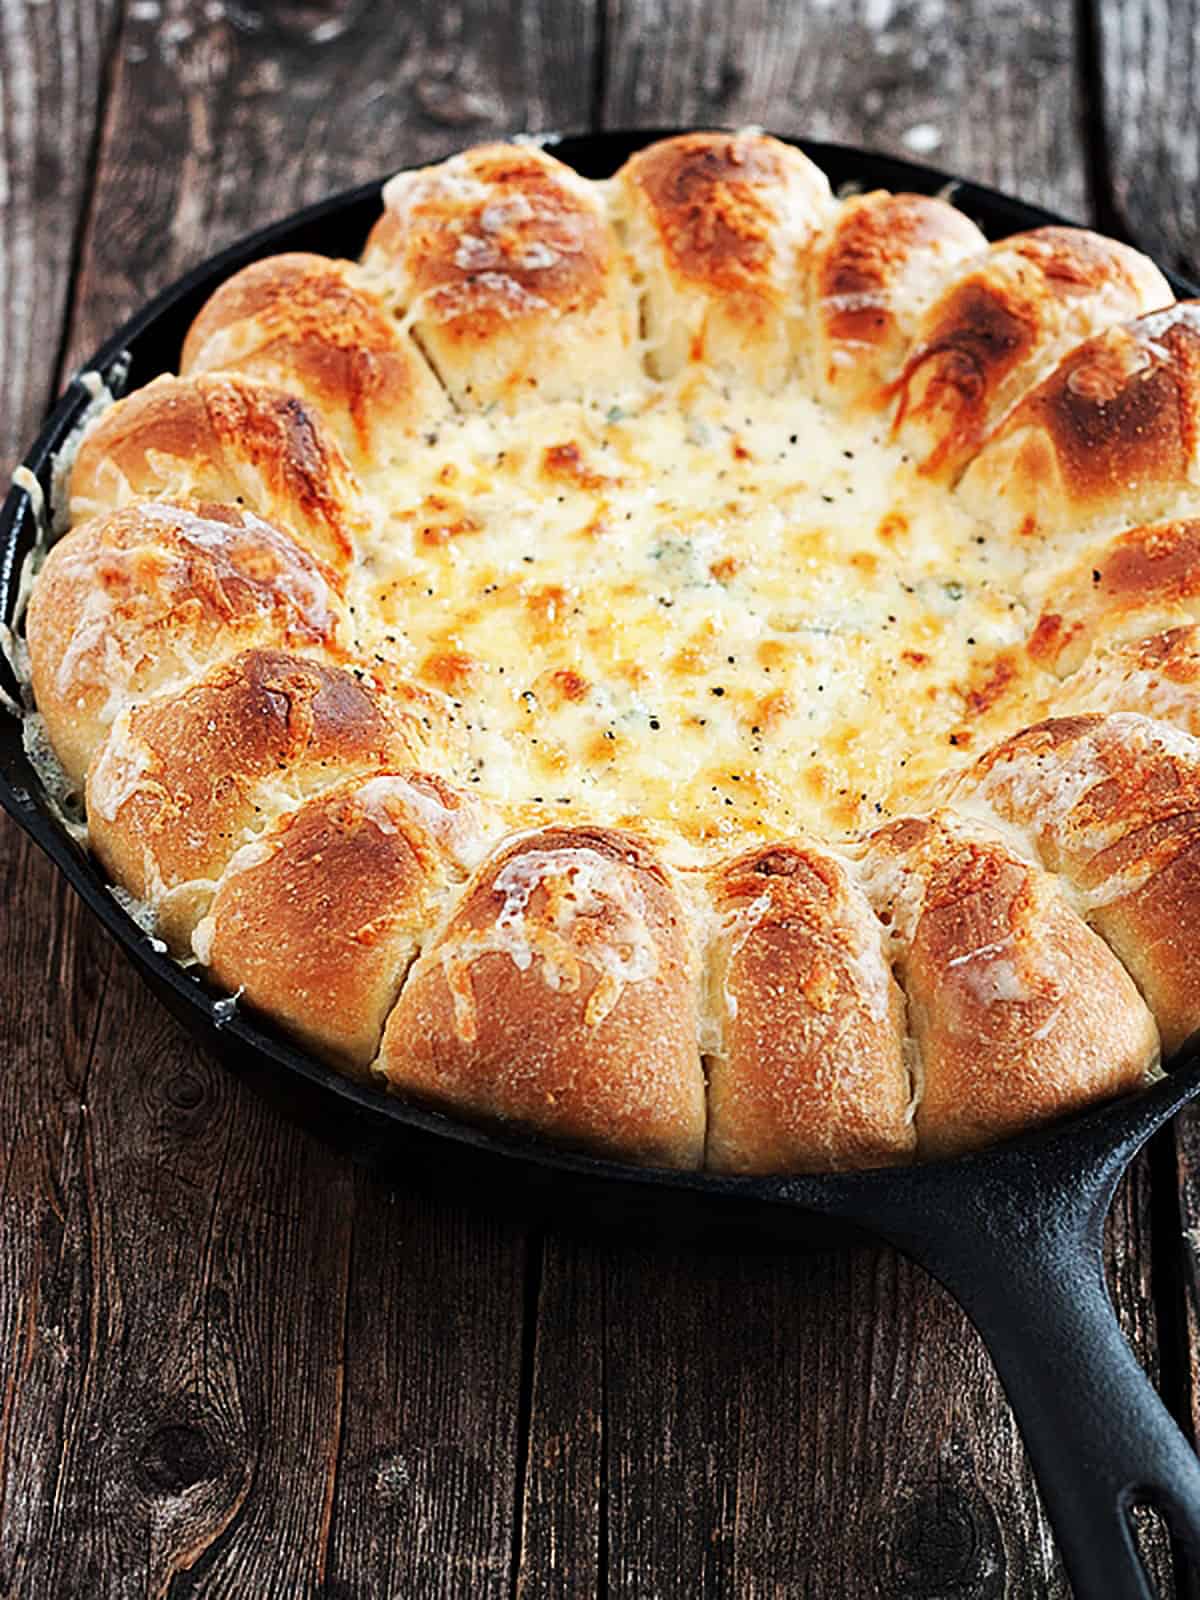
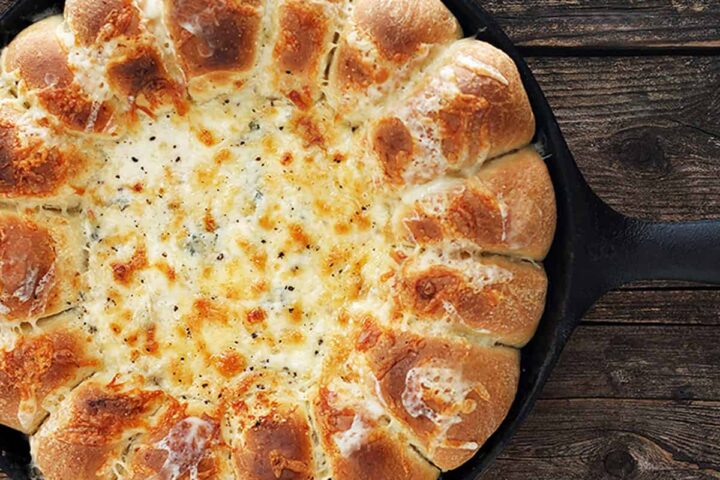
Whether it’s to accompany a football game or a holiday gathering, you’ll be the hit of the party when you bring this one out! Fresh, warm pull-apart buns ring the outside, while the centre is filled with warm artichoke and spinach dip. Simply grab a bun and spoon a bit of the warm dip on top.
As everyone knows, I like nothing more than to whip up my own bread dough, but don’t feel you need to do likewise (although this bread is wonderfully soft on the inside and crispy on the outside). Instead, you can easily use a loaf of frozen pre-made bread or roll dough (thawed). Just follow the directions below.
Ingredients and Substitutions
Bread Rolls – you can use the recipe below to make the rolls, or use a loaf of frozen pre-made bread or roll dough to make the rolls.
Cream Cheese – full fat cream cheese is recommended, for the best dip consistency.
Artichoke Hearts – canned artichoke hearts are recommended.
Recipe Tips
While best fresh from the oven, I have made this ahead and re-heated to serve. Simply bake, cool a bit then refrigerate covered with foil. To serve, cover loosely with tinfoil and pop into a 350° F. oven for 25-30 minutes to re-warm.
It’s also worth noting that you can use any of your favourite baked dips in this dish (I think it would be great with a warm crab dip!), so get creative and make your own version.
Want to save this recipe?
Enter your email and I'll send it to your inbox. Plus, you'll get great new recipes from me every week!
By submitting this form, you consent to receive emails from Seasons and Suppers.
You can unsubscribe at any time.
Get the Recipe: Skillet Artichoke Spinach Dip
Ingredients
Bread Dough: (or use one loaf of frozen bread dough, thawed)
- 2 3/4 - 3 cups all-purpose flour, spooned and levelled
- 2 1/2 teaspoons active dry or instant yeast
- 1 teaspoon fine salt
- 1 cup milk, warmed, but not hot
- 2 Tablespoons vegetable oil or melted butter
Artichoke Spinach Dip:
- 4 cups loosely packed fresh baby spinach, (or 1/2 of a 10 oz. package frozen spinach, thawed and drained)
- 6 oz canned marinated artichoke hearts, drained and coarsely chopped (can also use regular canned artichokes, about 2/3 cup chopped)
- 4 oz cream cheese, at room temperature (1/2 a typical brick)
- 1/2 cup sour cream
- 1/4 cup mayonnaise
- 1 clove garlic, minced
- 1/2 teaspoon Sriracha sauce, (or any "hot sauce" you like)
- 1/4 cup freshly grated Parmesan cheese
- 1/4 cup mozzarella,, shredded plus more for topping
- Salt and pepper
To serve:
- 1/4 cup mozzarella, shredded
- Freshly ground pepper
Instructions
- For making bread dough: (If using pre-made dough, skip ahead to make the dip and then Cutting/shaping dough below)
- Add two cups of the flour to a large bowl of the bowl of a stand mixer fitted with a kneading hook. Add salt and combine. Warm milk to lukewarm. Stir in yeast and let stand a few minutes. Add yeast mixture to bowl, along with the vegetable oil or melted butter. Mix and add additional flour in 1/4 cup increments until a smooth dough forms. Knead until smooth. Transfer dough to an oiled bowl. Cover with plastic wrap and let rise until doubled, about 1 hour.
- Make Dip: Meanwhile, place fresh spinach in a bowl with 1 Tbsp. of water. Cover tightly with plastic wrap and microwave on high for 1 minute. Remove from microwave, leave covered and let stand 15 minutes to cool. Drain spinach well and add to a medium bowl.
- Add the remaining dip ingredients and mix until well combined. Cover and refrigerate until needed.
- Cutting/shaping dough: Turn dough out onto a lightly floured cutting board. Using a sharp knife or bench scraper, cut the dough into 16 equal pieces. (I cut in half, then each piece in half, then repeat cutting each piece into equal parts until I have 16 pieces). Shape each piece into a ball by pinching the edges together underneath.
- Generously butter an 8-inch cast-iron skillet. Find a bowl that is about 5 1/2-inches across the top, spray the outside with cooking spray and place it, top side down, in the center of the skillet. (*If you can't find a bowl, take a sheet of tin foil and shape it into a tight circle about 5 1/2-inches around and 1 inch high and place it in the centre. Spray it with cooking spray.
- Arrange the dough balls around the outside of the skillet, pushing them together as needed until they all fit. Brush dough balls generously with melted butter. Cover the skillet with plastic wrap and let rise until puffy, about 30 minutes.
- Pre-heat oven to 375° (regular bake setting/not fan assisted) with rack in centre of oven. Remove bowl from center of skillet. Spoon prepared dip into the centre space, pushing it right up to the edge of the dough. Sprinkle top of dip with additional mozzarella/Parmesan. Bake in the pre-heated oven for about 30 minutes, until rolls are golden and sound hollow when tapped and the dip is bubbly.
- Remove from oven. Raise oven rack to the top third and switch oven to broil. Sprinkle the rolls with additional mozzarella cheese and return skillet to oven under the broiler, until the cheese and dip is browned.
- Let skillet stand at least 5-10 minutes, or until just warm (not hot). Add a bit of freshly ground pepper on top, if you like. Do watch the hot skillet handle and wrap in a towel if it is still to hot to hold. Serve with a dip "knife" and let everyone serve themselves.
Notes
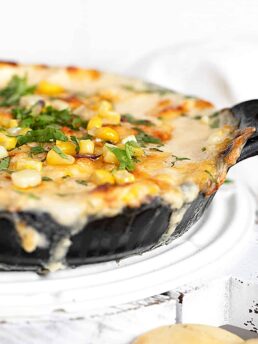
More Dip Recipes to Love!

Hi! I’m Jennifer, a home cook schooled by trial and error and almost 40 years of getting dinner on the table! I love to share my favourite recipes, both old and new, together with lots of tips and tricks to hopefully help make your home cooking enjoyable, stress-free, rewarding and of course, delicious!
I’ve made this recipe too many times to count for family and friends. It’s perfection!
I’m so glad to hear, Lacy :) Thanks so much!
I’ve had this pinned forever but I finally made it last night for NYE as part of our all-appetizers dinner. With the stay at home orders, it’s just me, my husband and our 12 year old daughter. This was the first thing I planned on putting out. We. Ate. All. Of. It. We literally couldn’t stop ourselves! Everyone was so happy and full, we didn’t bother making any other appetizers!
Thanks so much for the recipe! Will definitely be making it again and again.
So glad to hear, Sarah :) Thanks so much!
I LOVE this recipe! By far the best spinach artichoke dip, even if made without the bread, all together as is it’s perfection!!
So glad you are enjoying it, Ceri :) Thanks!
I’m attempting to make the is for a gathering today and would like to use a French baguette instead of the homemade dough. Are the directions still the same if I skip the dough part? I’m concerned about the cooking time. Can’t wait to try this out though!
Hi Jaime, No, you definitely wouldn’t want to put bread in the oven that long. Honestly, I would just warm/toast the bread separately, then warm the dip separately (microwave/oven), then just assemble the warm parts.
Couple of questions. 1. Like another reviewer, I’m confused by the instruction “Shape each piece into a ball by pinching the edges together underneath”. Which edges? Underneath what? (sorry; but, I am frightfully literal). I’m envisioning have 16 cube-shaped pieces of dough once I’ve cut up the whole; and then, interpreting the photo, shaping cube into more of a pie wedge shape. Wish there were pics of the various steps, esp. this one.
2. I don’t like to microwave my food. Can you provide alternative instruction for the spinach. Blanching quickly in a pan of boiling water for a few seconds? Also, would it be ok to chop spinach into smaller pieces; if yes, before or after blanching or makes no difference. Planning on making this next week for a neighborhood gathering.
Hi Margaret, I’ll start with the spinach and yes, you can blanch in boiling water. I would chop afterwards myself, just so it’s easier to scoop out of the water.
As for shaping the dough into balls, this might be easier to understand … Take a chunk of dough and roughly form it into a ball, then place it down in front of you and flatten it slightly with the palm of your hand. Now you have a circle. Imagine the circle is a clock. With your thumb and middle finger, take the edges at the 12 o’clock and the 6 o’clock position and bring them together in the middle and pinch them together. Now take the edges at 3 o’clock and 9 o’clock and pinch them together and so on until all the edges have been brought into the middle.
This forming action creates surface tension on the top of the ball, that makes them rise more efficiently and bake up higher. And yes, you want an actual ball shape (not a pie shaped wedge). The wedge shape you see in the finished buns happens as they rise, and they expand to fill in any empty space they can find, first in towards the centre of the pan until they run and then up. This creates that somewhat wedge shape you see in the finished buns, but they started out as perfectly round balls.
Hope that helps.
This recipe has been a staple for years now. My husband loves it EVERY TIME I make it. We’ve doubled the dip and rolls and made them separately, we’ve made it as written 3X more. We love this recipe.
So glad to hear you are enjoying it, Lisa :) Thanks so much!
OMG!!! amazing. Thank you!!!
Glad you enjoyed it! Thanks :)
I would love to try this recipe but my skillet is 12”. Will it work in a bigger skillet?
Hi Andrea, it will. My skillet shown is actually 10-inches across the top, so assuming yours is 12-inches across the top, it isn’t that much different. You’ll probably need to maybe space your dough balls out a bit more. Just evenly space them around the outside of the skillet. Enjoy!
I made this in my 12 inch skillet. I created a circle of foil to make it more like a 10-inch. I oiled it and made the inner circle also out of tin foil and then added the dough. Took out the inner circle, added the dip and baked. It worked out great. Once I baked it, I just lifted the outer circle away from the bread. It came right out and worked perfectly.
So glad to hear! Great tip :) Thanks!
I also made this for company for the first time. But the ingredients screamed flavor. It was an absolute hit! I’ve been asked to make this a standard for parties. Thank you so much for this recipe!
So glad to hear, Tacy! Thanks so much :)
I have been making this recipe for years and it’s always a hit: a party? A potluck meal with friends? Or just want to indulge with family? That’s the one recipe we always go back to. When serving for many people, I often arrange the bread in half smaller portion in 2 rows around the edge for one bite magic!
Thanks a lot!!!
So glad to hear, Sophie! Thanks so much :)
I tried this as a new recipe, never made before by me, which I usally don’t do for company. It was the perfect appetizer bread combo that I look for, combined both bread and appetize and I got rave reviews! Thank you so much.
So glad you enjoyed it, Lynn :) Thanks!
I accidentally submitted my comment rather than clicking my rating. This was amazing! A very simple recipe that results in something that looks incredibly difficult to make and tastes amazing!
So glad to hear! Thanks :)
I made this the other day and it turned out incredibly well. I was nervous about the bread-making but it turned out to be so simple and it was perfect! I will most definitely be making this again soon! Thank you!
Just to be clear…with your hands, you take the 16 pieces of dough and just make them into balls and put them side by side in the skillet, right? The “pinching the edges underneath” is throwing me off, sorry.
Hi Jim and yes. 16 balls put into skillet. The pinching the edges underneath is referring to how you should make the dough into balls in the first place (before you put them in skillet). Does that help? :)
It really miffs me that you can’t print this recipe ….The print button does not let it print
Hi Judy, It works fine for me and I haven’t had anyone else report an issue. Are you trying to print from the actual web page (in browser?). Have you tried the “Print Recipe” link at the top (right under the large top photo)?