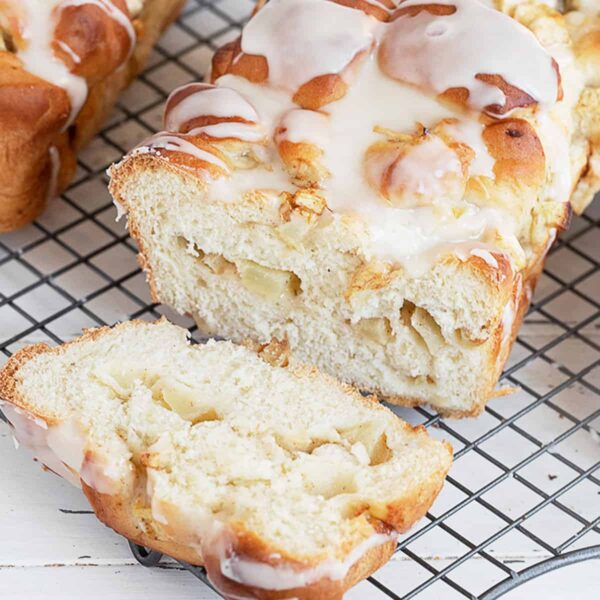
A wonderfully chunky and apple-filled yeast bread with an optional sweet maple glaze. Delicious eaten out of hand or toasted or makes great French Toast!
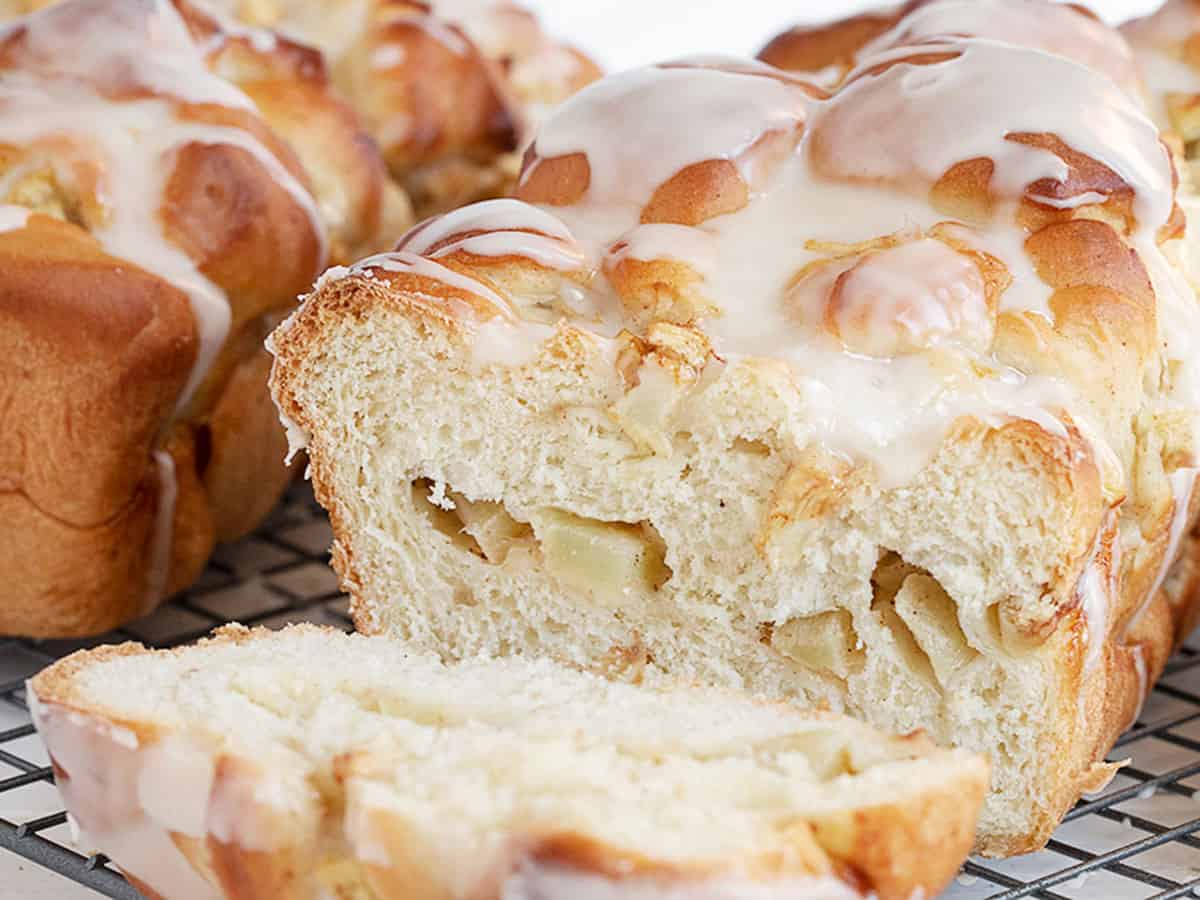
This is a fun and fruit-filled yeast bread, filled with lots of fresh apple. What makes it fun is that you get to cut it all up into chunks and toss it into loaf pans. What makes it fruit-filled is about 1 1/2 lbs. of fresh apple scattered out into the 2 loaves.
This is a great bread eaten out of hand, with butter or it makes great toast or French Toast. I’ve included an optional sweet, maple glaze, as well.
Ingredients and Substitutions
Yeast – You can use either Active Dry Yeast or regular Instant Yeast (such as SAF Brand) without adjustment, as we are proofing the yeast in warm water to start.
Flour – I always prefer unbleached all purpose flour for making breads, but regular, bleached all purpose flour will work just fine here, as well.
Milk – the addition of milk to yeast breads makes for a lovely tender and moist crumb, but if you prefer not to use milk, simply replace the milk with an equal amount of additional warm water.
Butter – soft butter is added to the dough in a sort of light brioche way, adding it to be incorporated into the dough as it kneads. If you don’t want to use butter for some reason, you’ll want to add some fat such as vegetable oil at the beginning of the recipe with the liquids. Use the same amount as specified for the butter. You will probably end up needing to add more flour at the end to compensate.
Apples – I used Granny Smith apples here, which are always a good option for this bread, as they are easily available year round. They are also nice and firm, so they keep their shape well. That said, they are also quite tart, so they will make for a loaf that is not a “sweet” apple loaf. You can use other apples, but try to stick with apples that keep their shape when cooked. Any apple you might use for a pie is good.
You will also need – Eggs (2), vanilla, cinnamon, white sugar, salt. If making the glaze, you will need powdered sugar, milk and maple syrup.
Recipe Video
Recipe Tips
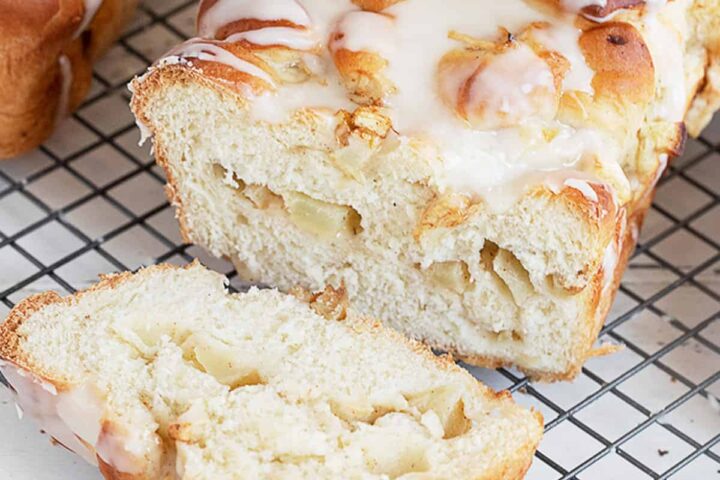
- If you like to toast your bread, obviously the glaze is not ideal. If you want to keep all your enjoyment options open, glaze just one half of the loaf, leaving the other half un-glazed for toasting.
- While this may look like a sweet apple bread, really only the glaze is sweet. That’s great for eating out of hand with butter, as it’s a nice balance with the tart apples. That said, an unglazed loaf is great for toasting, sandwiches or try it for French Toast or Bread Pudding.
- If you’re an adventurous bread baker, you could easily use this bread as a base for any number of fruit additions. Blueberries, peaches or pears, for example.
- This bread freezes well. Ideally, freeze unglazed, as the glaze tends to get quite moist and soft after thawing.
- You will have a couple of egg whites left-over from making this bread, which would be great for making macaroons or macarons.
Storing and Freezing
Store cooled bread in an airtight container or bag for a couple of days. This bread freezes beautifully up to 3 months, but is best frozen without the glaze, which tends to get moist through the freeze/thaw process.
Want to save this recipe?
Enter your email and I'll send it to your inbox. Plus, you'll get great new recipes from me every week!
By submitting this form, you consent to receive emails from Seasons and Suppers.
You can unsubscribe at any time.
Get the Recipe: Chunky Apple Yeast Bread
Ingredients
- 3 teaspoons active dry or instant yeast
- 3/4 cup lukewarm water, about 105F.
- 2/3 cup lukewarm milk, about 105F.
- 3 Tablespoons white granulated sugar
- 1 large egg yolk
- 1 teaspoon vanilla or vanilla bean paste
- 1 1/4 teaspoons fine salt, reduce to 1 tsp if using salted butter
- 4 cups all purpose flour, spooned and levelled, plus more as needed
- 4 Tablespoons unsalted butter, at room temperature, cut into 4 pieces
Apple Filling:
- 1 1/2 lbs granny smith apples, peeled, quartered, cored and diced into 1/2-inch cubes
- 2 Tablespoons white granulated sugar
- 1 teaspoon cinnamon
- 1 large egg yolk
Maple Glaze (Optional):
- 1 cup confections/icing sugar
- 2 Tablespoons maple syrup
- 1 Tablespoon milk
Instructions
- In a large bowl or the bowl of your stand mixer fitted with the paddle attachment, add the yeast and warm water. Stir and let stand 5 minutes. Add the sugar, warm milk, egg yolk, vanilla and salt and stir to combine. Add 2 cups of the all purpose flour and mix to combine. Add the softened butter, 1 Tbsp at a time and mix in.
- Switch to the kneading hook. Add 1 more cup of the flour and knead in. Begin adding the last cup of flour in small increments, adding only enough flour until the dough wraps around the kneading hook and cleans the bowl quite well. *You may not need all of the last cup OR you may need to add more than that last cup. Trust what you see in the bowl and add flour, as needed, to get your dough to that point.
- Remove dough to a floured work surface. Knead for 1 minute, then form into a ball. Place in a greased bowl, cover with plastic wrap and let rise until doubled, about 1 hour.
- When dough is almost doubled, prepare your apple filling. Prepare the apples by peeling, quartering, coring and cutting into 1/2-inch-ish cubes. Place into a large bowl. Sprinkle with white sugar and cinnamon and stir to combine. Add egg yolk and stir in to coat. Set aside.
- Prepare two 8x4-inch loaf pans by greasing or spraying with cooking spray. Set aside.
- Remove dough to a floured work surface. Divide dough into two equal pieces.
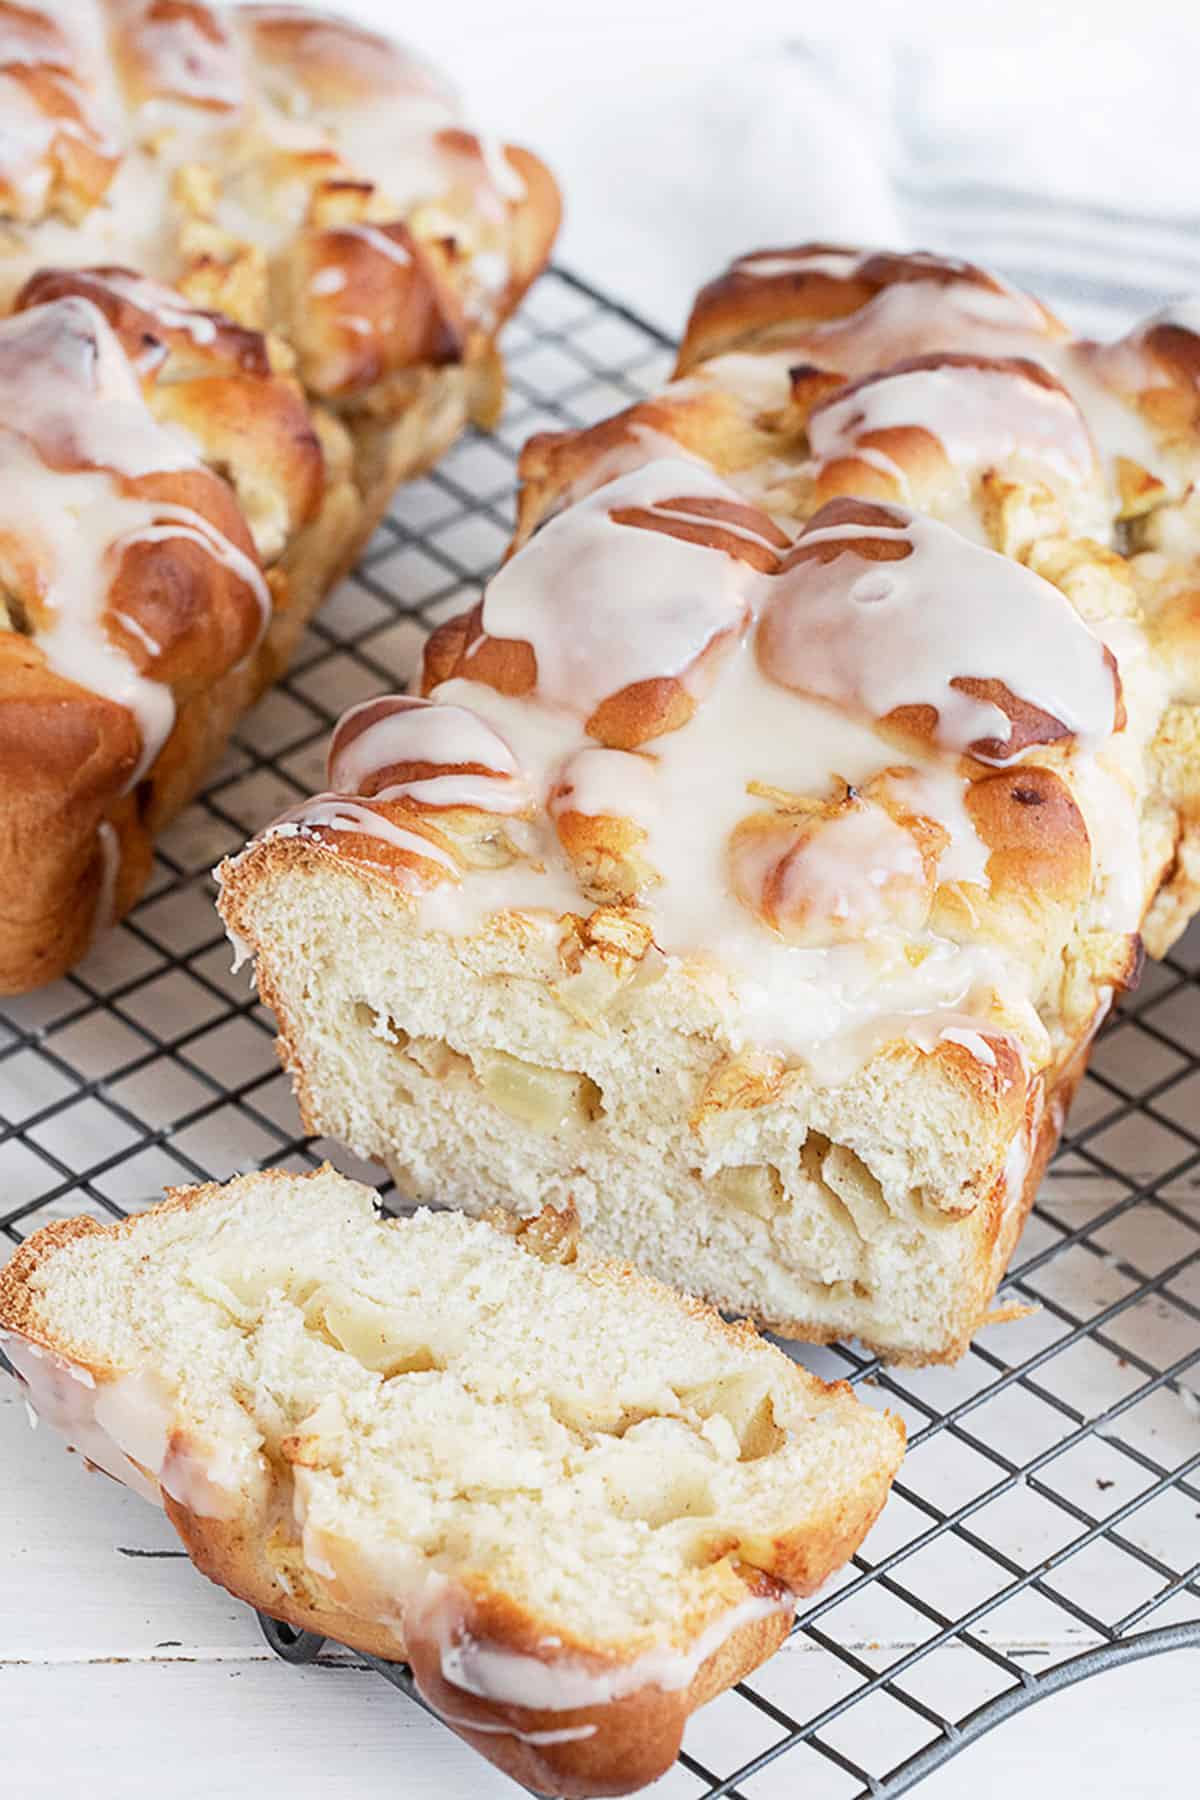
- Take one piece of dough and roll into a roughly 10x15-inch rectangle. Scatter one half of the apple filling evenly overtop of the dough, then roll up, starting from the long side. Pinch seam together. Using a sharp knife or bench cutter, cut the log into 1-inch slices, then slice down the centre of the slices from one end to the other, making a bunch of smaller chunks. *If the cutting isn't clear, refer to the video above this Recipe Card to see how it's done). Scoop up your chunks and place into your prepared 8x4-inch loaf pan. Adjust the dough chunks slightly, as needed, so that the top is as even as possible. (Any pieces sticking up much higher than others has a tendency to over-brown, so we'll try to avoid that).
- Repeat with the second piece of dough and the remaining apple mixture.
- Cover both loaves with greased plastic wrap and set to rise until doubled, about 45 minutes.
- Preheat oven to 350F (not fan assisted), with rack in the centre of the oven.
- When ready to bake, remove the plastic wrap. Place loaf pans on top of a baking sheet (to catch any juicy bubble-overs).
- Bake at 350F for about 45 minutes or until the breads internal temperature reaches 210F when tested with an instant read thermometer. Check bread at about 30 minutes and cover loosely with aluminum foil to prevent over-browning of the top.
- Allow loaves to cool in pans for 5 minutes, then remove to a cooling rack to cool completely before slicing.
- If glazing, prepare the glaze by mixing together the glaze ingredients until smooth. Drizzle over cooled loaves.
Notes
Watch how to make it
More apple recipes to love!

Hi! I’m Jennifer, a home cook schooled by trial and error and almost 40 years of getting dinner on the table! I love to share my favourite recipes, both old and new, together with lots of tips and tricks to hopefully help make your home cooking enjoyable, stress-free, rewarding and of course, delicious!
The best apple bread recipe EVER!! Ive been making it every year multiple time and it never fails !
So glad you’re enjoying it, Céline! Thanks so much :)
This turned out so well – super tasty, and I appreciated you giving the proper internal temp to cook it to, it really helped!
So pleased to hear, Deanna! Thanks so much :)
An excellent bread, I have been making it since 2021. Note the baking time in our oven is 70 to 80 minutes to reach 200F.
So glad you are enjoying it, Brian :) Thanks so much!
This is an incredible recipe! So clear and results are exactly as described. This bread was light even though it was wrapped around the diced apples. End result is airy, gentle sweet, incredible texture. I was out of milk so used buttermilk and that was a perfect substitute. Thanks to the creator for putting together a great recipe and providing excellent instructions!
So glad you enjoyed it, Lisa! Thanks so much :)
I am confused about how to cut the dough, but I don’t see a video anywhere. Where would I find it? Thank you
Hi Laurel, sorry about that. The video disappeared at some point. I have put it back in above the Recipe Card that you can reference for the cutting part. Enjoy!
This has got to be the BEST Recipe I have EVER made and it was spot on! Family was stunned and both loaves disappeared so fast. Well? Guess I’ll have to make a bunch more :)
So glad to hear, Bill :) Thanks so much!
Hi! Do these need to be placed in fridge until eating or can stay on counter?
Thanks!
Erica.
Hi Erica, I just leave it on the counter and I wrap the cut end well. Enjoy!
I was pretty geared up to try this recipe .
Chunks made sense and at the same time no sense at all to me .
Best day off baking in a long time .
Perfectly balanced recipe with clear instructions .
Curb appeal and taste !
I will make over and over .
Geoffrey , Bowmanville
So glad to hear, Geoffrey :) Thanks so much and have a great week. Spring is in the air in Ontario this week!
Jennifer , This recipe is so beautiful. I just want to be sure I can use the yeast I have. It is Red Star Platinum premium INSTANT yeast. I also have Red Star Active dry yeast. Which one would you prefer?
Thankyou for your advice and great recipes.
Merry Christmas to you!
Hi Carol, you can use either, as the yeast is proofed in water here, so both will work. Active Dry always needs to be proofed in water. Instant doesn’t need water to be activated, but it doesn’t hurt it to proof in water. That said, I always use Instant yeast in all my yeast baking and if you have it, I would use the Instant. It’s more reliable and more forgiving yeast. Enjoy and Merry Christmas to you and yours, as well! Thanks :)
Hiw I’d love a slice or two with my morning coffee today Jennifer! Loving all those yummy apple chunks! Delicious!
Thanks Mary Ann :)
I love the big chunks of apple in there! Bet this is amazing fresh out of the oven and would disappear fast at brunch. Nothing like homemade bread :)
Thanks Dawn and yes, loads of apple stuffed into this one :)