
A delicious and classic old-fashioned date nut bread recipe, made with a touch of molasses for a wonderful rich flavour. A great date loaf to enjoy any time of day!
Date and nut bread: at a glance
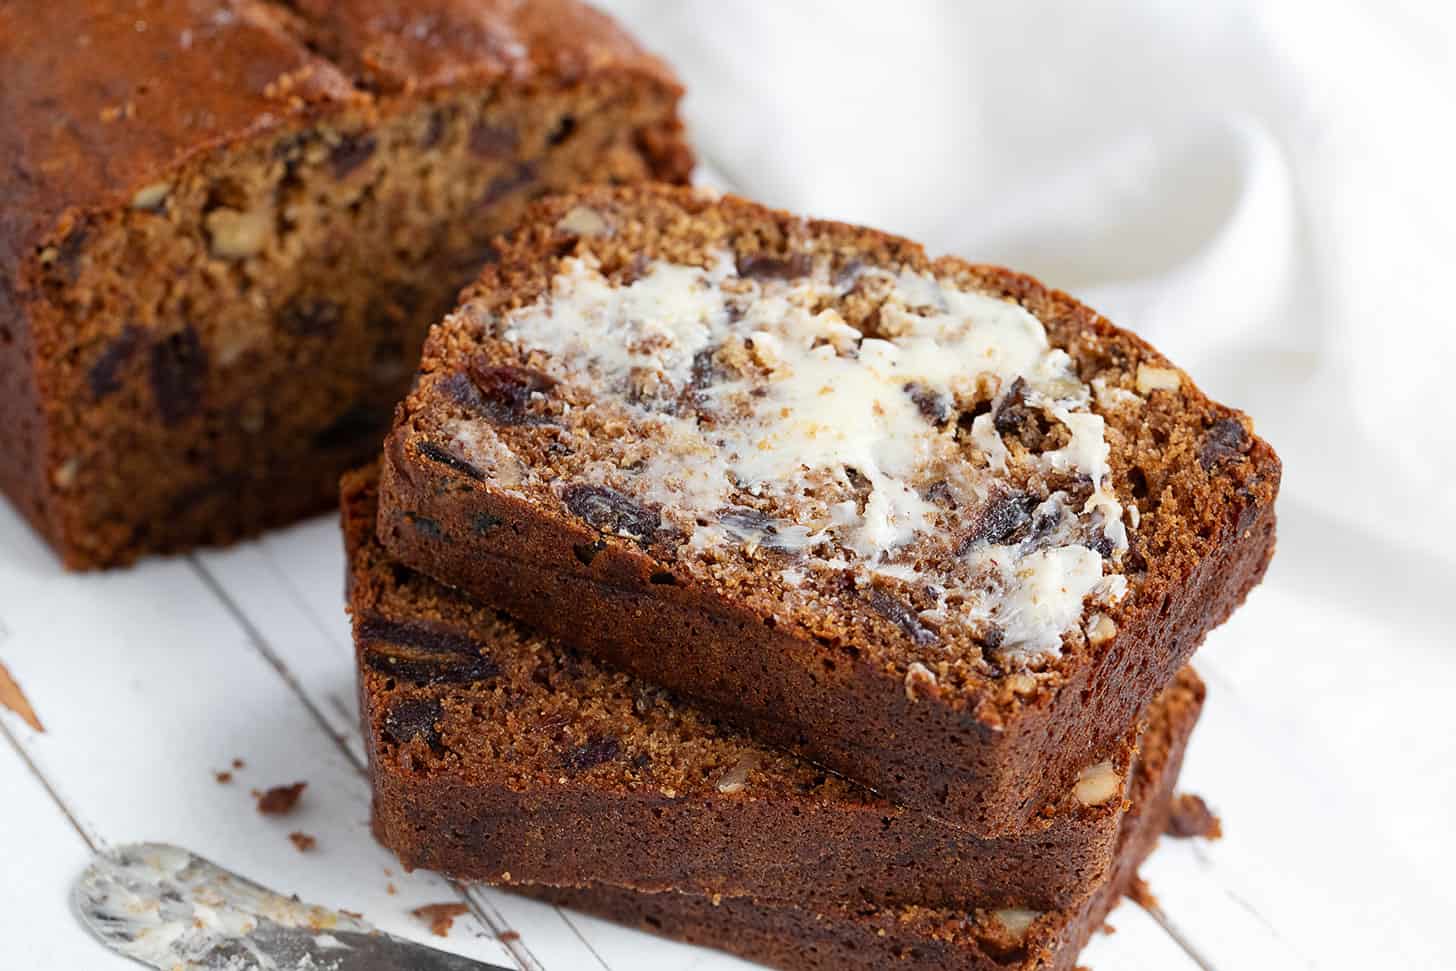
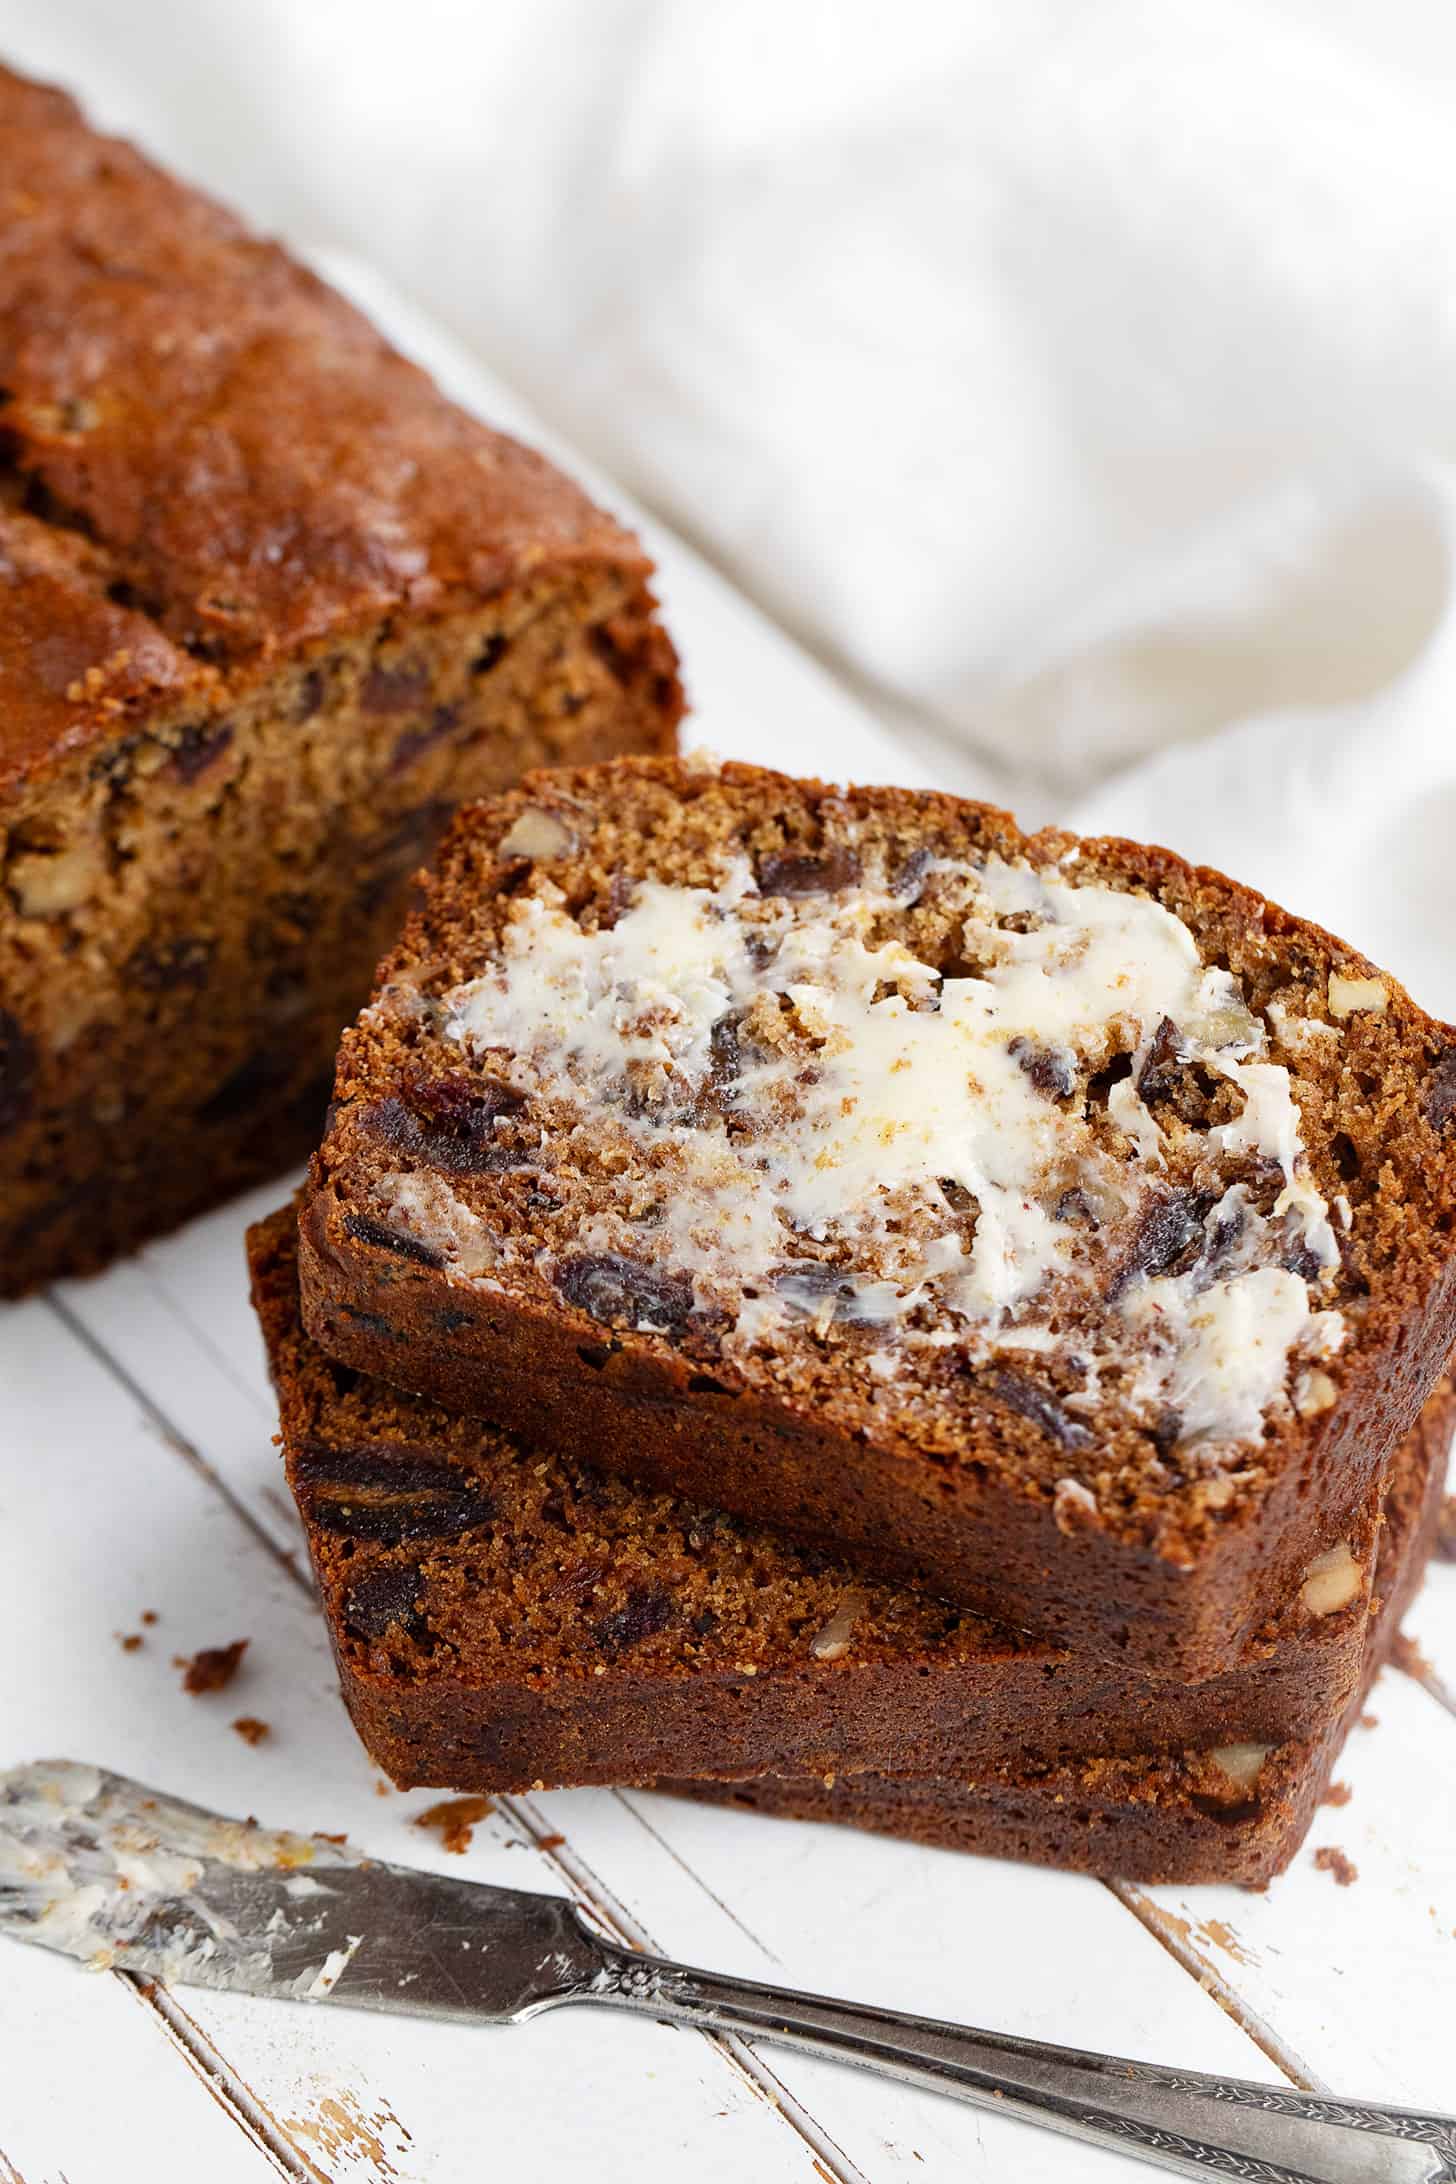
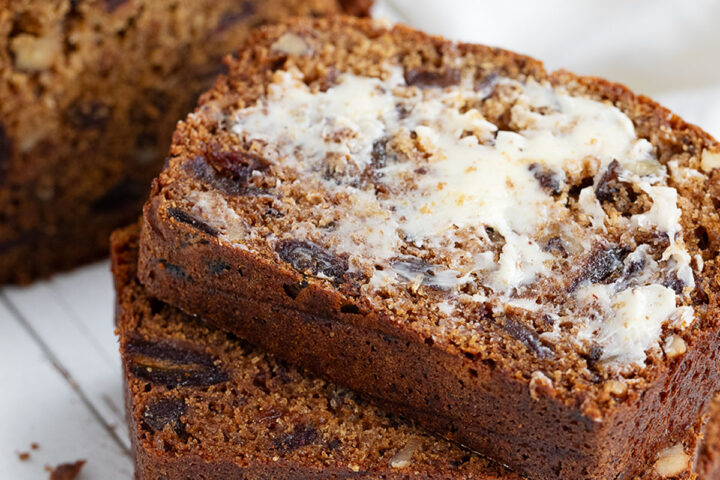
This date nut bread just might be one of my favourite things to have on the counter. I love the flavours and texture and with a bit of butter, it hits the spot any time of the day.
This classic old-fashioned date nut bread recipe is my favourite, delivering a loaf that is never dry, but not sticky or damp either. It’s just perfectly moist, with a great slicing texture.
This date nut bread keeps really well on the counter for several days or refrigerate or freeze it for longer storage.
Ingredients and substitutions
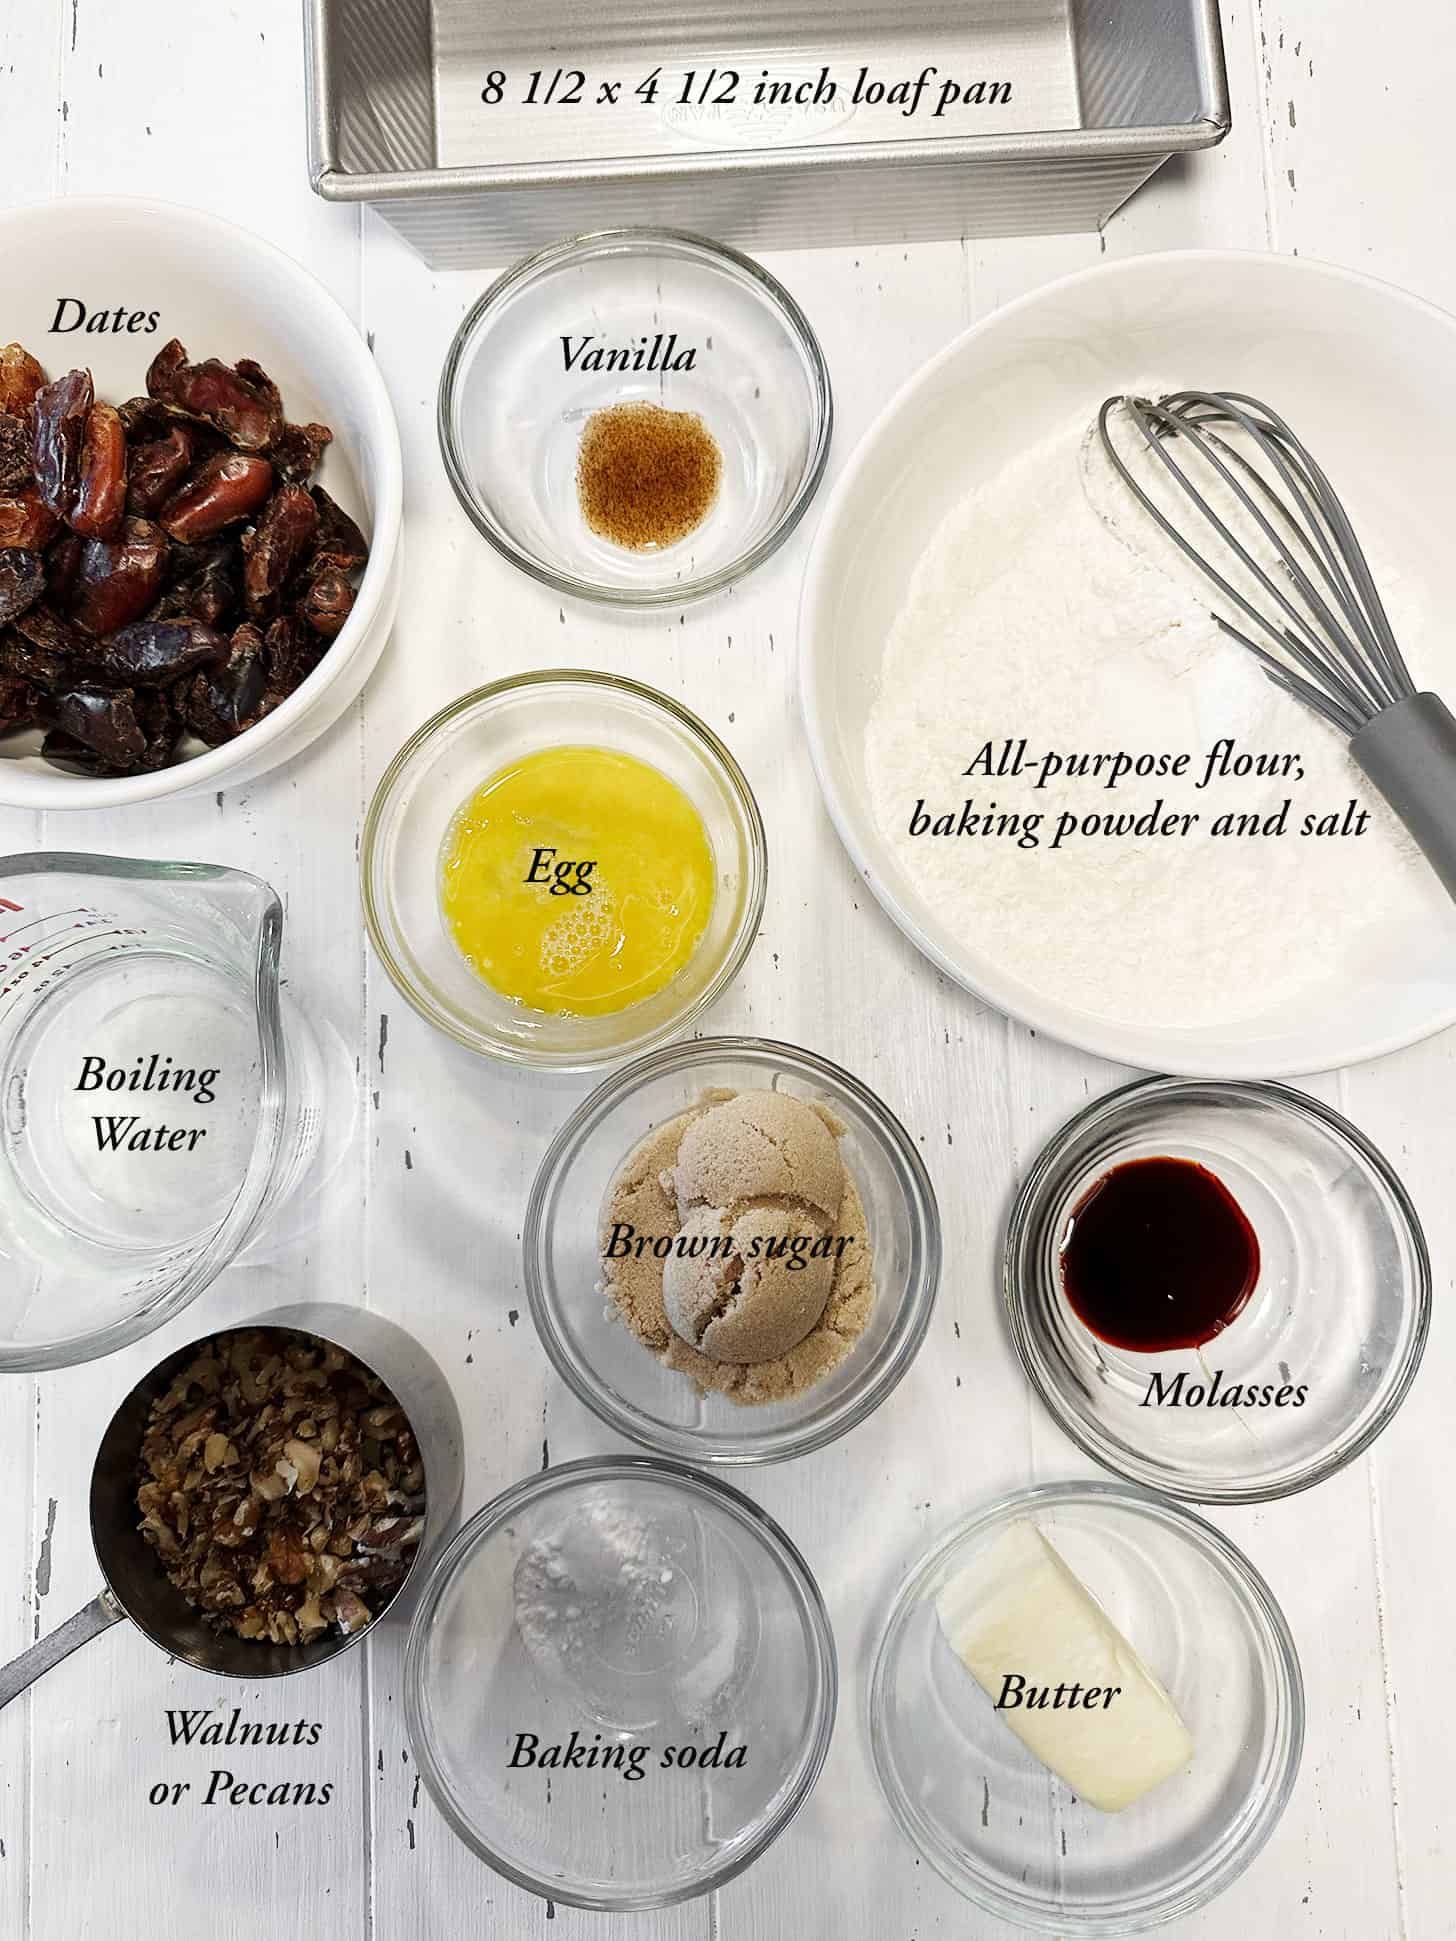
A few notes about the key ingredients …
Dates – you can use any kind of dates for this date nut loaf, from the economical supermarket baking aisle dried cooking dates, plain loose dates, Honey dates or Medjool dates. I tend to opt for the bulk loose dates, which are considerably less expensive than Medjool dates.
Molasses – you’ll want to use “Fancy” molasses here, for best results and flavour. Cooking molasses will work, though the molasses flavour will be stronger in the finished loaf. I don’t recommend Blackstrap molasses as I feel like the flavour might be too strong here. If you don’t have or want to use molasses, you can substitute it with an equal amount of honey, maple syrup or golden syrup.
Brown sugar – I generally use light brown sugar, though you could use dark brown sugar if you prefer. Dark brown sugar will produce a darker loaf, with a touch more molasses flavour.
Tip! You can tweak the sugar in this recipe slightly, to taste, but be careful making large changes to the amount of added sugar, as the sugar in baking recipes acts as more than a sweetener. It contributes to the texture and moistness of the finished loaf as well. Start by making small reductions, if desired, and go from there, so you can see the effect on the finished loaf and make your own decisions on acceptable compromises.
Pecans or walnuts – I enjoy this date nut bread with either walnuts or pecans. Walnuts would be the classic choice, and I feel like the slightly bitter walnuts pair especially nicely with the sweet dates. You can toast the nuts if you like before adding them to your loaf. Be sure to let them cool before adding to the batter, though!
How to make date nut bread: step-by-step
This is a visual summary of the steps to make this recipe. Scroll down to the Recipe Card below for the complete list of ingredients and instructions.
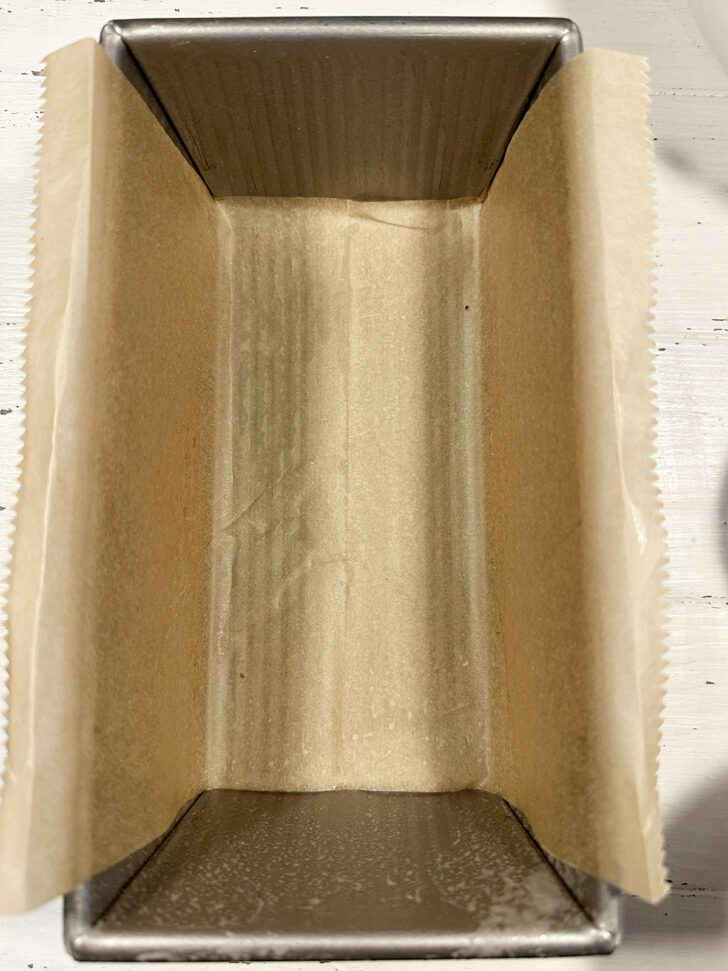

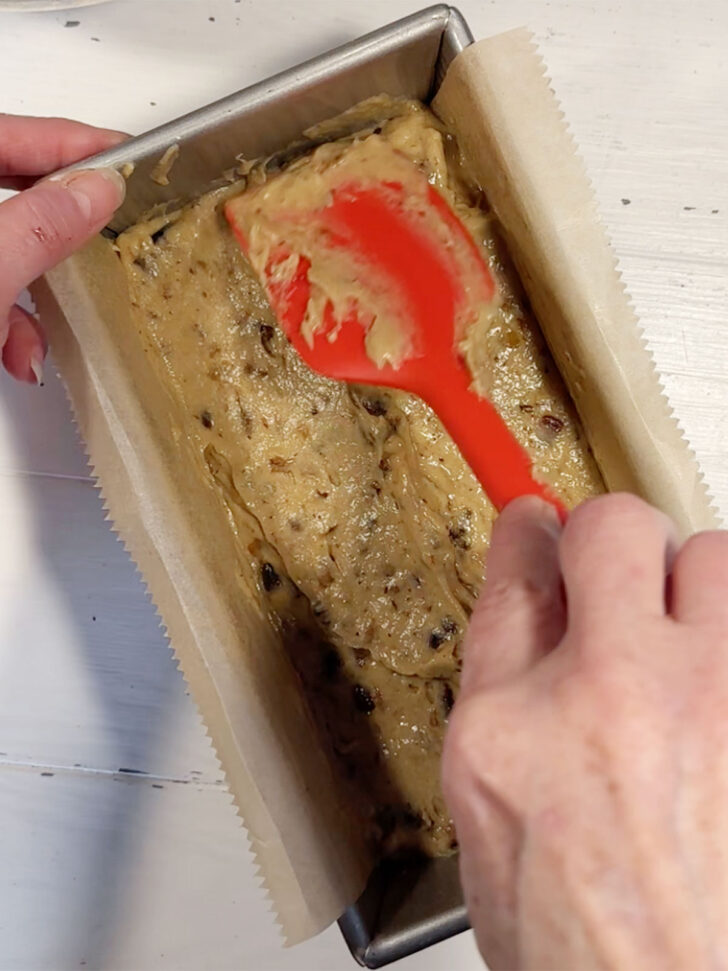
- Lightly grease an 8 1/2 x 4 1/2 inch loaf pan and line the bottom and long sides with a sheet of parchment paper (for easy removal).
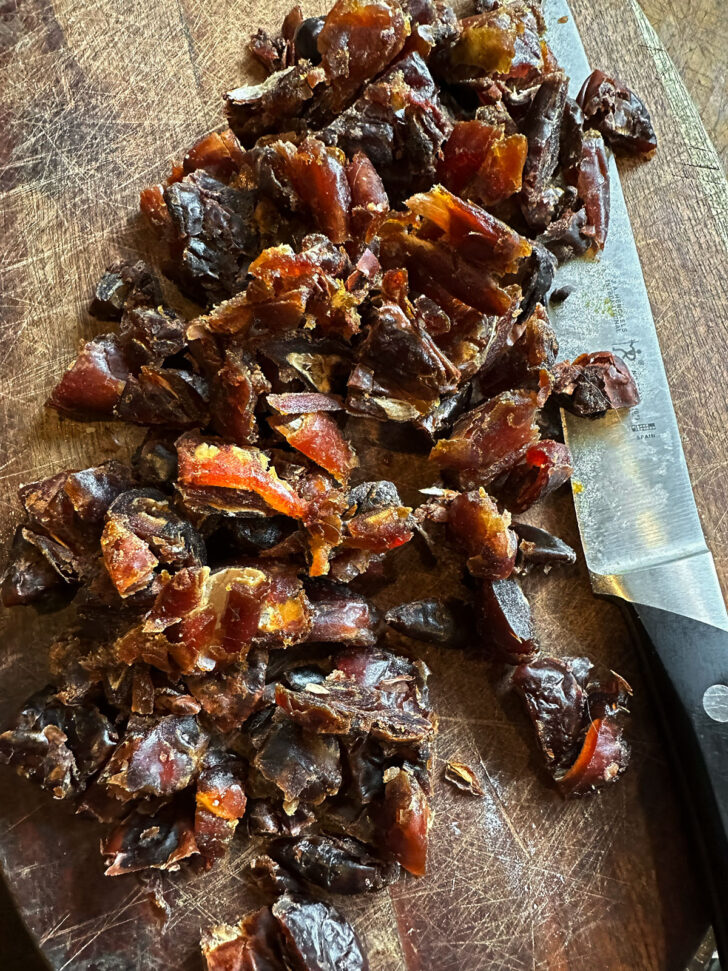
- Chop the dates. You can chop them as coarsely or as finely as you like.
- Add the dates to a small bowl, pour the boiling water over top, then stir in the baking soda. Let stand for 10-15 minutes to soften the dates and cool.
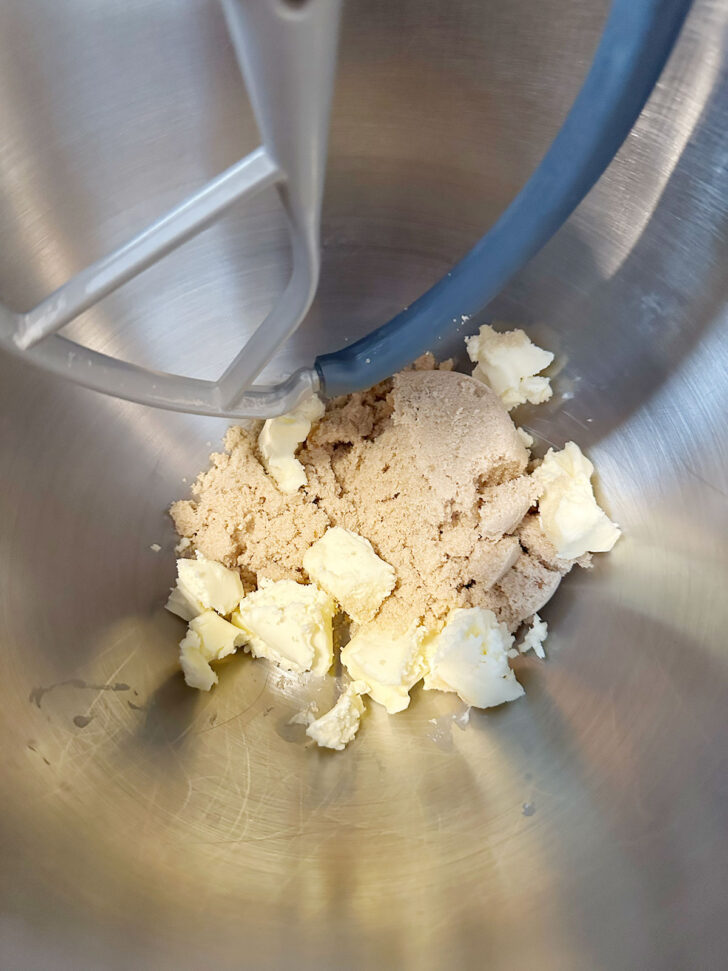

- Add the room-temperature butter and brown sugar to the mixing bowl and cream together at medium speed until light and fluffy.
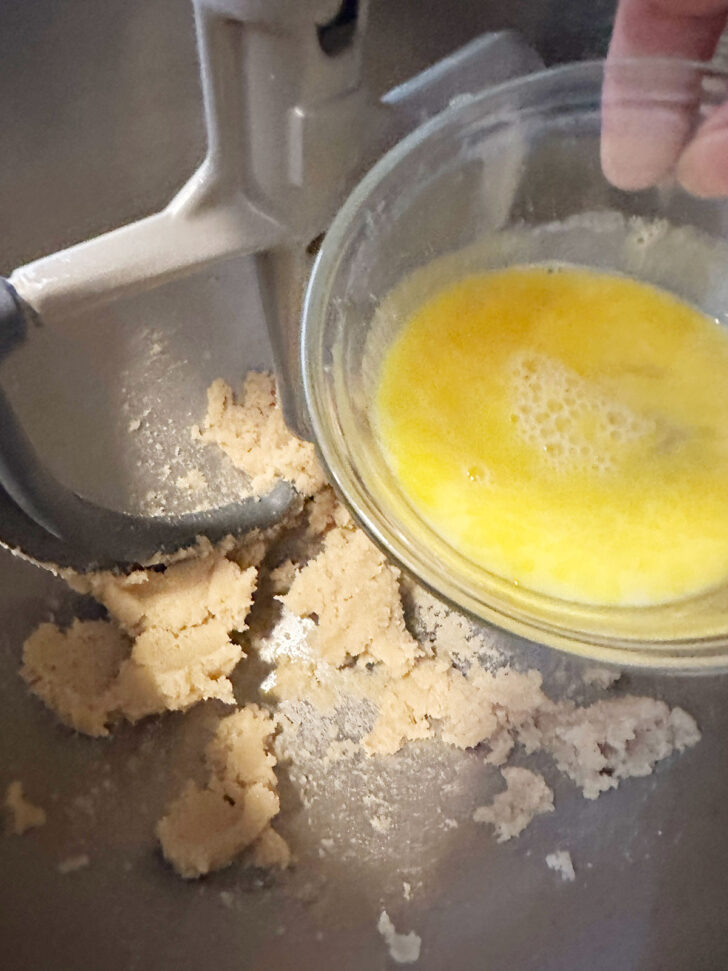
- Mix in the lightly beaten egg, then add the vanilla and molasses. Beat together well.
- Make sure the date mixture has cooled to lukewarm, then add the dates together with the soaking liquid to the mixing bowl and mix in.
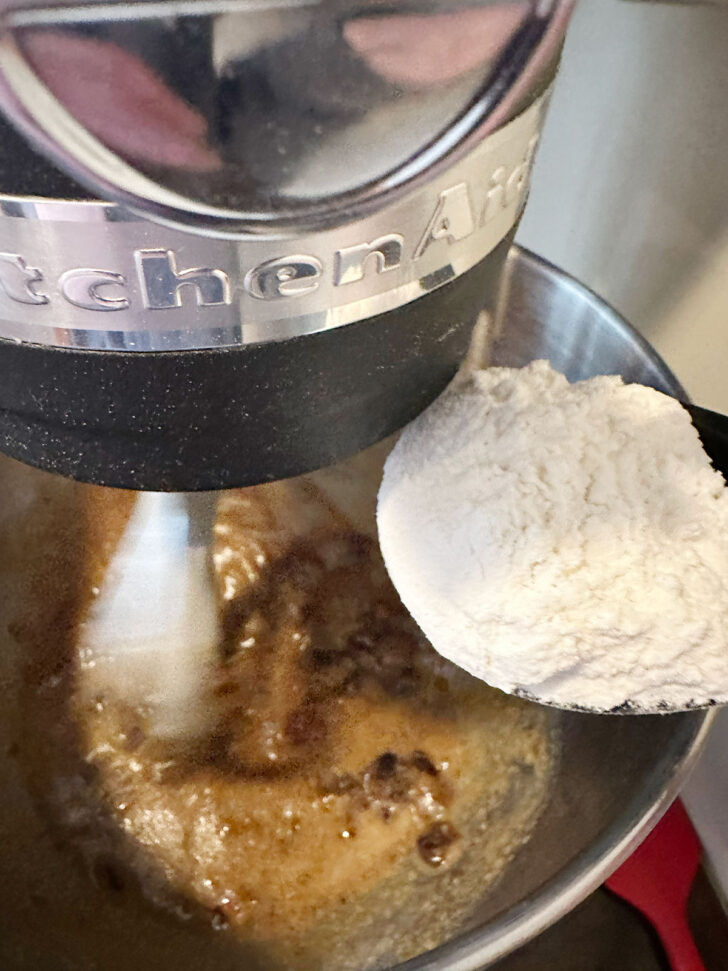
- Add the flour mixture to the bowl and mix on low speed just until incorporated.
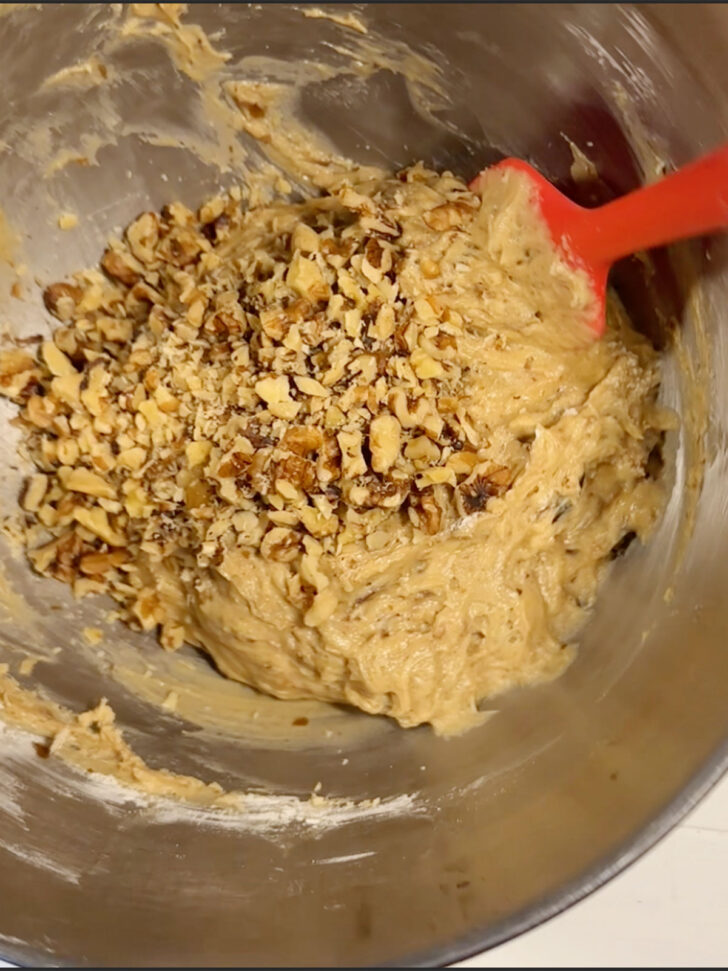
- Fold in the chopped nuts.
- Spread the batter into the prepared loaf pan and bake.
Recipe video
Baking tips!
- Baking times will vary from oven to oven and depending on pan colour, so use the listed baking time as a guideline only. Watch closely when nearing the baking time window, test regularly and bake the loaf as long as needed. The loaf is done when a toothpick or cake tester comes out clean when inserted in the centre of the loaf.
- Be sure to measure the flour using the spoon and level method, which means spooning the flour into a dry (metal) measuring cup, over-filling it, and then scraping the excess off with the back edge of a knife.
- Scrape the bowl down several times when mixing the batter, being sure to get under the paddle at the bottom of the bowl, where bits of unincorporated butter like to hang around sometimes.
- If you feel your loaf is at risk of over-browning, lay a sheet of foil loosely over the top of the pan to prevent further browning.
Variations
- Do you like dark date nut bread? Simply double the molasses in this recipe. No need to change anything else.
- Need a nut-free loaf? You can easily omit the nuts in this loaf, without issue or any other changes.
- Need another loaf to share? This recipe doubles easily to bake in two 8 1/2 x 4 1/2 inch pans.
How to enjoy your date nut bread
- I love date nut bread with a generous spread of butter, but it is equally nice with a spread of cream cheese instead. With either butter or cream cheese, you can make a bit of a sandwich, by cutting thin slices, spreading one with butter or cream cheese and sandwiching it by placing the other half on top.
- For a fancier presentation, cut really thin slices, spread with cream cheese and cut into fingers or triangles.
- A little bit of orange zest added to the butter or cream cheese makes a great flavour combination with date nut bread!
Storage and freezing
Date nut bread does not need to be refrigerated. Simply wrap well and store at room temperature for up to 3 days. That said, as long as it is well-wrapped (to prevent drying), you can refrigerate date nut bread to stretch it out to about 1 week if you don’t want to freeze it.
You can freeze date nut bread, for longer storage. Wrap well and freeze for up to 3 months.
Want to save this recipe?
Enter your email and I’ll send it to your inbox. Plus, you’ll get great new recipes from me every week!
By submitting this form, you consent to receive emails from Seasons and Suppers.
You can unsubscribe at any time.
Get the Recipe: Date Nut Bread
Ingredients
- 1/2 lb. pitted dried dates, cut in half or chopped finer, if you prefer
- 1 teaspoon baking soda
- 3/4 cups boiling water
- 1 1/2 cups all-purpose flour, measured with the spoon and level method
- 1 teaspoons baking powder
- 1/2 teaspoon fine salt, use a bit less if using salted butter
- 1/4 cup butter, at room temperature
- 1/2 cup + 2 Tablespoons brown sugar, packed, light brown sugar recommended, though dark brown sugar will also work
- 1 large egg, at room temperature and beaten lightly with a fork
- 1/2 teaspoon vanilla extract, or vanilla bean paste
- 1 1/2 teaspoons Fancy molasses, *see Note 1 below
- 3/4 cups walnuts or pecans, chopped as coarsely or as finely as you prefer
Instructions
- An 8 1/2 x 4 1/2 inch metal loaf pan is recommended. If you only have a glass or ceramic loaf pan of the same size, reduce the oven temperature for baking by 25 degrees F. *See Note 2 below for information on using other pan sizes.
- Preheat oven to 350F (regular bake setting/not fan assisted).
- Grease the loaf pan lightly, then line it with parchment paper, covering the bottom and the long sides and extending over the edges a couple of inches, to use as handles to remove the loaves later.
- Soak the dates: Add the chopped dates to a medium bowl. Pour boiling water over top and stir in baking soda. baking soda. Let stand for 10-15 minutes, to both soften the dates and allow the liquid to cool before adding to the batter..
- Combine the dry ingredients: In a medium bowl, whisk together, the flour, baking powder and salt. Set aside.
- Make the batter: In a large bowl with an electric mixer or the bowl of a stand mixer fitted with the paddle attachment, cream together the butter and brown sugar at medium speed, until light and fluffy, about 2 minutes. Add the lightly beaten egg, vanilla and molasses. Beat until well combined, scraping down the bowl as needed. (Do a quick check of the date mixture and make sure it isn't hot. A little warm is fine, but not hot, as you don't want to cook the egg in the batter.)
- Add the date mixture together with any liquid in the bowl and mix in on low speed so it doesn't splash. Mix until combined. Add the flour mixture to the batter and mix in on low speed, mixing just until combined. Fold in the nuts, then pour the batter into the prepared loaf pan. Smooth the top of the batter.
- Bake the loaf in the preheated 350F oven for 50-75 minutes, or until a tester inserted in the centre of the loaf comes out clean. **Note that baking times will vary, depending on the oven and the weight and colour of the baking pan used. Check regularly after about 45 minutes of baking and start testing when it looks like it is nearing done. If the loaf is not quite baked through but looks at risk of over-browning, loosely lay a sheet of aluminum foil over the top of the loaf to prevent further browning.
- Remove the loaf from the oven and allow to cool in the pan for about 10 minutes, then lift out of the pan and remove to a wire rack, carefully removing the parchment paper. Allow to cool almost completely before slicing.
Notes
Watch how to make it
More date recipes to love!
Hi! I’m Jennifer, a home cook schooled by trial and error and almost 40 years of getting dinner on the table! I love to share my favourite recipes, both old and new, together with lots of tips and tricks to hopefully help make your home cooking enjoyable, stress-free, rewarding and of course, delicious!
I forgot to leave the 5 stars this recipe deserves.
Thanks :)
The most delicious date nut bread..ever!
Thank-you, Jennifer
So glad you enjoyed it, Susan :) Thanks so much!
This bread is outstanding! I bake it in a 9×5 but only for 40 minutes. I need to start doubling the receipe!
So glad you’re enjoying it, Susan :) Thanks!
This is a great recipe. Thank you for sharing it. Could this recipe be used in a muffin pan for individual portions?
Glad you enjoyed it, Candy :) And yes, you could put the batter into a muffin pan. The baking time would be greatly reduced. I can’t say by how much, as I’ve never tried it, but typically muffins bake in the 15-30 minute range. You’d want to watch closely and test when they look close to done.
Can you tell what do with pre-made date paste instead if fresh ones
Hi Dawn, I’ve never used date paste, but if I understand what it is correctly, I would simply leave out the dates in the bread and just make the batter. Fill a loaf pan half-full of batter, then lay some dollops of date paste over the batter. Add the rest of the batter, then use a knife to run through the batter, swirling the date paste with the loaf batter.
Hello! Can I make this in muffin tin?
Thank you,
Sandra
Hi Sandra and yes, you could, but keep in mind that it will be the same texture of the loaf, which is not light and fluffy exactly.
Absolutely love this recipe! The outcome was delicious!! Really appreciated all the photos and tips. I will definitely be baking this one again. Thank you.
So glad you are enjoying it, Jackie. It’s one of my favourites, too :) Thanks so much!
What can I use instead of molasses? Thanks.
Hi Joan, technically you could use any other syrup (honey, maple syrup, golden syrup, treacle) although the flavour of the finished loaf will be slightly different.
This cake is delicious! My husband and son like it also. I used dark brown sugar because that is what I had, added a little extra molasses, and used walnuts. This will be added to my “keeper” recipes.
Thank you!
So glad you enjoyed it, Dani :) Thanks so much!
P.S. I hslved the recipe in order to make 3 individual loaves.
I made 3 individual 3 x5 loaves in foil pans using this recipe. Spray the bottoms with nonstick spray. No need for parchment slings….3 regular sized ice cream scoops filled the pans just right. Use same oven temp and start checking for doneness at 35 minutes. Test with toothpick. They came out perfect and people LOVED them.
So glad you enjoyed them, Amelia :) Thanks!
Can I use oil instead of butter?
Hi Farah and generally you can, though I haven’t tried it with this recipe specifically, so I don’t know how it will affect the loaf texture-wise. Technically, it should work.
I’ll need to give this lovely loaf a try Jennifer, as well as the carrot cake one that’s also showing above. Loaf cakes are easily one of my favorites. A slice is perfect alongside my morning coffee or as a dessert!
Thanks Mary Ann and yes, I love. loaf cake, too. There’s just something about those slices :)
Can this recipe be adapted to omit the nuts?
Hi Anne and absolutely. Just omit them :) Enjoy!