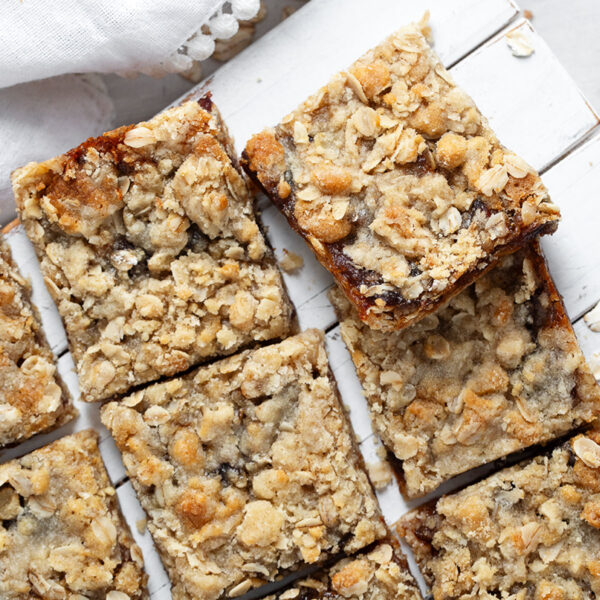
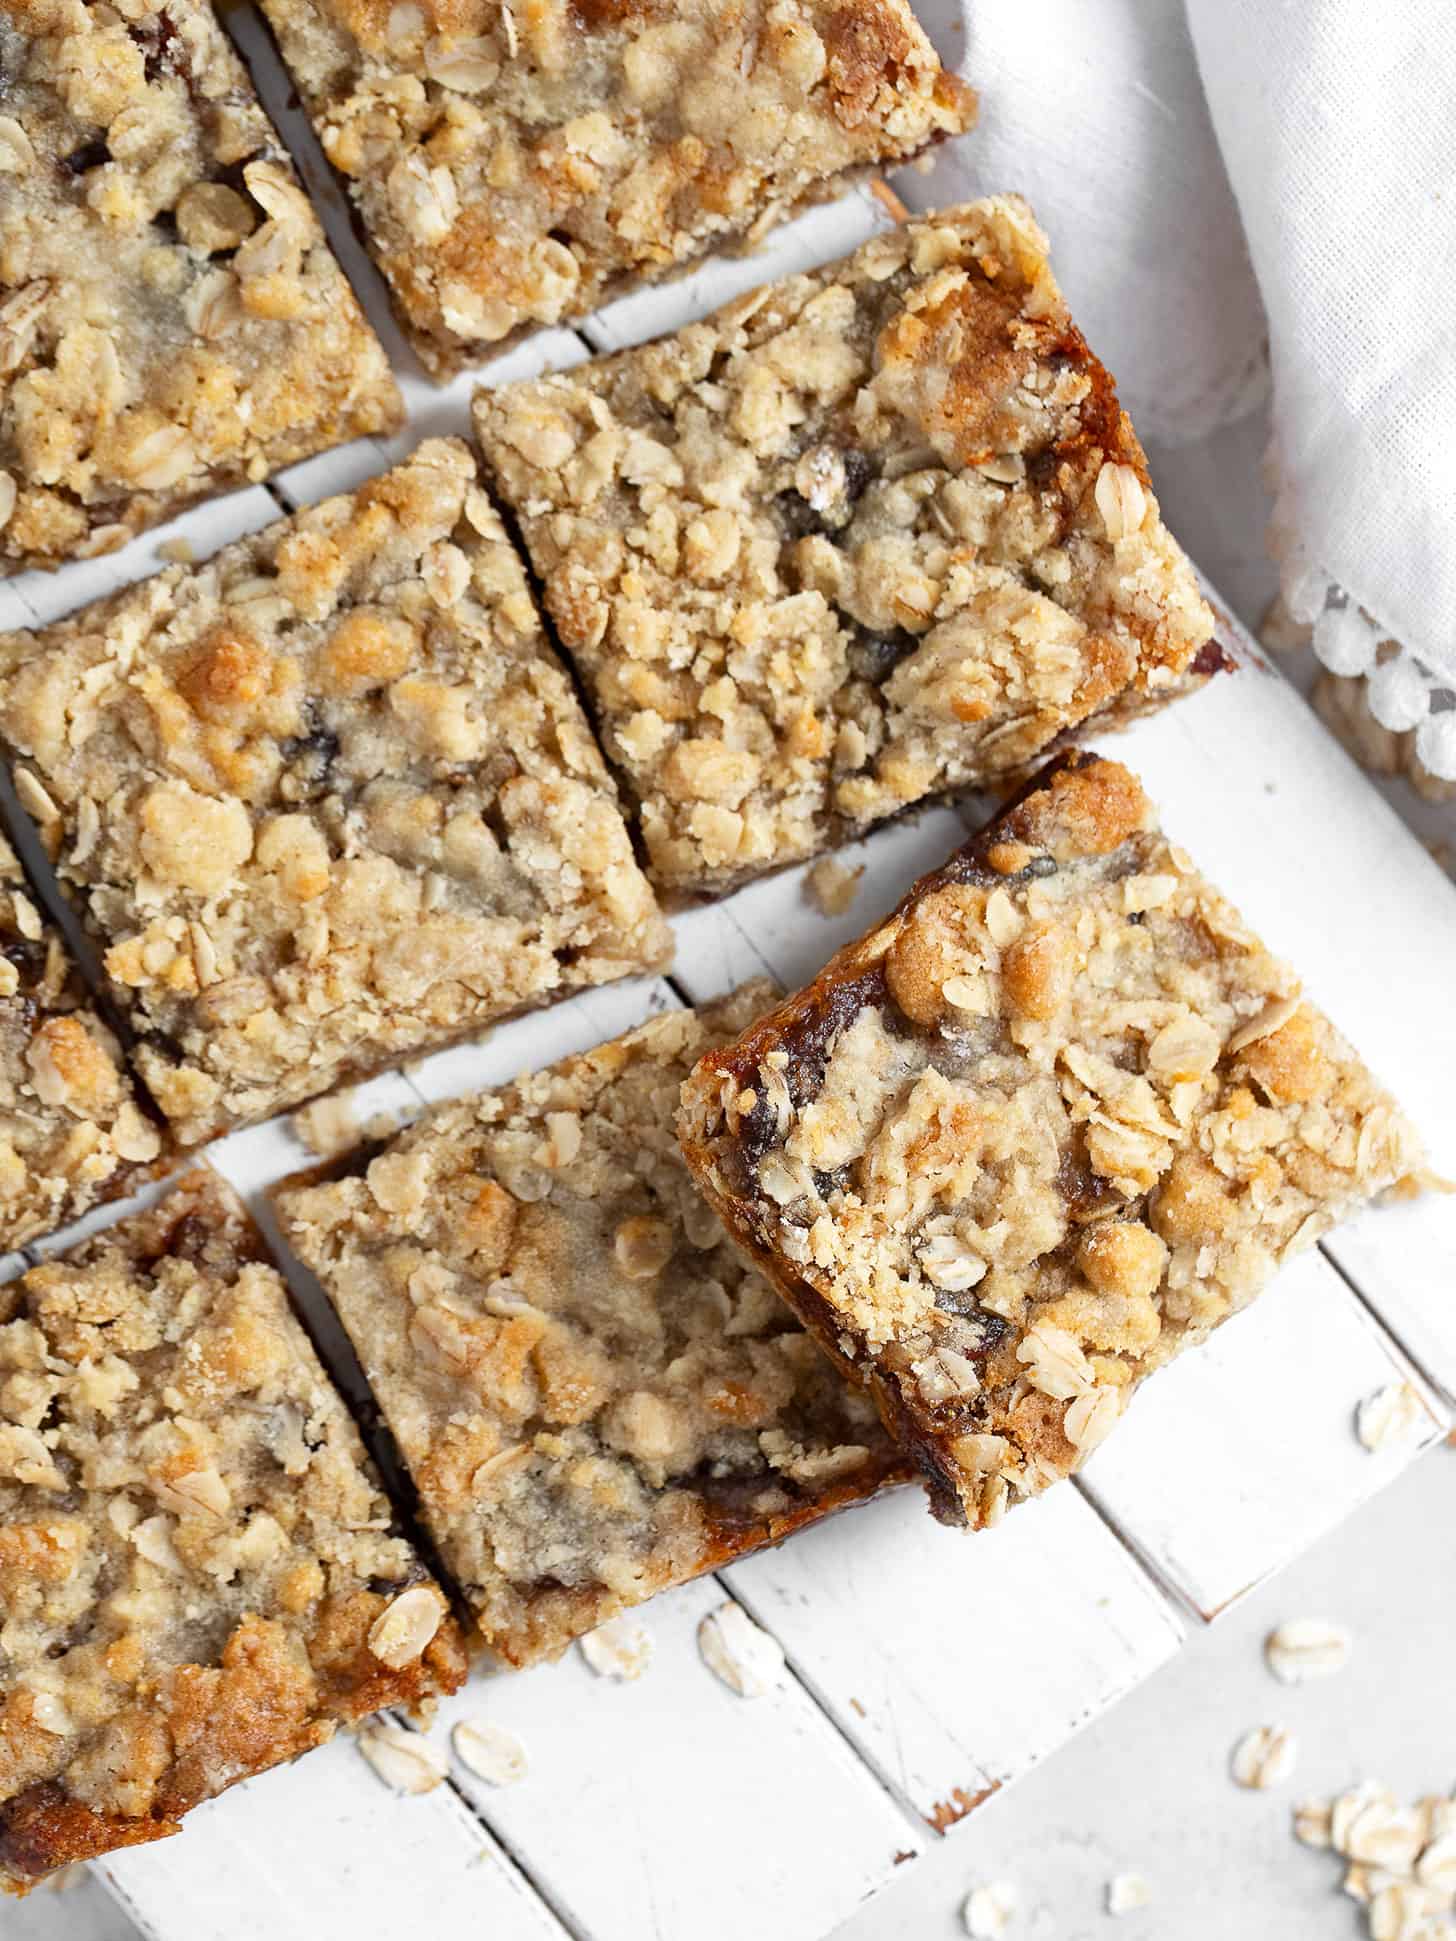
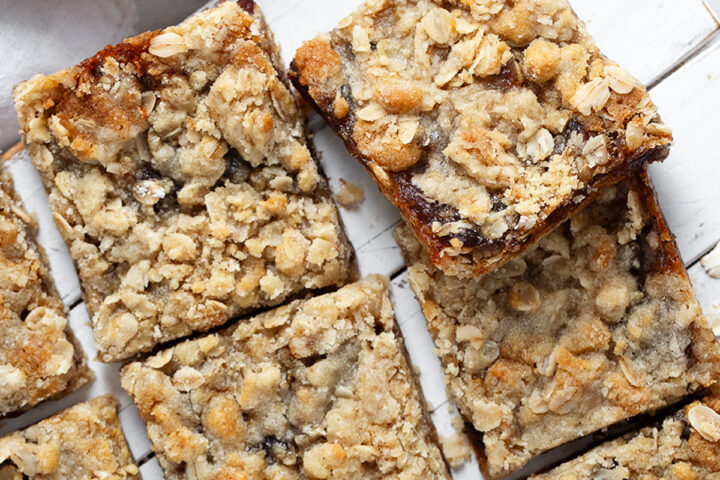
Classic, old-fashioned date squares, just like the ones Grandma made. Nice and thin, with the perfect balance of date filling to crumb! Can be made in a small 8×8 pan or double for a 9×13 pan.
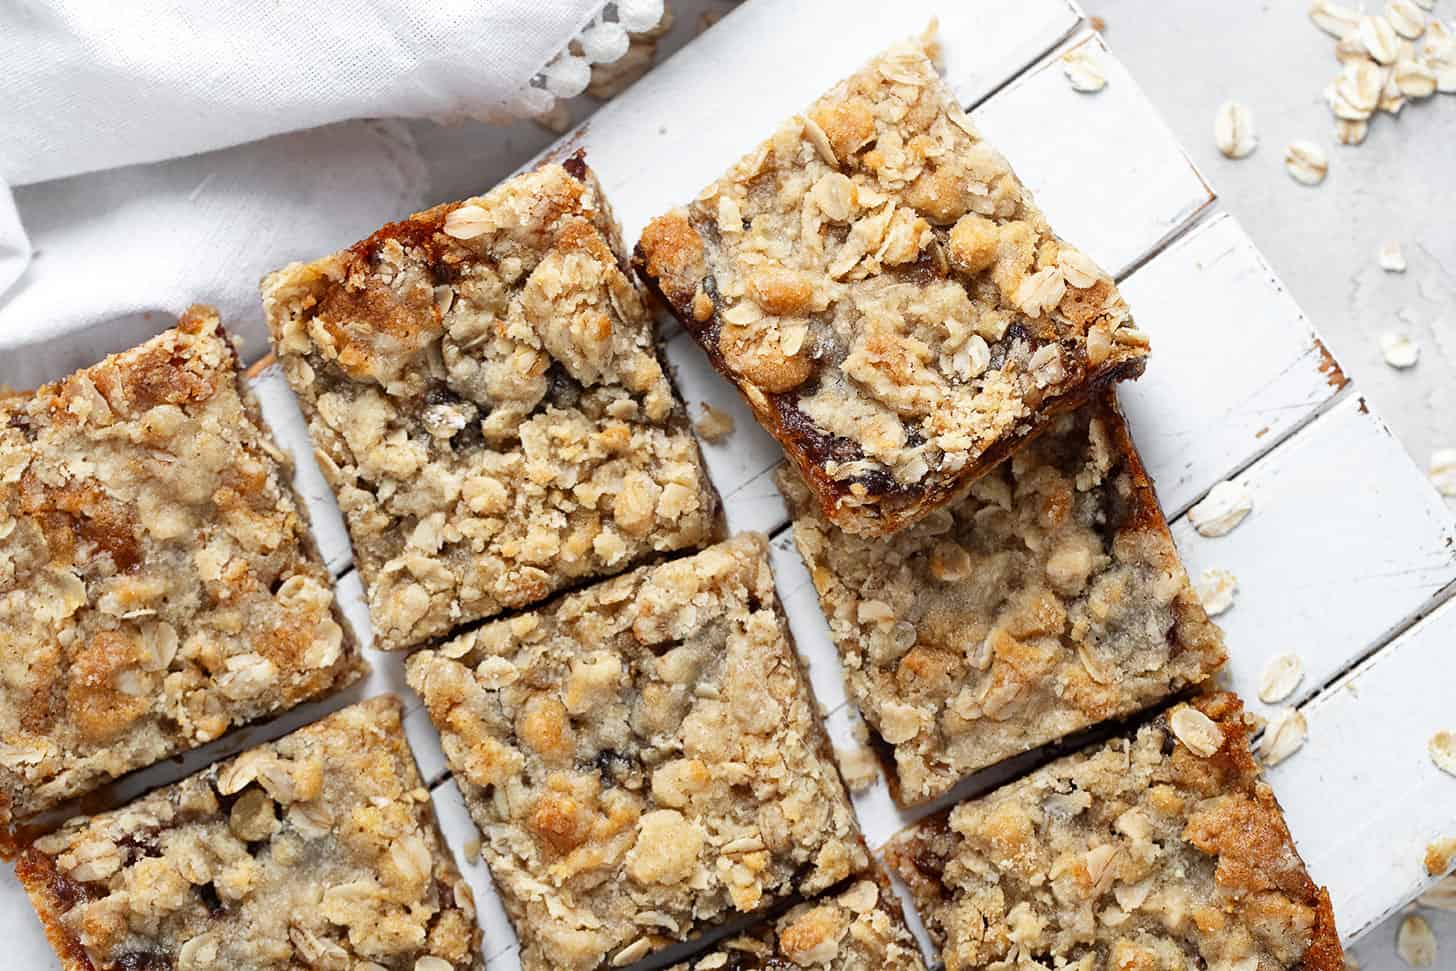
These are the classic, old-fashioned, bake-sale, church dinner, pot-luck, just-like-your-Grandma-made kind of date squares. They are thinner than many date squares that you see these days, but in my mind, they offer the perfect bite, with the crumb and date filling in perfect balance.
Ingredients and substitutions
A few notes about the key ingredients …
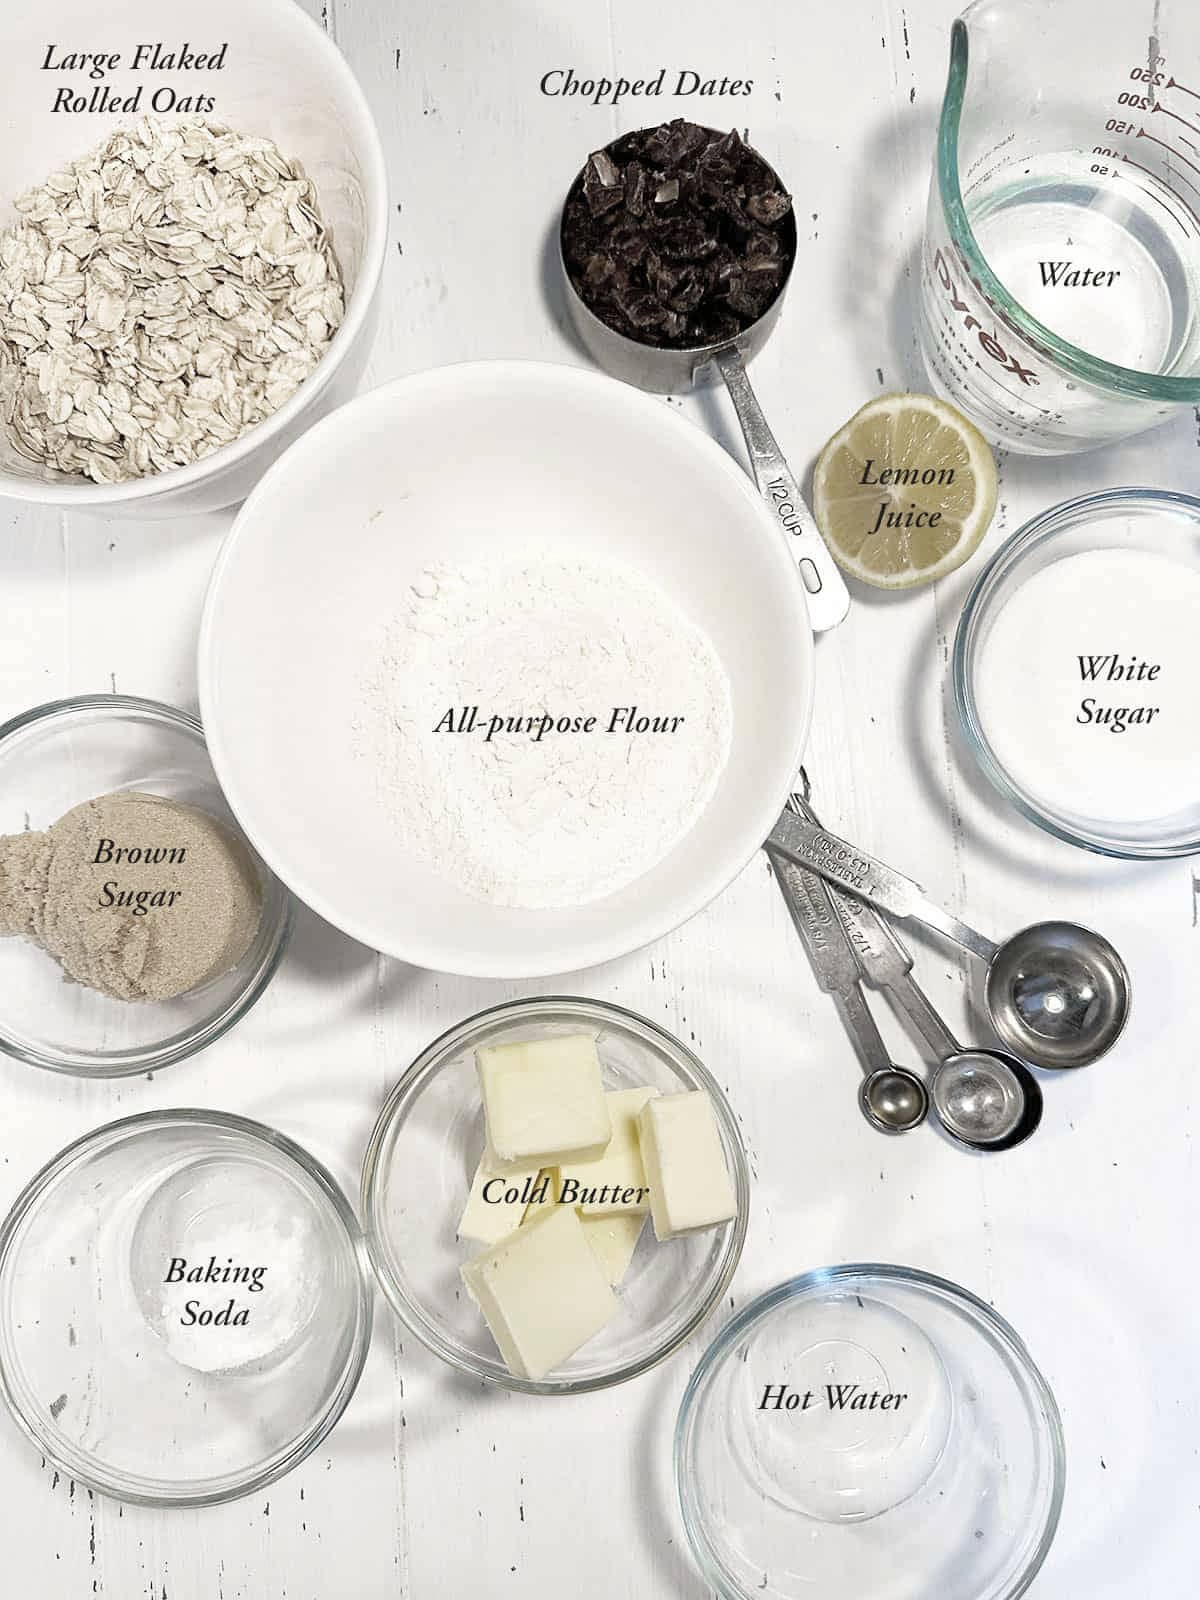
Rolled oats – These date squares will need old-fashioned, large-flake rolled oats. I haven’t tested this recipe with quick-cooking oats. They may work, though as they are milled finer, the resulting bars would lack the lovely texture of the larger-flake oatmeal. I don’t recommend quick oats here.
Dates – Delicious date squares have been made for years using basic and inexpensive, “baking aisle” dried pitted and chopped dates. That said, whole dried and pitted dates that you chop yourself are also fine. Regular dates or honey dates are both fine, as they are dried dates. I haven’t tested this recipe with Medjool dates. Medjool dates are fresh dates, as opposed to dried dates. They may work, but as I haven’t tested them I can’t confirm that.
Dried dates are typically sold pitted, but if your dates have pits, simply slice the dates in half and pull out the pit before chopping.
Brown sugar – Light brown sugar is recommended, but dark brown sugar will work in a pinch. The squares will have a darker appearance and a bit more molasses flavour.
How to make date squares: step-by-step
This is a visual summary of the steps to make this recipe. Scroll down to the Recipe Card for the complete list of ingredients and instructions.
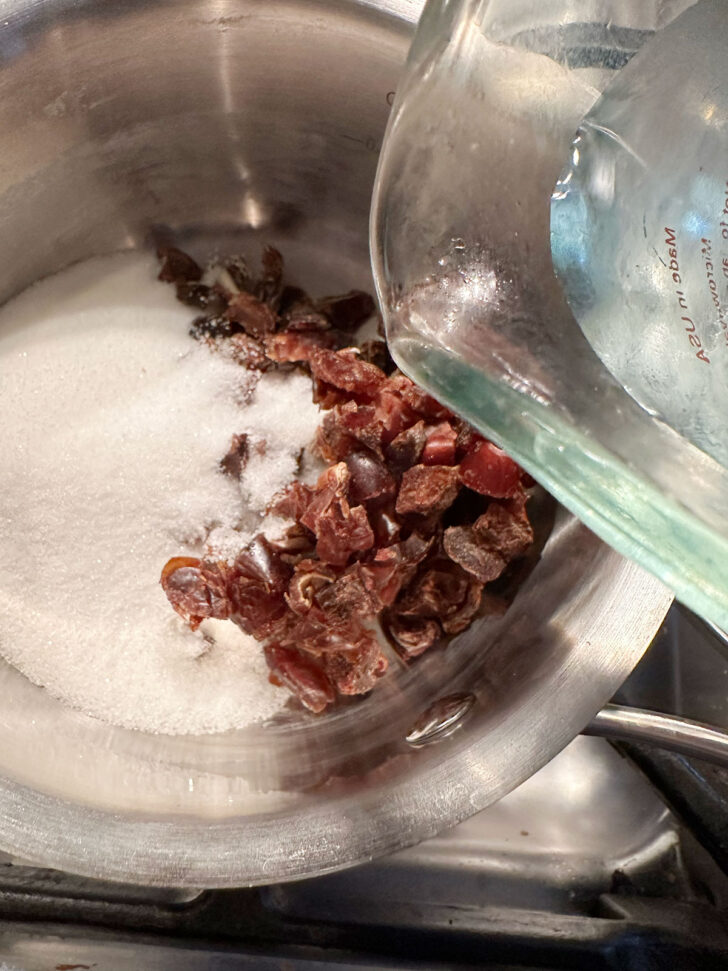
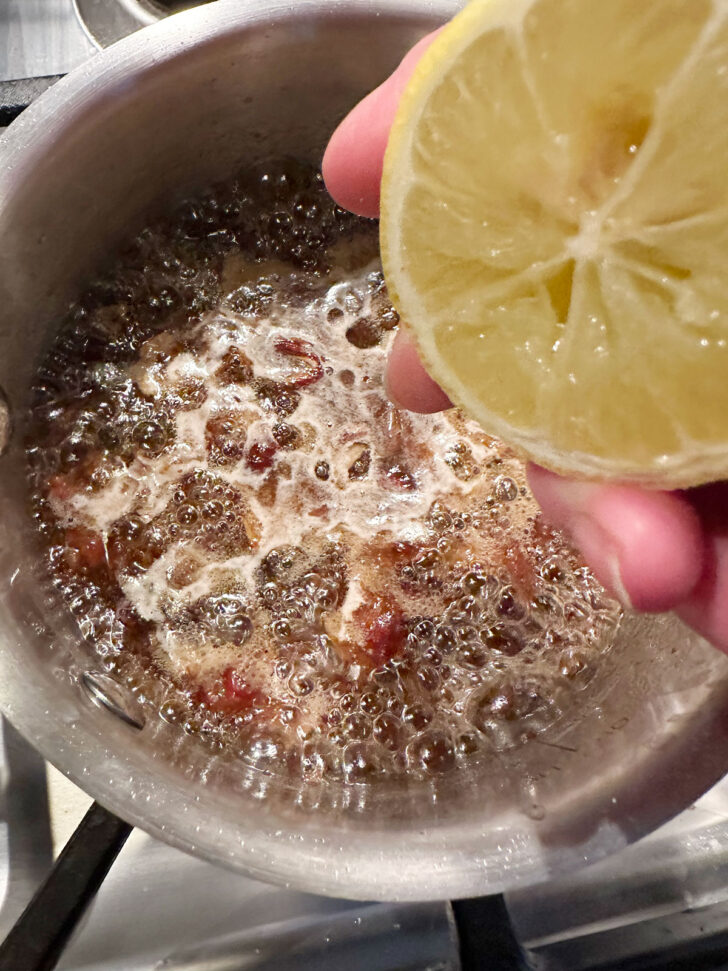
- Combine the date-filling ingredients in a small saucepan. Bring to a boil over medium heat.
- Remove from heat and stir in the lemon juice. Remove to a bowl and refrigerate until cooled completely before proceeding, about 1 hour in the refrigerator.
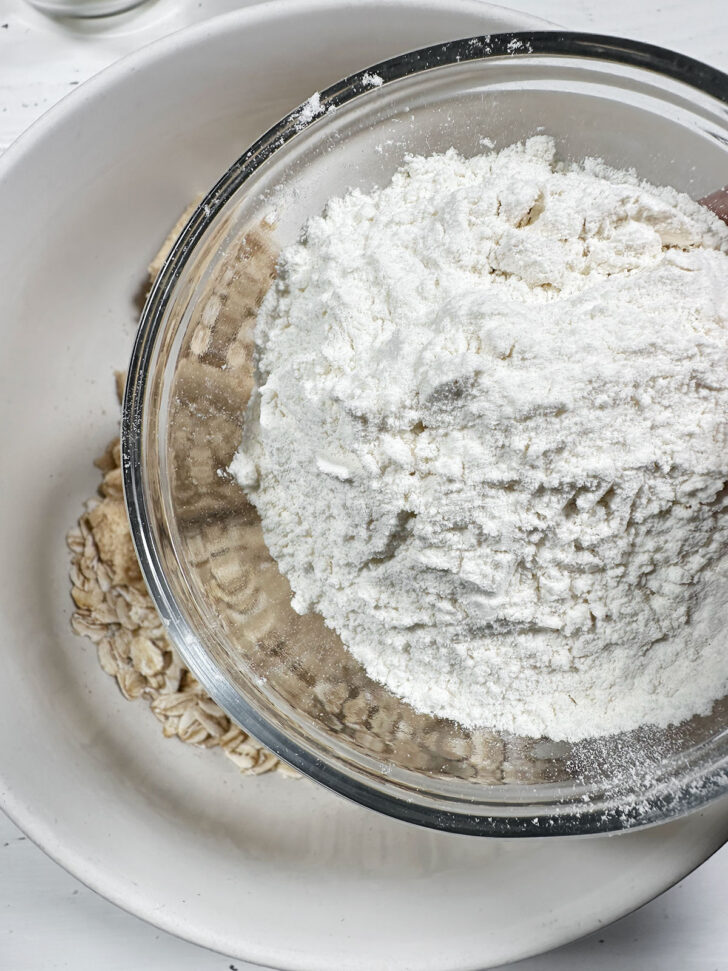
- Make the base and topping by combining the oats, flour and brown sugar in a mixing bowl and stirring together.
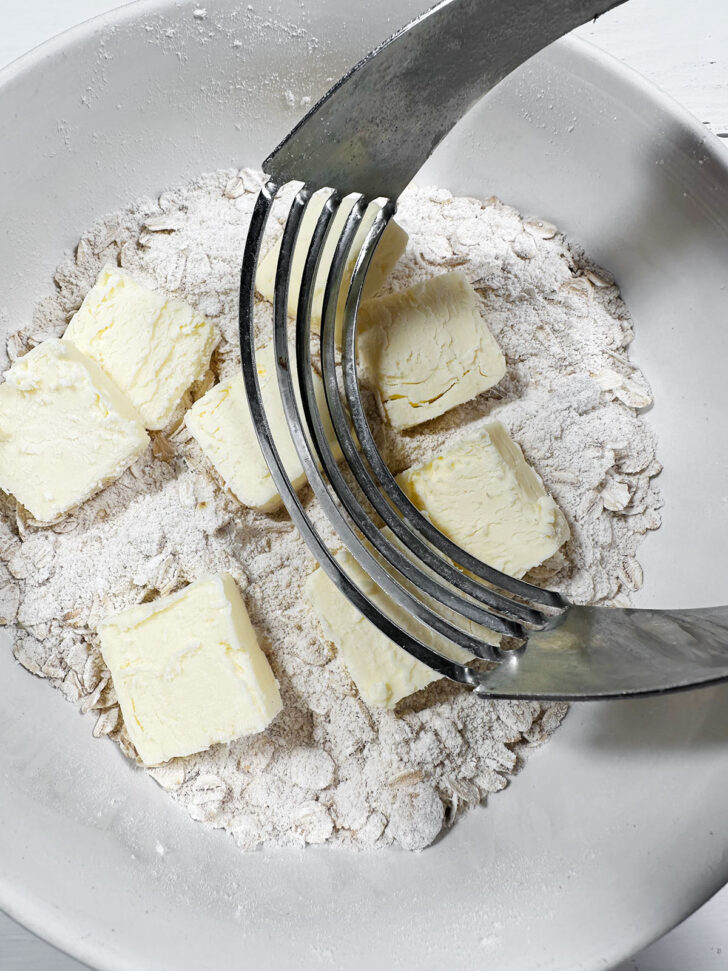
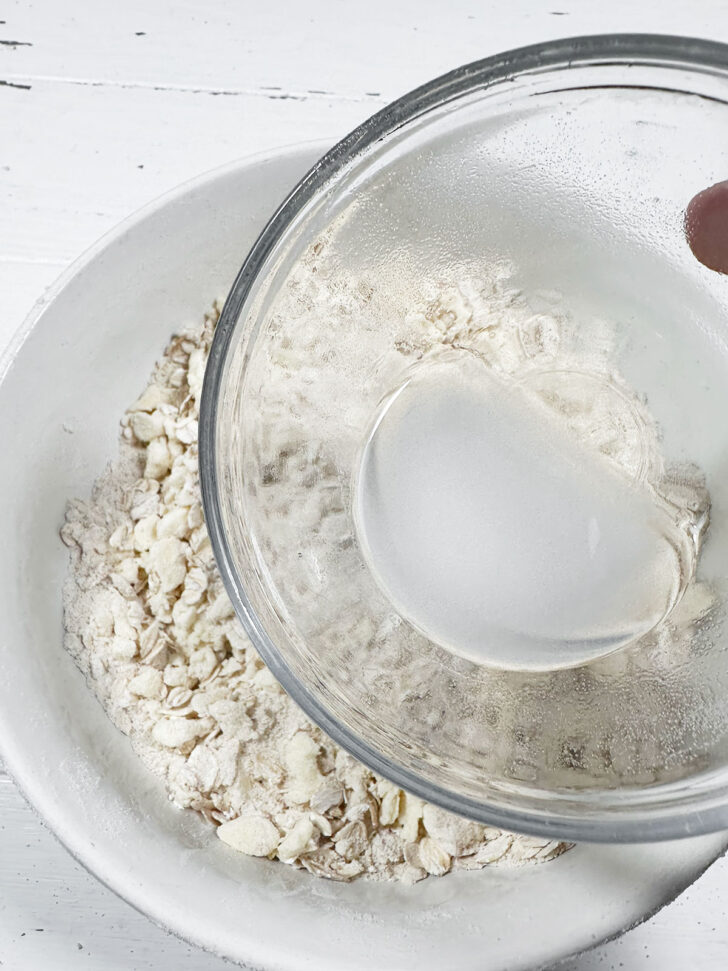
- Add the cold butter pieces to the flour mixture and cut in using a pastry cutter, or two knives or rub in with your fingertips.
- Cut in the butter until the butter pieces are pea-sized.
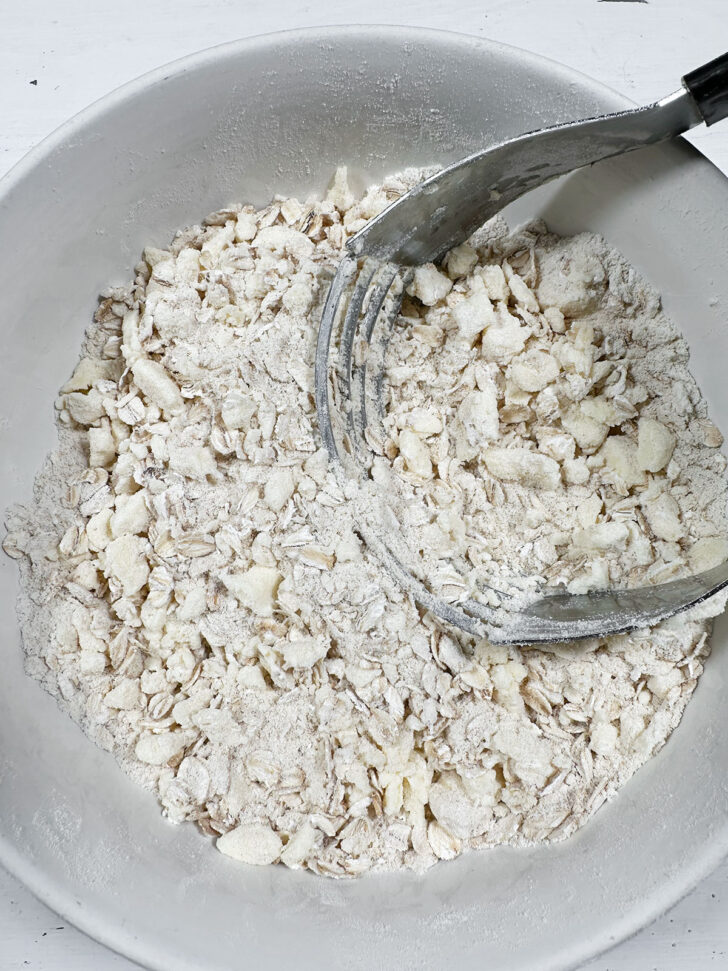
- Stir together the baking soda and hot water and drizzle over the flour mixture.
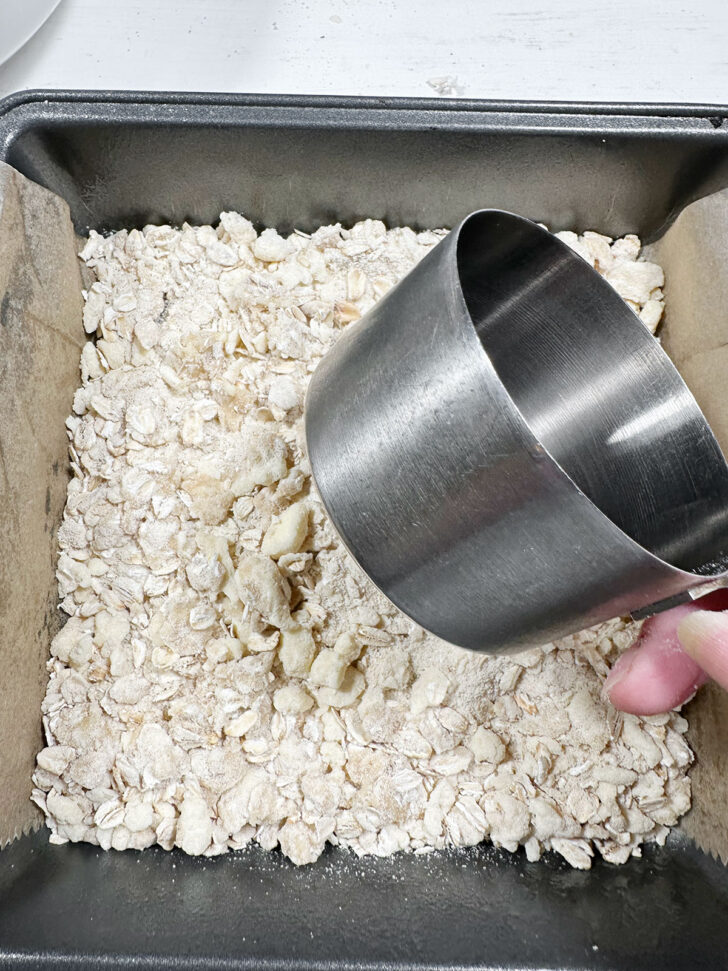
- Add about 1/2 of the flour mixture to the bottom of a parchment-lined 8×8-inch baking pan and use a flat measure to press it into the pan.
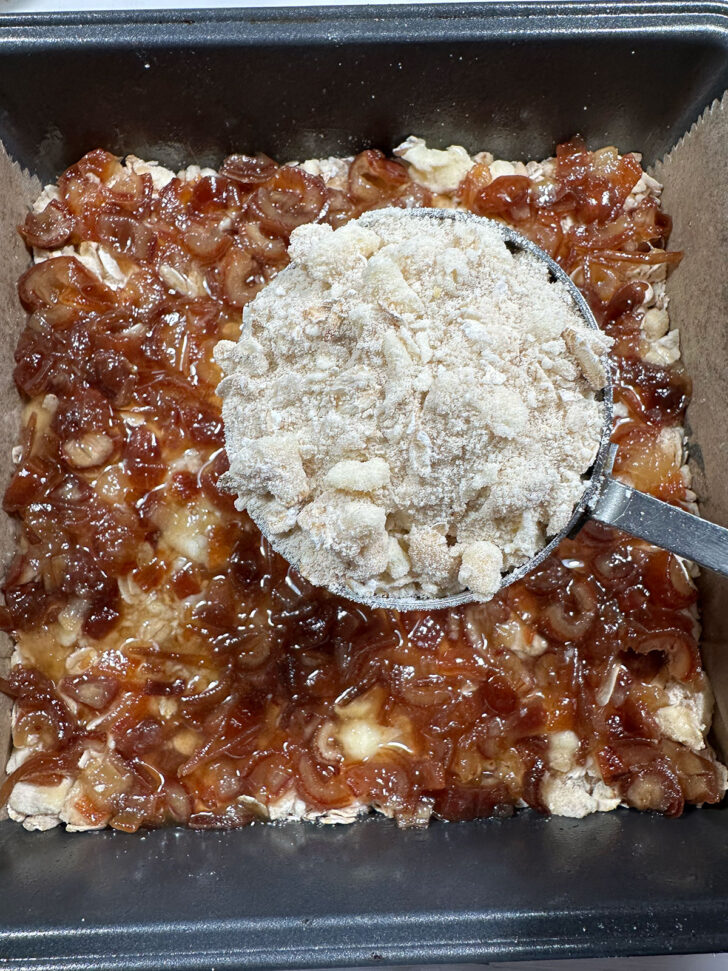
- Spread the cooled date filling mixture over the top of the base, then scatter the remaining flour mixture evenly over top.
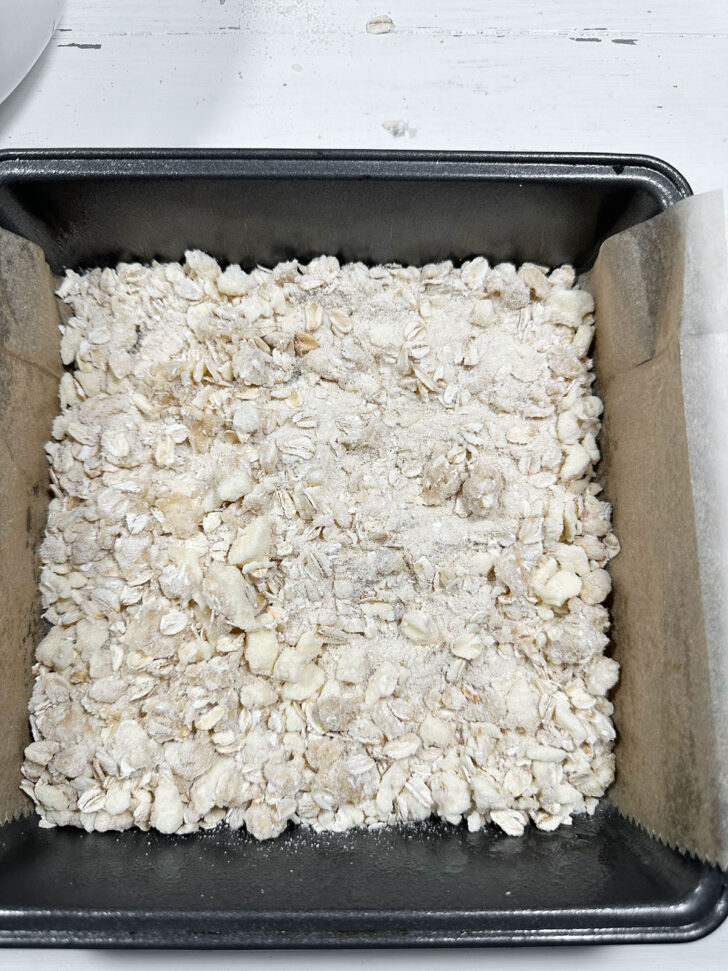
- Spread the topping out evenly and bake for 18-24 minutes, until golden and set.
How to make old-fashioned date squares: video
Recipe tips!
- You can make these squares as a small batch in an 8-inch square baking pan, as I have done here, or double the recipe to make a 9×13 pan of date squares. (Just use the handy “2X” button above the ingredients in the recipe card below and it will be calculated automatically for you!).
- It is very important to allow the filling mixture to cool completely before using. Ideally, you will make it ahead and refrigerate so it is chilled when assembling the squares. Any warmth in the filling will melt the butter in the base and affect the cooked texture.
- It may look like there is very little filling when you spread it out over the base, but trust me, it will be fine! There will be plenty of date flavour in the finished squares.
Storing and freezing
Store these date squares in an air-tight container in the refrigerator for up to a week. They keep well, though the crust tends to soften slightly the longer they sit.
Date squares freeze well, so don’t hesitate to freeze for longer storage. Wrap well and freeze up to 3 months.
Want to save this recipe?
Enter your email and I’ll send it to your inbox. Plus, you’ll get great new recipes from me every week!
By submitting this form, you consent to receive emails from Seasons and Suppers.
You can unsubscribe at any time.
Get the Recipe: Old-Fashioned Date Squares
Ingredients
Filling:
- 1/2 cup chopped pitted dates, tightly packed *see Note 1 below
- 1/2 cup white granulated sugar
- 1/2 cup water
- 1/2 teaspoon lemon juice
Base and topping:
- 3/4 cup + 2 Tablespoons large flake old-fashioned oats
- 3/4 cup all-purpose flour
- 1/2 cup light brown sugar, packed
- 6 Tablespoons salted butter, cold, cut into 6 pieces
- 1/2 teaspoon baking soda
- 1 Tablespoon hot water
Instructions
- Preheat oven to 350F. (regular bake setting/not fan assisted) Grease an 8×8-inch baking pan and line the bottom and two sides with parchment paper, allowing the paper to extend over the edges by an inch or so (to use as handles to lift out of the pan later on). (You can also double the ingredients and make them in a 9×13-inch baking pan.)
- It is important to make the date filling ahead so that it cools completely before assembling the date squares so it is chilled when assembling the squares. Any bit of warmth in the filling will melt the butter in the base and negatively affect the texture of the finished squares.
- Make the date filling (do ahead!): Combine the dates, white sugar and water in a medium saucepan. Stir to combine. Heat over medium heat, stirring regularly. Bring mixture just to a full boil. Remove from heat. Stir in lemon juice. Transfer the date filling to a bowl and refrigerate for 1 hour to cool completely.
- Make the base and topping: In a large bowl, stir together the oats, flour and light brown sugar. Add the cold butter pieces to the flour mixture and cut in with a pastry cutter (or use your fingertips to rub the butter into the flour) until the butter pieces are evenly pea-sized. In a small bowl, stir together the baking soda and hot water until the soda is dissolved. Sprinkle over the flour/butter mixture and stir in.
- Add about half of the flour mixture to your prepared pan (it's around 1 1/4-1 1/3 cups-ish). Press into an even layer, adding a bit more of the flour mixture, as needed, to make a thin, even layer. (I like to use a dry 1-cup measuring cup to press the base down.) Spoon the cooled date-filling mixture over the top and spread out evenly. (It will seem like there is barely enough filling to cover the base but trust it. It will be fine!) Scatter the remaining crumb mixture evenly over the top. Tip! Sometimes I will squeeze the mixture for the topping and then crumble it with my fingertips over the top. This makes for a more crumbly topping.
- Bake in preheated oven for 18-24 minutes, until golden brown and set. (Baking time should be similar for both an 8×8-inch pan or a 9×13-inch pan.) Remove the pan from the oven to a wire rack, allowing it to cool completely in the pan before lifting out by the parchment "handles" to a cutting board. Cut into sixteen 2×2-inch squares or nine 3×3-inch squares. (I like to refrigerate the squares in the pan before cutting, as they cut more neatly.)
- Store in an airtight container in the refrigerator for up to 1 week or freeze for up to 3 months, for longer storage.
Notes
Watch how to make it
More date recipes to love!
Hi! I’m Jennifer, a home cook schooled by trial and error and almost 40 years of getting dinner on the table! I love to share my favourite recipes, both old and new, together with lots of tips and tricks to hopefully help make your home cooking enjoyable, stress-free, rewarding and of course, delicious!
The topping and base for these date squares is amazing!! The large flake oats make a huge difference, and it’s just the right amount. I have always found the base/topping was WAY too much in other recipes I have tried. I have tweaked a recipe for the filling over the years, which includes omitting the sugar, cold black coffee to cut the sweetness of the dates a little bit, orange zest and both orange and lemon juice added at the end. This filling plus this base and topping is so good!!
This recipe reminds me of my Grandmother, I made this for the quilting group on Mondays. Yes, these are awesome, but I would like to know if I can add walnuts to these bars next time I make them?
So glad you enjoyed them, Cheryl and yes, you could certainly add some walnuts. It would be a nice flavour combination! Thanks :)
First time making date squares. End result was absolutely divine! Thank you for guiding me along😄
I’m so glad to hear, Wendy! Thanks :)
Delicious! My gramma used to make these and I love them! This recipe is pretty close to hers!
Thank You for sharing this !
Thanks Janihe, so glad to hear!
My grandfather used to make these whenever we would visit with him. I had his recipe where I thought I could never misplace it, however, I haven’t been able to find it as yet.
My thoughts and memories of them has shined a new light with your recipe.
I’ll let you know my reaction once I’ve had the opportunity to make them.
Thank you once again!
Delicious. I baked it 23 minutes. Otherwise followed the directions exactly. Will make again! Thank you.
So glad you enjoyed the, Marylee :) Thanks so much!
Can you use margarine instead of butter?
Hi Wendy, I haven’t tested it, but as margarine was often used in older recipes, I’m thinking it would work just fine.
I totally forgot to do the baking soda and hot water!!! It just went into the oven :( what can I expect? I’m so mad at myself for missing that part
Hi Nancy and it won’t be a saucy date filling, but more of a chunky date centre. They may be a little dry, but will still be edible.
Hi can I use quick oats small flake ? 100percent whole grain Canadian oats , also I have fresh dates can I use chopped up ? Thank you
Hi Lorraine, you should use cooking dates here, as they won’t soften into a paste the same way as fresh dates. As for the oats, you’d be better off to wait and get some large-flake oats, as they really do make for a nice date square.
can you use regular dates instead of dried dates?
Hi Samra and no, you would need to start with dried dates for this recipe to work correctly. Regular dates won’t absorb the water to make the paste filling, so too much liquid would remain.
These were delicious! I drained the liquid from the cooked date mixture, thinking it would just seem through the crust. Is that necessary or should I include all the liquid the next time?
Hi Michele and glad you enjoyed them :) No, there should be no need to drain the liquid, as there really shouldn’t be any liquid. The filling should cook and cool to a paste-like texture (you can see the finished texture in the Recipe video). What sort of dates did you use?
Can I substitute small flake quick oatmeal for the large flake?
Hi Brenda and yes, you could use the quick oats (not instant). You will lose some of the nice texture of the large-flake oats, but will work just fine. Enjoy :)
my first attempt at date squares and I’ll make them again for sure! I baked at 350º convection and it took 20 minutes but the top sugar stayed kind of powdery… also the filling seems a little shy, I added another ¼ cup of dates (and sugar, water, lemon juice) as there was no way I could cover the 8×8 pan with the ½ cup amount – otherwise perfection!
Hi Francesca and glad you enjoyed them. I think perhaps you just didn’t pack the dates in to measure, as the 1/2 cup should be fine to make a thin even layer of date for an 8×8 pan. I’ve updated the recipe to indicate it should be tightly packed. Thanks!
I’ll need to get these on my baking list Jennifer. They look super easy and I love dates! In fact, I’ve already got all the ingredients in my pantry!
Thanks Mary Ann :)