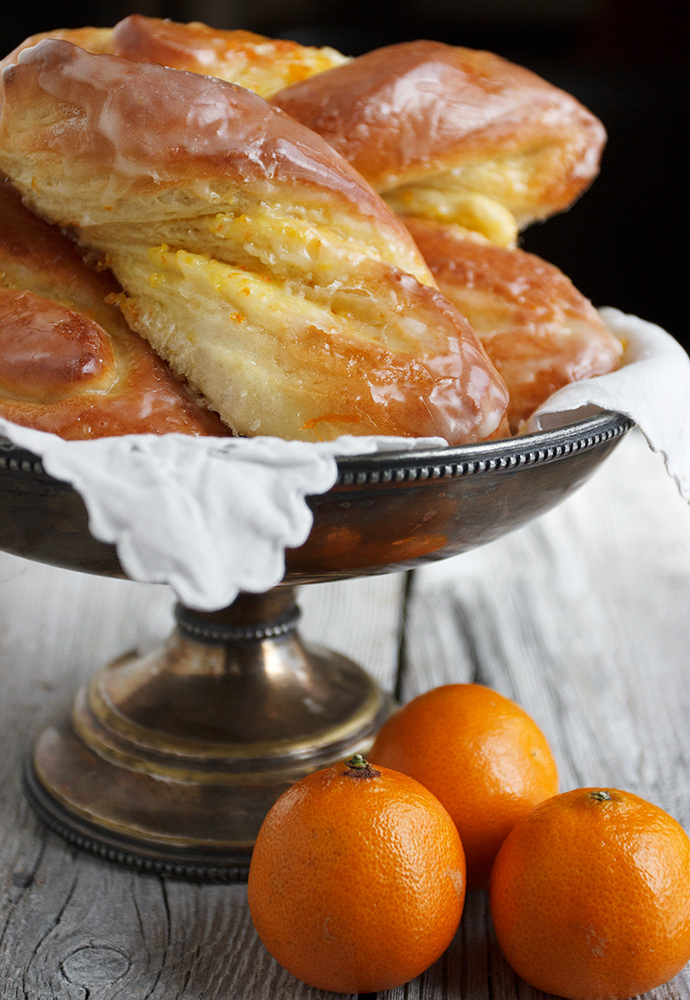
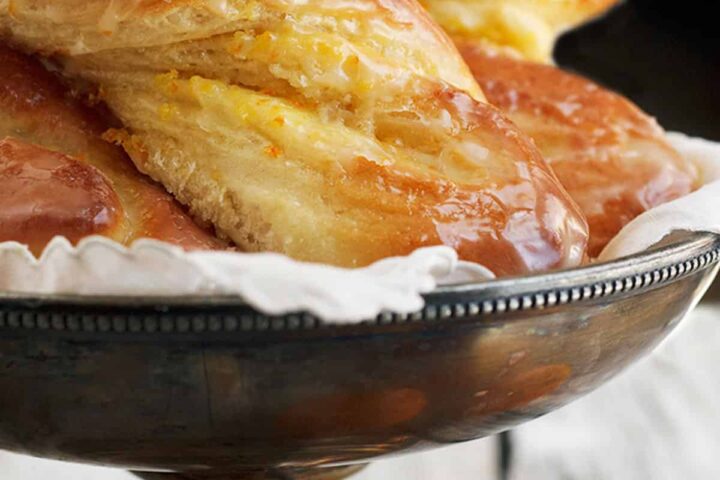
These glazed orange twists have a ribbon of orange zest and sugar running through them, giving them a lovely orange flavour, very much like marmalade. The sweet orange glaze is the perfect complement.

If you are an orange marmalade lover, these glazed orange twists are for you! The orange rind and sugar filling has a lovely tart orange flavour, that pairs perfectly with the sweet orange glaze.
These are baked twists, so no deep frying necessary.
Recipe tips!
- Adjusting the amount of orange rind you use to taste. You could also replace the orange rind with orange zest (probably 1 1/2 – 2 Tbsp. of zest).
- If using a navel orange cut the rind from the navel orange, rather than simply peeling the orange and using half of it. Starting from the top of the orange, simply cut down the sides of the orange from top to bottom. Don’t slice too thick a slice. Leave a layer of pith on the orange. As the pith is the bitter part, you don’t want to take all of it.
- Twisting these buns wasn’t difficult. Getting them to stay twisted was a little more difficult :) It helps to press the ends of the twisted dough onto the parchment paper, but parchment paper, by nature, doesn’t really want to hold on to the dough. I ended up adjusting the worst of the untwisting offenders before baking, but for the most part, just embraced their imperfection.
- For the prettiest glaze, only glaze the buns once. I had extra glaze left and went over them a second time (hate to waste :). It makes for more glaze, but it does muck it up a bit when you back over it with a second layer.
- These buns turned out to be quite large! You could easily adjust the recipe to make smaller ones. Or just break them in half, to make two smaller servings :)

Making ahead, storing and freezing
These orange twists are best enjoyed freshly made. Store leftovers in an airtight container for 1-2 days or freeze up to 3 months for longer storage.
Want to save this recipe?
Enter your email and I’ll send it to your inbox. Plus, you’ll get great new recipes from me every week!
By submitting this form, you consent to receive emails from Seasons and Suppers.
You can unsubscribe at any time.

Get the Recipe: Glazed Orange Twists
Ingredients
Sweet dough:
- 1 1/4 cup milk, heated to lukewarm (about 105F)
- 2 1/4 teaspoons active dry or instant yeast
- 4 cups all-purpose flour, plus more as needed
- 1/3 cup white granulated sugar
- 1 1/2 teaspoons kosher salt, (reduce to 1 tsp. if using finer sea salt)
- 2 Tablespoons butter, melted
- 1 large egg, lightly beaten
Filling:
- 1/2 cup white granulated sugar
- Rind of 1/2 of a small navel orange, orange part only, cut into 1/2-inch pieces
- 1 large egg
- 2 teaspoons water
Glaze:
- 1 cup icing (confectioners) sugar
- 2 Tablespoons freshly squeezed orange juice, plus more, as needed to thin
Instructions
- For the dough: Warm milk in small saucepan or in microwave to lukewarm (about 105° F.). Add a pinch of white sugar and stir in. Sprinkle yeast over-top. Stir and allow to stand for 5 minutes, until frothy.
- In a large bowl or the bowl of your stand mixer, fitted with a kneading hook, add 3 cups of the flour, the sugar and salt. Mix briefly to combine. Add the yeast/milk mixture, melted butter and lightly beaten egg. Mix until well combined. Start adding flour 1/4 cup at a time, then a Tablespoon at a time, until dough comes together into a moist, smooth but not sticky dough. Remove dough to a greased bowl, cover with plastic wrap and allow to rise until doubled.
- Meanwhile, prepare filling by combining orange rind and sugar in a food processor. Process until rind is finely minced. Transfer to a bowl and set aside. In a small bowl, combine egg with 2 tsp. water and set aside.
- When dough has risen, remove to a floured surface and with a rolling pin, roll into a 12-inch x 11-inch rectangle. On the 12-inch side, lightly mark three 4-inch strips (don’t cut all the way through, just mark lightly with edge of knife to make guidelines.). Brush the centre 4-inch strip with beaten egg/water mixture. Sprinkle 1/2 of the sugar/orange mixture evenly over that same strip. Fold the left 4-inch strip over the centre strip. Brush top-side of that strip with beaten egg/water mixture and sprinkle remaining orange/sugar mixture evenly over top. Fold right strip of dough over-top and gently pinch together the left edge and the dough to seal. Using a rolling pin, gently roll the dough lengthwise, just to embed the sugar. Do not throw out additional egg/water mixture. Save it to brush rolls before baking!
- You should now have a 4-inch x 14-inch piece of dough with two sugar/orange layers inside. Transfer dough to a parchment-lined baking sheet and place in the freezer until firm but not hard, about 10-15 minutes.
- Remove dough from baking sheet, setting baking sheet with parchment paper aside to use later. Place the dough horizontally on a work surface suitable for cutting. Cut about 1-inch from each end of the dough, to make the dough piece 4-inches wide x 12-inches long. Using the edge of a knife, mark every one inch along the 12-inch length of the dough. Go back and cut dough along the marked lines, making 12 pieces. Take one piece of dough and holding one end in each hand, twist twice by rotating your hands in opposite directions, while stretching slightly. Place each twist onto parchment-lined baking sheet, allowing about 1-inch in between.** When all twists have been made, cover pan loosely with plastic wrap and allow to rise until doubled in size.
- Preheat oven to 375° F. When bun have risen, remove plastic wrap and gently brush dough part of buns with left-over egg/water mixture. Place into pre-heated oven and bake until golden brown, about 22-28 minutes.
- While buns are baking, mix glaze by combining icing sugar and orange juice. Add a bit more orange juice, as needed to create a thin icing.
- As soon as buns are removed from the oven, remove buns to a cooling rack placed over parchment paper. Brush rolls generously with prepared orange glaze. Allow to cool on rack.
- These buns freeze well! Defrost covered loosely with plastic wrap, at room temperature.
More orange recipes to love!
Hi! I’m Jennifer, a home cook schooled by trial and error and almost 40 years of getting dinner on the table! I love to share my favourite recipes, both old and new, together with lots of tips and tricks to hopefully help make your home cooking enjoyable, stress free, rewarding and of course, delicious!


Great recipe.. soft light texture and perfect citrus tang. I just ended up making twisted knots(..that’s what I’m used to), but thank you for this..It will be one of my favorites!
So glad you enjoyed them, Donna. Thanks!
Made these yesterday. The taste is fabulous! The color was perfect. However, the buns were a little tough to the bite. Any sugestions?
Hi Nancy, I’m not sure what you mean by tough to the bite. Hard? These are a baked, yeast bun really, so they should be light and soft, especially once the glaze is added. Did your yeast rise ok?
I made these a few times and am just trying to perfect the outcome a little more on my end. Any suggestions for keeping the filling from overcooking on the bottoms? It leaks out during the second prove for me. Also, minde seem more dense than yours even though everything looks fully doubled with each proving. Any thoughts on why that might be the case? Thanks! Family still raves about these every time I make them.
Hi Melissa, are you doing the 2nd proof on an unlined baking sheet and then transferring them to a parchment lined one to bake? If so, you can try using a paper towel to gently wipe the moist sugar syrup from the underside of the twist before transferring to the parchment. If your dough is more dense, you may have worked in too much flour. The flour amount is always approximate (not exact), so maybe try a little less flour for a more moist (lighter) dough. Hope that helps :)