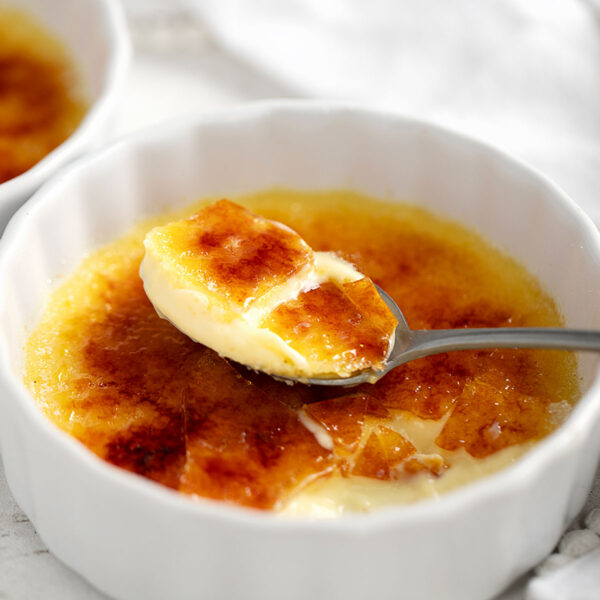
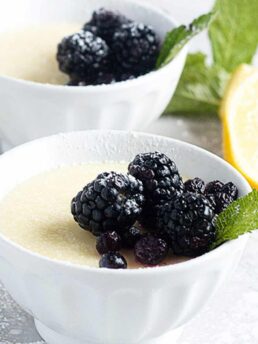
Classic Crème Brûlée with a touch of lemon! With the same silky smooth custard and crunchy sugar topping you expect, but with a wonderful flavour addition.
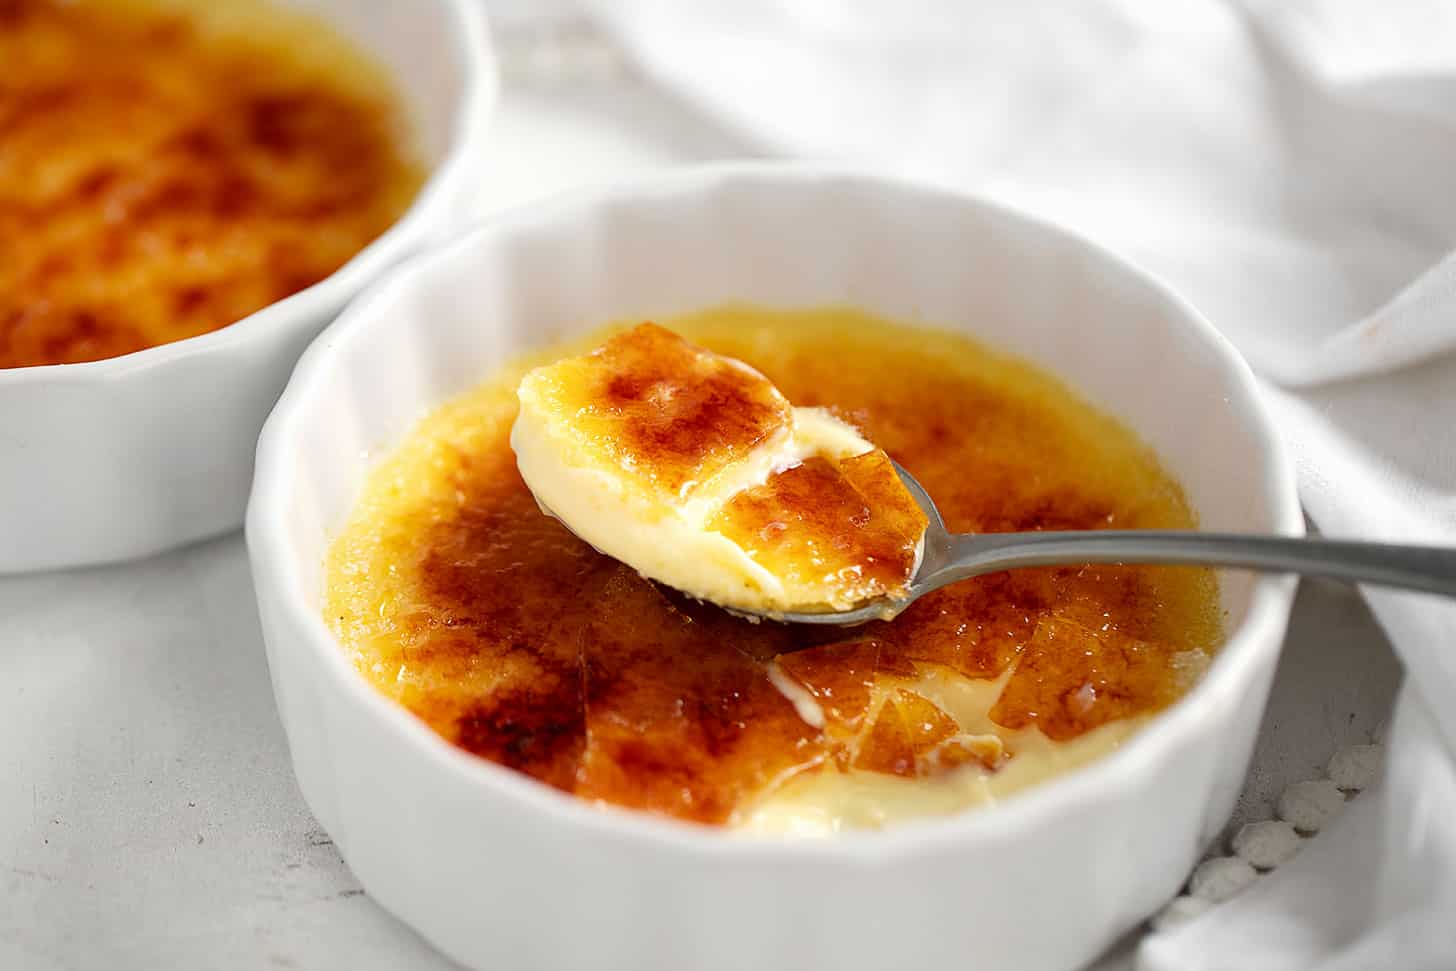
Crème Brûlée has always been one of my favourite desserts and I love experimenting with flavours. Last year I made and loved this Maple Crème Brûlée. This year, it was lemon’s turn and it did not disappoint.
Ingredients and substitutions
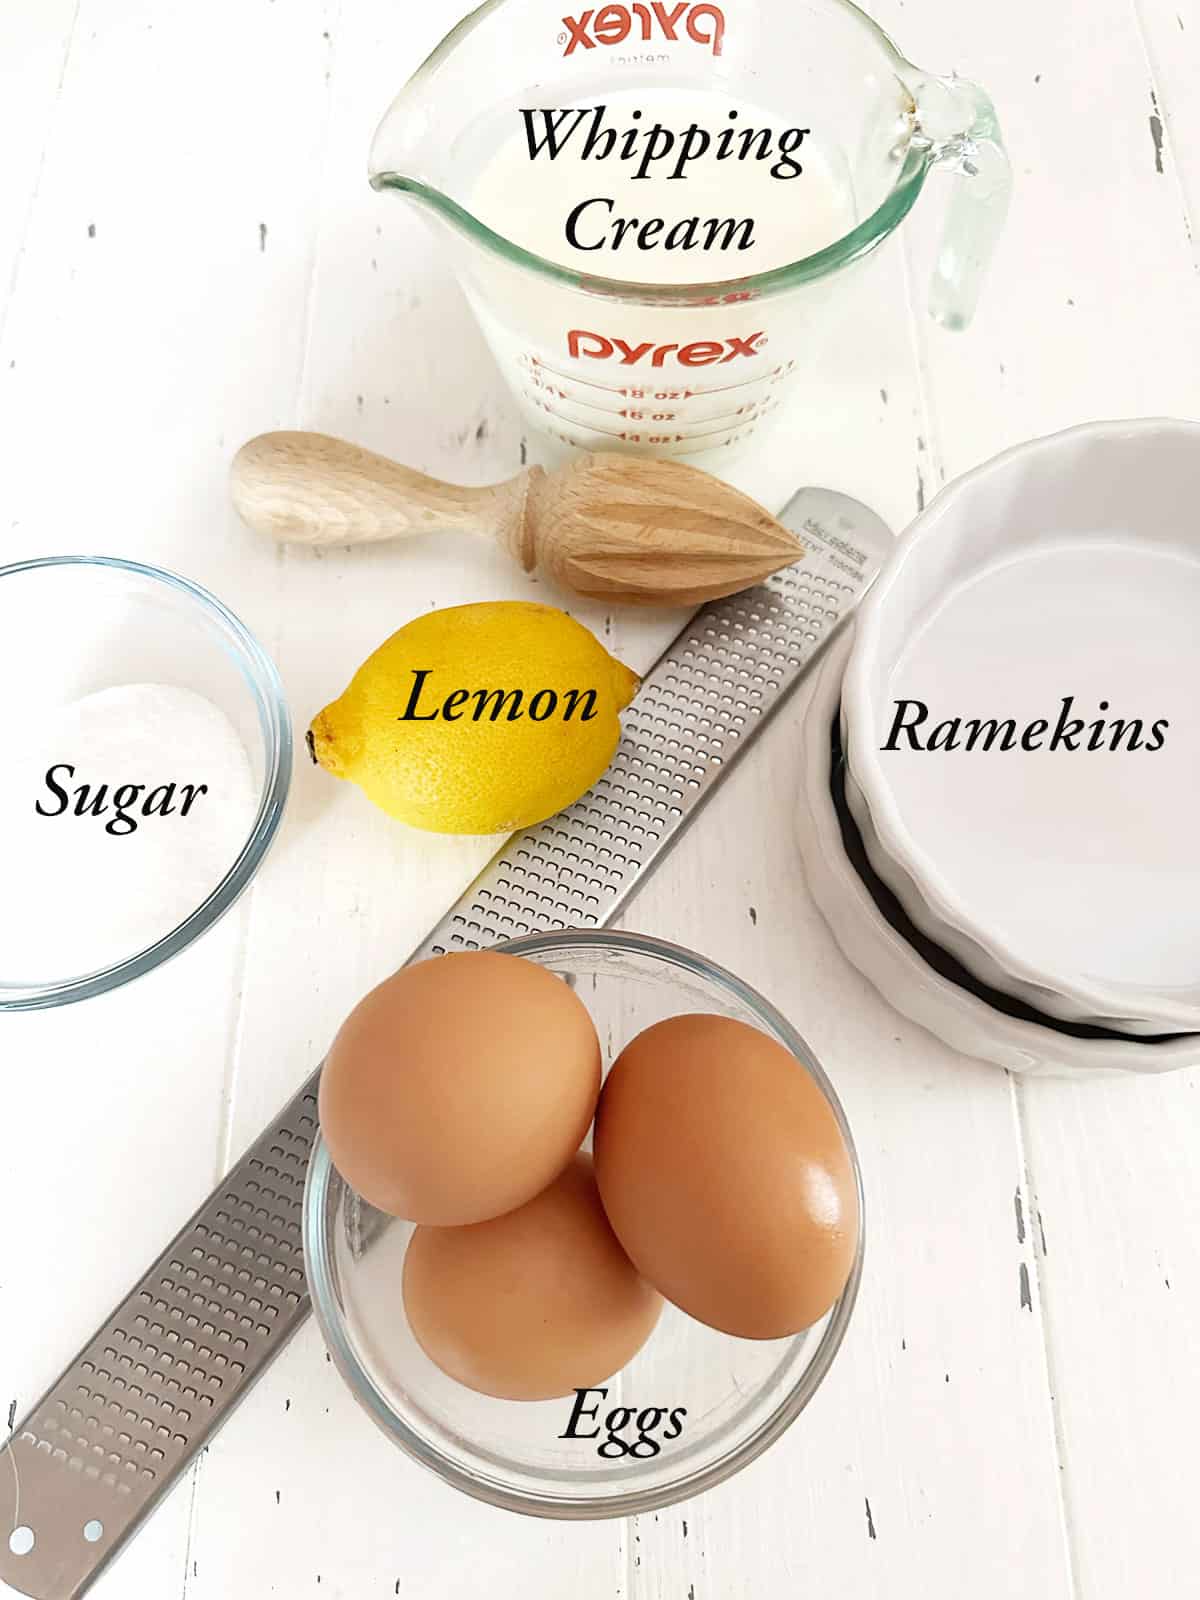
A few notes about the key ingredients …
Heavy Whipping Cream – Heavy cream (aka Whipping Cream) is generally in the 35% butterfat range and is critical to achieving the creamy texture of Crème Brûlée. It is not recommended to substitute with a lower-fat cream.
Lemon – You’ll want to start with one fresh lemon to obtain both the lemon zest and fresh lemon juice required for this recipe. I don’t suggest using bottled lemon juice.
How to make lemon Crème Brûlée
This is a visual summary of the steps to make this recipe. Refer to the Recipe Card below for the complete list of ingredients and instructions.
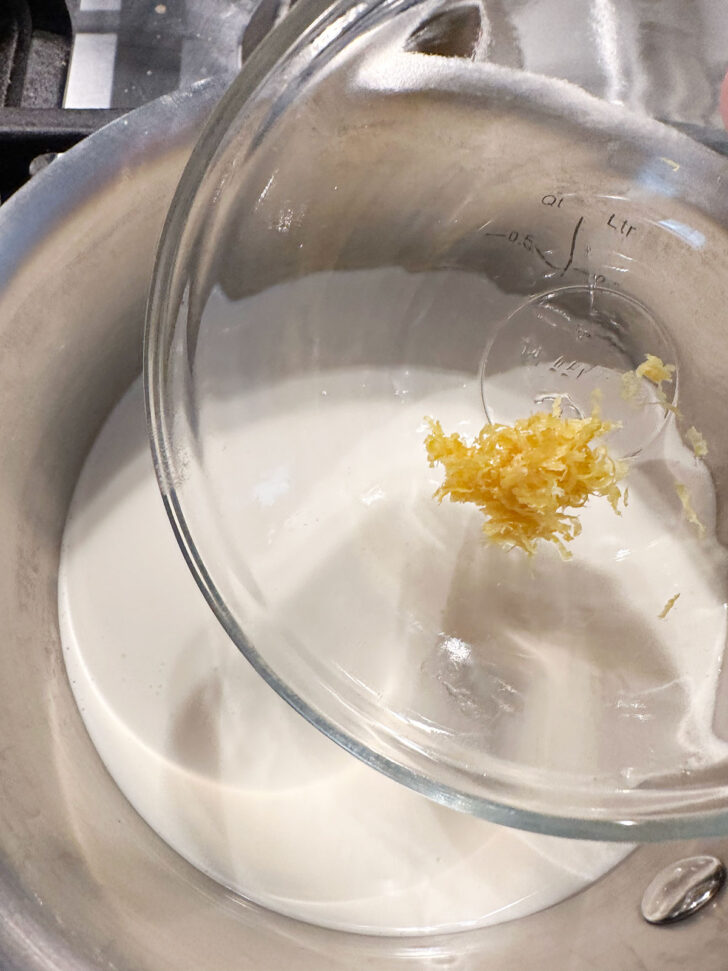
- Start by adding the whipping cream and lemon zest to a saucepan to warm and infuse with lemon flavour.
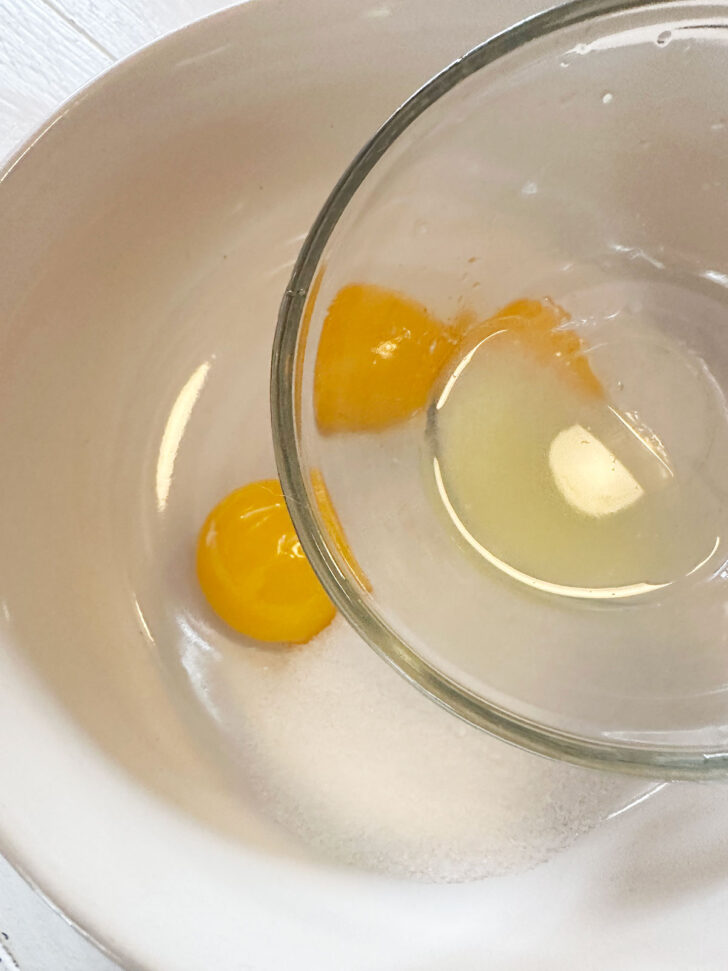
- Meanwhile, add the egg yolks, sugar and lemon juice to a small bowl.
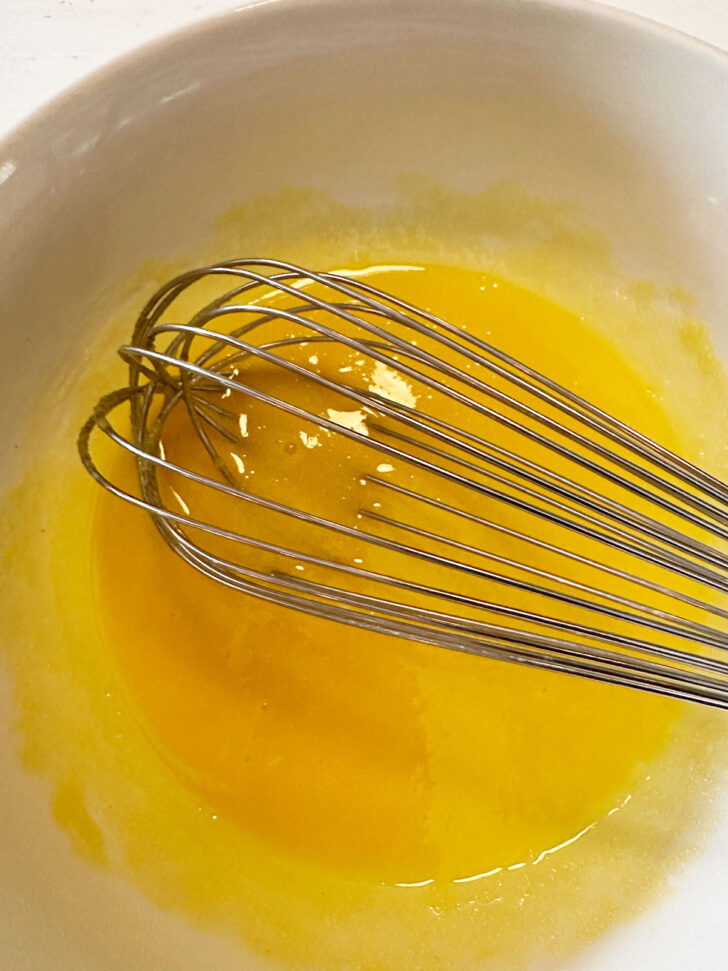
- Whisk together to combine well. When the cream is warmed, drizzle very, very slowly (a drop at a time to start) into the egg yolk mixture, whisking constantly while adding the cream, gradually increasing to a steady stream, until all the cream is added.
Tip! Ideally, you’ll have a perfectly smooth custard at this point, but if there are bits of cooked egg in it, run it through a fine-mesh strainer to remove the solids.
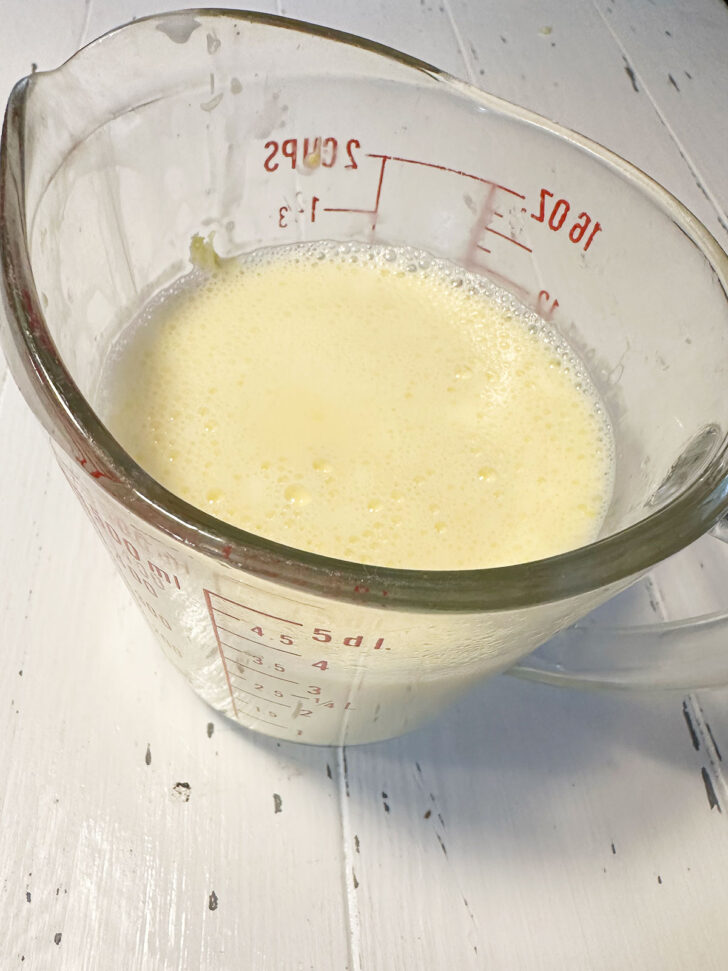
- I like to transfer the custard to a measuring cup for easy pouring.
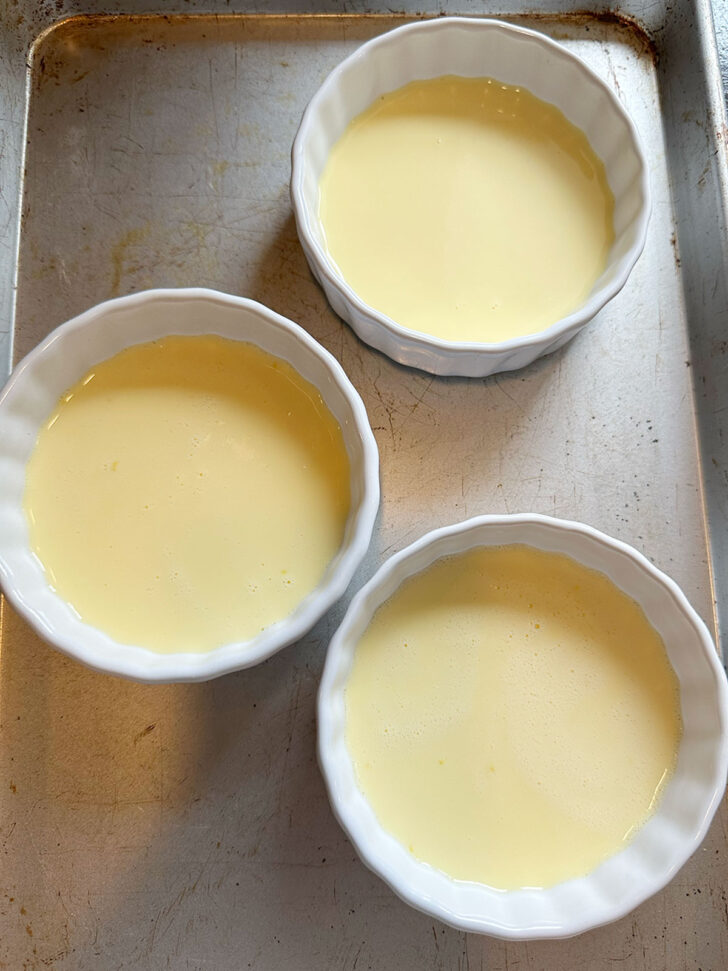
- Place the ramekins into a baking pan or a deep baking sheet, then pour the custard into the ramekins. Pour boiling water into the pan until it reaches halfway up the sides of the ramekins, being careful not to splash water into the custard.
Tip! If there are a lot of bubbles on the top of the custard, you can briefly run a kitchen torch over the top to remove the bubbles. This will give you a perfectly smooth top for the custard after baking.
Recipe video
Recipe tips!
- If possible, use ramekins that are shallow and wide. My ramekins here are 4 1/2 inches in diameter and 1 1/4 inches high. I used 3 ramekins for the base recipe, but at this size of dish, using 2 would have been better. Ideally, aim for at least 1 inch of liquid in the dish and no more than 2 inches.
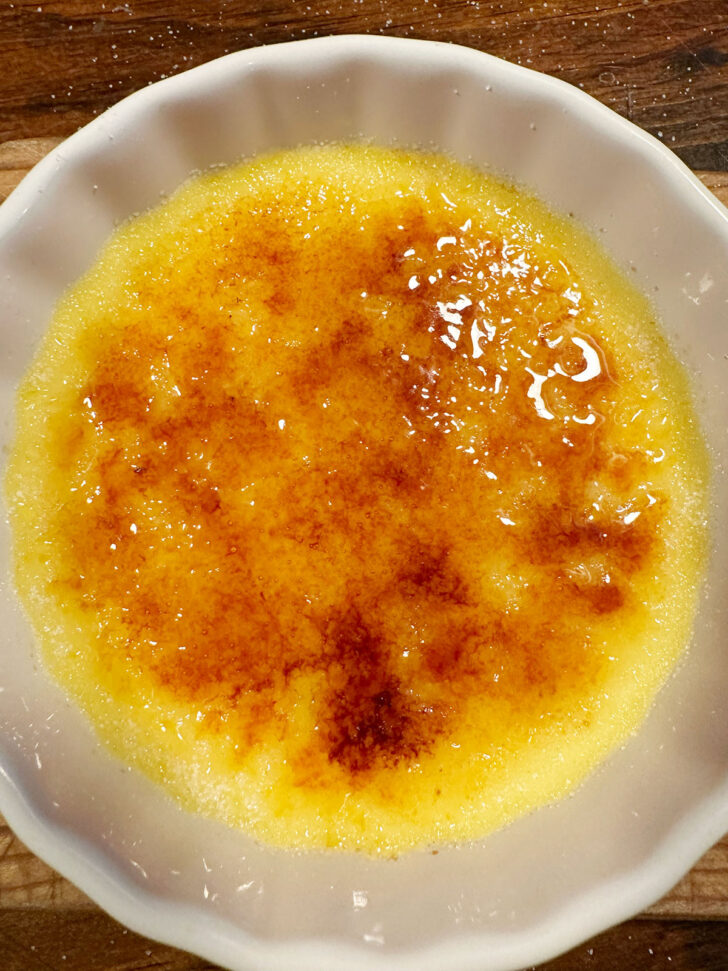
- This may be my personal preference, but I prefer not to brown the brûlée topping too much as the slightly bitter flavour can easily overpower the lovely lemon flavour. I think a deep golden colour makes for a nicer balance of flavours.
- Use a blow torch for a lovely thin, hard caramel topping and use two layers of sugar for the perfect topping.
- If you don’t have a blow torch, sprinkle a generous layer of sugar over the top of the custard. Place the ramekins on a baking sheet and place into a 475F oven. Watch it constantly until the sugar melts and turns golden brown. Remove from oven and transfer to the refrigerator briefly to set the topping and re-cool the custard.
Top tip!
One of the hardest parts of Crème Brûlée is knowing when they are done, as it will vary depending on the size of the ramekin and the depth of the custard. The best tip is to remember that the custard will be wobbly when it is done (not firm), so the best test is to jiggle the baking sheet slightly. If it sloshes like liquid, it is not done. If it moves as one wobbly mass, it is. The custard will firm up a bit more when it cools and is refrigerated.

Making ahead and storing
The custard for Crème Brûlée needs to be made ahead so that it can chill before serving. You can make the custard for the Crème Brûlèe ahead and refrigerate for up to 24 hours. It is important to allow the custard to cool completely at room temperature before refrigerating, which can take an hour or so. Once cooled cover with plastic wrap before refrigerating.
I highly recommend torching the topping within about 1 hour of serving, as the sugar topping begins to melt after a few hours in the refrigerator. I have been happy with torching a couple of hours ahead, refrigerating and serving.
Want to save this recipe?
Enter your email and I’ll send it to your inbox. Plus, you’ll get great new recipes from me every week!
By submitting this form, you consent to receive emails from Seasons and Suppers.
You can unsubscribe at any time.

Get the Recipe: Lemon Crème Brûlée
Ingredients
- 1/2 teaspoon lemon zest
- 1 cups heavy whipping cream, 35% butterfat
- 3 large egg yolks
- 2 1/2 Tablespoons white granulated sugar
- 1 teaspoons lemon juice
Topping
- 1/2 cup white sugar , for topping
Instructions
- The base recipe will make 2 servings (possibly 3 depending on the ramekin size). Use the 2X or 3X buttons to double or triple the recipe to serve more.
- Preheat oven to 300ºF (150ºC) on the regular bake/non-convection setting. Start water boiling for adding in Step 5.
- To make the custard, add the cream and lemon zest to a medium saucepan. Bring the cream just to a simmer, slowly, over medium-low heat, then remove from the heat and let stand for 5 minutes. Tip! I like to transfer the cream mixture to a measuring cup with a spout, as it is easier to add to the egg yolks if you can pour slowly.
- Meanwhile, place the yolks, sugar and lemon juice into a bowl and whisk to blend.
- After the cream has rested for 5 minutes, very slowly and gradually add the cream to the egg yolk mixture, adding just a drop at a time to start and whisking continuously. Gradually increase the cream addition to a slow, steady stream, whisking as you go until all the cream has been added. Ideally, the mixture will be perfectly smooth, but if not, pour it through a fine-mesh strainer to remove any solids.
- Place ramekins in a roasting pan. Divide the custard between the ramekins, filling each ramekin at least 1 inch or up to 2 inches deep with custard. Pour boiling water into the pan, being careful not to splash the custard, adding enough boiling water to come halfway up the sides of the ramekins. Tip! If you have lots of bubbles on the top of the custard and you have a kitchen torch, quickly run the torch over the top of the custard to eliminate all the bubbles!
- Tip! The baking time will vary based on the size of the ramekins used and the depth of the custard. Watch the progress of cooking closely after about 20 minutes of baking. The best way to test is to gently jiggle the baking pan and observe the movement of the custard. If it sloshes like liquid, it is not set. If it is wobbly but moves as one set piece, it is ready.
- Carefully transfer to the oven and bake for about 25 to 35 minutes or until the custard is set but is still jiggly. Remove from the oven, then use oven mitts to transfer the ramekins to a cooling rack to cool completely at room temperature. Cover with plastic wrap and refrigerate for at least 2 hours or up to 24 hours.
- When ready to serve (or up to 2 hours before serving) sprinkle a layer of sugar evenly over the top of each ramekin and caramelize with a blow torch. Add a second even layer of sugar and torch again.
- If you don't have a kitchen torch, preheat the oven to 475F. Place the ramekins with the custard on a baking sheet. Sprinkle with sugar and place into the preheated oven. Watch constantly and remove just when the sugar topping is golden brown.
Notes
Watch how to make it
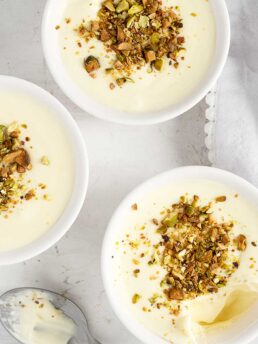
More lemon desserts to love!

Hi! I’m Jennifer, a home cook schooled by trial and error and almost 40 years of getting dinner on the table! I love to share my favourite recipes, both old and new, together with lots of tips and tricks to hopefully help make your home cooking enjoyable, stress-free, rewarding and of course, delicious!