
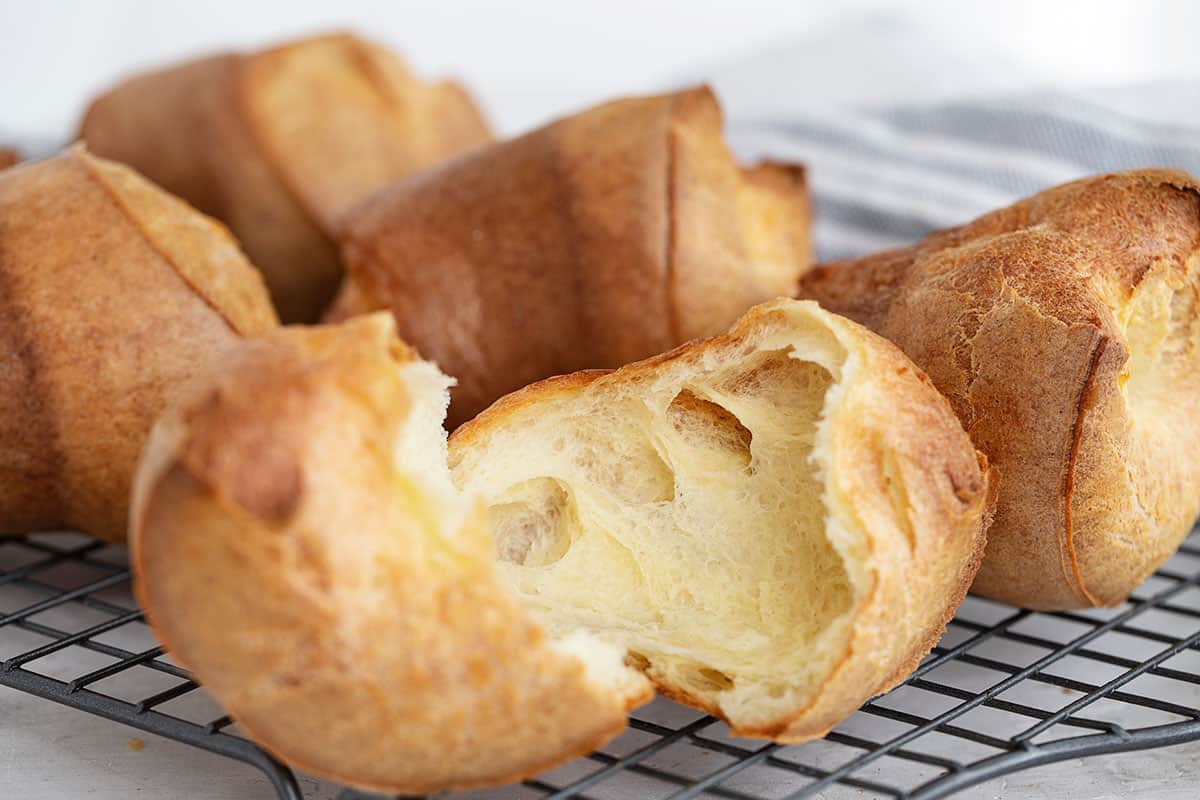
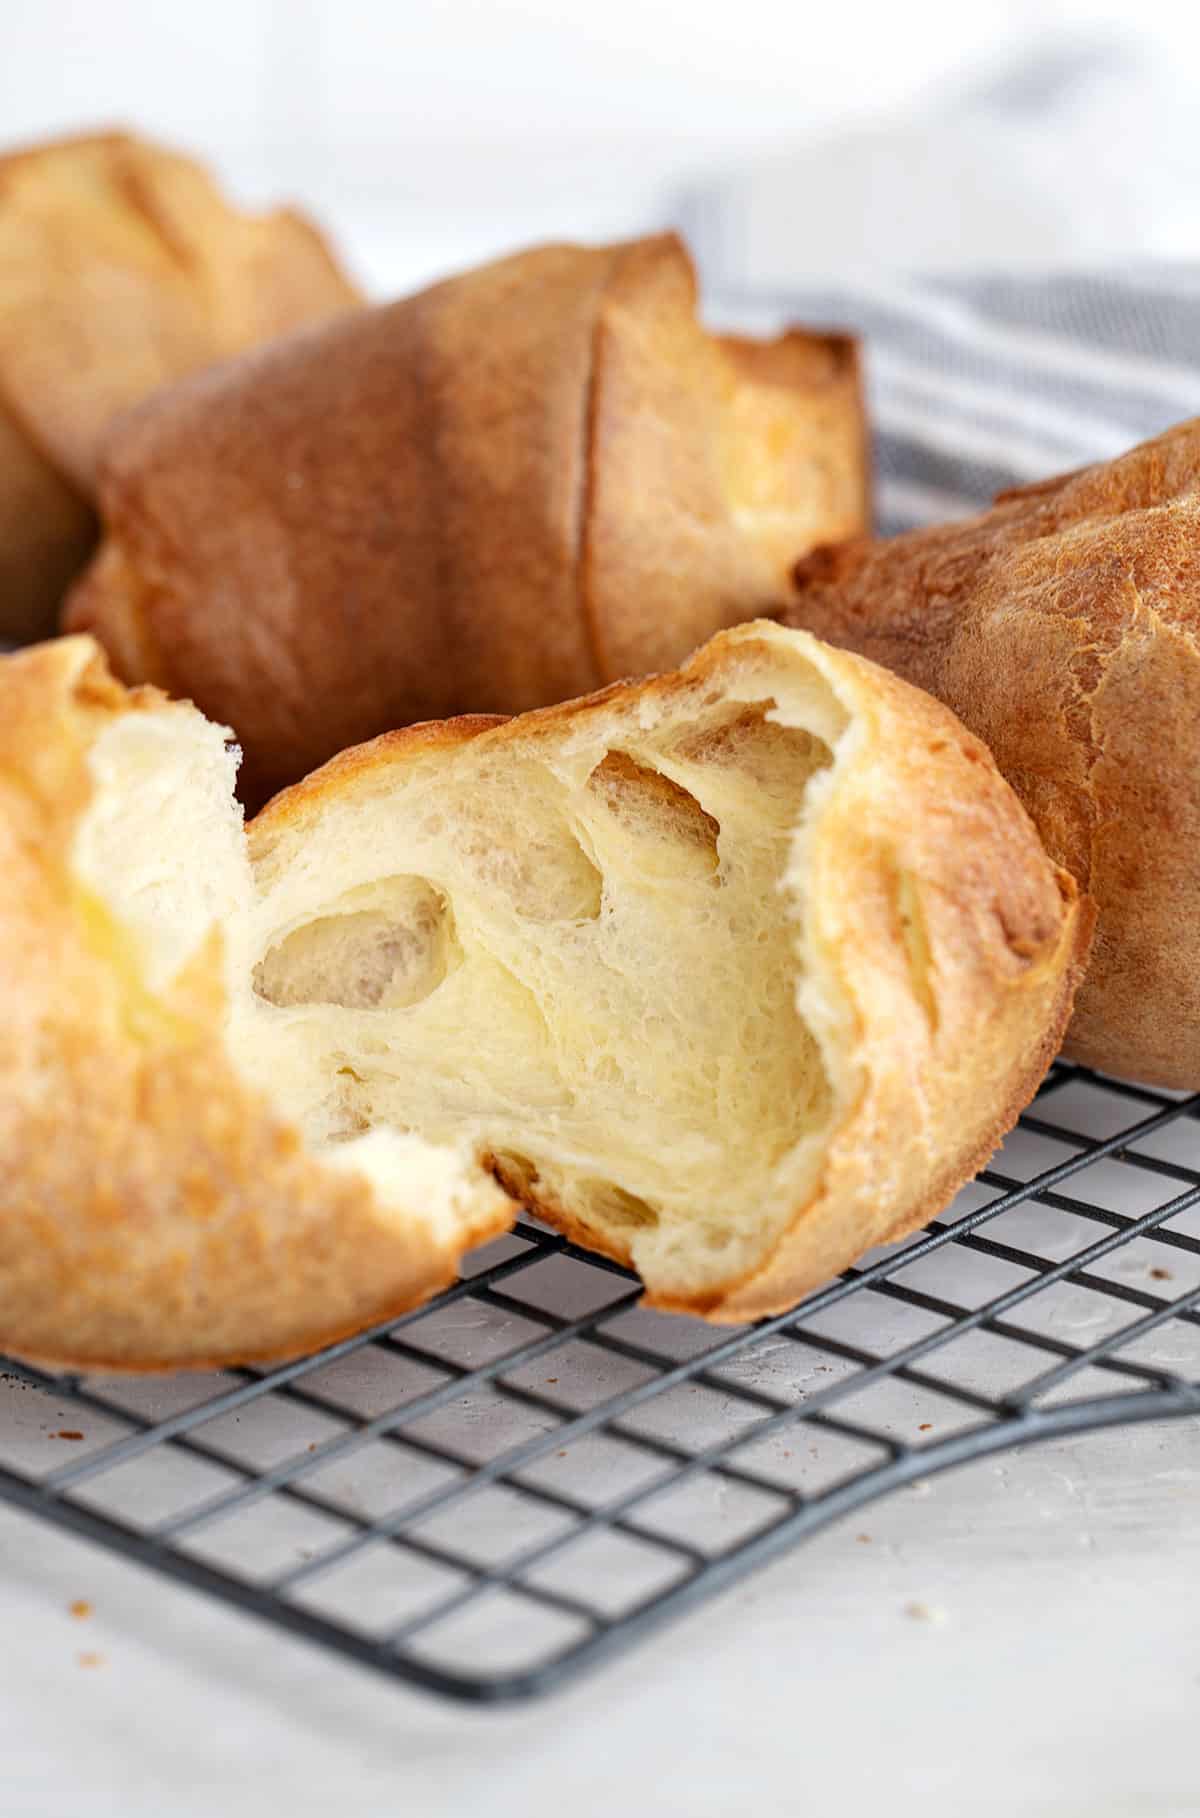
My go-to popover recipe, these perfect popovers are crispy on the outside but light on the inside. Perfect side for soups or stews or try them for breakfast with butter and jam!
- Why this is my favourite popover recipe!
- Are popovers and Yorkshire pudding the same thing?
- How to make perfect popovers: step-by-step
- Are popovers supposed to be hollow?
- How to enjoy popovers
- Tips for perfect popovers
- Do I need a popover pan? Can I make popovers in a muffin tin?
- How to make ahead, store and reheat popovers
- Popover variations
- Get the Recipe: Simply Perfect Popovers
- More popover recipes to love!
Why this is my favourite popover recipe!
- These are sturdy popovers, so they are perfect for hand-held eating and dipping.
- These popovers are crisp on the outside, but nice and soft inside, but not wet, like some popovers can be.
- For making ahead and/or re-heating, these sturdy popovers hold their shape and texture really beautifully. They also freeze well!
Are popovers and Yorkshire pudding the same thing?
Classically, Yorkshire pudding is made with beef drippings from a roast, while popovers are not. Even without the drippings, my Yorkshire Pudding recipe uses a different batter and more fat in the pans. Yorkshire Pudding is usually softer than popovers.
How to make perfect popovers: step-by-step
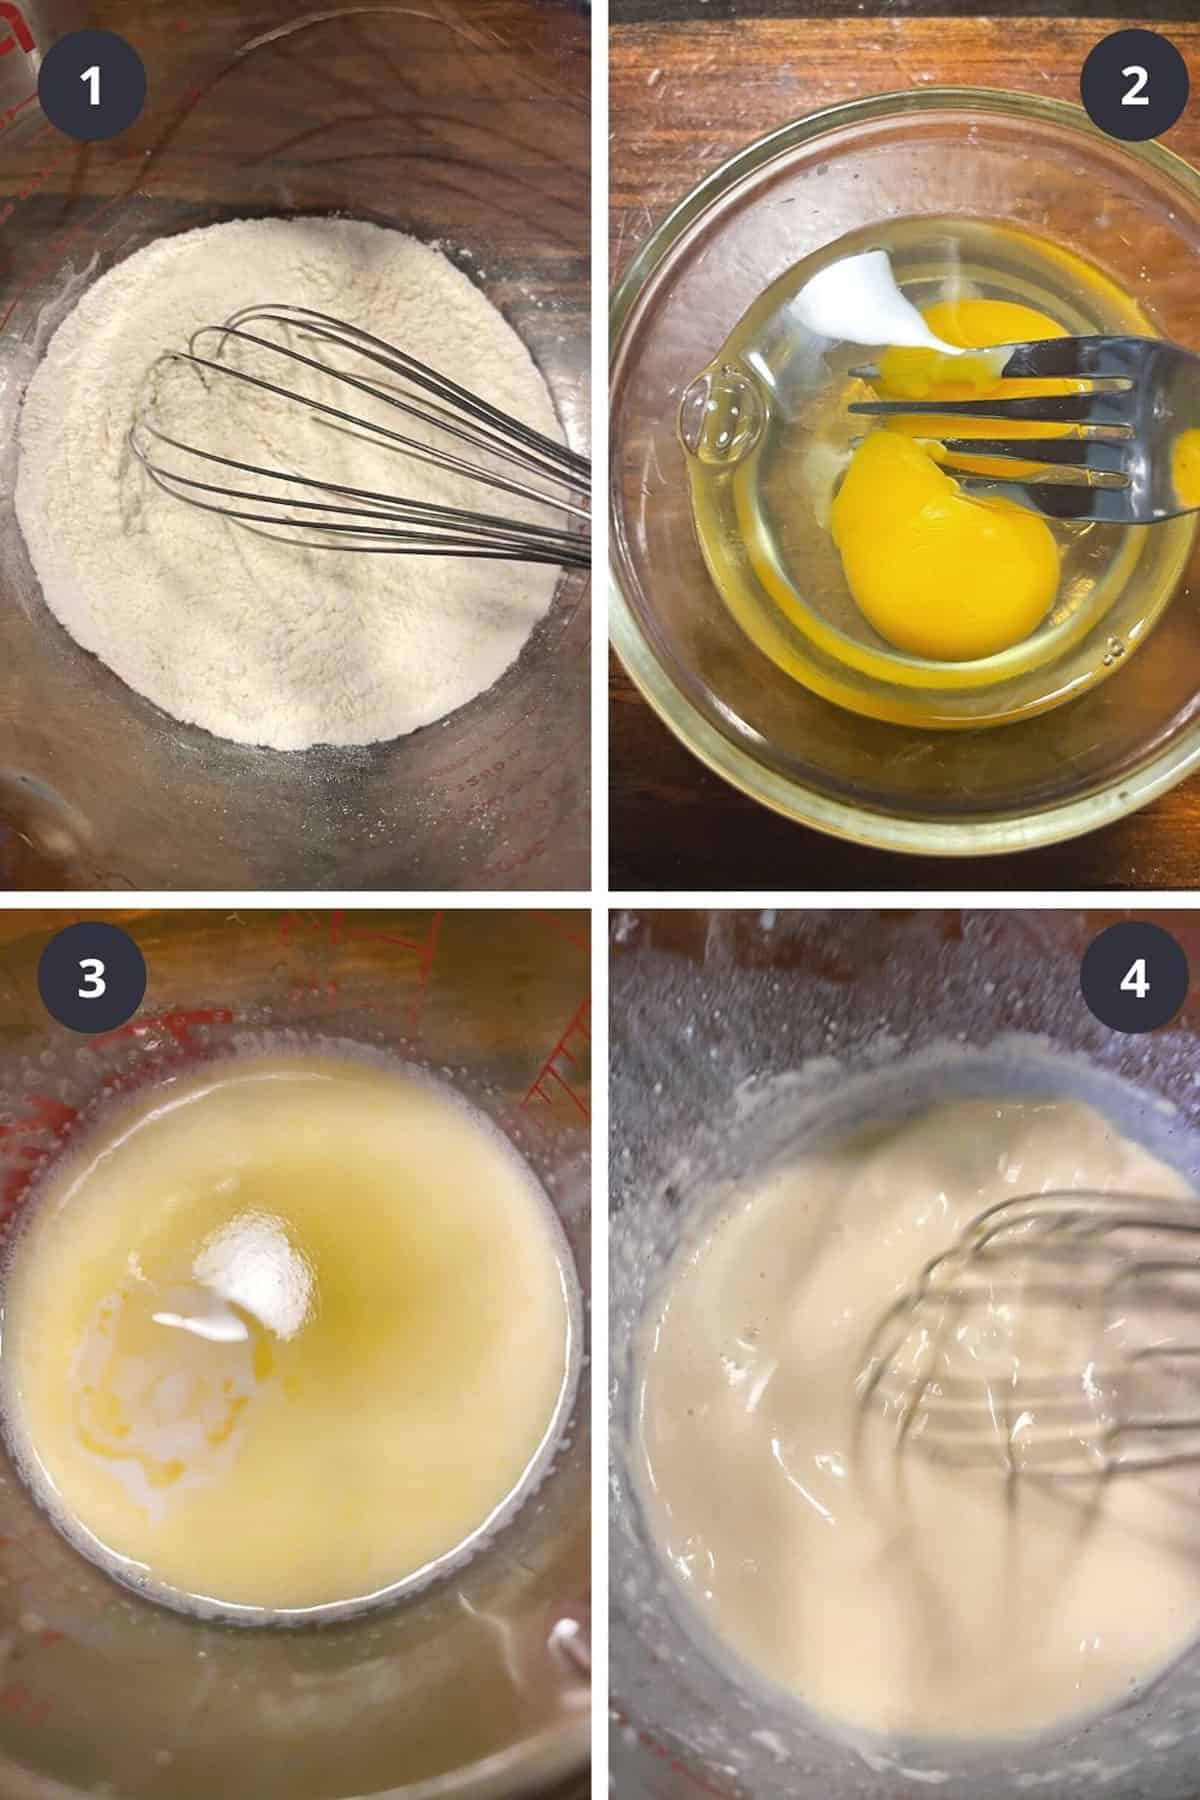
- Combine the flour and salt in a bowl and whisk together.
- Beat the eggs with a fork and set aside.
- Heat the milk and butter until warm (not hot and definitely not boiling).
- Make a well in the flour mixture and add the eggs, then slowly add the warm milk, whisking in the flour until you have a smooth batter.
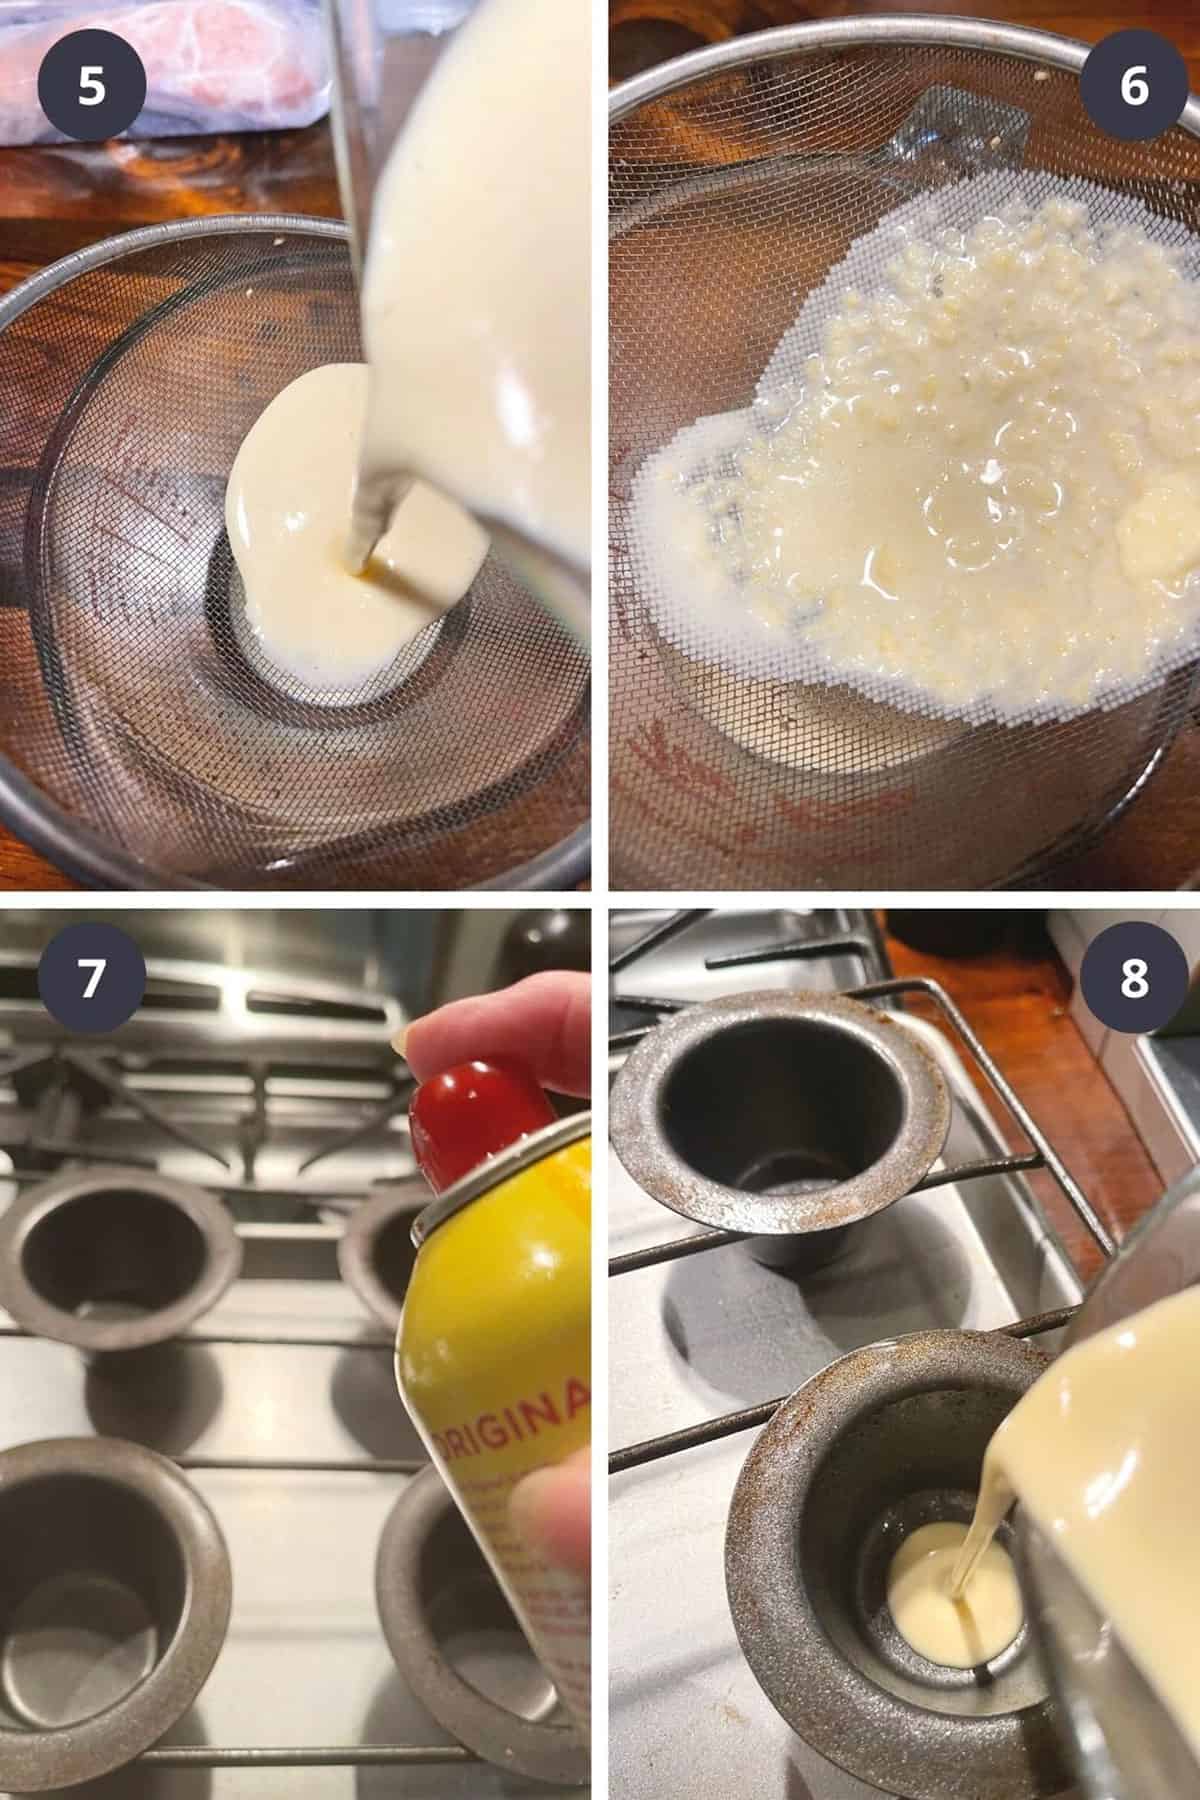
- Strain the batter through a fine mesh strainer.
- Discard any solids in the strainer.
- Preheat the popover pan, then take it out of the oven and spray it with cooking spray.
- Pour batter into the hot and greased pan, filling about 1/2 full for a popover pan, or almost to the top for a muffin tin. Bake and enjoy!
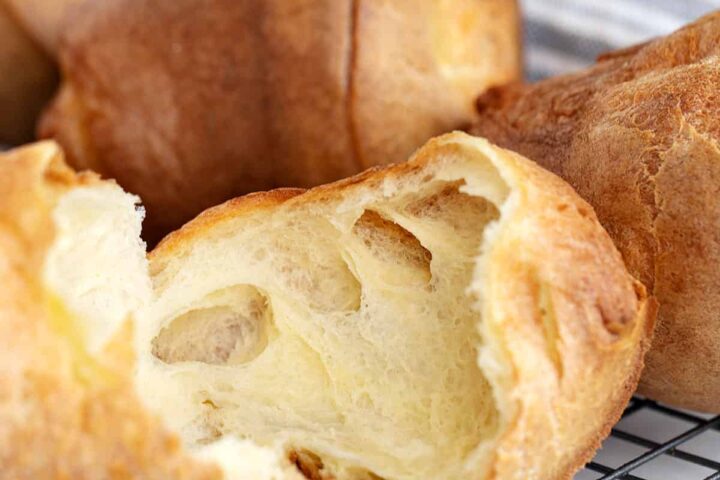
Are popovers supposed to be hollow?
Yes! Popovers are supposed to be hollow. Think of them as little cups for the butter, jam or gravy you plan to put in there.
How to enjoy popovers
- With butter, nestled up to a bowl of soup or stew.
- Split and spoon the stew right on top of them!
- For breakfast, with butter and jam.
- With any dish that demands something to dip with.
Tips for perfect popovers
- Use room-temperature eggs and warm milk.
- Let the batter rest a bit before baking.
- Preheat the popover pan.
- Don’t open the oven for the first part of baking.
- Don’t overfill the popover pan. Halfway full is about perfect.
Do I need a popover pan? Can I make popovers in a muffin tin?
I’m not going to lie … a popover pan makes better popovers. That said, a muffin tin will work, though they will, of course, be shorter and as a result, a little more dense. If you enjoy popovers, I highly recommend adding a popover pan to your kitchen.
How to make ahead, store and reheat popovers
The perfect popover is almost certainly the freshly baked popovers, but that said, these popovers hold up really well, so they can be made ahead and reheated to serve.
Once cooled, store the popovers in an airtight container and refrigerate for 24 hours. For longer storage, you can freeze for a couple of months.
To reheat popovers, simply place refrigerated or frozen popovers onto a baking sheet and place into a 350F oven for about 5-8 minutes, or until sufficiently warmed.
Popover variations
Once out of the oven, brush the warm popovers with butter, garlic butter or garlic and herb butter. I find it easier to brush when using melted butter, combined with garlic and/or herbs. Butter-brushed popovers will be a little softer (not quite as crispy).
You could also add some finely chopped herbs directly to the popover batter.
Want to save this recipe?
Enter your email and I’ll send it to your inbox. Plus, you’ll get great new recipes from me every week!
By submitting this form, you consent to receive emails from Seasons and Suppers.
You can unsubscribe at any time.
Get the Recipe: Simply Perfect Popovers
Ingredients
- 1 cup milk, whole (3 or 3.5%) or 2% milk recommended
- 1 Tablespoon butter, salted or unsalted
- 1 cup all purpose flour, spooned and levelled
- 3/4 teaspoon fine salt, reduce slightly if using salted butter
- 2 large eggs, at room temperature, beaten
Instructions
- Take your eggs out of the fridge ahead to come to room temperature. (If you forget, you can place them in a bowl of slightly warm water for 5-10 minutes).
- Preheat oven to 375F (regular bake/not fan assisted), with rack in the lower third of the oven (1 rack position below centre).
- In a medium bowl, whisk together the flour and salt.
- Crack the eggs into a small bowl and beat with a fork. Set aside.
- Add the butter to the milk and warm in the microwave or in a small saucepan until just warm (about 110F) or to a temperature when you can put your finger in and it is not so hot you feel you need to take your finger out :) Don't heat until hot and definitely don't let it boil.
- Tip! In the next step you will be mixing warm milk with eggs. If you add the milk too quickly, it will cook the eggs. So the trick is to add the warm milk very, very slowly, to bring up the temperature of the eggs slowly, to prevent cooking (or lumpy eggs. Be sure to be stirring vigorously while you add the milk, which also helps the process. Don't worry if you get a few lumps. We will be straining the batter later, too.
- Make a well in the flour mixture and pour the beaten eggs into the well. Very, very slowly (a drop at a time, to start, then increasing to a slow stream), begin adding the warm milk to the eggs while you continually whisk the mixture, bringing in the flour around the sides as you whisk, until you have added all the milk, no flour is visible and you have a smooth-looking batter.
- Place a strainer over a container with a spout or a large measuring cup. Pour the batter through the strainer and into the measuring cup. Discard any solids left in the strainer and set batter aside to rest while you pre-heat the pan.
- Place a 6-cup popover pan into the preheated oven for 10 minutes.
- **You can also use a 6 or 12 cup muffin tin instead of a popover pan. Place the muffin tin on a baking sheet and preheat the muffin tin on top of the baking sheet. Divide the batter between the muffin cups, filling the muffin cups to the top. Fill any empty muffin cups half full with water. Baking time should be the same as for a popover pan, but check a few minutes early, just in case.
- When pan is preheated after 10 minutes, remove from oven and spray with cooking spray. Pour batter into the hot popover cups, filling about 1/2 way full. *For muffin tins, you could fill up to 2/3 full.
- Place into oven and bake for 25 minutes. *Do not open the oven until 25 minutes! Rotate the pan front to back in the oven and continue baking for an additional 22 minutes or until golden brown.
- Remove from oven and carefully remove the popovers to a cooling rack while still hot. *If you like, you can brush with softened butter while still hot, or with garlic and/or herb butter.
- Serve warm or allow to cool completely and transfer to an airtight container to serve later the same day or refrigerate for a couple of days. Popovers also freeze well up to 2 months. To re-warm popovers (fresh or frozen), place on a baking sheet and pop into a 350F oven for 5-8 minutes, or until warmed through.
Notes
More popover recipes to love!

Hi! I’m Jennifer, a home cook schooled by trial and error and almost 40 years of getting dinner on the table! I love to share my favourite recipes, both old and new, together with lots of tips and tricks to hopefully help make your home cooking enjoyable, stress-free, rewarding and of course, delicious!
You’re a Canadian, why are you promoting popovers an American favorite recipe rather than Yorkshire puddings, a centuries old Canadian favourite recipe?
I have a Yorkshire Pudding recipe too, Jocelyn :) – https://www.seasonsandsuppers.ca/yorkshire-pudding/