
A delicious rhubarb custard pie topped with a generous layer of meringue. This rhubarb pie can be made with fresh or frozen rhubarb.

This rhubarb meringue pie has a lovely rhubarb custard base and a generous meringue topping. You can make this pie with fresh rhubarb or frozen rhubarb.
Got rhubarb? You might want to try my Rhubarb Custard Cake, Rhubarb Orange Muffins or Rhubarb Blondies, next!
Ingredients and substitutions
A few notes about the key ingredients …
Rhubarb – You can use fresh or frozen rhubarb to make this pie. For frozen rhubarb, measure it while still frozen and then thaw it completely in a colander placed over a bowl so the excess liquid will drain off.
How to make rhubarb meringue pie
This is a visual summary of the steps to make this recipe. Always refer to the complete instructions in the Recipe Card below when making the recipe.


- Start the rhubarb pie filling by whisking together the flour and sugar.
- Add the egg yolks and vanilla.
- Stir together. The mixture will be very thick!


- Add the fresh or thawed frozen rhubarb and stir in.
- If the mixture seems dry (may be dry-ish if using fresh rhubarb), let it stand a few minutes to let the sugar draw some of the moisture out of the rhubarb and then stir again.
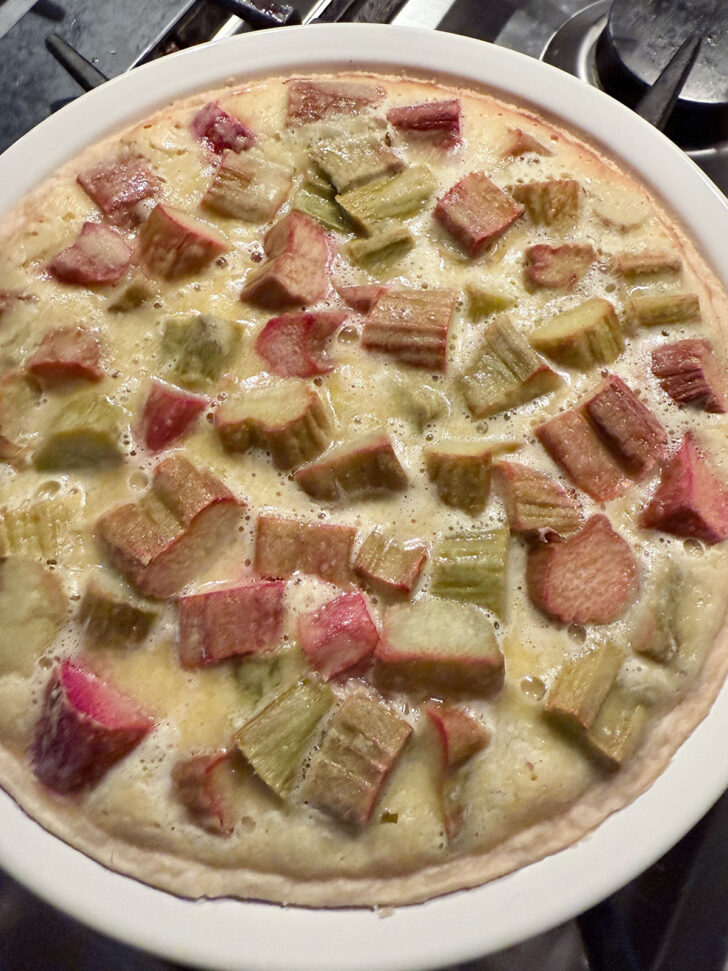
- Pour the filling into an unbaked pie shell and put in the oven to bake for 50-55 minutes.


- When the pie is almost done, whip the egg whites until they are stiff.
- Remove the pie from the oven.
- While the pie is hot from the oven, spoon the whipped egg whites over the top of the pie and return to the oven for about 10 minutes or until set and golden on the peaks.
Recipe tips!
- Try and get as much moisture out of frozen rhubarb as possible. Let it thaw completely in a colander and then lightly press down on it to get a bit more moisture out. Even at that, while the pie will be lovely with the frozen rhubarb, it may be a bit more loose than if using fresh rhubarb.
- This vintage rhubarb pie recipe is generously sweet, as is common for older recipes I find. Of course, rhubarb tends to need a good bit of sugar to balance the tartness. If you’d prefer a little less sweetness, you can reduce the sugar in the pie.
- The secret to preventing the meringue topping from shrinking is to seal the edge of the meringue onto the crust well. There shouldn’t be any gaps or filling showing around the edge.
- Use the 4 leftover egg yolks to make a pudding, crème brûlée or lemon curd. You can also add them to an omelet or freeze them.

Making ahead, storing and freezing
This pie is best enjoyed on the day it is baked. Store at room temperature if storing for a few hours. For longer storage, refrigerate.
Refrigerate leftovers for up to 3 days.
Unfortunately, meringue pies don’t freeze well, so freezing is not recommended.
Want to save this recipe?
Enter your email and I’ll send it to your inbox. Plus, you’ll get great new recipes from me every week!
By submitting this form, you consent to receive emails from Seasons and Suppers.
You can unsubscribe at any time.

Get the Recipe: Rhubarb Meringue Pie
Ingredients
Crust:
- 1 9-inch deep dish pie crust, thawed if frozen, unbaked
Rhubarb custard filling:
- 1 1/2 cups white granulated sugar, *see Note 1 below
- 1/2 cup all-purpose flour, spooned and levelled
- Pinch salt
- 3 large eggs, slightly beaten
- 1 teaspoon vanilla
- 3 cups rhubarb, chopped *see Note 3 below
For the meringue:
- 4 large egg whites, *see Note 2 below
- 1/2 cup white granulated sugar
Instructions
- If starting with frozen rhubarb, you will want to thaw the rhubarb completely in a colander set over a bowl so the excess moisture will drip off. Even after thawing, press lightly down on the rhubarb in the colander to encourage a bit more of the liquid to leave the rhubarb.
- Preheat the oven to 350F (non-convection/not fan-assisted).
- Place the thawed pie shell onto a baking sheet and set aside.
- For the filling: In a large bowl, whisk together the white sugar, flour and salt. Add the eggs and vanilla and stir together. The mixture will be very thick! Add the rhubarb and fold into the filling. Spoon the filling into the pie shell.
- Bake the pie in the preheated oven for 50-55 minutes or until the centre of the pie is set.
- Tip! Test the firmness of the egg whites by dipping the beaters into the egg whites, pulling out and inverting. Look at the dollop of egg whites at the end of the beater. If they start to droop, you should beat them a bit longer. Stiff peaks will hold their shape and not droop.
- For the meringue: When the pie is almost done, using a stand mixer with the whisk attachment or in a large bowl with an electric beater, beat the egg whites on medium speed until foamy (like a bubble bath). With the mixer still on medium, gradually add the white sugar until it is all added. Increase the mixer speed a notch and continue beating for a minute or so. Increase the mixer speed again and continue beating for another minute. Finally, increase the mixer to high speed and beat until the egg whites form very stiff peaks. This whole process will probably take about 5 minutes or a bit more.
- When the pie is baked, remove it from the oven and immediately spoon the whipped egg whites over the top of the pie. Use the back of a spoon to spread the meringue towards the crust of the pie, making sure to overlap the crust with the meringue and sealing the meringue to the crust by pressing it down gently against the crust with the spoon. Make sure there are no gaps around the edge of the pie where you can see the filling. You want it to be well sealed by the meringue. This will prevent the meringue from shrinking. Finally, use the spoon to make big swirls in the meringue.
- Return the pie to the oven for 10 minutes or until the meringue is set and the edges of the swirls are golden.
- Enjoy the pie warm or allow it to cool. If the pie will be enjoyed within a couple of hours, you can leave it at room temperature; otherwise, transfer it to the refrigerator to store. Enjoy the pie cold from the fridge or at room temperature.
Notes
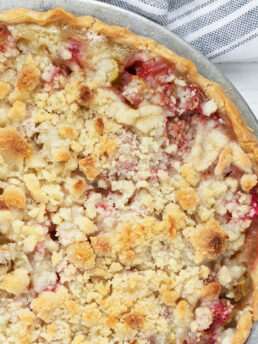
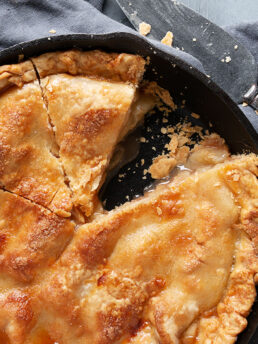
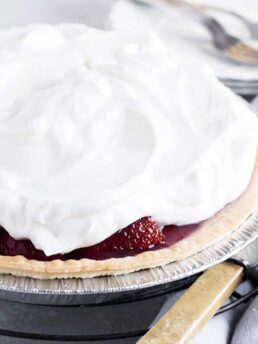
More pie recipes to love!
Hi! I’m Jennifer, a home cook schooled by trial and error and almost 40 years of getting dinner on the table! I love to share my favourite recipes, both old and new, together with lots of tips and tricks to hopefully help make your home cooking enjoyable, stress-free, rewarding and of course, delicious!
Hi Kathleen, the filling is quite thick before stirring in the rhubarb, as in photo #3. Once you add the rhubarb it should be ok. I was using thawed frozen rhubarb, so that no doubt added a bit more moisture to mine. If it seems to dry once you’ve mixed in the rhubarb, an extra egg yolk won’t hurt.
Hi Hilary and no, there is no milk in this one. I know typically milk is part of a custard, but this one is only the eggs.