Delicious, classic Japanese sandwich bread, that is both soft and light, but with a lovely, spongy crumb. Makes great toast, sandwiches and French Toast!
Are you a bread lover and a bread baker? If so, I think you really owe it to yourself to make yourself some of this classic Japanese bread, known as Shokupan.
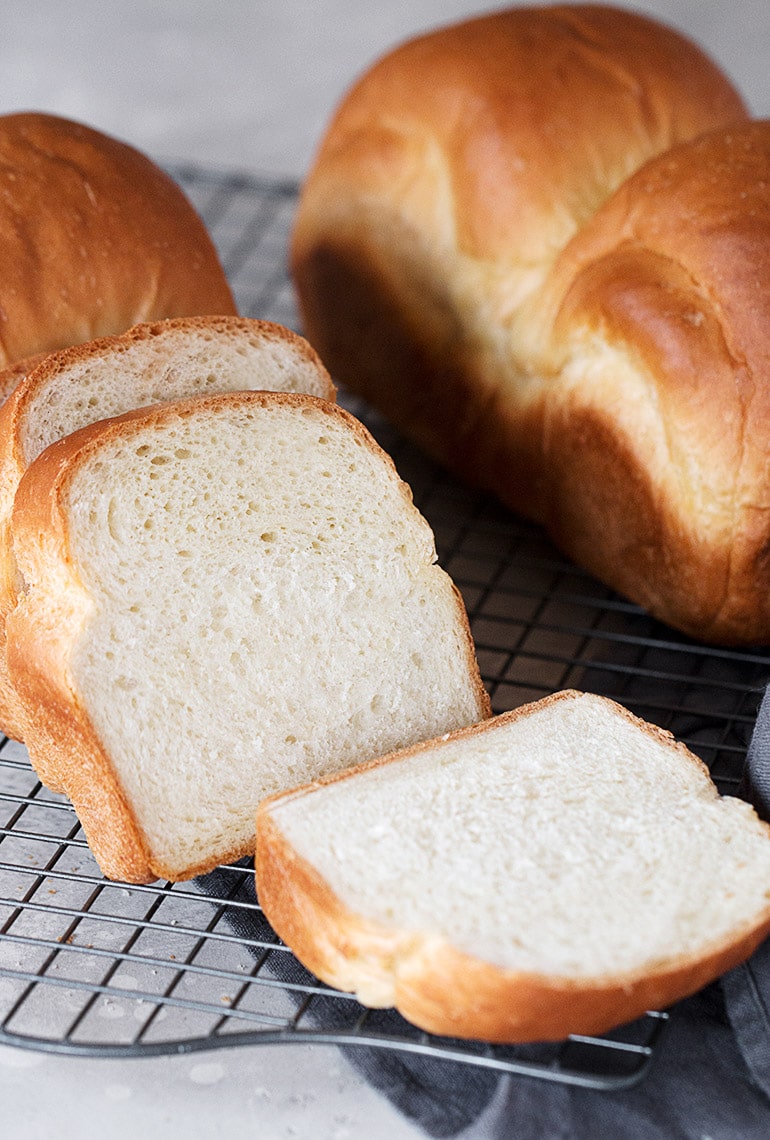
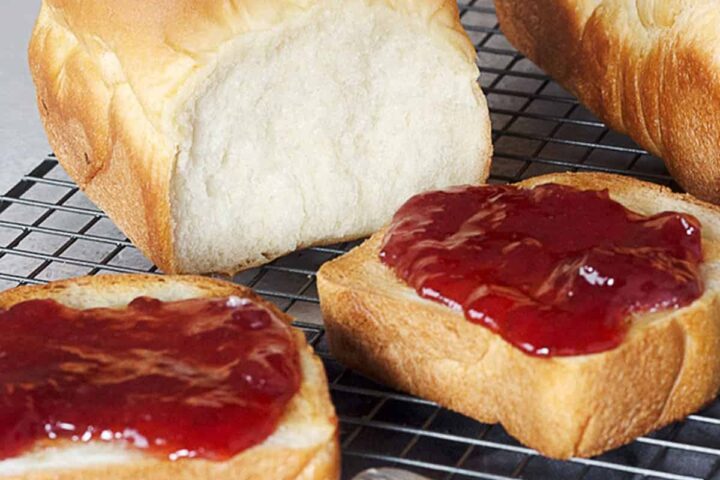
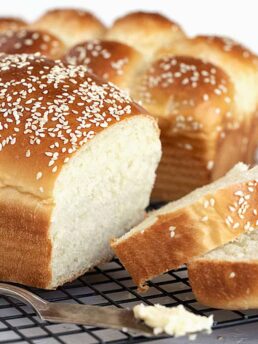
Shokupan, or sometimes called Japanese Sandwich Bread is a bread that somehow manages to be both light and fluffy, yet with a bouncy crumb at the same time. Don’t ask me how. All I know is that it is a fabulous sandwich bread and makes the most incredible toast.
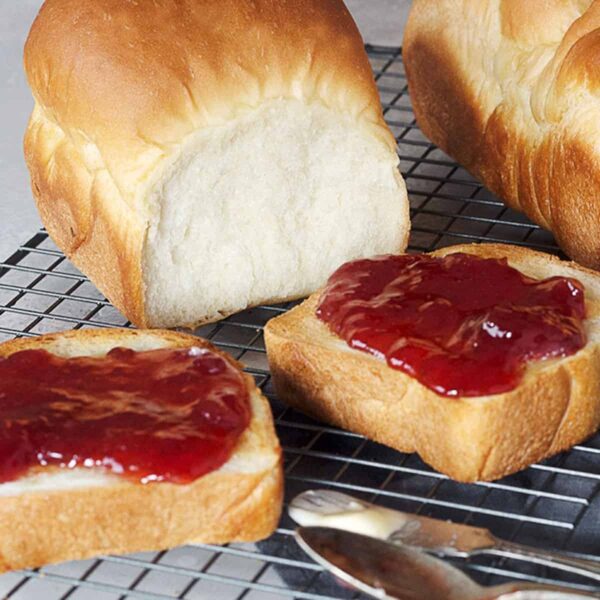
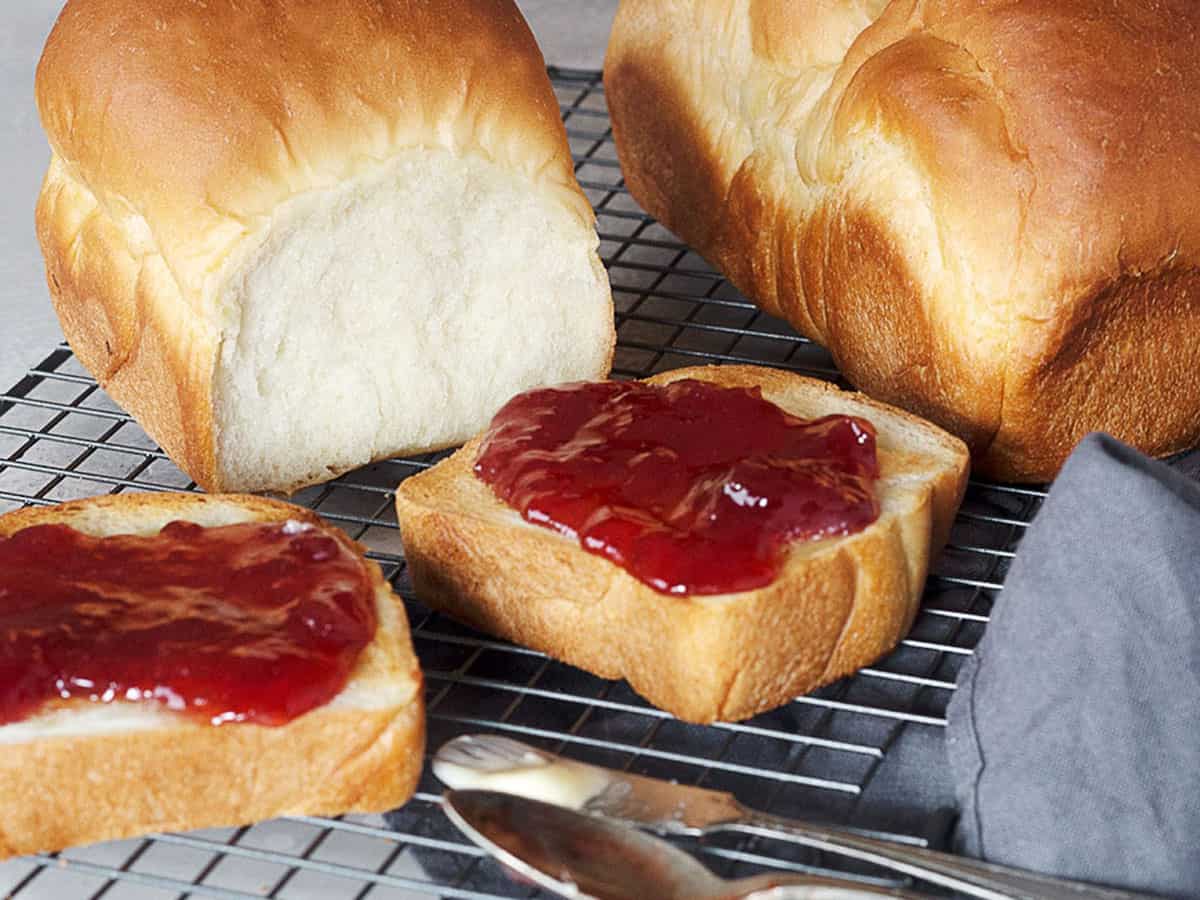
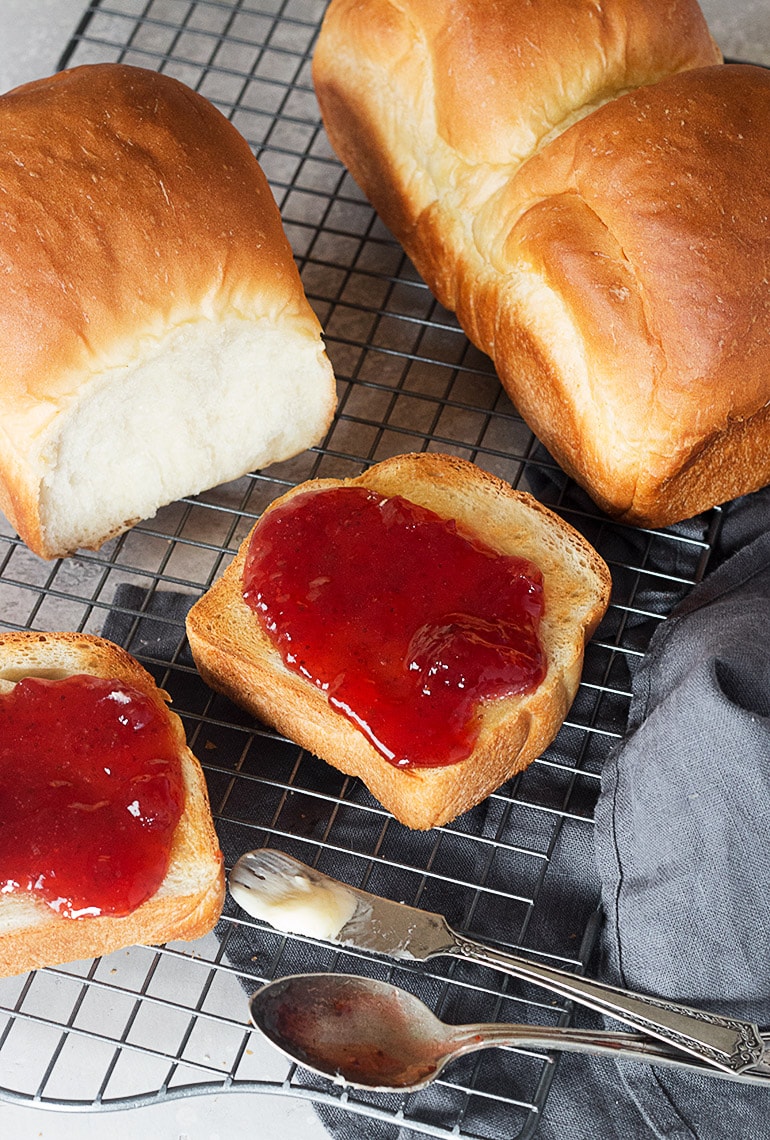
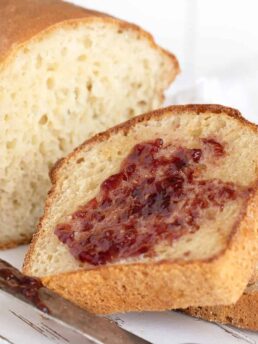
Yes, Shokupan Toast is a thing and again, you owe it to yourself to experience it! Cut thick, toasted, generously buttered and topped with your favourite jam, it reminds me of the joy of a warm, buttered crumpet. Shokupan is also a great sandwich bread. Trim the crust and make yourself a lovely sandwich. And finally, Shokupan is a perfect choice for fabulous French Toast.
What is Shokupan?
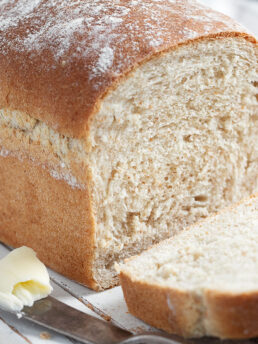
Shokupan, which translates roughly as “eating bread” is a simple, every-day bread, with a soft crust and texture that is both soft and light, while also having a bouncy structure.
While Shokupan is often made with the Tangzhong method, it is not always made that way. This recipe doesn’t use a tangzhong, but produces beautiful results nonetheless, as you can no doubt see from the photos. In fact, I tested a bunch of Shokupan recipes, many that used the tangzhong method, and preferred this one.
Shokupan can be baked in two shapes. The “mountain” shape uses two (or sometimes more) rolls of dough baked together in one pan. Shokupan is also made in a Pullman pan, that is a bread pan with a cover. This results in a perfectly square loaf that is ideal for sandwiches.
How to enjoy Shokupan
Shokupan bread makes fabulous toast. Slice it thick, then toast it to golden. Top with a generous spread of butter while still warm (so it soaks well into the thick toast), then top with your favourite jam.
Shokupan is also a great sandwich bread. The square shape is perfect for sandwiches either with or without the crust. A classic Japanese sandwich is a multi-layered sandwich, using trimmed bread, consisting of layers of potato and egg salad and ham and cheese, with some lettuce in there, too.
Finally, Shokupan is pretty much the perfect bread to use for outstanding French toast.
Ingredients and Substitutions
Bread Flour: In many cases, I would suggest bread flour not absolutely necessary. In the case of this Shokupan though, if you want the high rise and perfect texture, you really should start with bread flour, ideally unbleached bread flour. Canadians can easily find this at Bulk Barn, where you can buy just as much as you need, so you don’t need to buy a big bag.
Yeast: You can use active dry yeast or instant yeast for this bread. For active dry, you can proof in some of the water before adding to the flour.
Equipment Notes
Kitchen Scale (Optional): If you enjoy baking, I can’t stress enough the wonderful benefit of having a simple Kitchen Scale. Measuring in grams is just plain more accurate than measuring by cups. No question. And when it comes to baking, that’s even more important. Kitchen scales can be bought for less than $20. Go for a simple on, like the one I’m using here. All it needs to do is measure in grams, oz and fluid oz and have a tare (zero-ing) function. When measuring, grams are the easiest to use, since you don’t have to convert pounds into oz etc. Why do math when you don’t have to :)
Bread Pans: You will need two 8×4-inch loaf pans to make this bread. You can also make Shokupan in a Pullman-type loaf pan with a cover, for a perfectly square loaf, that’s ideal for sandwiches.
Recipe Tips
If you have a kitchen scale already, use the gram/ml measurements for best accuracy.
Be sure to check your bake after about 20 minutes, as this bread rises high and will likely be sufficiently browned at that point. Lay a piece of aluminum foil loosely overtop of both loaves, then allow to continue baking for the full 35 minutes.
Shaping Shokupan for Maximum Rise
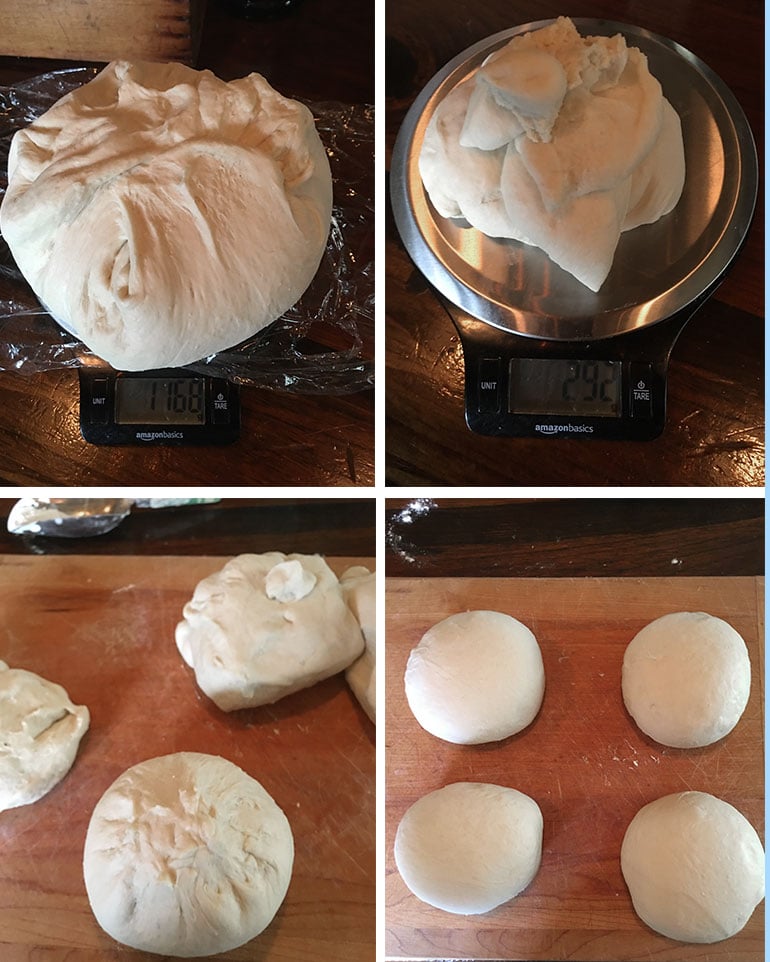
Step 1: Weigh the entire dough ball. Divide the total weight by 4. (In my case, that number was 292g)
Step 2: Weigh out 4 individual pieces, each 292 grams in weight.
Step 3: Form each of the 4 dough pieces into balls, by pinching together at the bottom, then flipping over with the pinched side down.
Step 4: Let balls stand for a few minutes to allow the gluten to relax after cutting and shaping and before rolling.
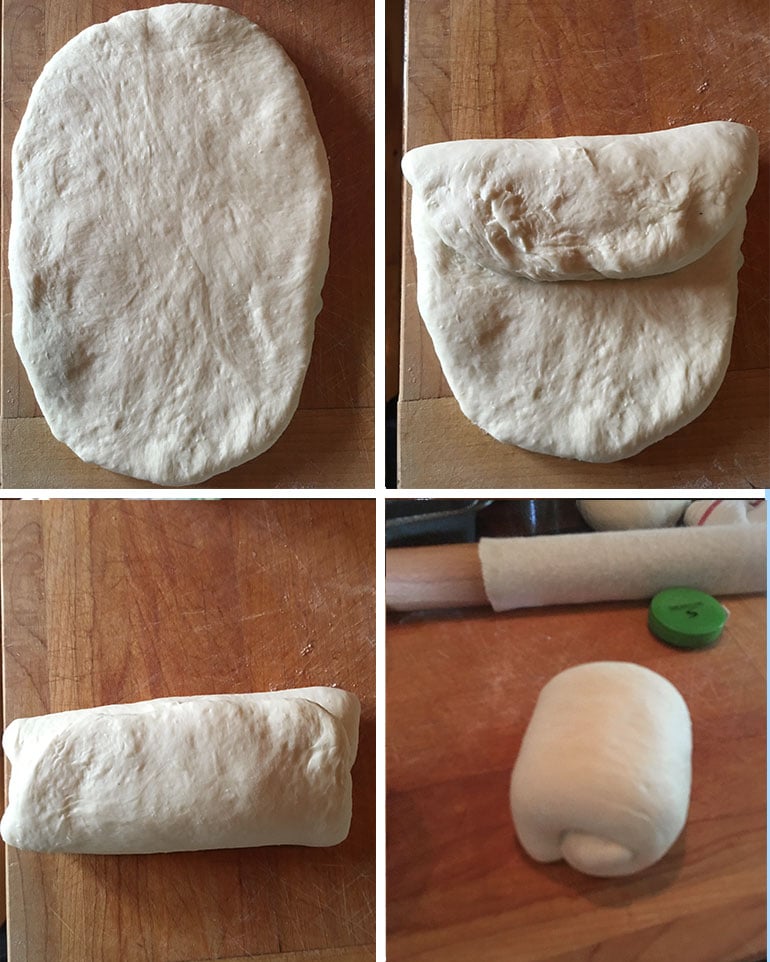
Step 5: Roll one of the balls into a 1/2-inch thick rectangle, about 9 inches long by 6 inches wide. (Try to get it as square as possible, but the dough is quite springy, so rounded corners are ok :)
Step 6: Fold the top 1/3 of the rolled piece down.
Step 7: Fold the bottom 1/3 of the rolled piece up the top.
Step 8: Turn dough 90 degrees, then roll up tightly, stretching and pulling as necessary, for a tight roll. Gently pinch the end of the roll in to the roll.
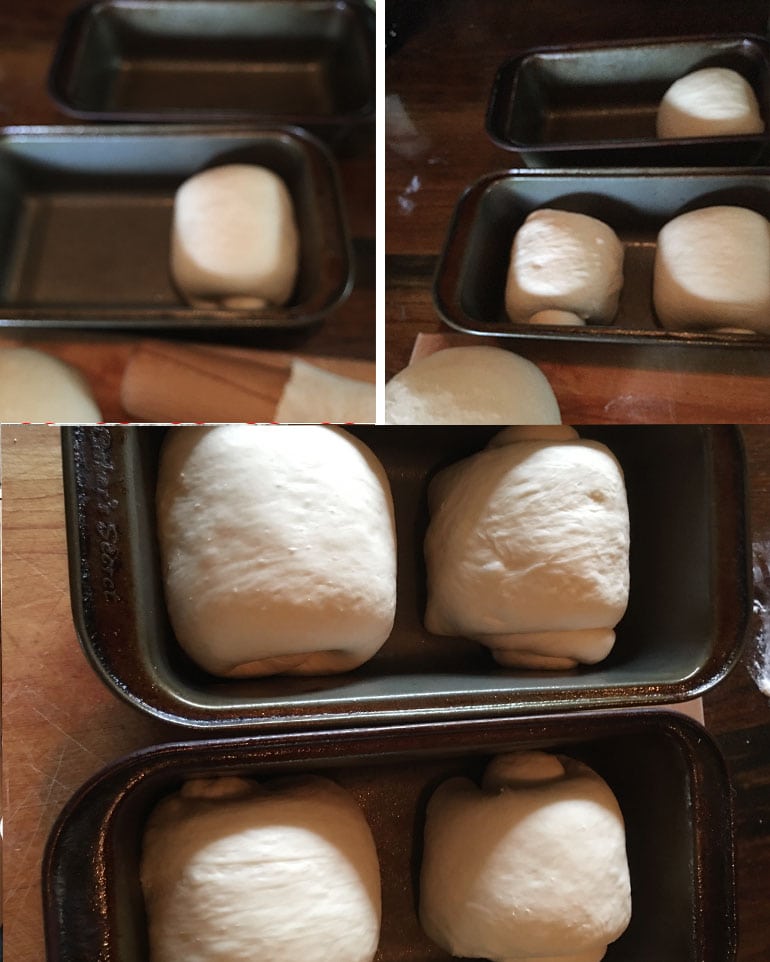
Step 9: Place rolled dough into prepared bread pans, ensuring that the right side piece is rolling to the right and the left side piece is rolling to the left. (check the direction of the top of the roll and which direction that last top roll is heading).
Step 10: Place two rolls in each 8×4-inch pan, with the rolls just touching the ends of the pan and a small gap in the middle.
Want to save this recipe?
Enter your email and I'll send it to your inbox. Plus, you'll get great new recipes from me every week!
By submitting this form, you consent to receive emails from Seasons and Suppers.
You can unsubscribe at any time.
Get the Recipe: Shokupan (Japanese Sandwich and Toasting Bread)
Ingredients
Dough:
- 4 cups (625 g) bread flour
- 3 Tablespoons (30 g) white sugar
- 2 1/2 teaspoons (12 g) salt, reduce if using salted butter below
- 2 teaspoons (8 g) instant yeast
- 1 3/4 cups + 2 Tablespoons (450 ml) water, lukewarm, about 100F
- 3 Tablespoons (35 g) unsalted butter, cut into 3 pieces, at room temperature
For brushing baked loaves:
- 2 Tablespoons (25 g) butter, melted
Instructions
- In a large bowl or the bowl of a stand mixer fitted with a kneading hook, stir together the flour, sugar, salt and yeast. With the mixer running (or with a spoon), stir while you slowly add the water to the flour mixture.
- Mix/knead for about 6-7 minutes, or until dough is soft and moist. Add the butter and continue mixing/kneading until dough comes back together, about 3-4 minutes. Form dough into a ball and place into a greased bowl. Cover with plastic wrap and allow to rise about 40-45 minutes, or until doubled.
- Punch the air out of the dough, then re-shape into a ball and place back in the bowl. Cover and let rise another 30 minutes, or until dough doubles again.
- Stick a floured finger into the dough. If the hole you just created remains, the dough is ready. If the hole shrinks, it needs to rise a little longer.
- Place dough onto a floured work surface. (If you have a kitchen scale, weigh the entire dough ball, then divide by 4 to determine the desired weight for each ball.) Divide dough into 4 equal sized pieces (should be somewhere around 280-300g each). Shape the pieces into balls by pinching together at the bottom. Place on counter, pinched side down and cover with a clean tea towel and let stand 5-8 minutes.
- Grease two 8x4-inch bread pans and set aside.
- Shaping: Flip dough over so the pinched side from making the balls is facing up. With a rolling pin, roll dough to about 1/2-inch thick, or about 9-inches long by 6 inches wide. Fold in 2/3 of the way down, then fold the bottom 1/3 up to cover the top. Rotate the rectangle 90 degrees. Roll up the dough tightly, by pulling and stretching as necessary, to make a smooth surface. Gently pinch together the end of the roll with the roll itself.
- Placing in pan: Before placing rolls into pan, check the direction of the roll for each dough piece. The rolls should be placed in the pan with the ensuring that the right side piece is rolling to the right and the left side piece is rolling to the left. (check the direction of the top of the roll and which direction that last top roll is heading). Place two rolls in each pan, with the balls just barely touching the ends of the pan and with a small gap between the rolls in the centre.
- Cover pans with a clean tea towel. Let rise about 45-50 minutes or until the dough rises to about 1 cm above the sides of the pan (for square/pullman pan baking, it should be 1 cm below the sides of the pan).
- Preheat oven to 390F. (regular bake setting/ not fan asssited)
- Once risen, bake in the preheated oven for about 35 min. *Check at about the 20 minute mark and loosely cover with aluminum foil if bread is browned enough already.
- Remove from oven and immediately remove to a cooling rack. Brush tops of loaves with melted butter, then leave to cool completely.
Notes
More Bread Recipes to Love!
Hi! I’m Jennifer, a home cook schooled by trial and error and almost 40 years of getting dinner on the table! I love to share my favourite recipes, both old and new, together with lots of tips and tricks to hopefully help make your home cooking enjoyable, stress-free, rewarding and of course, delicious!
This came out fantastic and disappeared so fast, thanks for the recipe!
So glad you enjoyed it, Jola! Thanks so much :)
Hello! I really want to try this bread and I was wondering if a 9 by 5 pan would work?
Hi Samantha and yes, it will work. Obviously your loaf will be wider and shorter, so the baking time may change. Be sure to watch it closely the first time you make it :)
Hi! Is there any change in temp/bake time if you use a Pullman loaf pan? I really wanna make some square bread haha
Hi Cat and no, it should be roughly the same, but if you have a thermometer, do check the internal temperature for done-ness. It should be at least 190F internal temp.
Hi Jennifer,
I love your recipe. I tried it on Tuesday, the bread came out very beautiful, soft and light and it is still soft until today (Thursday). I used bread mixer and i have to say to myself to keep calm and wait until the dough reach the perfect point. 😅.
I ate it right after out of the oven with bitter sweet marmalade and another time toasted and spreaded it with nutella, it was so delicious.
By the way, i used himalayan pink salt in the recipe and found out that it made the bread a little bit salty. Next time I’ll just use normal sea salt or reduce the quantity.
Thank you.
So glad you enjoyed it Anne and yes, I have pink Himalayan in my salt grinder and I have discovered it packs a salt punch :) Thanks!
Hello! I only want to make one loaf.
Can I halve the recipe and make one loaf?
Thanks!
Yes, you can half the recipe to make one loaf :)
Thank you! Can’t wait to try it!
Well this looks gorgeous sitting on my counter cooling!!! Wish I could share a photo!!! Excited to try it!
So glad, Lauren! And yes, it’s such a pretty loaf :) Thanks!