


Homemade pizza buns are my from‑scratch version of the soft, cheesy bakery pizza buns you see at the grocery store, but made much more economically at home. Starting with a simple homemade pizza dough, these soft buns are topped with pizza sauce and plenty of melted cheddar cheese for that classic, bakery‑style look and taste. They bake up into light, fluffy, handheld buns that kids (and adults) love for snacks, school lunches or quick dinners, and they’re made with everyday pantry ingredients.
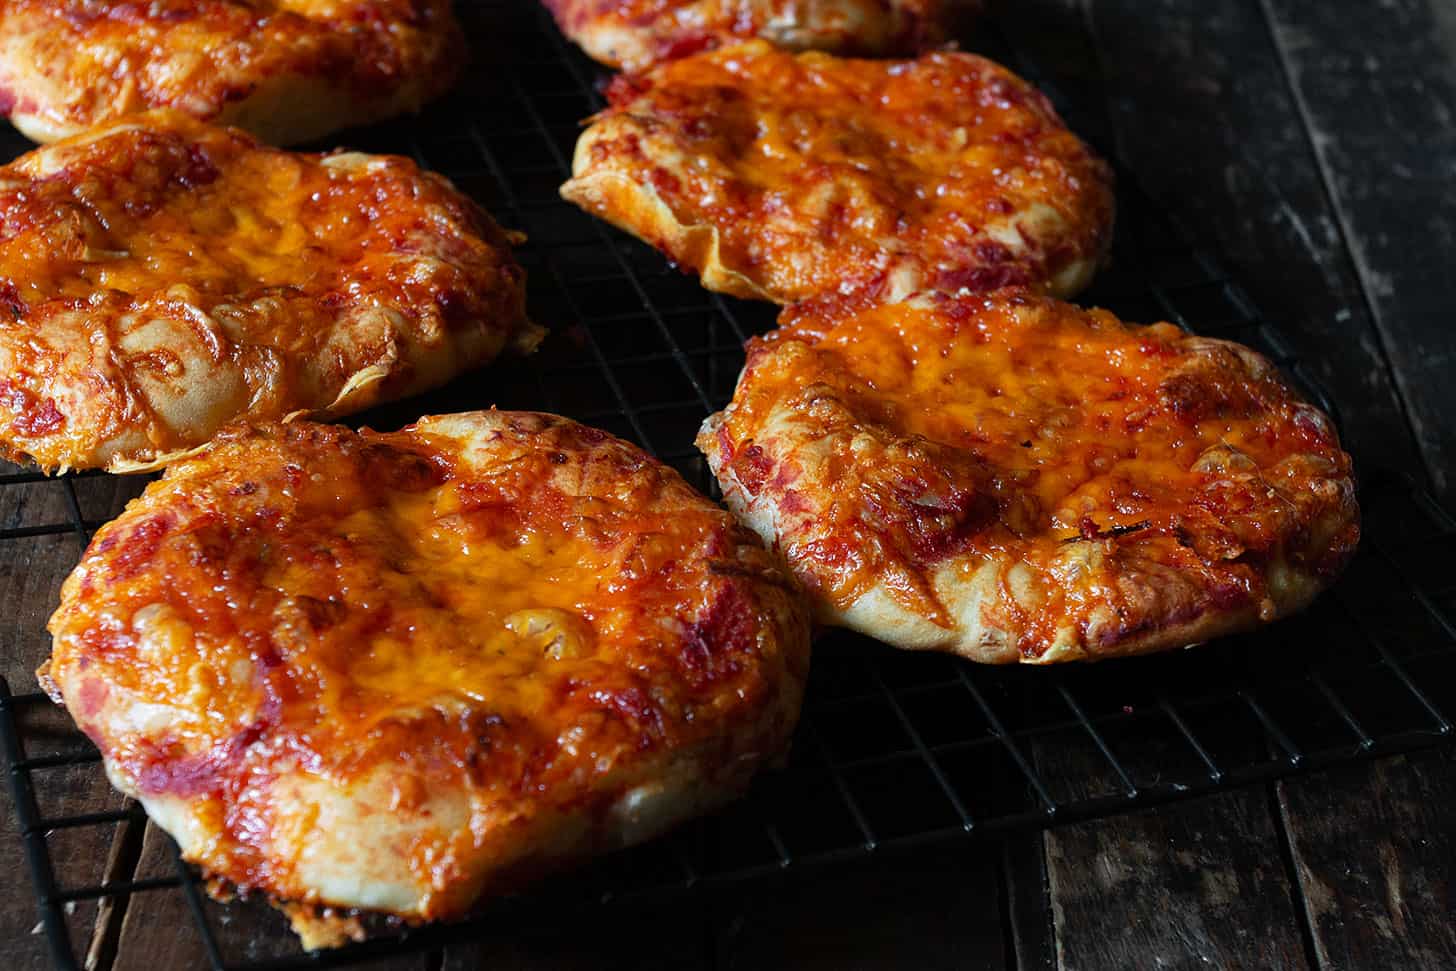
These easy homemade pizza buns are straightforward to make, even if you’re new to working with yeast dough. The dough comes together quickly, rises fast, and the baked buns freeze beautifully, so you can tuck a batch into the freezer for busy days or grab‑and‑go meals. Whether you’re stocking up for the week, feeding hungry kids after school or looking for a freezer‑friendly lunch option, these homemade pizza buns are a great make‑ahead baking project.
Why you’ll love these homemade pizza buns
- Soft, bakery‑style pizza buns made from scratch with a simple, homemade dough.
- Cheesy, kid‑friendly handheld buns that are perfect for snacks, school lunches and quick dinners.
- Freezer‑friendly make‑ahead recipe so you can stash a batch for busy days and grab‑and‑go meals.
- More economical than store‑bought bakery pizza buns, with the flexibility to customize toppings and cheese.
- Beginner‑friendly yeast dough with clear step‑by‑step photos and a video to guide you through the process.
- The pizza buns reheat quickly and easily from frozen.
Homemade pizza buns recipe: at a glance
These easy homemade pizza buns start with a simple, soft dough that’s shaped into individual buns and topped with pizza sauce and plenty of cheese. They bake up into light, fluffy, cheesy buns that are perfect for snacks, lunches or quick dinners.
- Soft homemade pizza bun dough topped with pizza sauce and lots of melted cheese.
- Easy to make, bake in the oven and ready in just over an hour (including the dough rising time).
- Kid‑friendly handheld snacks that are perfect for lunches, parties and game day.
- Freezer‑friendly pizza buns you can make ahead and reheat as needed.
- Simple to customize with extra toppings if you like.
What readers are saying …
“Amazing buns! I was so happy to have come across this recipe for pizza buns just like the ones I used to love getting from the grocery store. They have turned out perfectly every time I make them and are requested often. Recently, I was trying to think of a way to help out a friend who was dealing with a sick parent, so I made a batch of these buns to add to a basket of grab-and-go snacks. The perfect thing for when you are running from work to the hospital and don’t have time for a proper meal.” – Steph
- Why you’ll love these homemade pizza buns
- Homemade pizza buns recipe: at a glance
- What readers are saying …
- Ingredients and substitutions
- How to make homemade pizza buns: step-by-step photos
- How to make homemade pizza buns: video
- Recipe tips!
- Homemade pizza buns FAQ
- Serving suggestions
- Making ahead, storing, freezing and reheating pizza buns
- Get the Recipe: Homemade Pizza Buns (Soft, Cheesy & Freezer‑Friendly)
- If you love these pizza buns, you might also enjoy …
Ingredients and substitutions
A few notes about the key ingredients …
Yeast – you can use either Active Dry Yeast or Instant Yeast to make these pizza buns. Be sure to see the special instructions in the Recipe Card if using Active Dry yeast, as you will need to proof the yeast in water before using.
Pizza sauce – use your favourite canned pizza sauce (I love Mutti™!) or make your own.
Cheese – I used cheddar cheese, because that’s what the pizza buns in the store have on them. I generally use an Old cheddar for the most cheddar flavour. Of course, you can always use mozzarella (or another cheese) if you like. Or a mixture of different cheeses. That’s the great thing about making your own pizza buns. You get to make all the decisions :)
How to make homemade pizza buns: step-by-step photos
This is a visual summary of the steps to make this recipe. Scroll down to the Recipe Card below for the complete list of ingredients and instructions.
To make homemade pizza buns, you’ll mix a simple pizza dough, shape it into flat buns, top with pizza sauce and cheese, then bake until golden and bubbly.
- Make the pizza bun dough and knead until smooth and elastic.
- Let the dough rise until doubled in size, then divide into equal pieces.
- Shape each piece into a flat round and place on a baking sheet.
- Top each bun with pizza sauce and shredded cheese.
- Let rise briefly, then bake until the buns are puffed, golden and the cheese is melted and bubbly.
- Cool slightly on a rack before serving or freezing.
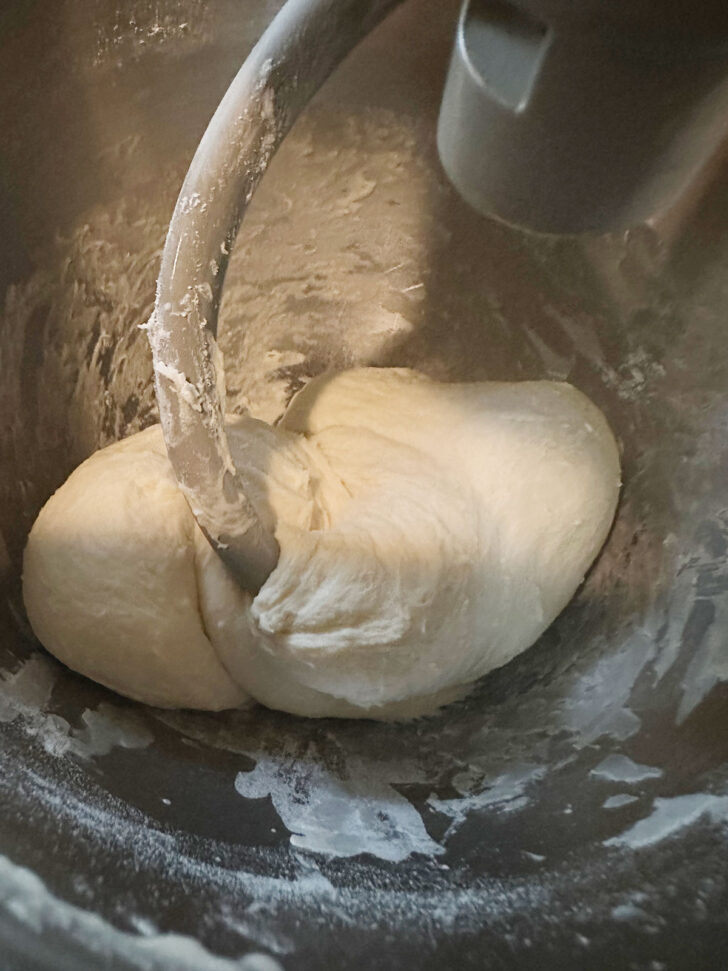
Step 1: Mix the dough until it is still moist, but wraps the dough hook and cleans the bowl in places.
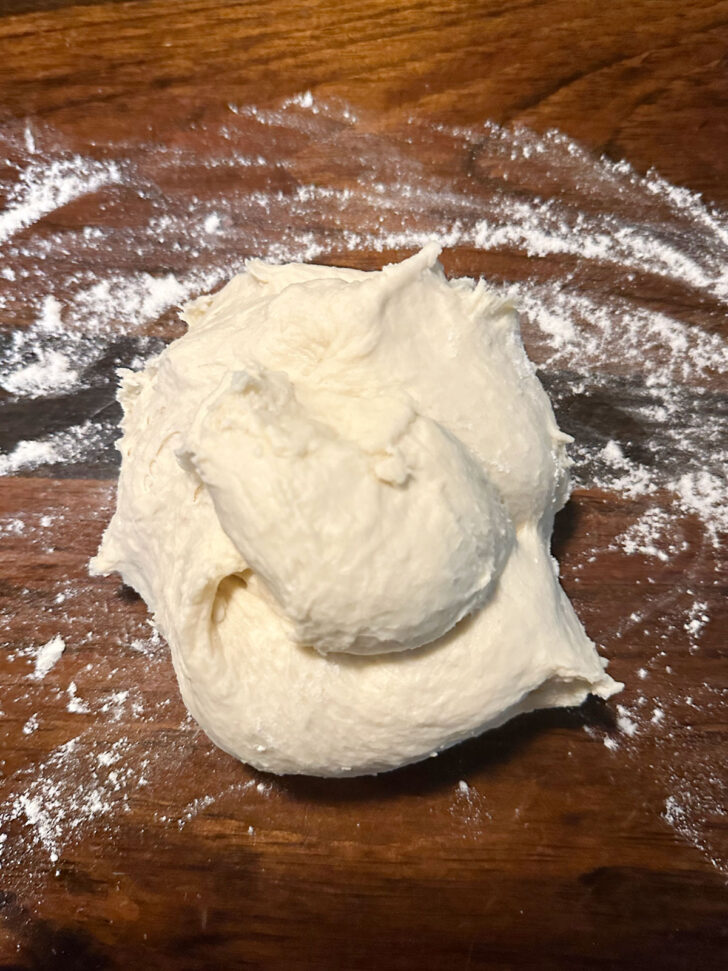
Step 2: Remove the dough to a floured work surface and knead briefly. The dough shouldn’t stick to your hands or the work surface. Add a bit more flour if it does.
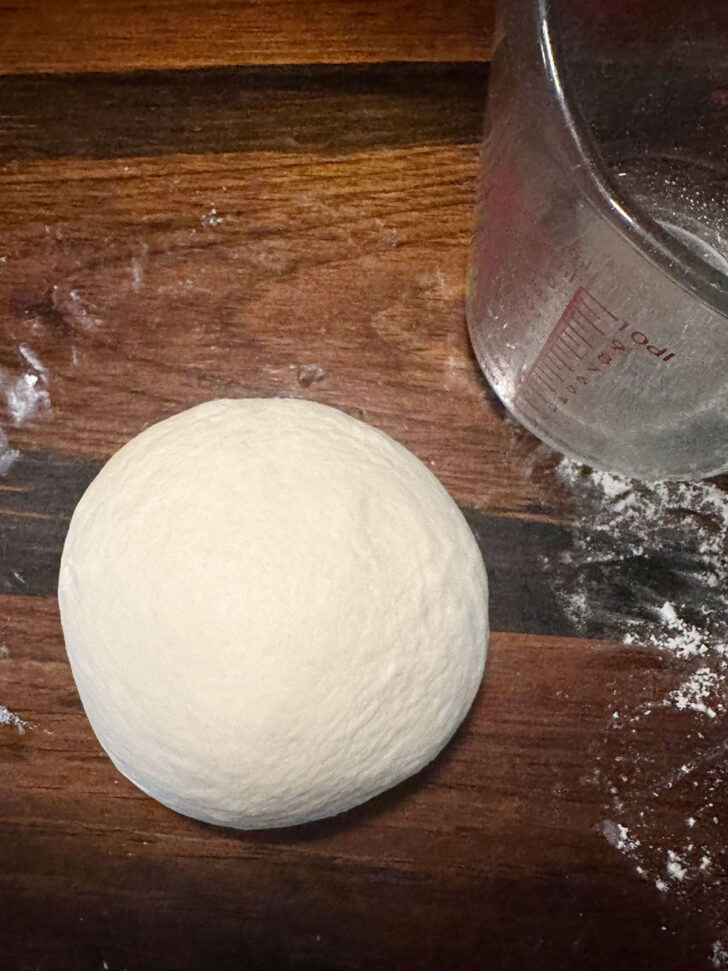
Step 3: Form dough into a ball.
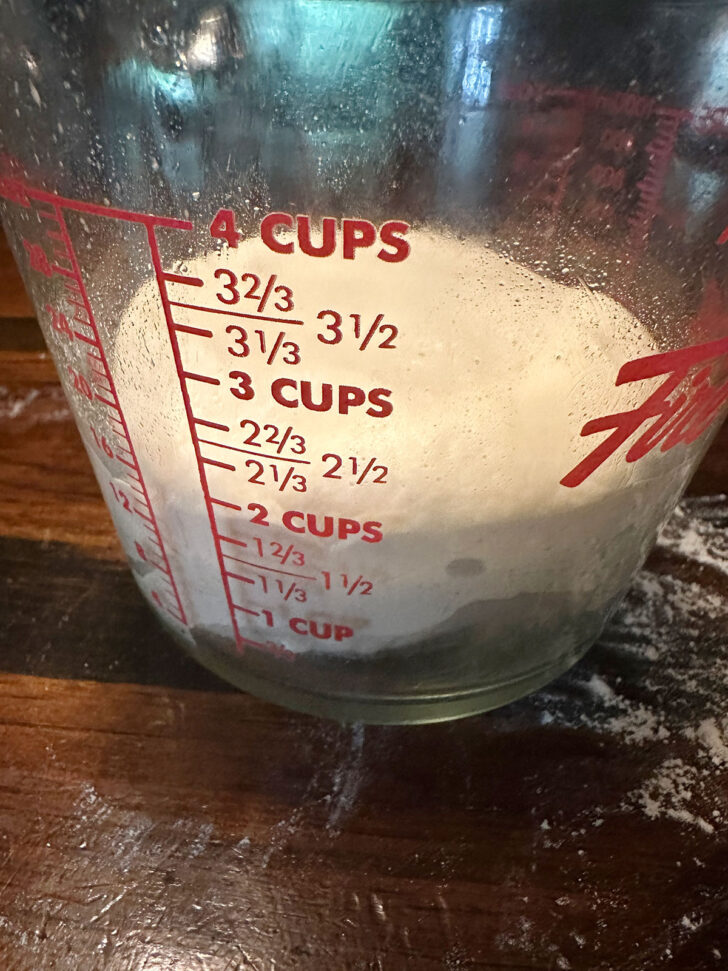
Step 4: Place the dough into a greased bowl or 4-cup measuring cup and cover with plastic wrap.
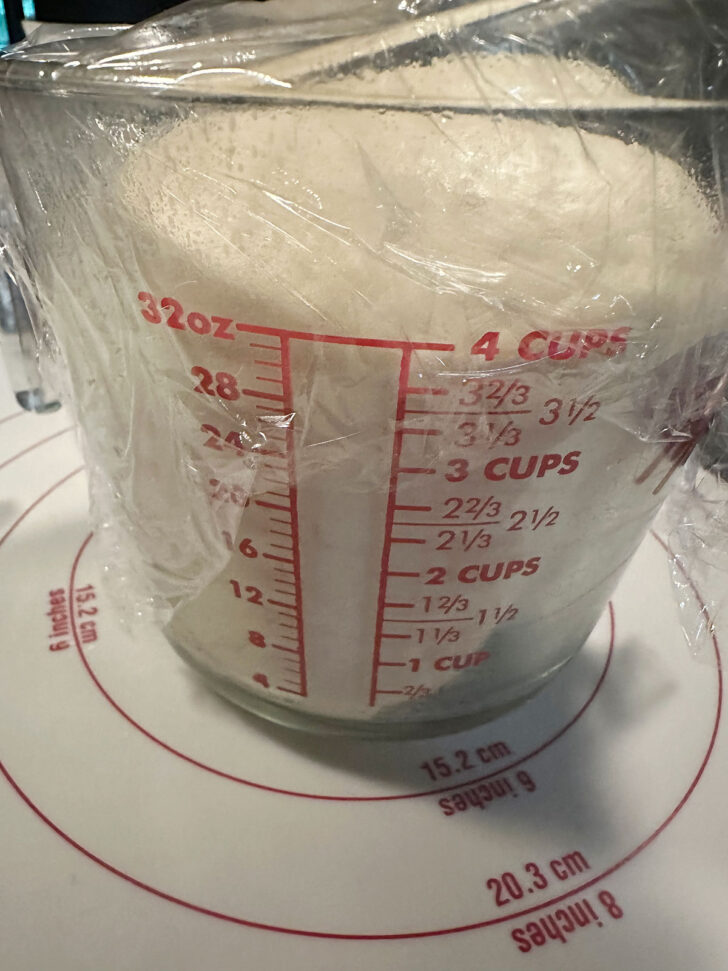
Step 5: Allow the dough to rise until doubled, about 30-40 minutes.
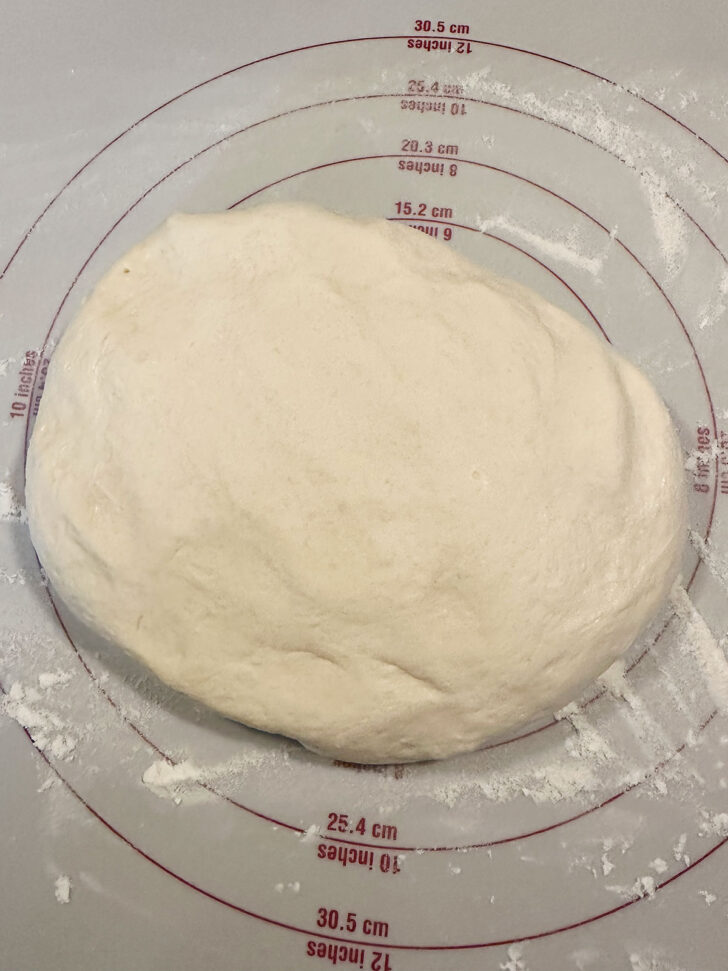
Step 6: Remove the dough to a floured work surface and deflate.
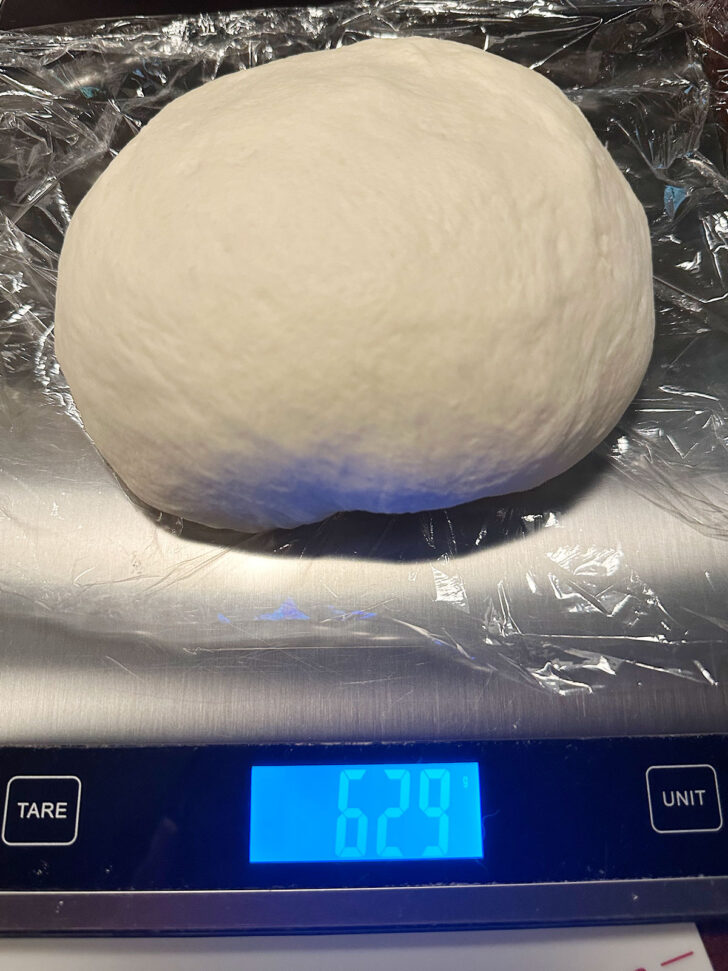
Step 7: If you have a scale, weigh the dough, then divide by 12 to get the amount needed for each piece.
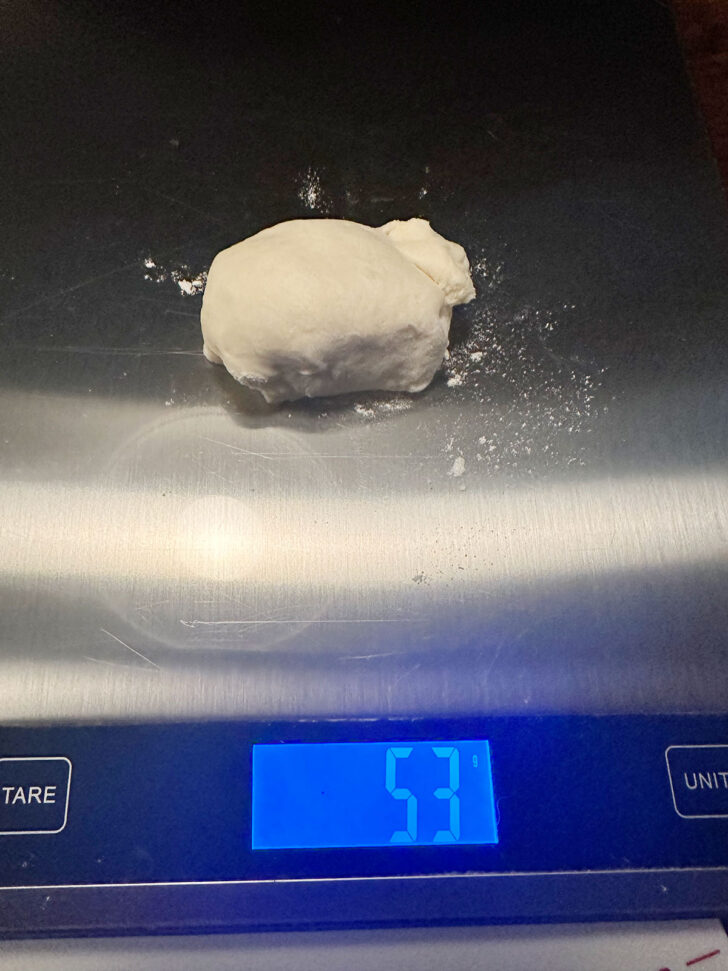
Step 8: Weigh out each piece (mine were 53g apiece).
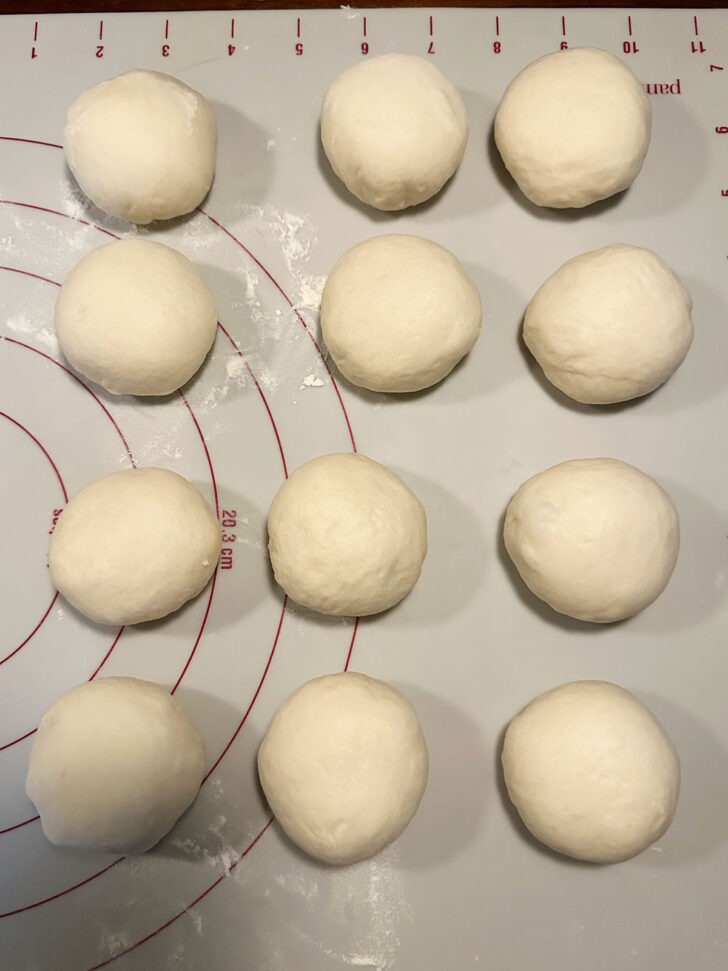
Step 9: Form all the pieces into balls.
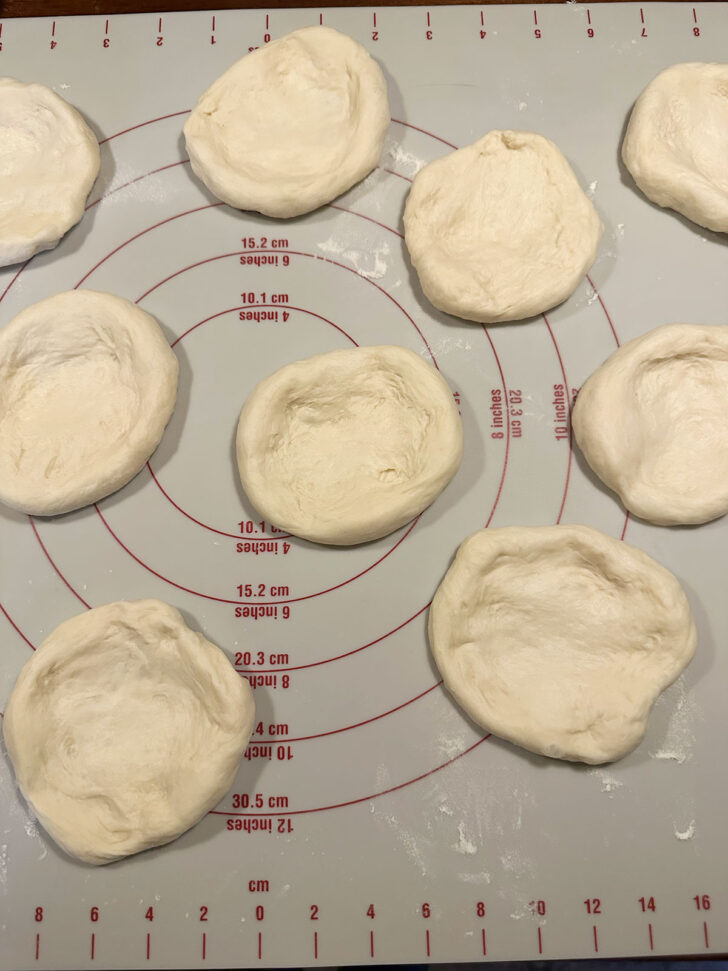
Step 10: Start stretching the dough, stretching out to about 3 inches in diameter. Place onto a baking sheet
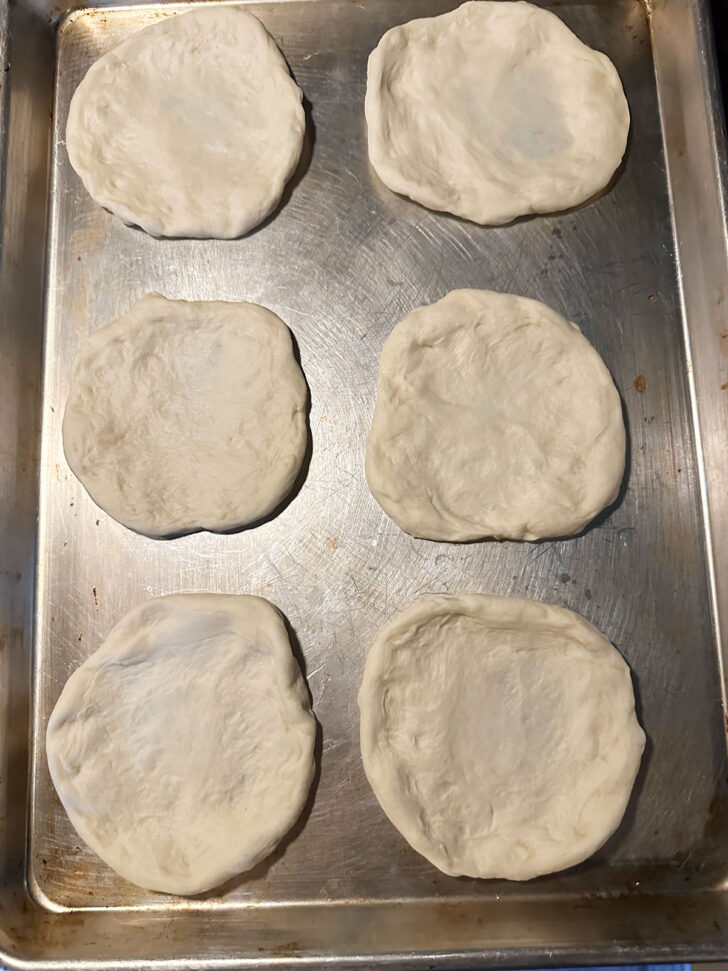
Step 11: Stretch the dough rounds a bit more, until each one is about 5 inches in diameter.
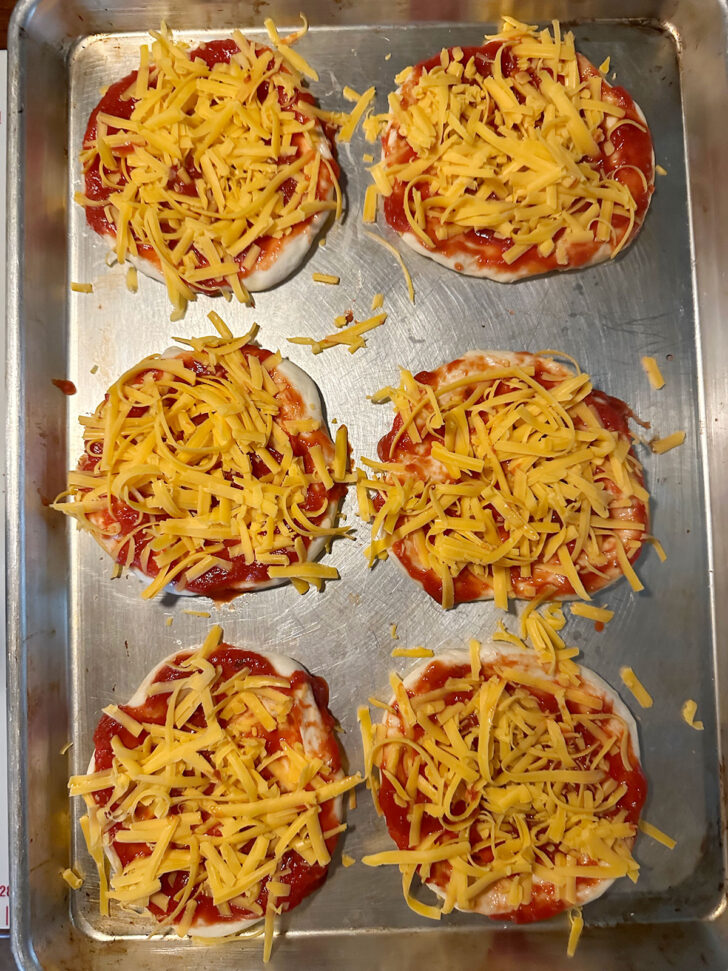
Step 12: Top each dough round with pizza sauce (spreading right to the edges!) and cheddar cheese. Allow to rest 20-25 minutes on the pan, then bake.
How to make homemade pizza buns: video
This pizza bun recipe is also available in a longer form video in my YouTube “Cook Along” playlist. Great for beginner bakers, as you can see the process in more detail. View the longer Pizza Bun Recipe Video on YouTube.
Recipe tips!
- This pizza buns dough is a fast riser! It usually doubles for me in 30-35 minutes, so don’t wander too far :)
- If you don’t want to bake two baking sheets at one time, you can place the second sheet into the refrigerate after stretching the dough to 5-inches, but before topping. Keep in the refrigerator while the first batch bakes, then remove from the fridge, top with sauce and cheese, then let rest about 30 minutes before baking off.
- Baking at 375 F. will produce a crispy crust. If you prefer a softer pizza bun, bake at 350 F. instead and extend the baking time slightly. Also, be sure to use parchment paper to line the baking sheets. Finally, if you place the buns into an airtight container while still slightly warm, they will be softer.
Homemade pizza buns FAQ
Pizza buns are soft, individual buns made from pizza dough and topped with sauce, cheese, and your favourite pizza toppings, then baked until golden and cheesy.
Yes, pizza buns freeze beautifully. Let them cool completely, then freeze in an airtight container or bag for up to 3 months. If possible, place the buns onto a baking sheet and freeze for one hour before transferring to the freezer container, to keep the pizza buns nice and neat. You can reheat pizza buns from frozen in the oven or the microwave.
Yes, as written, these pizza buns are topped with pizza sauce and cheese, but you can add other toppings like pepperoni, cooked sausage, ham, veggies or extra cheese.
Pizza buns are larger, softer and more like individual mini pizzas baked on buns, while pizza rolls are usually smaller, fully enclosed bites of dough stuffed with sauce and cheese.
Yes, you can bake pizza buns ahead and refrigerate or freeze them, then reheat in the oven until warmed through.
You can reheat frozen pizza buns in the microwave for 60-75 seconds, but I love to reheat them on a baking sheet in a 400F oven for 7-8 minutes. The oven method restores a bit of the crisp!
Homemade dough will give you the best soft, bakery‑style texture. That said, store-bought pizza dough will technically work, though it may create a dough that is crisper or puffier than intended.
Yes! Simply divide the dough into more pieces (maybe 16 pieces instead of 12) and reduce the baking time slightly. Mini pizza buns would be great for parties!
Serving suggestions
These homemade pizza buns are perfect for school lunches, after‑school snacks, game day, and potlucks.
If you love these homemade pizza buns, try my Easy Homemade Sub Rolls for sandwiches!
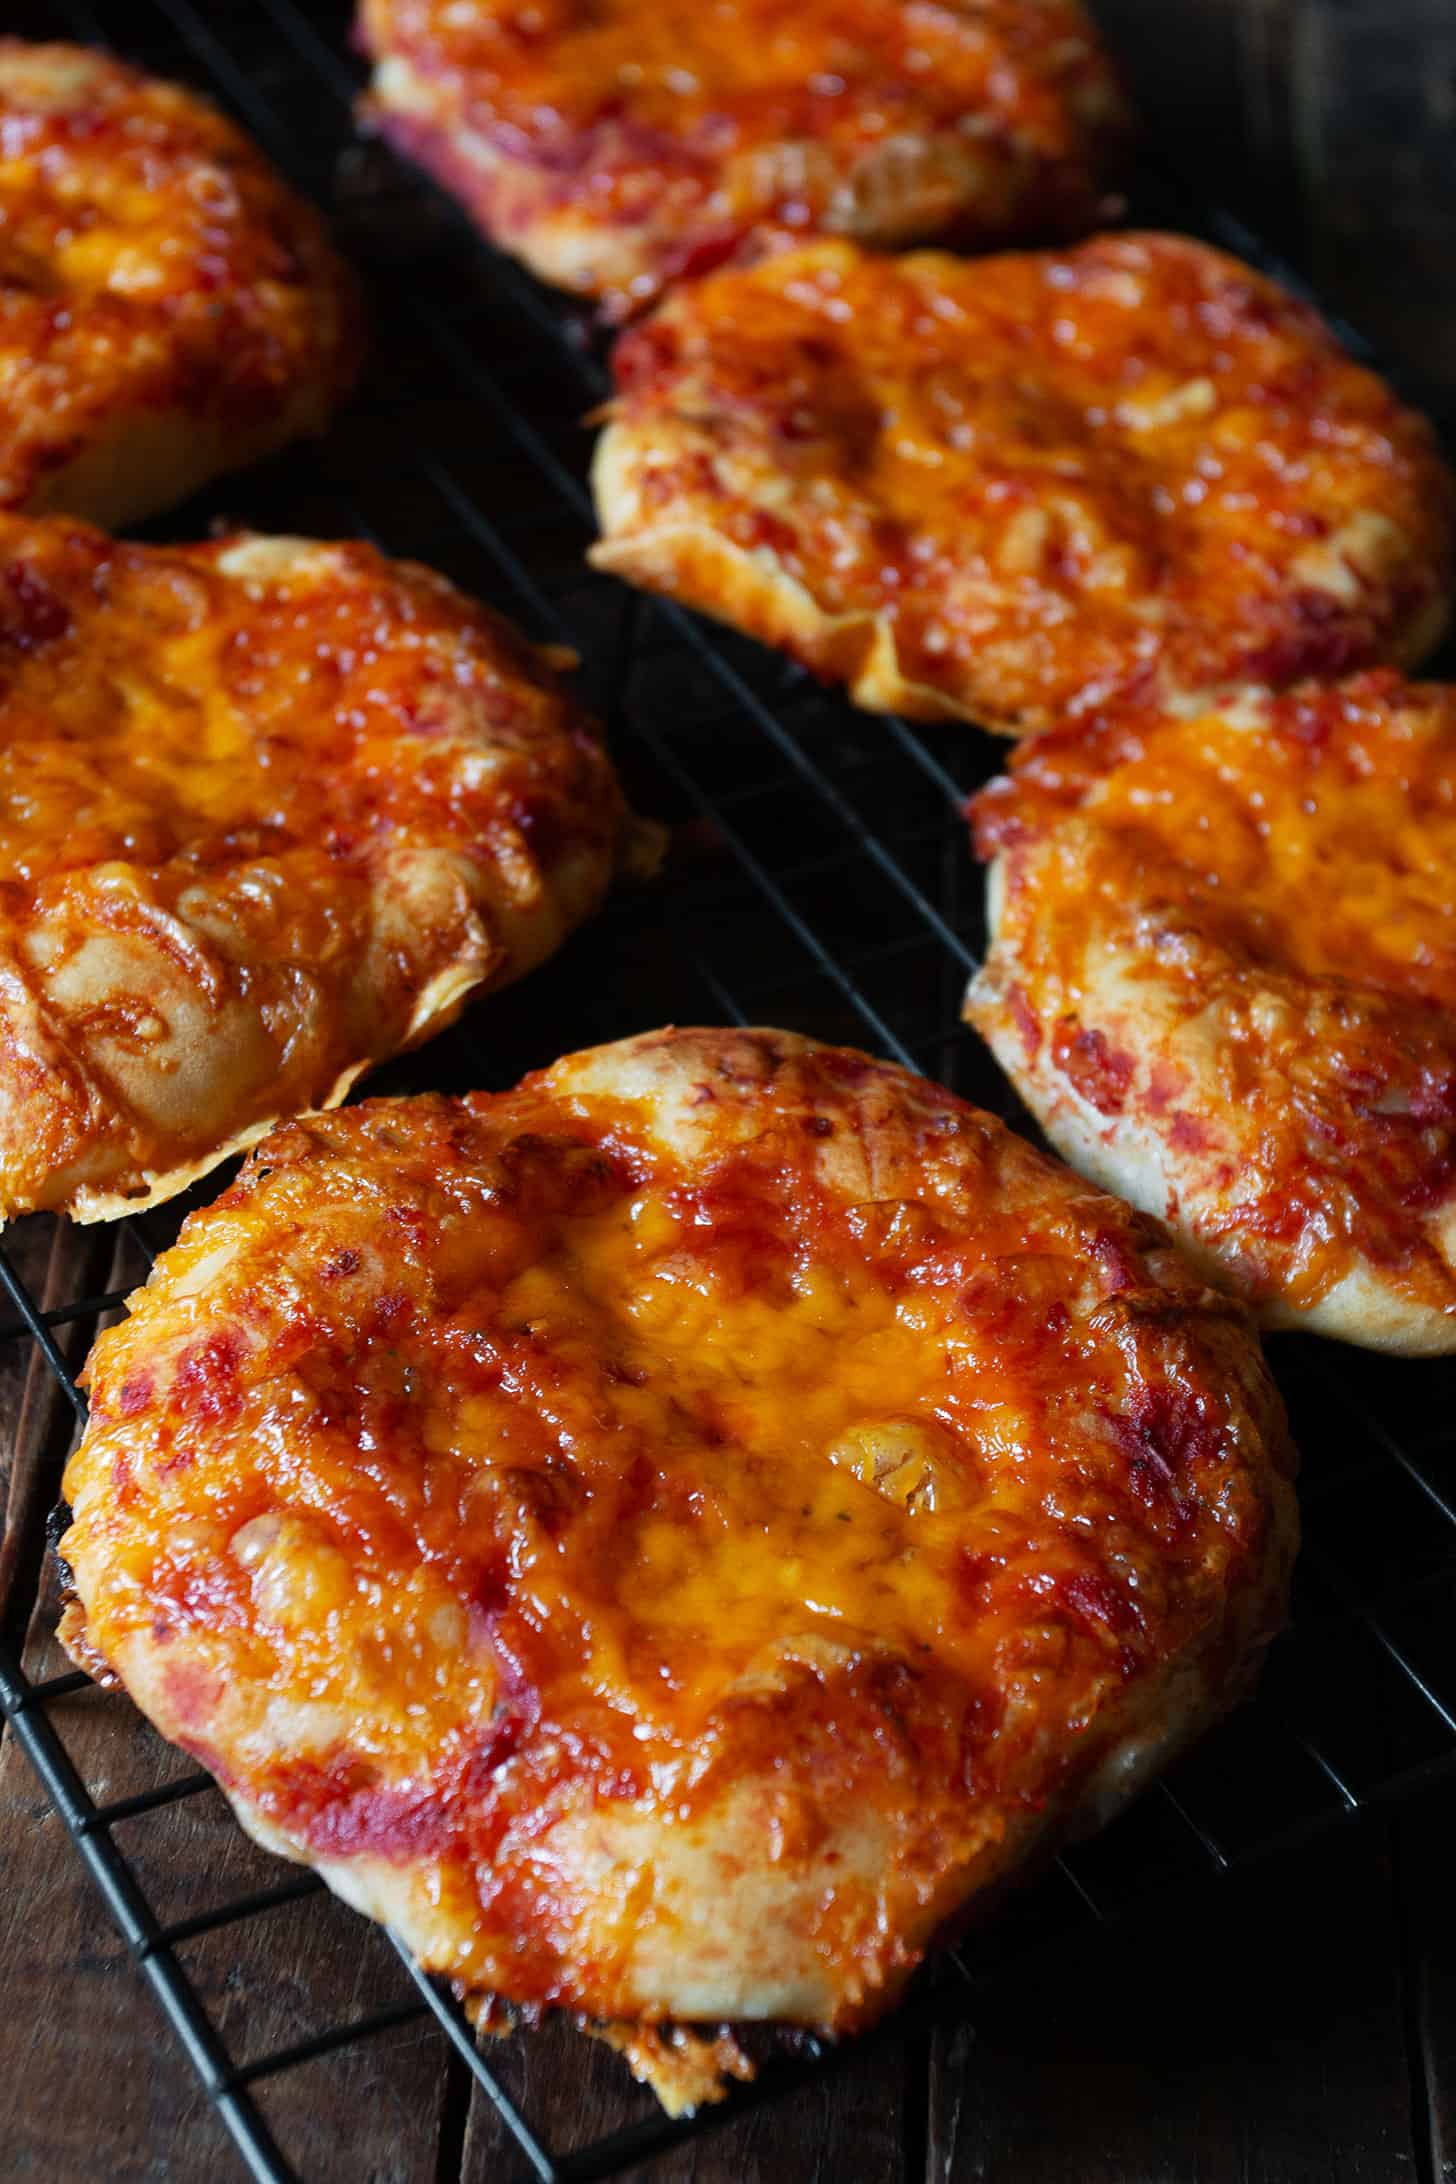
Making ahead, storing, freezing and reheating pizza buns
Store baked pizza buns in an airtight container in the refrigerator for 3 or 4 days or freeze for longer storage. They will keep well in the fridge for 3-4 days or in the freezer for up to 3 months.
These buns freeze really well. If possible, freeze the buns on a baking sheet for about an hour, then transfer to an airtight container or freezer bag.
Reheat the pizza buns straight from the freezer, with no need to thaw. Just place the frozen buns on a baking sheet and warm in a preheated 400°F oven for 7 or 8 minutes until warmed through. Alternatively, you can microwave the frozen pizza buns for 60-75 seconds.
Want to save this recipe?
Enter your email and I’ll send it to your inbox. Plus, you’ll get great new recipes from me every week!
By submitting this form, you consent to receive emails from Seasons and Suppers.
You can unsubscribe at any time.
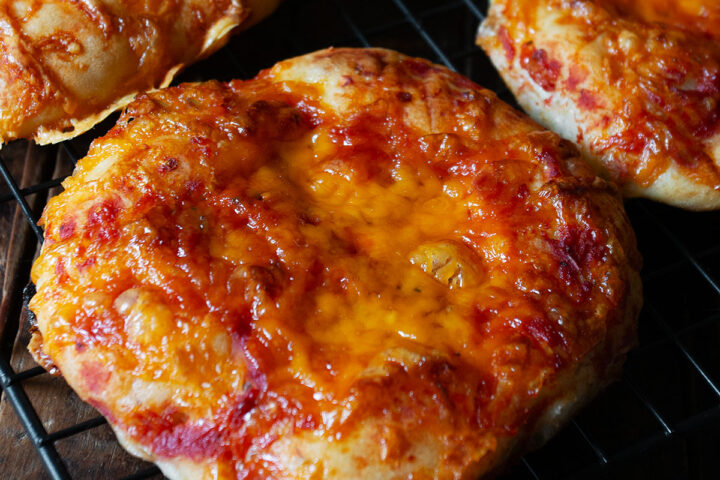
Get the Recipe: Homemade Pizza Buns (Soft, Cheesy & Freezer‑Friendly)
Ingredients
For the pizza bun dough:
- 2 1/4 teaspoons (7 g) active dry or instant yeast
- 1 teaspoon (4 g) white granulated sugar, for the yeast
- 1 cup (240 ml) lukewarm water, about 105F
- 1 teaspoon (4 g) white granulated sugar, for the dough
- 1 teaspoon (6 g) fine salt
- 1 Tablespoon (15 ml) vegetable, canola or other neutral oil
- 2 1/2 – 3 cups (310 – 375 g) all-purpose flour, spooned and levelled
For the toppings:
- 1 1/2 cups (360 ml) pizza sauce, store bought or make your own
- 3 cups (720 ml) sharp cheddar cheese, shredded
Instructions
- Add the 2 1/4 teaspoons active dry or instant yeast and 1 teaspoon white granulated sugar (for the yeast) to 1 cup lukewarm water (about 105F) in a small bowl or measuring cup. Stir and let stand for 5-10 minutes before using.
- In a large bowl or the bowl of a stand mixer fitted with the kneading hook, mix together 2 cups (250g) of the flour, 1 teaspoon white granulated sugar (for the dough) and 1 teaspoon fine salt. Add the yeast and water mixture and the 1 Tablespoon vegetable, canola or other neutral oil and mix together until combined.
- Knead by hand or with the mixer, adding the remaining 1 cup (125g) of flour in small increments, only as much as needed, until the dough comes together into a smooth dough that wraps the kneading hook and cleans the bowl. (I find I generally end up using just shy of 3 cups of flour in total.)
- Remove the dough to a floured work surface and knead briefly, then form the dough into a ball. (The dough shouldn't stick to your hands or the work surface. If it does, add a touch more flour, as needed.) Grease a bowl and place the dough ball into the bowl. Cover with plastic wrap and let it rise until doubled in size, about 30 – 45 minutes, depending on how warm your kitchen is.
- Prepare two large baking sheets. You can use a bare baking sheet or line it with a sheet of parchment paper if you like. Set aside.
- Remove the doubled dough to a floured work surface. Divide the dough into 12 equal pieces
- Take a piece of dough. Form it into a ball, then stretch in to a circle about 3 inches in diameter. You don't need to stretch them completely at this point. Once you have stretched each of the 12 pieces, go back and stretch each piece again to about 4-inches diameter. Repeat with each piece of dough, placing 6 pieces on each of the prepared baking sheets (you can place them fairly close together as they don't spread much, but don't allow them to actually touch each other). Once on the baking sheet, stretch the rounds one last time until they are about 5 inches in diameter.
- Using a Tablespoon measure from your cutlery drawer, top each piece of dough with with a heaping Tablespoon of pizza sauce, spreading it over the top, going right to the edge, as far as you can without it spilling over the sides. Top with a generous amount of shredded cheddar cheese. Repeat with all the buns. Let stand 20-25 minutes, while you preheat the oven.
- With racks in the upper and lower third of your oven, preheat oven to 375° F (or 350°F for softer buns – see Notes). (regular bake setting/not fan-assisted). After the buns have stood for 20-25 minutes or so (or until they look a little puffy around the outside edges), bake in the preheated oven for 20-25 minutes, switching the pans from top to bottom halfway through baking. Cook until golden and bubbly. Remove from the oven, then immediately remove the buns to a cooling rack to cool completely. Enjoy immediately or place in an airtight container and refrigerate, or see below for freezing instructions!
- Freezing: These buns freeze really well. Freeze them on baking sheet and then transfer to a freezer bag. Enjoy straight from the freezer, no need to thaw! Just place the frozen buns on a baking sheet and warm in a preheated 400° oven for 7 or 8 minutes.
Notes
Watch how to make it
If you love these pizza buns, you might also enjoy …


Hi! I’m Jennifer, a home cook schooled by trial and error and almost 40 years of getting dinner on the table! I love to share my favourite recipes, both old and new, together with lots of tips and tricks to hopefully help make your home cooking enjoyable, stress-free, rewarding and of course, delicious!


Making them as I write this I let you know how they come out thank you
Enjoy Kelly!
Thank you so much they were a big hit all 12 gone within minutes
So pleased to hear, Kelly :) Thanks so much!
Delicious and so easy to make! This will be my new “go-to” for pizza buns. Thanks for sharing !
So pleased to hear, Loreen. Thanks!
Delicious! My one regret is a halved the recipe as cooking for two. I added some shaved hot salami and a cheese combo and baked them on a pizza stone.
So glad you enjoyed them, Beverly. They freeze perfectly if you want to eat some/freeze some, too. Thanks!
I’ve been making these buns once a month or more for over a year. They freeze SO well and taste amazing! My kids and husband love them 😊
I’m so happy you are all enjoying them, Jessie :) Thanks so much!
Amazing! These turned out phenomenal! I added some ham and pepperoni. So much flavour and the perfect texture. They were more like mini pizzas but the whole family was very happy with them.
So glad to hear, Autumn :) Thanks!
This is an amazing recipe! My kids love them. I make a weeks worth for their lunches. I use tomato paste for an extra bold flavour.
I’m so glad you are all enjoying these, Alicia :) Thanks so much!
I only made 1/2 the recipe. I had to add approximately 30 g. more flour. Worked out great! Very tasty.
So glad you enjoyed them, Heather :) Thanks so much!
I’m from Ontario but i don’t have pizza buns in the grocery store where I live now so I was searching for a copycat recipe to get my fix. After making them I read the comments because I was confused if I made them wrong. They came out more like mini pizzas(which I can’t complain about but isn’t the same) I ate a couple (still so delicious!!) and pondered, and I decided to put them in a Tupperware while still warm to get them that kind of squishy consistency… and it worked perfectly!! Definitely will be making these again and trying out some different toppings!
Hi Laura and yes, they do start off with a bit of crisp when baked at 375F. They can be baked at 350F for a softer pizza bun (just extend the baking time slightly. I find these generally soften quite quickly as they sit and are definitely soft after freezing and thawing. So glad you enjoyed them!
Made these today and they were delicious! I love knowing what’s in my kids food and it being home made. Will make again for sure.
Any chance you could upgrade the nutritional info with correct carbs? I was very surprised to see only 2g
So glad to hear, Kristy :) I just ran the recipe through the nutritional calculator again and it looks like it’s returned a more realistic number this time :)
My pickiest eater BEGS me to make them! All my kids love them and my pizza-loving husband does too.
I’m so glad everyone is enjoying them, Lindsay :) I love having them in my freezer! Thanks so much.
Excellent recipe, turned out delicious and I will make again and again! Thank you!
Hi Gabrielle! So glad you enjoyed these pizza buns. They are in regular rotation here :) Thanks so much!
These are better than the store version! I used the dough to make 4 buns, but depending on my dough I could make 6-8 that would be a mini frozen pizza size. So good, a new favourite recipe!
So glad to hear, Sheila :) Thanks so much!
I make 15 buns because I can fit 5 on each pan, by weight the dough balls are 2.1 ounces each, my sons enjoy these pizza buns and they are much cheaper than the store bought, 25 minutes is spot on, I rotate the pans at 10 and 20 minutes since I bake all three pans at once.
So glad you are enjoying the, Michele :) Thanks so much!
We love these pizza buns, taste just like they came from the bakery of a famous grocery chain here in Ontario.
So glad to hear, Melissa and yes, they were inspired by those very buns ;) Thanks!
Super easy and delicious! They look just like the picture and taste better then any pre-made!
So glad you enjoyed them! Thanks so much :)