Learn how to make gourmet pizza at home, following this easy recipe, with detailed timeline and lots of tips and tricks for making the best pizza at home!
I love pizza, so it’s probably not surprising that I have spent a good deal of time perfecting my at-home pizza. So I thought I’d take a moment to document my easy process for anyone else looking to make gourmet pizza at home.
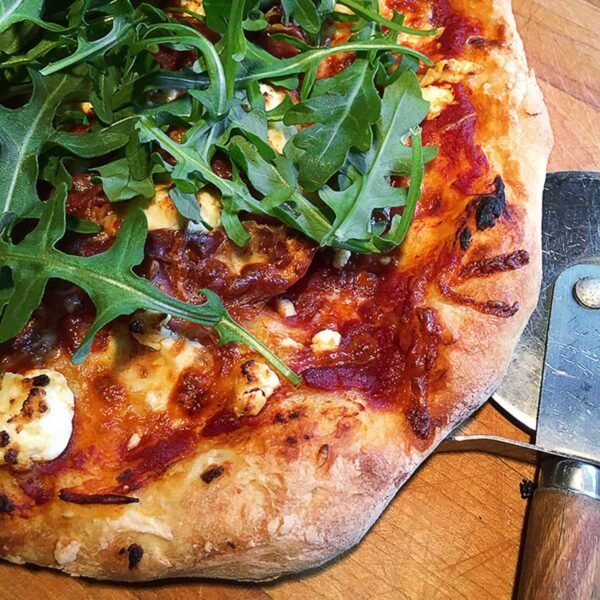
I’m using the term “gourmet” simply to distinguish it from the thicker, pepperoni-dotted and lotsa-cheese-topped pizza. Not that there’s anything wrong with that. I love that pizza, too! This is just a thinner, more sparsely topped kind of pizza that I most often like to make at home. A fancy pizza.
My pizza starts with No-Knead pizza dough, is topped with No-Cook Pizza Sauce (or use store-bought pizza sauce, if you prefer) and includes my favourite toppings. Feel free to top your pizza as you like.
Ingredients
Here are the ingredients you will need …
For the dough:
- All-purpose flour or ’00’ Pizza flour
- Active dry yeast
- Salt
- Water
For the sauce:
- Garlic
- Canned whole tomatoes
- Extra-virgin olive oil
- Dried oregano
- Dried basil
- Salt
For the toppings (or use what you like):
- Prosciutto
- Goat Cheese
- Shredded pizza mozzarella
For serving:
- Fresh baby arugula
Equipment
Here are the basics of a simple home pizza making toolkit …
- Silicone bowl scraper: Optional, but recommended! A silicone bowl scraper is an inexpensive kitchen tool that more than earns it cost when it comes to dealing with sticky doughs like this pizza dough.
- Hot Oven: Ovens vary somewhat in their top temperature. Mine tops out at 500F. Whatever yours is, preheat it to the hottest temperature. Be sure to preheat the oven at least 30 minutes and more if you have the time.
- Pizza Stone or Baking Steel: I have both a ceramic pizza stone and a baking steel in my kitchen. They both produce great homemade pizza, so use what you have or prefer. If you have neither, simply use a large baking sheet, popping it in the hot oven 5-10 minutes before you are ready to bake your pizza.
- Parchment Paper: I think parchment paper is a “must” for homemade pizza. If you’ve ever attempted homemade pizza and had the toppings slide off and onto a hot pizza stone when you tried to put it in the oven, you’ll appreciate what parchment paper brings to pizza making at home! I assemble my pizza on the parchment, then trim the parchment close to the pizza (so it doesn’t scorch), then I transfer and bake all on top of the parchment. It’s easy, fool-proof and the bottom of the pizza bakes up perfectly well on top of the parchment.
- Pizza Peel: Again, optional, but recommended. A pizza peel just makes transferring the pizza in and out of the oven so much easier.
Timeline
Night before:
- Step 1: Mix up the dough ingredients – In a large bowl. Dough will rise considerably, so be sure to use a large bowl! Cover tightly and leave on the counter to develop and rise.
Next day – 1 hour before you want to assemble your pizza:
- Step 2: Prepare your oven – Place a rack in the lower third of oven. I like to remove the top rack(s), so I don’t have to worry about it being in the way when putting my pizza in or taking it out. PLACE YOUR PIZZA STONE INTO The COLD OVEN, then preheat the oven to it’s hottest setting (500F-ish). Allow it to heat while your dough rests.
- Step 3: Prepare your pizza sauce (if making your own) – Take a minute to mix up your pizza sauce and set aside, so it is ready when you assemble your pizza.
- Step 4: Divide and Rest the Dough – Use a bowl scraper to scrape the dough from the bowl and onto a well-floured surface. Dust the top of the dough with more flour. Cut the dough into two equal pieces (for two 12-inch pizzas) or 4 equal pieces for four mini/individual pizzas. Gently form each piece into a ball, dusting with additional flour it it’s too sticky to handle. Cover the balls with a clean towel and let rest/rise for 1 hour.
- Step 5: Shape the Dough – Dust a sheet of parchment paper with flour or cornmeal (make sure it’s large enough for your finished pizza size). Take a ball of dough and place on your prepared parchment paper. Very gently, using just your fingertips so you don’t deflate the dough too much, press and stretch the dough outward. If it doesn’t seem to be getting larger easily, pick it up by the edge and just let it hang from your hand, allowing the weight of the dough to “stretch” it. Rotate around the edge of the dough, letting it stretch out from a different side. Place back on the parchment and finish shaping it. Once it is the desired size, add your toppings.
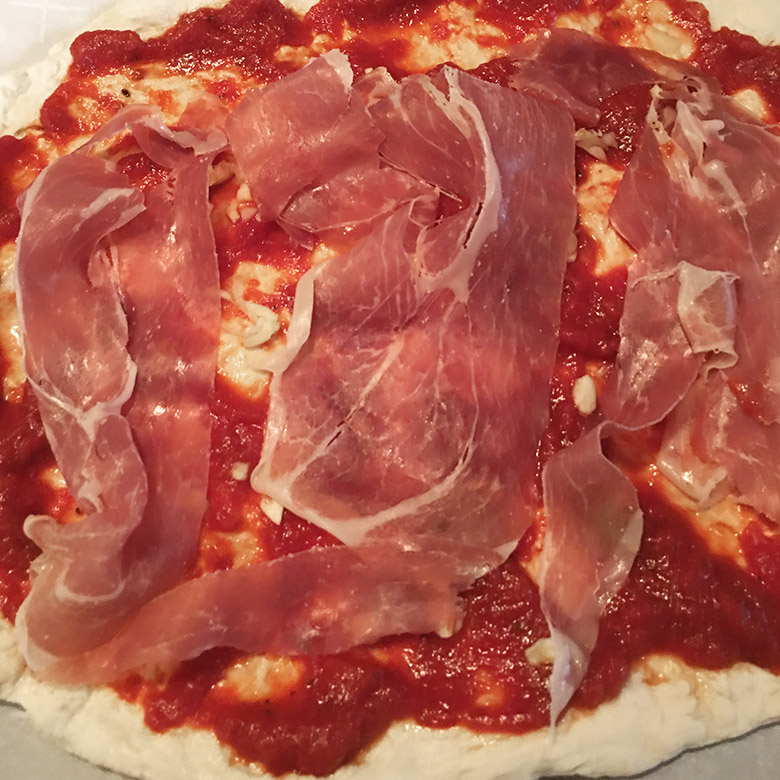
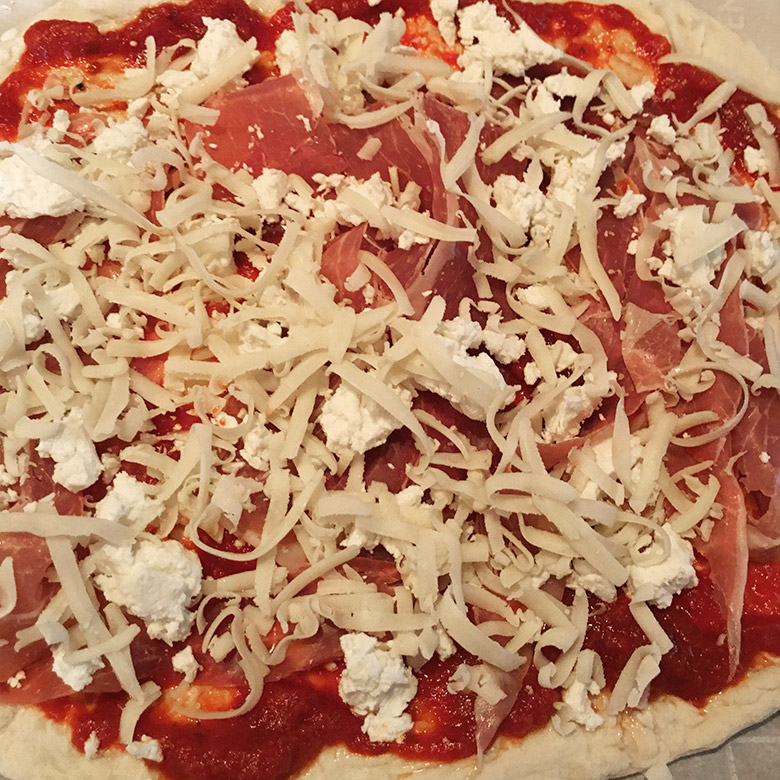
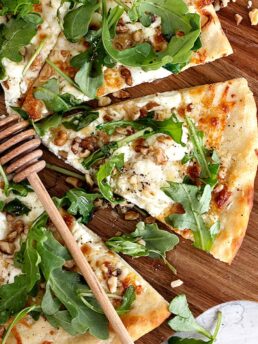
- Step 6: Add your Toppings – Spread pizza sauce on top of dough, leaving the edges bare about 1-inch in. Place 2-3 pieces of prosciutto on top (I like to twist them a bit, so they don’t lay completely flat). Scatter goat cheese on top, then scatter a bit of mozzarella. Not too much. Just a bit to fill in some bare spots.
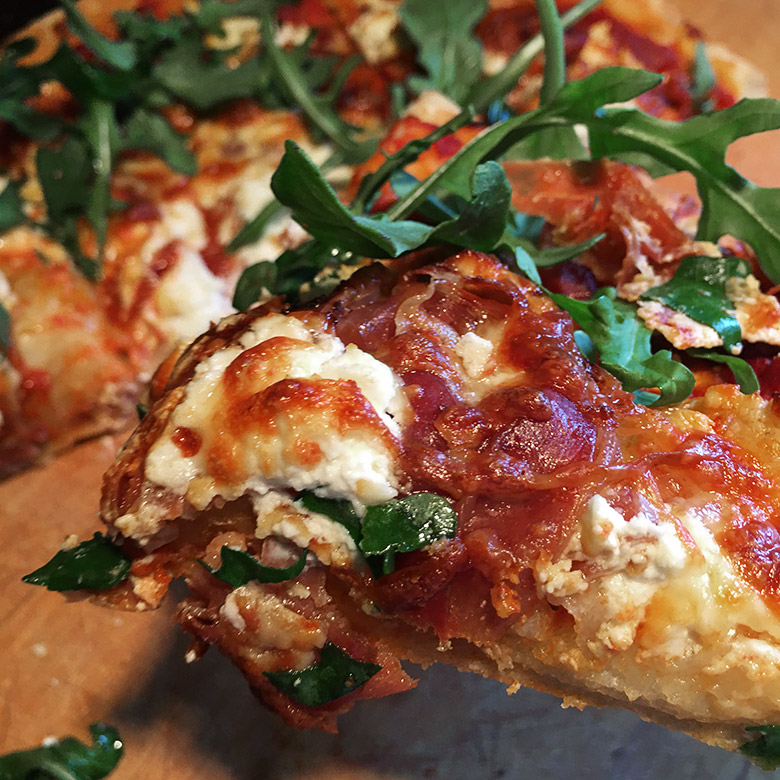
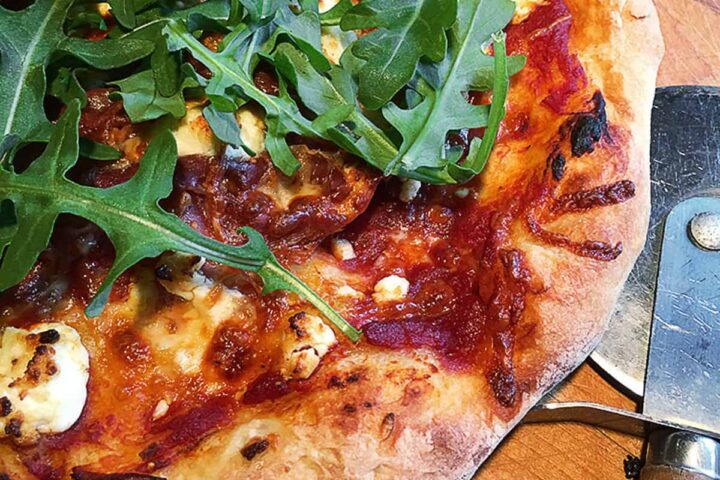
- Step 7: Bake your Pizza – Trim the parchment paper close to your finished pizza. Using a pizza peel, transfer the pizza on top of the parchment paper onto the hot baking stone in your preheated oven. Bake for about 8-10 minutes. If you like, you can carefully grab the edge of the parchment and tug it out from under the pizza, so the pizza finishes cooking directly on the pizza stone. Bake a few more minutes, until the underside is golden in spots and the edge of the pizza is dark in spots, about 12-15 minutes total. Time will vary, depending on the thickness of your pizza dough.
This fabulous No-Knead pizza dough comes from Jim Lahey and is the only pizza dough recipe I use!
Gourmet Pizza Topping Ideas
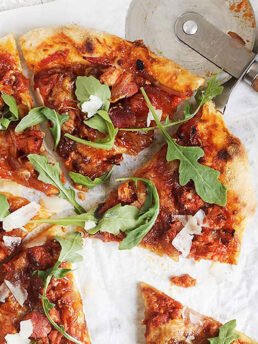
Prosciutto and Fig: Top your pizza with thinly sliced prosciutto, fresh figs, arugula, and a drizzle of balsamic reduction for a sweet and savoury combination.
Pear and Gorgonzola: Slices of ripe pear, crumbled gorgonzola cheese, caramelized onions, and a sprinkle of chopped walnuts create a balanced and flavourful combination.
Roasted Vegetable Medley: Roast a variety of colourful vegetables such as bell peppers, zucchini, eggplant, and red onion, then top with goat cheese and fresh herbs.
Grilled Shrimp and Pesto: Grilled shrimp, sun-dried tomatoes, Kalamata olives, and a drizzle of basil pesto make for a Mediterranean-inspired delight.
Brie and Caramelized Onion: Spread a layer of caramelized onions over the dough, then add slices of creamy Brie cheese and a sprinkle of thyme.
Thai Chicken: Cooked and shredded chicken tossed in a peanut sauce, along with sliced bell peppers, bean sprouts, cilantro, and chopped peanuts for a fusion-inspired topping.
Roasted Beet and Goat Cheese: Roasted beet slices, crumbled goat cheese, toasted pine nuts, and a drizzle of honey offer a colorful and delightful combination.
Fig and Prosciutto with Arugula Pesto: Top with fig jam, prosciutto, and dollops of arugula pesto, then finish with a handful of fresh arugula leaves.
Sun Dried Tomato and Goat Cheese: Sun Dried tomatoes, goat cheese, Kalamata olives, fresh basil, and a drizzle of olive oil offer a Mediterranean-inspired burst of flavours.
Top Tip
If you forget to start your dough the night before, or if you just decide in the morning that you want pizza for dinner, all is not lost! Simply prepare the dough as directed, EXCEPT increase the yeast to 3/4 tsp. Mix and let stand at room temperature until close to dinnertime. Pick up the directions from there and you’re good to go. It’s important to note that this will work in a pinch, but when it comes to dough, time = flavour, so the less time your dough sits, the less flavour it will have. The long rise is best for best flavour, when and if you can, but this will work when needed.
Want to save this recipe?
Enter your email and I'll send it to your inbox. Plus, you'll get great new recipes from me every week!
By submitting this form, you consent to receive emails from Seasons and Suppers.
You can unsubscribe at any time.
Get the Recipe: Gourmet Homemade Pizza
Ingredients
No-Knead Pizza Dough:
- 3 3/4 cups (500 g) all-purpose flour, spooned and levelled
- 1/4 teaspoon active dry or instant yeast
- 2 teaspoons fine sea salt
- 1 1/2 cups (350 g) room temperature water
No-Cook Pizza Sauce:
- 28 oz canned whole tomatoes
- 1-2 cloves garlic, peeled
- 1 Tablespoon extra-virgin olive oil
- 1 teaspoon dried oregano leaves
- 1 teaspoon dried basil
- 1/2 teaspoon salt
Toppings:
- 6-8 slices Prosciutto
- 3 oz Goat Cheese
- 2-3 cups pizza mozzarella, shredded
For serving:
- Fresh baby arugula
Equipment
- Parchment paper (recommended)
- Pizza stone or baking steel (recommended)
- Pizza Peel (recommended)
Instructions
Prepare the Dough (Approximately 18-24 hours ahead):
- In a large bowl (dough will rise considerably!), combine all the dough ingredients and stir well, until smooth. It will be stiff, but be sure all the flour is incorporated. Cover the bowl and let stand at room temperature approximately 18-24 hours. Doing this the night before is best.
Divide and rest the dough (Approximately 1 hour before you want to assemble your pizzas):
- Using a silicone bowl scraper, scrape the dough onto a well floured surface. It will seem very loose and sticky at this point still. That's normal. Generously dust the top of the dough with some flour, then use the bowl scraper or a bench scraper to roll the dough around a bit in the flour on the work surface, to coat thinly. You will find it should quickly become workable and no longer sticky. Divide the dough into two equal pieces (or four, for mini pizzas). Shape each piece into a ball, then cover with a clean towel and let rest for 1 hour.
- Prepare your oven: Place your pizza stone into the cold oven on a rack in the lower third of the oven. I like to remove any top rack at this point, too, just to not have that obstacle when transferring the pizza into and out of the oven. Preheat oven to the highest setting, typically 500F. Let the oven preheat while your dough rests.
- Prepare your sauce: If you are making your own pizza sauce, prepare that when the dough is resting as well. Using a fine mesh strainer, drain the juice from the canned tomatoes, then gently squeeze the tomatoes to let some of the juice inside the tomatoes drain off as well. Place the tomatoes into a food processor, with the garlic, olive oil, spices and a generous pinch of salt. Pulse a few times, to break it up, but not so much that it is completely smooth. A few small pieces of tomato visible is about right. Set aside.
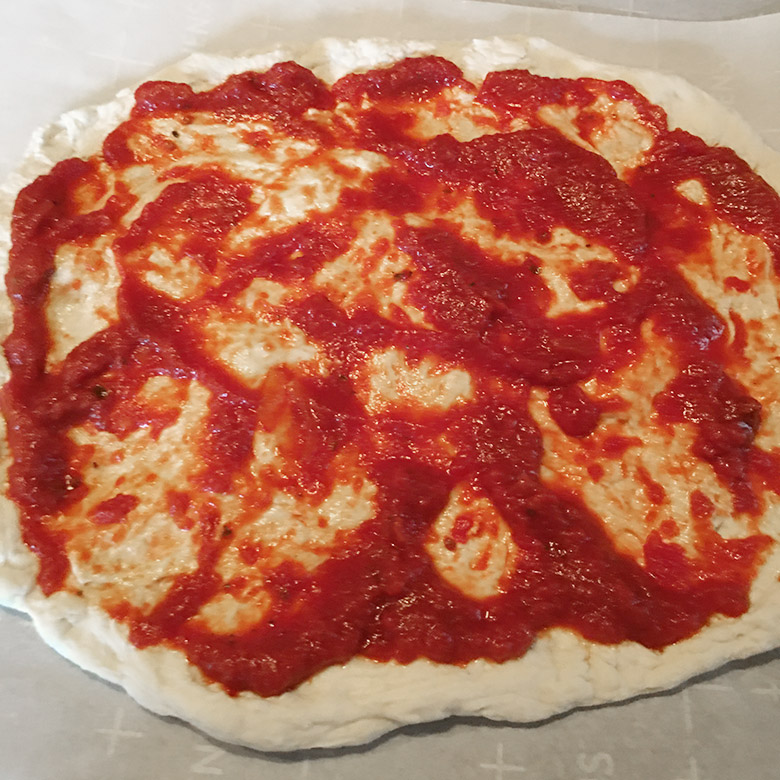
- Shape the pizza: Dust a sheet of parchment paper with flour or cornmeal. Take a ball of dough and gently stretch it out a bit. Place it on your prepared parchment and gently, using just your fingertips so you don't deflate the dough too much, press and stretch outward to shape the pizza and make it bigger. If it seems to not be enlarging much, lift it up by the outside edge and let it hang in the air. The weight of the dough will stretch it out. Rotate around the edge and let it stretch in the same way. Return the dough to the parchment and finish stretching and shaping. If you like a thin crust pizza, your dough will need to be quite thin. Leave the outside edges thicker, for the lovely bubbly edge crust.
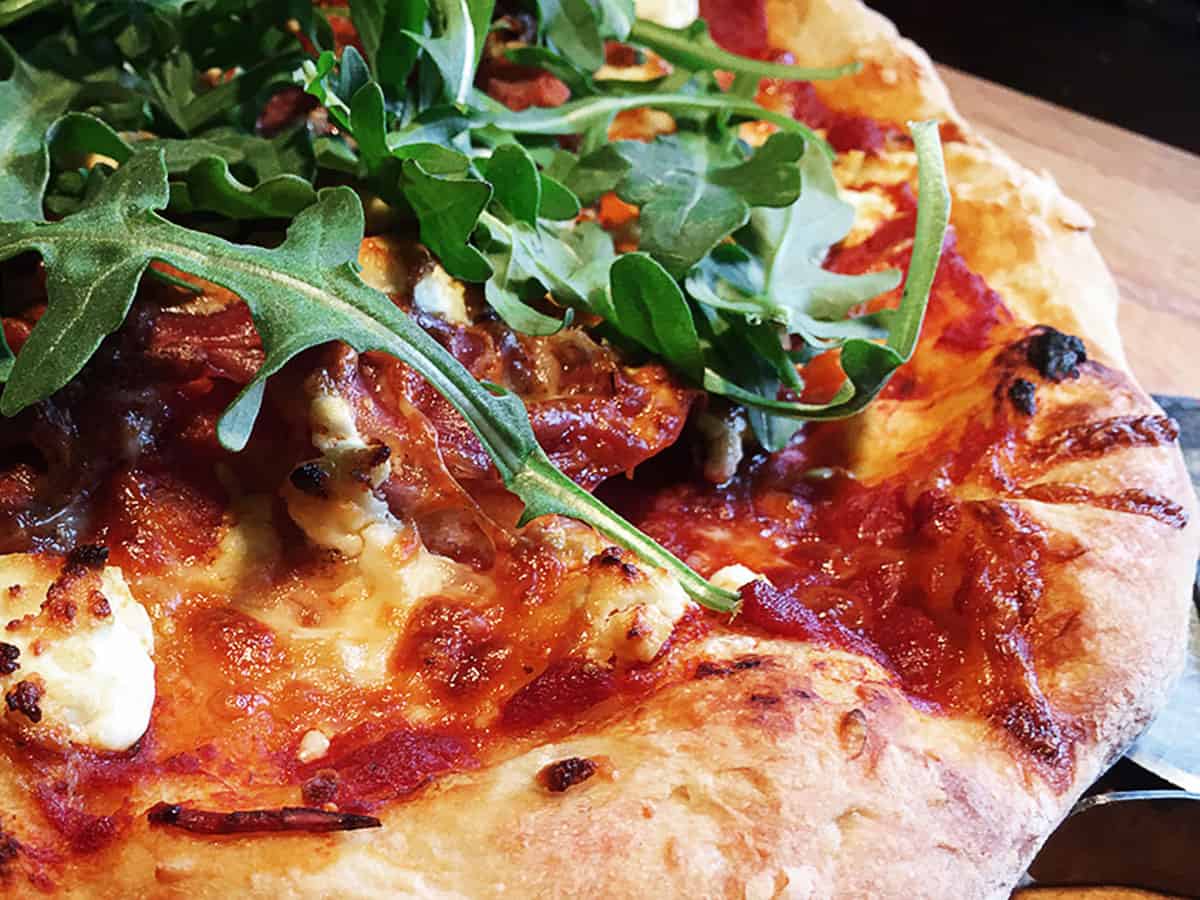
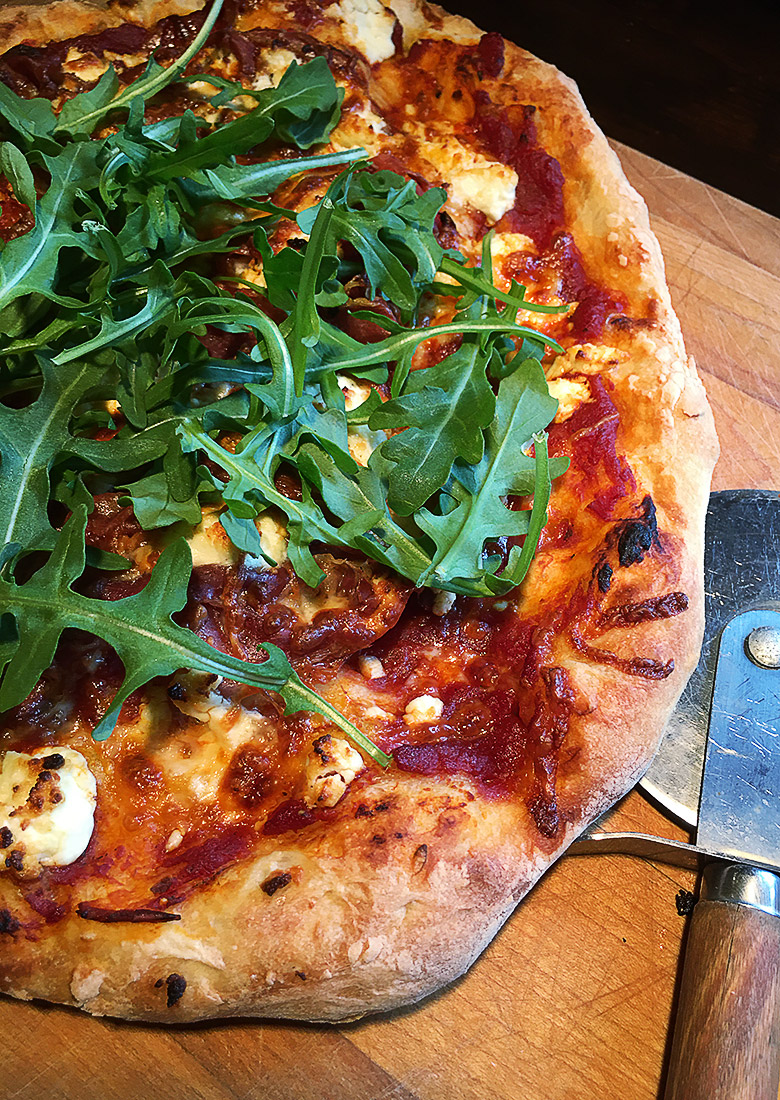
- Add the toppings: Spread the pizza sauce on the dough. Place 2-3 slices of prosciutto onto the pizza. I like to twist it a bit so it doesn't lay flat on the sauce. This helps to get some lovely, crisp prosciutto as it bakes. Scatter some goat cheese on top, then some shredded mozzarella (not too much, just enough to fill in here and there).
- Bake your pizza: Trim the parchment paper close to your pizza, so there is little excess that might scorch in the hot oven. Using a pizza peel, transfer your pizza on top of the parchment paper and onto the hot pizza stone. Allow to bake 7-8 minutes. If you like, you can very carefully pull the parchment paper out from under the pizza at this point. Allow the pizza to continue baking until the crust underneath has some good colour, the topping are bubbly and the top edges of the crust are quite dark in spots. Remove pizza to a cutting board and allow to rest a couple of minutes. Top with fresh arugula to serve.
Notes
More Pizza Recipes to Love!

Hi! I’m Jennifer, a home cook schooled by trial and error and almost 40 years of getting dinner on the table! I love to share my favourite recipes, both old and new, together with lots of tips and tricks to hopefully help make your home cooking enjoyable, stress-free, rewarding and of course, delicious!
It’s the same here Jennifer. Everyday feels the same, but Fridays are a little special and it’s because it’s our usual pizza night. This one seriously looks gourmet and delicious. Thank goodness tomorrow is Friday and pizza will be on the menu again!
Thanks Leanne :) It wouldn’t be Friday here without pizza!
The dough did not rise for me. I used Bread flour and my yeast is super fresh. 1/4 teaspoon does not seem like much and it’s a sticky mess. TIA for any tips.
Hi Francoise, Did you let the dough rise the 18 hours? And yes, it is sticky. You need to flour the dough as needed, but not too much. You don’t want it to be too dry, or you won’t get the nice bubbles in the dough.
Can you freeze the dough if you only want to make one pizza?
You can Laurel, though keep in mind it only make two small (12-inch-ish) pizzas – not big ones. We use this dough to make two pizzas for just my husband and I, so we can top it as we like. Any bit left-over is great for re-heating later, too. That said, if you want to freeze, freeze it right after you shape it into a ball (before the last 1 hour rest).
So many great tips! Nothing like homemade pizza…and now I’m craving some for breakfast ;)
Thanks Dawn and yes, pizza for breakfast is definitely a thing here :)
Gourmet indeed! This pizza looks fantastic Jennifer. I am a pizza addict! This is my one food – if stuck on an island for the rest of my life, I’d pick pizza. Love the arugula on top. That peppery bite must be terrific. Bravo :) And happy Mother’s Day
Thanks Tricia and to you, as well!
I love making homemade pizza Jennifer! Can’t wait to try your recipe. I wish I could grab a slice right through my screen!
Thanks Mary Ann :) I love being able to make great pizza at home, too!
That’s my go-to pizza dough recipe as well! It’s so wonderfully chewy and gets those nice air bubbles in the crust.
I’ve also found that you can mix the dough and keep it in the fridge for a few days if needed–I still make sure it has ~18 hours at room temperature, but otherwise I’ve kept it in the fridge for up to 4 days. If anything, the flavour gets even a little deeper.
I have to try that, Julia! I bet the flavour is great :)
Absolutely love this post. Homemade pizza is so much fun and so easy as you demonstrate! Love all the tips.