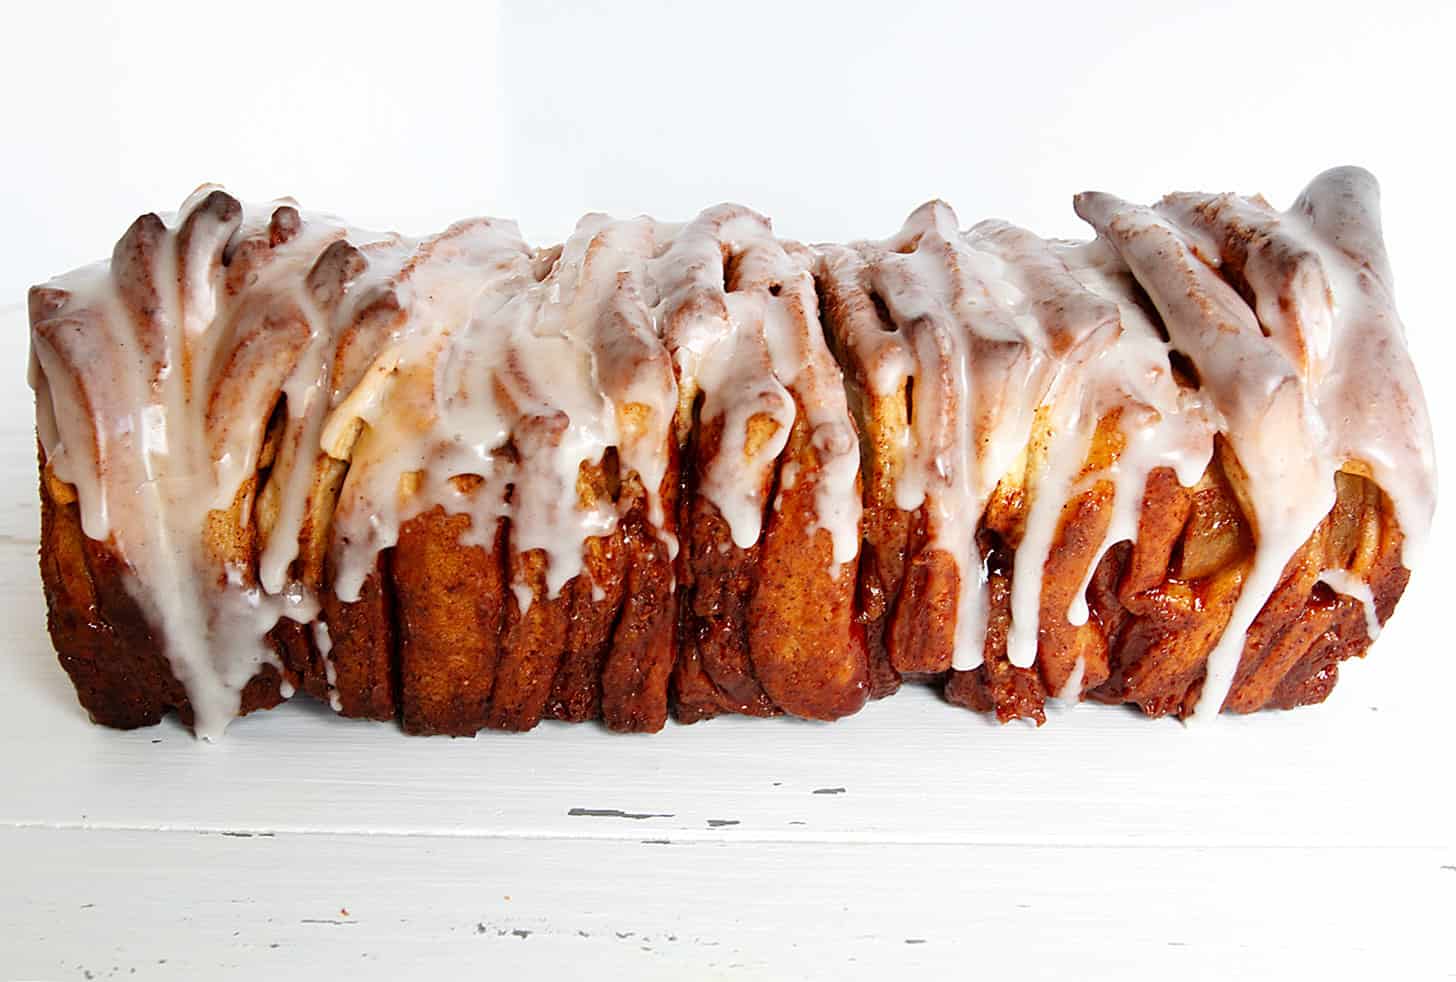
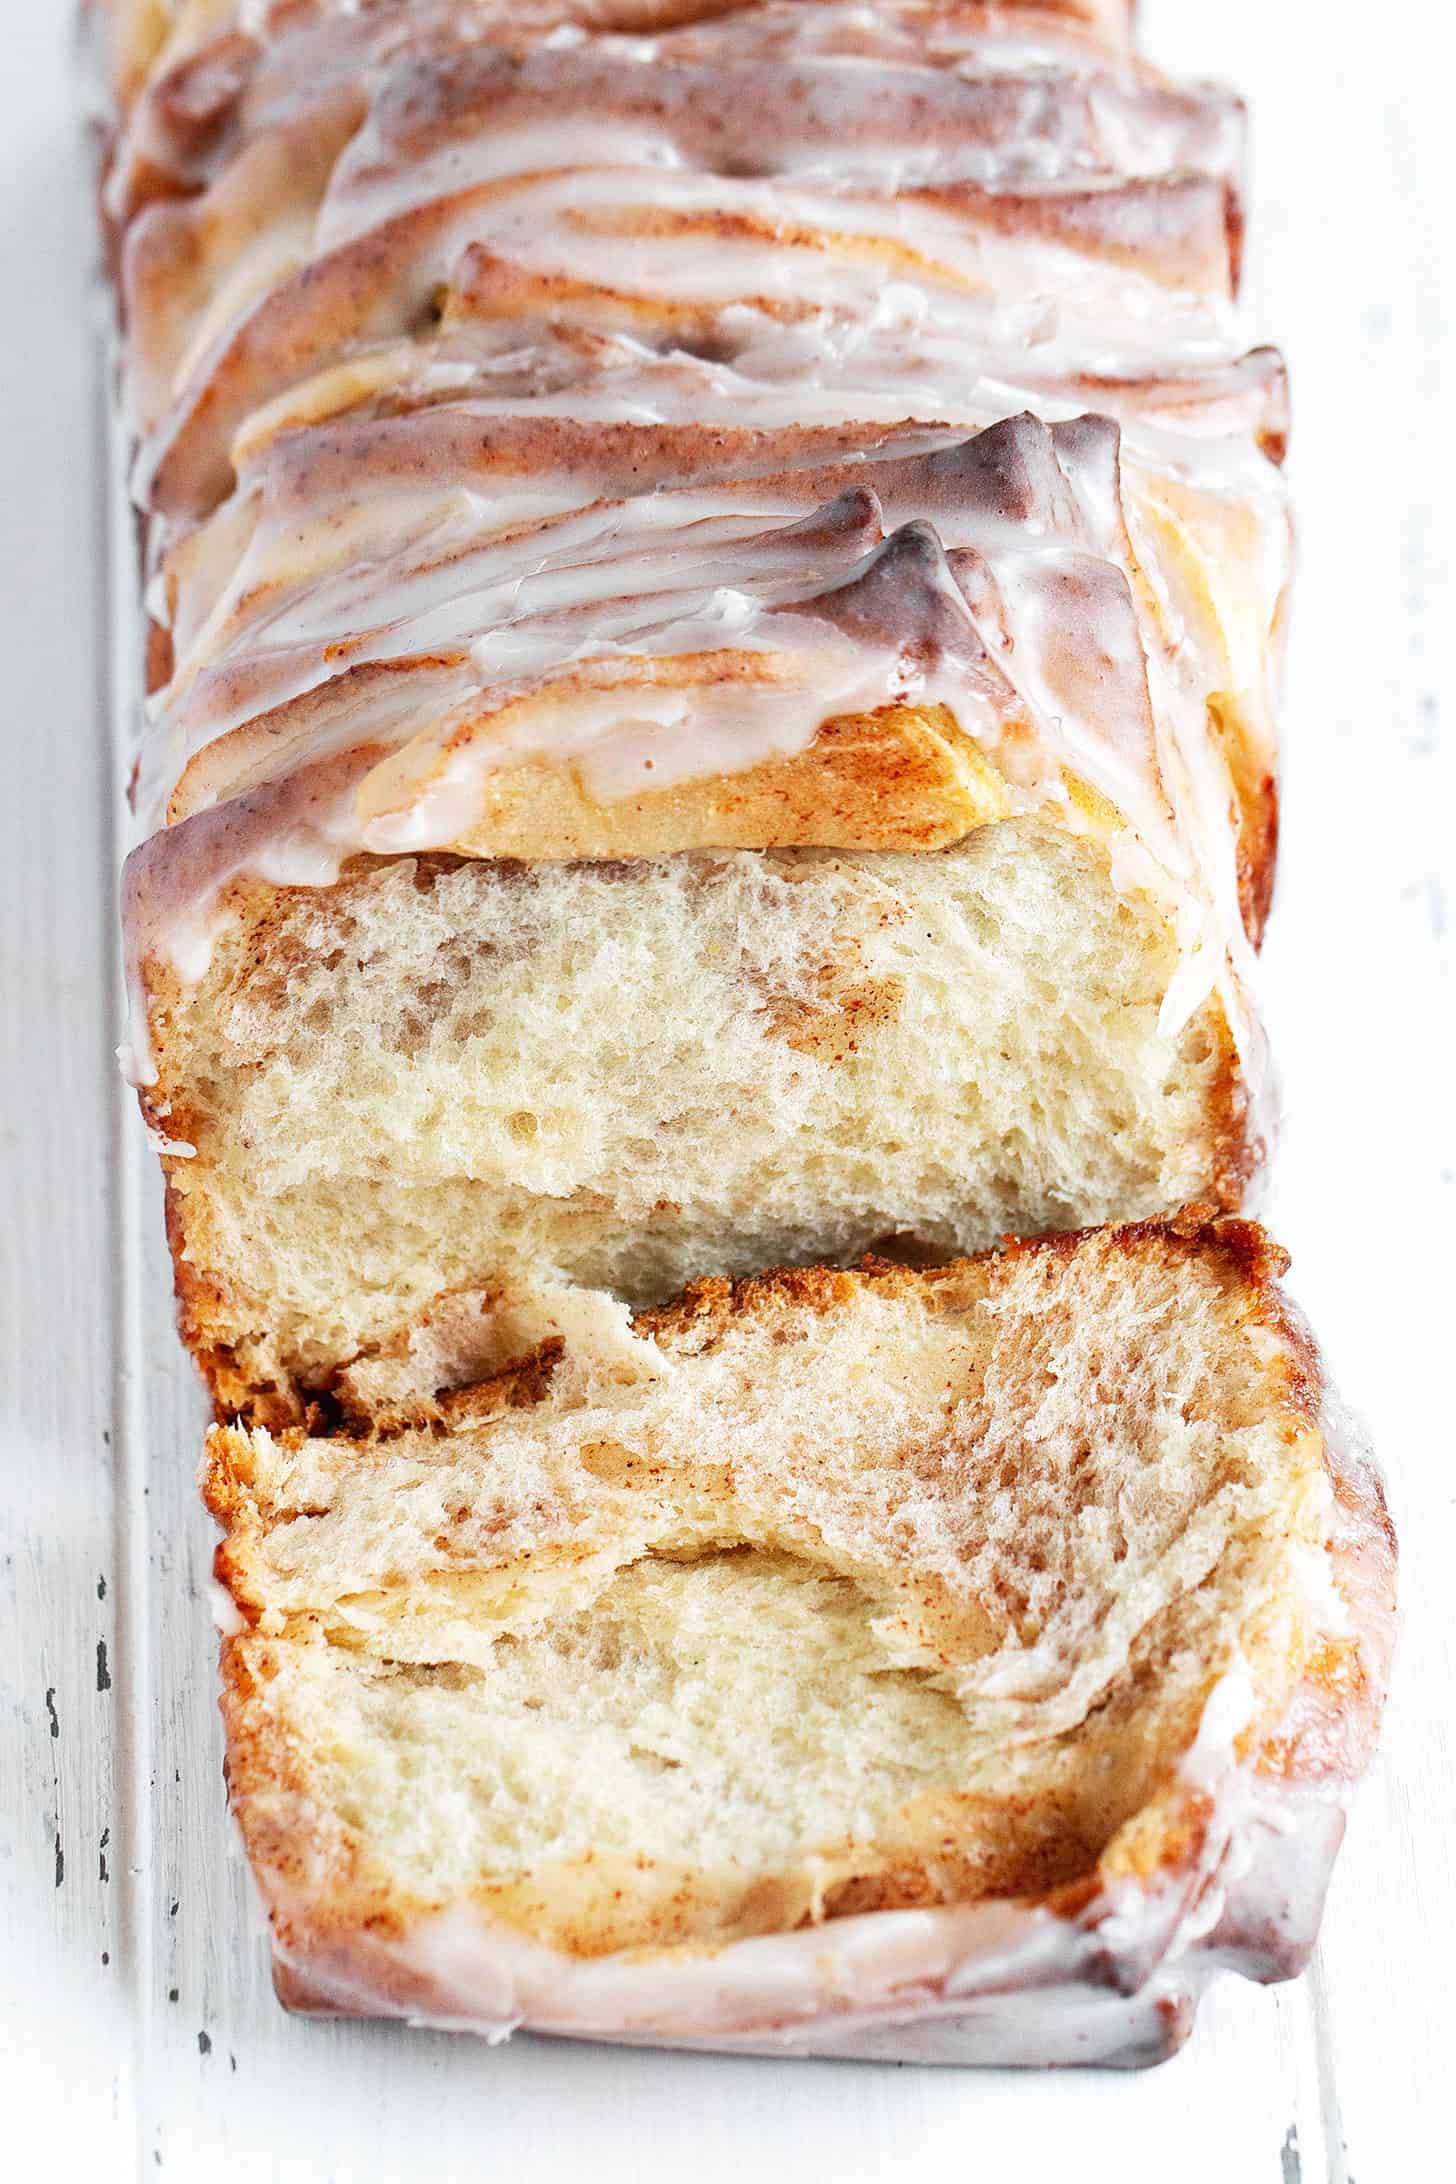
This delicious pull-apart apple fritter bread is filled with roasted apples and a generous cinnamon-sugar filling. A great Fall bake!

Yes it’s true. I have a thing for pull-apart bread. There’s just something about the sweet-glazed, crispy, golden top and the light, flaky insides, not to mention how fun it is to tear off a piece every time you pass by it :)
If you’ve made one of my pull-apart breads before, you will be glad to know that this apple version shares the same fabulous dough. I love it for it’s great consistency, both as a dough and as a light and flavourful finished bread.
Tucked into the top of this loaf are oven-roasted, cinnamon dusted apples. Between the layers, you’ll find a sugar and cinnamon mixture, which runs like a vein throughout the loaf. And yes, the end result tastes just like an apple fritter.
Ingredients and Substitutions
Apples – The type of apple you use isn’t critical, though I would stick to the sweeter, softer red-skinned varieties. Be sure to cut the slices thinly, as you will be tucking them between the dough layers later on. If they are too thick, you will have trouble getting them into your loaf.
Yeast – you can make this bread with either Active Dry Yeast or Instant Yeast. I have included instructions for both in the Recipe Card.
Flour – I prefer an unbleached all-purpose flour for bread making, though bleached all-purpose flour is fine if that’s what you have on hand.
Recipe Tips
As this bread is enriched with eggs and butter, it is best enjoyed in the first day after baking. Well-wrapped, it will be fine into the second day as well. For longer, I’d suggest freezing to enjoy the rest later, as this bread freezes well.
I love using the narrower/longer 4×10-inch tea loaf pan for pull-apart bread. It makes smaller slices, as I don’t always want (or need :) a big slice. If you’d like to add a tea loaf pan to your kitchen, here is the one I use.

Top Tip
This bread may look done before it is done. It will need 35-40 minutes in the oven. Check it around the 30 minute mark and if it has browned enough, lay a piece of aluminum foil loosely over-top to prevent further browning and allow to cook longer.
Want to save this recipe?
Enter your email & I’ll send it to your inbox. Plus, get great new recipes from me every week!
By submitting this form, you consent to receive emails from Seasons and Suppers.

Get the Recipe: Pull Apart Apple Fritter Bread
Ingredients
For the bread dough:
- 2 3/4 cups all purpose flour
- 1/4 cup white granulated sugar
- 2 1/4 teaspoons instant yeast or see *Notes below for active dry yeast
- 1/2 teaspoon fine salt
- 1/3 cup milk
- 4 Tablespoons butter
- 1/4 cup water
- 1 1/2 teaspoon vanilla bean paste or pure vanilla extract
- 2 large eggs
For the sugar/cinnamon filling:
- 1/2 cup white granulated sugar
- 1 Tablespoon cinnamon
For assembling:
- 4 Tablespoons unsalted butter, melted
- 2 apples, peeled, thinly sliced and roasted *see instructions
- 1/4 teaspoons cinnamon
For the glaze:
- 1 cup confectioners’/icing sugar
- 1 Tablespoon milk
- 1 teaspoon vanilla bean paste, or pure vanilla extract
Instructions
- Roast the apples: Preheat oven to 350F (regular bake setting/not fan assisted). Peel and core the apples and cut into thin wedges. Line a baking sheet with parchment paper. Scatter apple slices evenly on pan. Sprinkle with about 1/4 tsp of cinnamon. Roast in preheated oven for 15 minutes. Remove from oven and allow to cool on the baking sheet until completely cool.
- Make the bread dough: Stir together 2 cups of the flour, 1/4 cup sugar, the yeast and salt in a large bowl or the bowl of a stand mixer fitted with a paddle attachment.
- In a small saucepan, heat the milk and butter over low heat just until the butter is melted. Alternately, warm in the microwave for about 45 seconds. Remove from the heat and add the 1/4 cup water. Set aside until cooled to just warm (120 to 130°F for instant yeast or about 110F for active dry yeast), about 1 minute. Stir in the vanilla.
- Add the milk mixture to the flour mixture and, using a rubber spatula or the paddle attachment, mix until the dry ingredients are evenly moistened. With the mixer on low speed, add the eggs, one at a time, mixing just until incorporated after each addition. Stop the mixer and add the remaining 1/2 cup flour.
- If using a stand mixture, remove the paddle attachment and place the kneading hook on the mixture. Resume mixing on low speed, adding additional flour as needed to make a smooth, moist and just slightly sticky dough. If making by hand, knead with as little additional flour as needed until dough is smooth.
- Place the dough in a large, greased bowl, cover tightly with plastic wrap and let rise in a warm place until doubled in size, about 45 to 60 minutes.
- Make the cinnamon sugar filling: While the dough is rising, in a small bowl, mix together the white sugar and cinnamon. Set aside.
- Assemble the pull apart bread: Preheat the oven to 350°F with the rack in the centre of the oven. Spray a 4 x 10-inch tea loaf pan with cooking spray. **Alternately, use a 9×5-inch loaf pan and see Notes at bottom for cutting strips. Set on to a baking sheet and set aside.
- Place risen dough on a lightly floured surface and gently deflate the dough. Roll the dough into a 12-inch by 21-inch rectangle. Using a sharp knife and with the long side closest to you, cut the dough into 6 strips even strips about 3 1/2 inches wide, making 6 strips 3 1/2-inches wide and 12 inches long. Using a pastry brush, brush the 4 Tbsp melted butter generously over each of the strips of dough. Scatter all the cinnamon/sugar mixture evenly over-top of the strips.
- Gently layer all the strips on top of each other into one pile. Your pile will be 12 inches long and 3 1/2 inches wide. Use a ruler to mark 2-inch increments along the 12-inch side. Using a sharp knife, cut the pile into 6 even pieces, cutting at each 2 inch increment mark, making 6 separate piles about 3 1/2 x 2 inches in size. Arrange the piles in a row in your prepared loaf pan by standing them up in a row along the pan (you may need to push them together gently, to fit them all in). Scatter any cinnamon sugar the was left behind on your work surface over-top of the loaf.
- Gently slide cooled, roasted apple slices in between the dough slices here and there across the loaf, trying to get one slice of apple between each layer of dough and alternating from one side to the other (so the slices aren’t all in the middle or in on one side). Don’t push them down completely. Leave the top edge of the apple slice just peeking out the top. You may not need quite all of the apples you roasted.
- Cover the pan with plastic wrap and let the dough rise in a warm place until puffy and almost doubled in size, 30 to 60 minutes.
- Bake the loaf on top of a baking sheet at 350F (regular bake setting/not fan assisted), until golden brown and they sound hollow when tapped, about 35 minutes or until it reaches about 190-195F when tested with an instant read thermometer. If the top seems to be at risk of over-browning, cover the top loosely with a sheet of aluminum foil and continue cooking.
- Remove from oven and allow to cool in the pan for 15 minutes, then run a knife around the edge and remove loaf to a cooling rack set on top of a baking sheet. Allow to cool completely.
- Make the glaze: In a medium bowl combine the icing sugar with the milk and vanilla until the mixture is smooth and pours easily off a spoon. *You may need to add a touch more milk. Brush the glaze over the top of the cooled loaf.
Notes
Hi! I’m Jennifer, a home cook schooled by trial and error and almost 40 years of getting dinner on the table! I love to share my favourite recipes, both old and new, together with lots of tips and tricks to hopefully help make your home cooking enjoyable, stress free, rewarding and of course, delicious!


Looks amazing!
I really want to eat this over Xmas but will be pushed for time to do all the preparation.. Is it possible to chill or freeze the dough in advance by any chance?
Thanks so much for the amazing recipes!
Hi Lauren and thanks! I think you have a few options here. You could bake it off and freeze until you need it (you can thaw, then reheat wrapped in foil in a 350F oven). I also think you could probably shape in the pan and freeze at that point (before the 2nd rise). Thaw at room temperature, let rise then bake off. Hope that helps :)
Perfect, thanks Jennifer. I think I’ll try your second suggestion and make the dough this week, then freeze in the pan until Christmas eve.
Thanks again and have a great Christmas!
Enjoy Lauren and Merry Christmas to you and yours, as well :)
I have a lot of “bread flour”. I’d like to use it up and your recipe looks absolutely delicious! Do you think it would work with bread flour rather than all purpose flour?
Hi Tricia and yes, you can go ahead and use that bread flour here if you like. Your bread might be a touch more chewy and you may need to add a bit less flour, but other than that, should be quite fine.
Hi, I’ve enjoyed your blog for a while now and save those recipes I plan to make one day…however, since you updated your site, it’s been almost impossible to copy and paste your photos to my copy file of your recipes! It’s important to me to be able to see what the finish product is supposed to look like. What has happened and can your fix that? Nothing I have tried for capturing images has worked so far.
Thank you! jph
Hi Judy, I’m not sure where you are trying to copy and paste the photos to, but nothing has changed in that regard. I just tested it myself. I can copy and paste into a Word document without problem. You can also right click and select “Save Image” and then manually insert that saved image into your file.
When my sister and I were kids, we used to make Pillsbury cinnamon buns from the tube, quarter them and toss them into a bread pan with chopped apples. It tasted great but never looked as good as this. I might have to make this and re-live my childhood a bit!
I think you just might have to, Matt :) Thanks!
You know I’m such a fan of your bread recipes Jennifer! Need to get this one on my fall baking list for sure!
Thanks so much, Mary Ann :)
Oh wow, now this is one gorgeous loaf! You make the best breads and if I trusted that I wouldn’t eat the whole thing myself, I would make it asap. Bravo, yum!
Thanks Tricia! You just have to do what I do and freeze 3/4 of it :)
What happened to your old format of one page printed recipes, loved it, why did you change??!!! This recipe looks amazing by the way!
Hi Gabriela and thanks :) I’m still working on getting the print page down to 1 page. This particular recipe is much longer than most, so I’m not sure I can get all of them to one page, but even right now, most of them should print on one page.
This looks insanely delicious, Jennifer! I’d tear apart the whole thing and eat myself, lol! So fluffy! Pinned :)
Thanks so much, Dawn :)
I adore your pull-apart breads, and this is no exception! So tender and delicious! Sign me up!
Thanks so much, Annie :)