

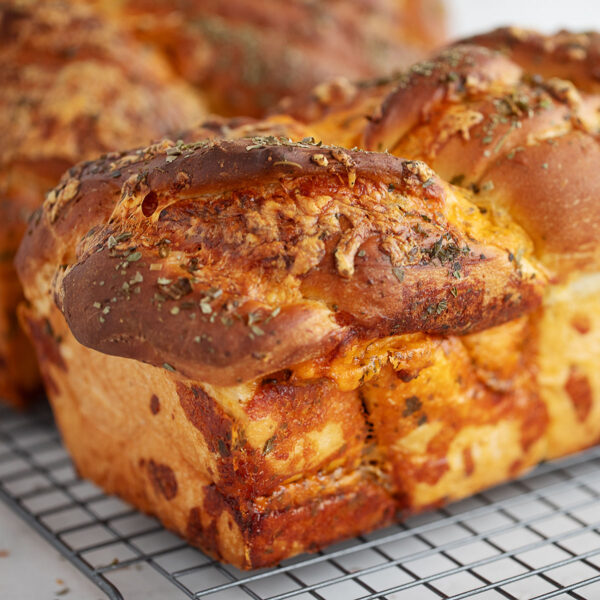
This is my absolute favourite cheese bread recipe! This recipe produces delicious homemade soft cheese bread that’s filled with cheddar cheese and herbs. The dough is a dream to work with, and the twisted shape makes for a beautiful loaf (with none of those dreaded rolled cheese bread gaps).
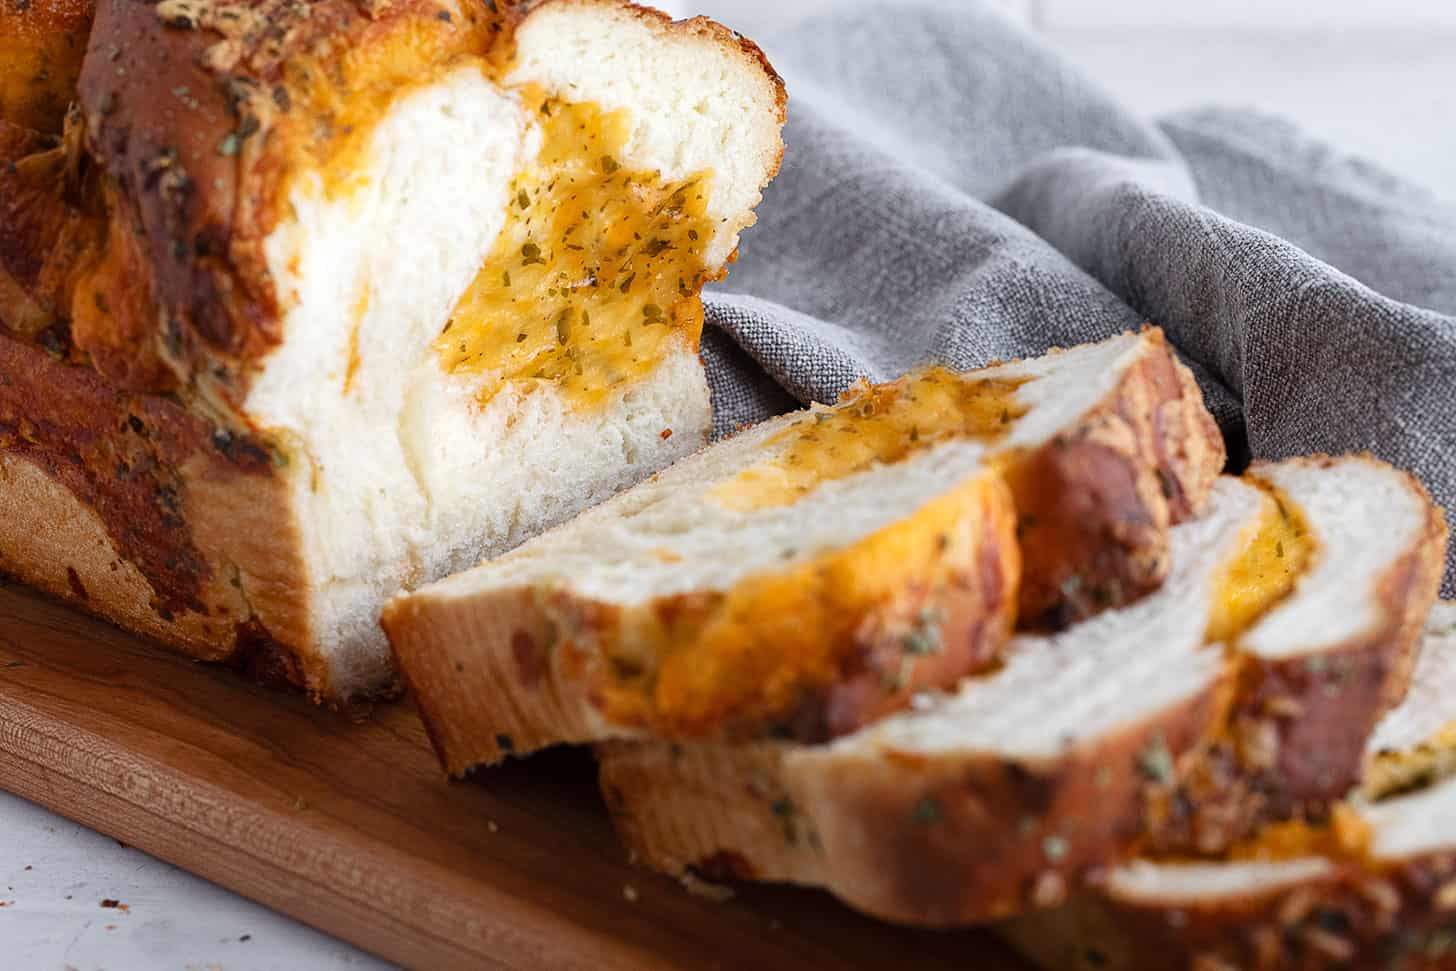
Homemade cheese bread: at a glance.
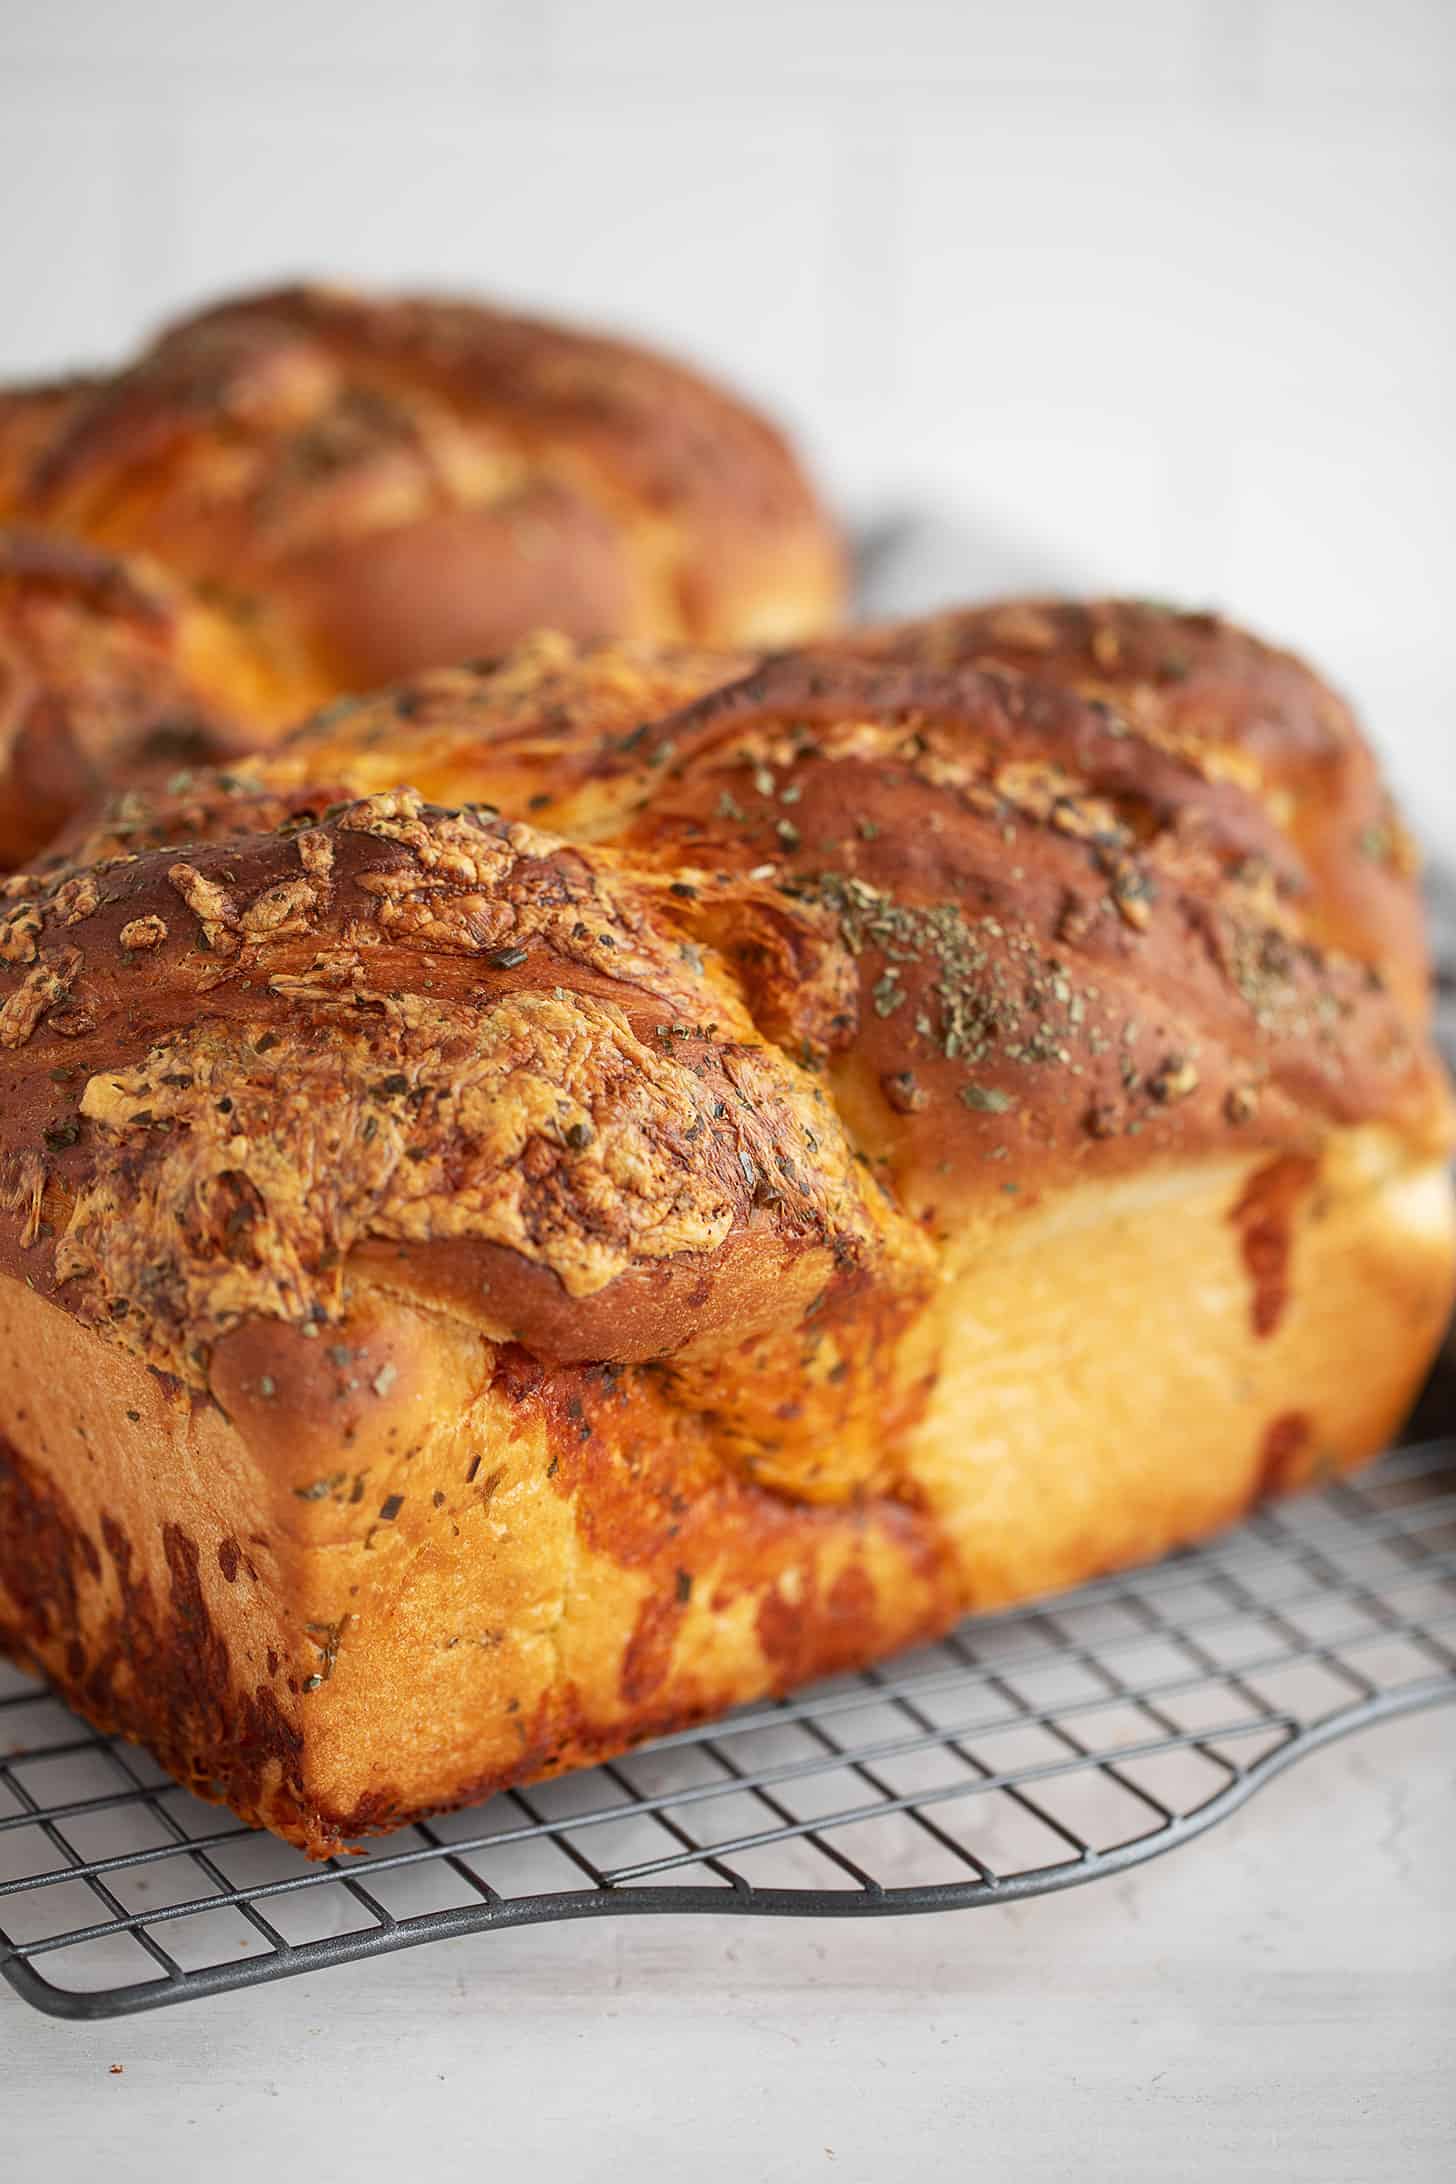
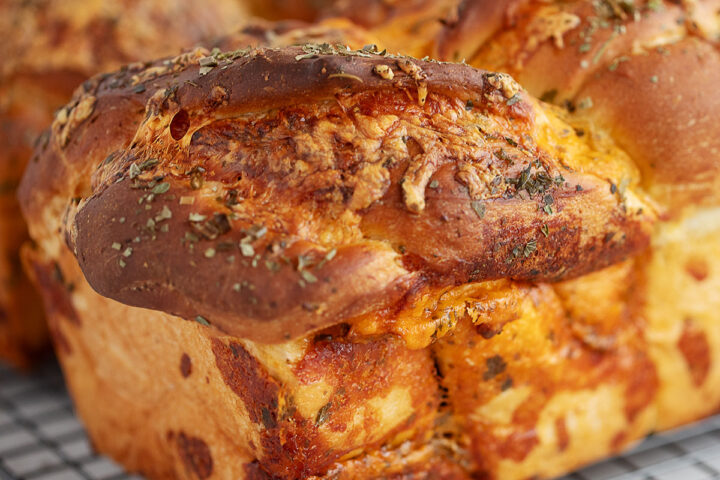
This cheese bread recipe produces two tall, beautiful loaves with veins of cheese running throughout. The crumb is wonderfully soft, yet still perfectly sliceable, so it’s perfect for sandwiches. It also provides a small moment of joy when enjoyed toasted and buttered.
Despite its impressive appearance, this is an excellent beginner bread-baking recipe. As it has ample yeast and sugar, it is a fast-riser, which reduces a lot of guesswork. It is also a beautiful dough to work with, as it is perfectly smooth and moist.
This cheese bread recipe is also endlessly customizable for more or less cheese, different cheeses or cheese combinations, or just about anything else you can imagine adding to the mix!
- Homemade cheese bread: at a glance.
- Ingredients and substitutions
- How to make homemade cheese bread: step-by-step
- How to make homemade cheese bread: video
- Recipe tips!
- New to bread baking? Here is my best advice!
- Storing and freezing cheese bread
- Get the Recipe: Simply Perfect Homemade Cheese Bread
- More cheese bread recipes to love!
Ingredients and substitutions
A few notes about the key ingredients …
Bread flour – High-protein bread flour will provide the nicest texture for your finished loaf. If you only have all-purpose flour, you can use it, but do note that you may need to add a bit more flour to get that moist, smooth dough when using all-purpose flour. The texture of your loaf will be slightly heavier than it would have been if using bread flour, but will still be nice and soft.
Yeast – You can use Instant yeast or Active Dry yeast to make this bread. I recommend and use SAF Brand (Red) yeast for all my bread baking.
Milk – I recommend whole milk (3.5% b.f.) if possible, or at least 2% milk, for best results. Warm the milk just slightly in a saucepan or in the microwave.
Cheese – use a sharp/old cheddar cheese for best flavour and grate it yourself. I find a yellow cheddar cheese makes a prettier loaf, as you can see the cheese, but an old white cheddar also works here.
How to make homemade cheese bread: step-by-step
This is a visual summary of the steps to make this recipe. Scroll down to the Recipe Card below for the complete list of ingredients and instructions.
Start by mixing the bread dough. You can mix the dough in a stand mixer with the kneading hook or in a bowl with a spoon and some elbow grease.
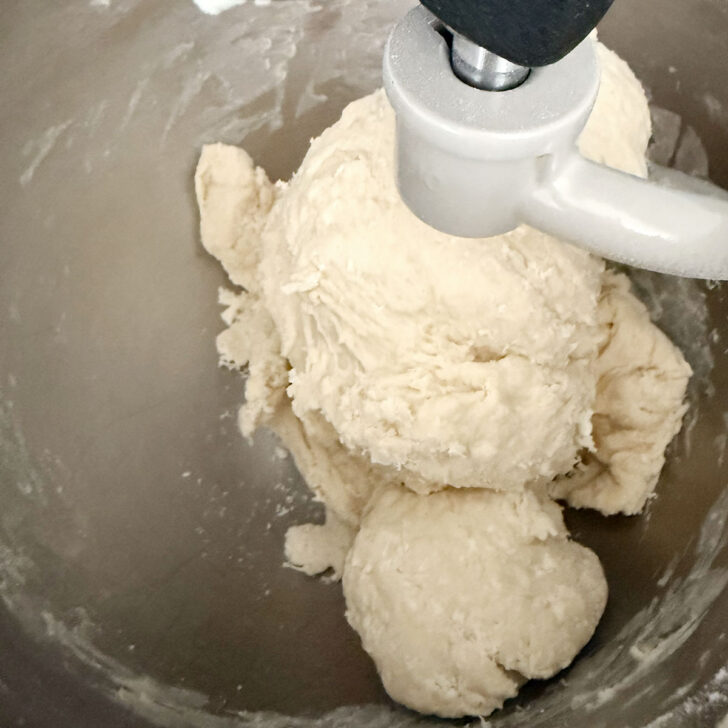
Step 1: Begin by mixing together the dough ingredients into a shaggy, just moistened dough. Let the dough rest for 5 minutes.
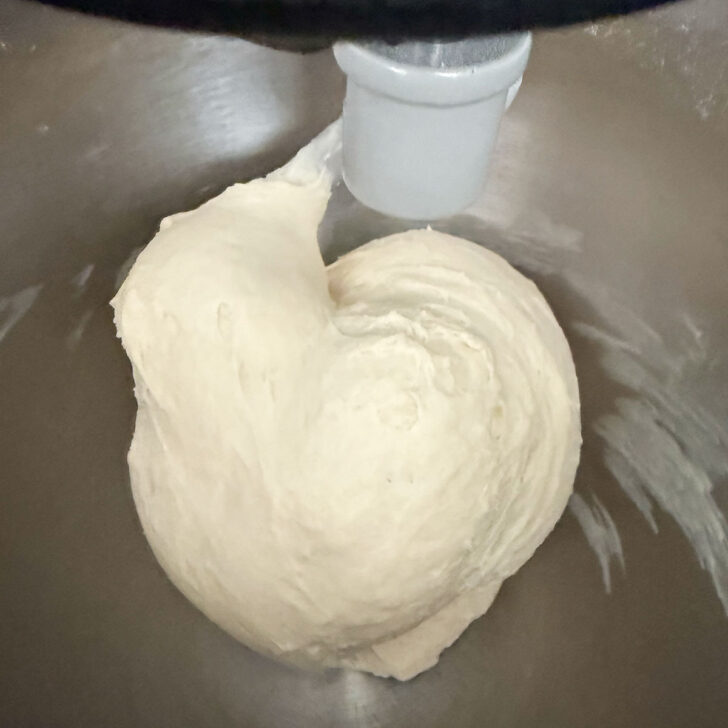
Step 2: Start kneading the dough on Speed 2 on a KitchenAid mixer and knead for 5-7 minutes until you have a smooth, moist dough that wraps the dough hook and cleans the bowl.
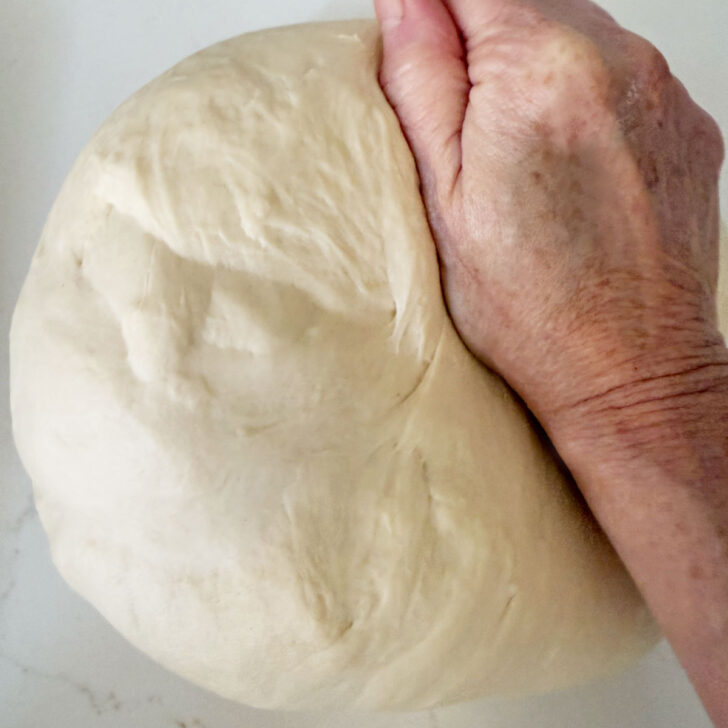
Step 3: Remove the dough to a work surface and knead briefly.
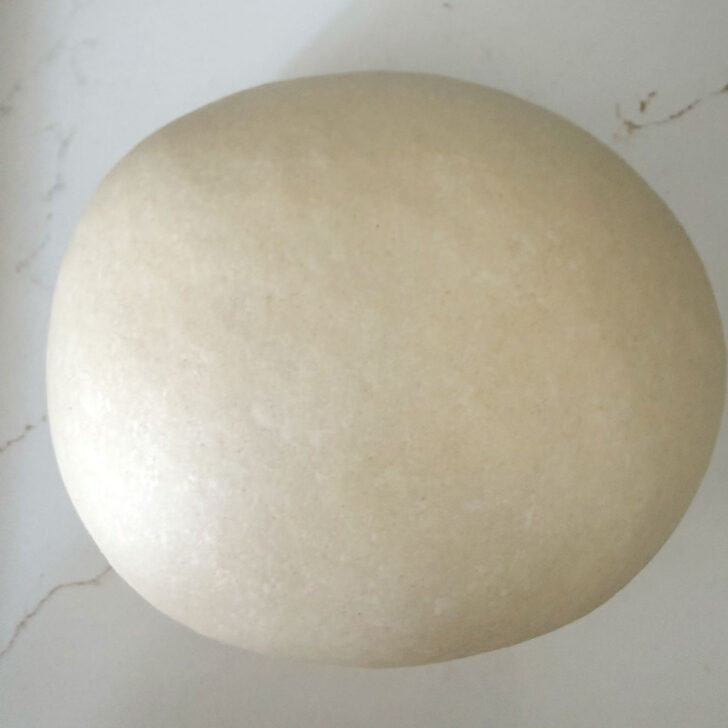
Step 4: Form the finished dough into a ball. It should be smooth like a baby’s bottom!
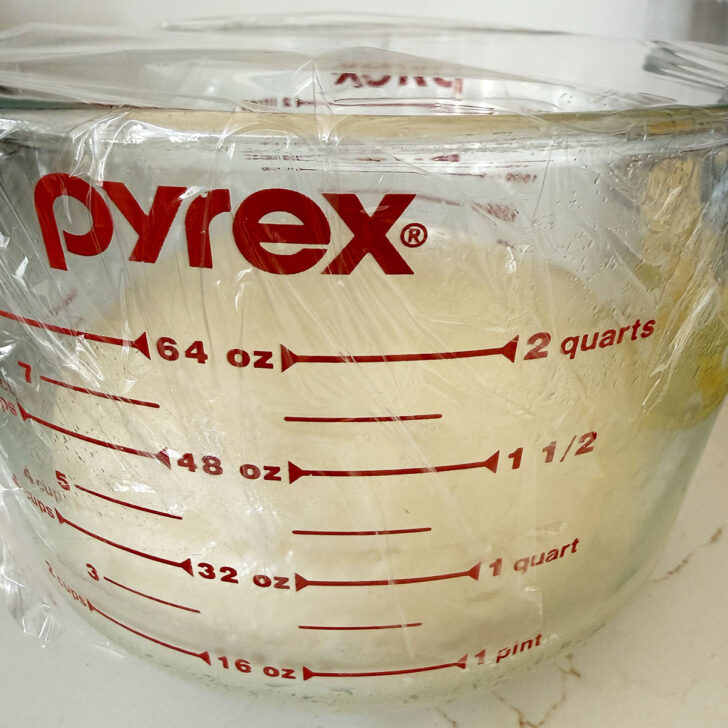
Step 5: Place the dough ball into a greased bowl or large measuring cup to rise.
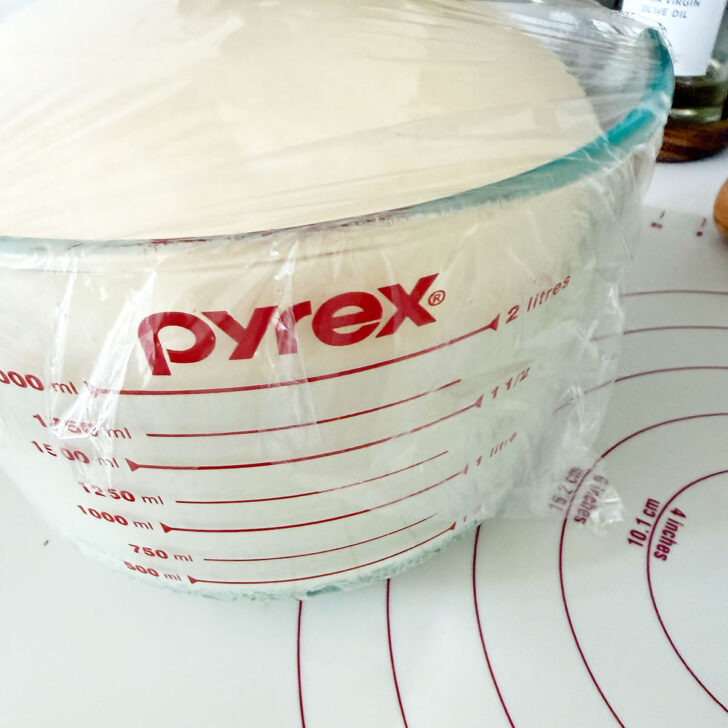
Step 6: Cover and let rise until doubled in size, about 45-60 minutes.
Once the dough has risen, here are the steps to roll, fill and shape the bread loaves.
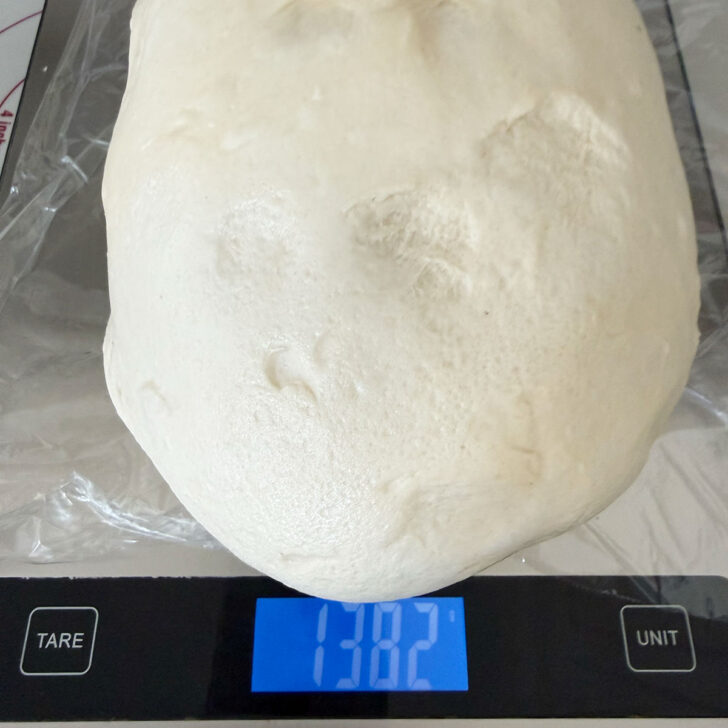
Step 7: If you have a scale, weigh the dough to get the total weight.

Step 8: Divide the total weight by two and weigh out two equal-sized dough balls.

Step 9: Cover one ball of dough with plastic wrap while you work with the other ball.
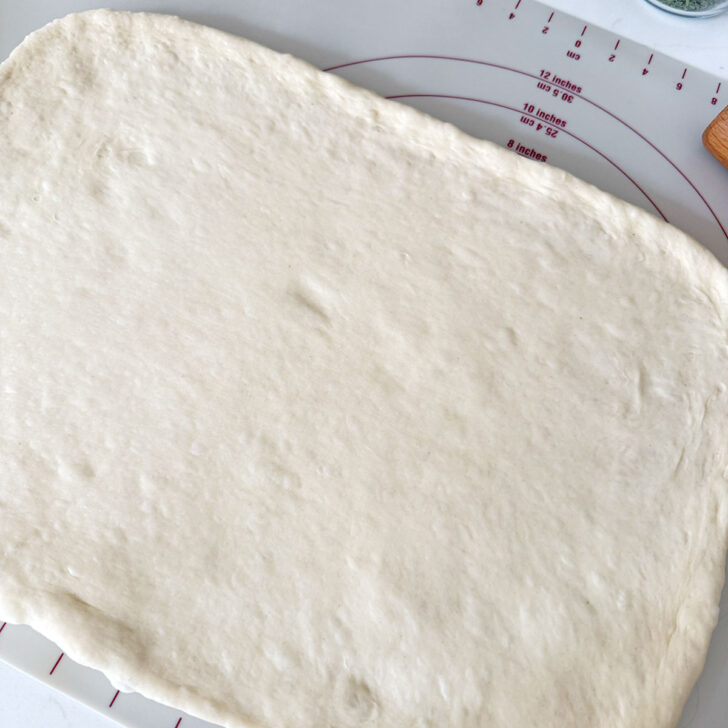
Step 10: Roll the dough ball into a 12×16-inch rectangele.

Step 11: Scatter half of the shredded cheese over the rolled dough and sprinkle with some herbs, if using.
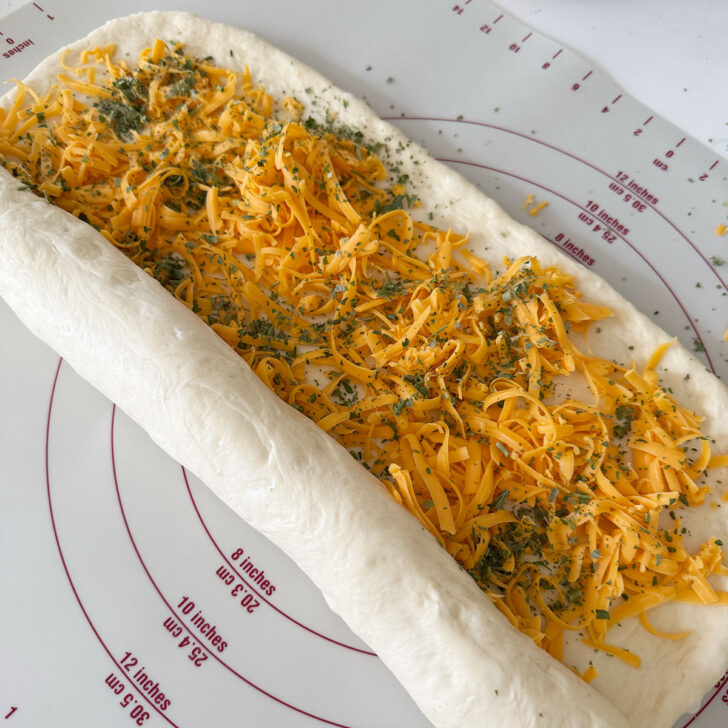
Step 12: Roll the dough up jelly-roll style, rolling from the long side.
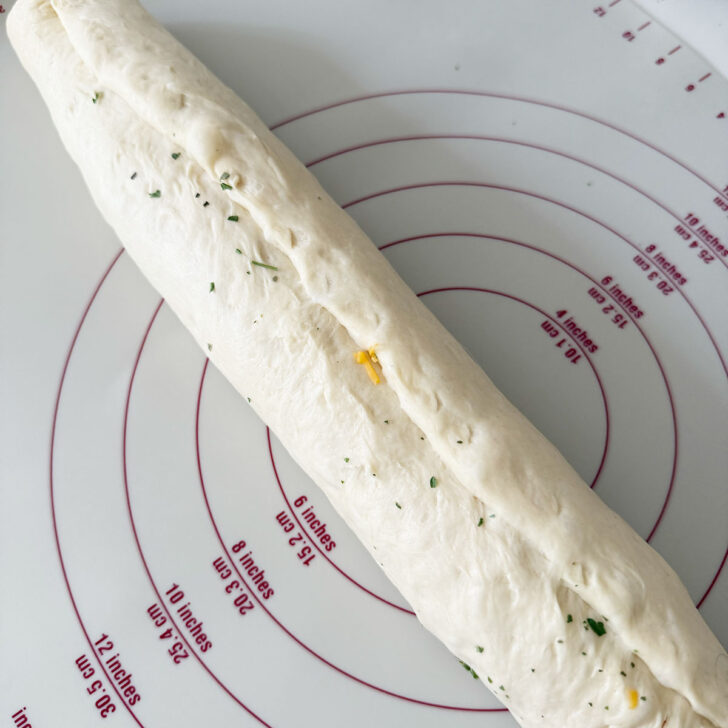
Step 13: Pinch the seam together.
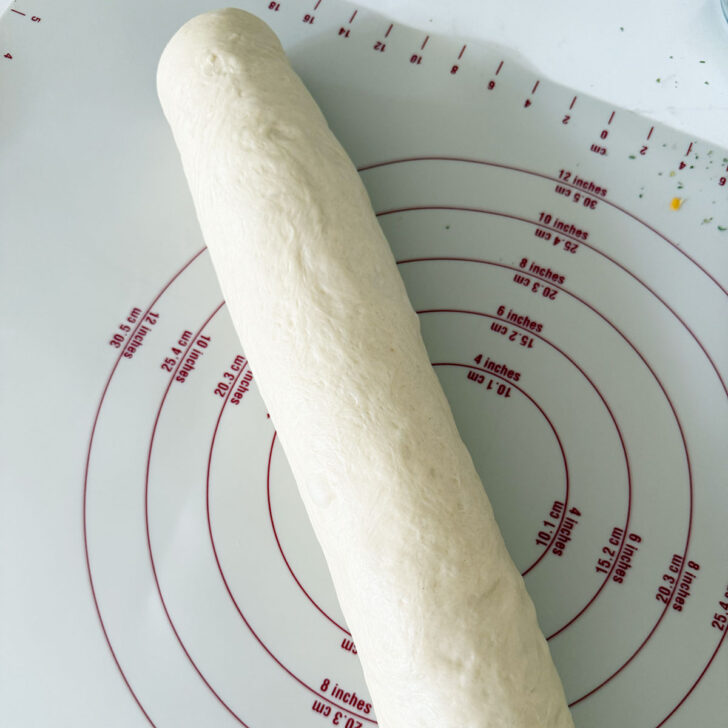
Step 14: Flip the dough over so the seam is down.
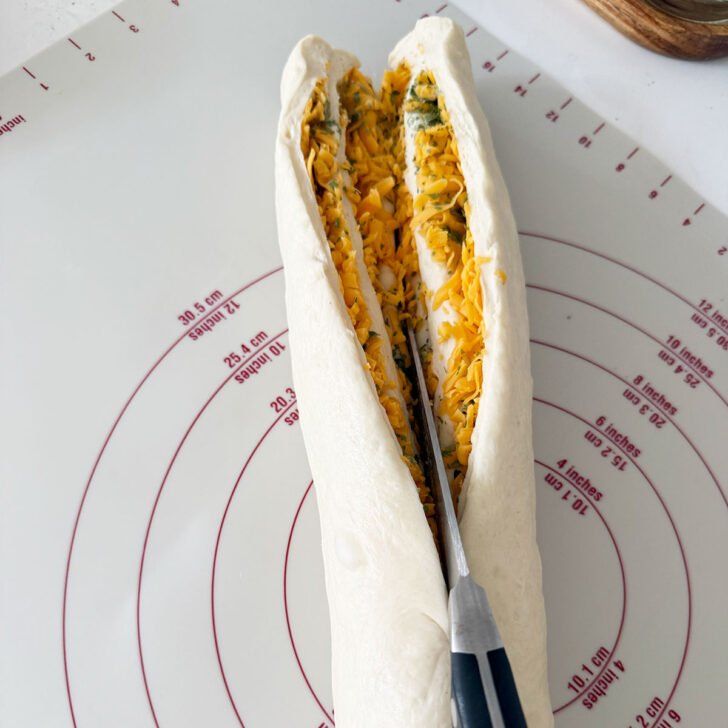
Step 15: Using a sharp knife, slice the rolled dough lengthwise down the centre.

Step 16: The dough is not cut into two pieces.
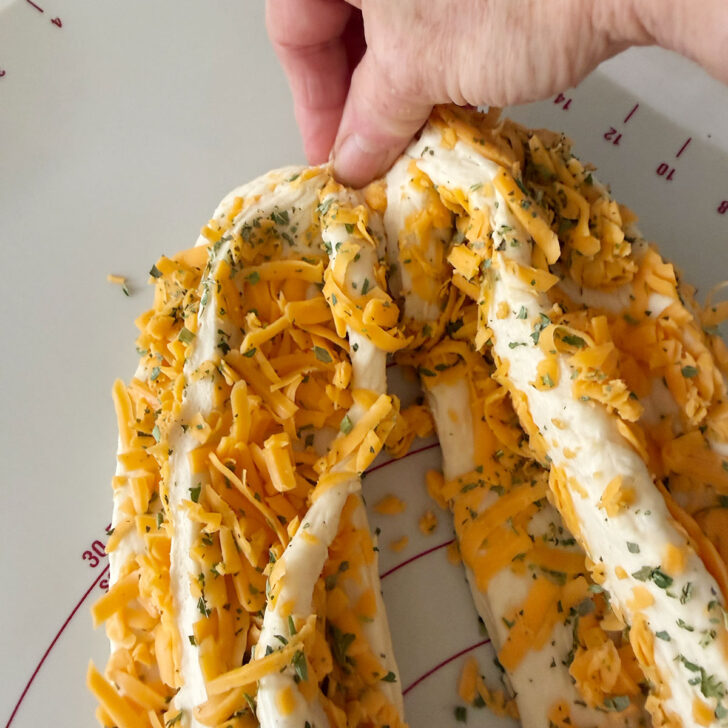
Step 17: Pinch the two pieces together at the far end.
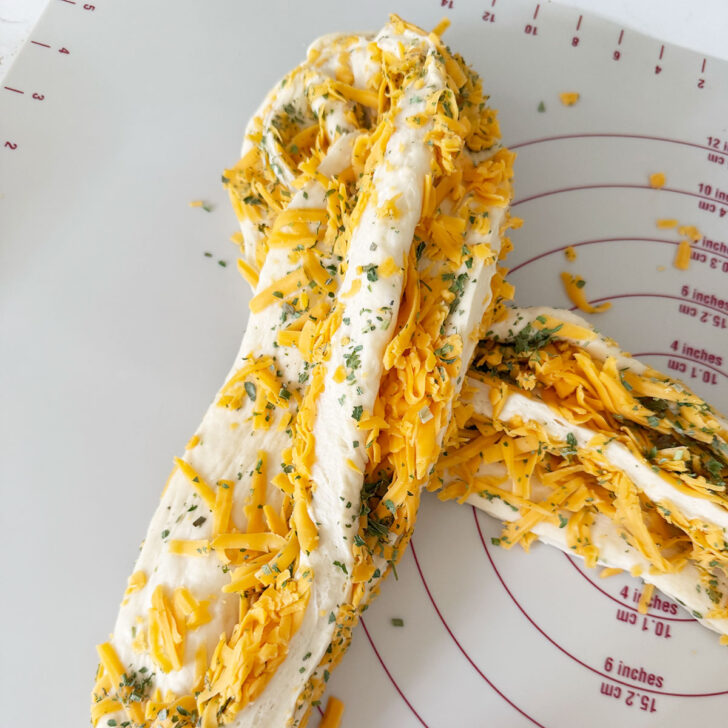
Step 18: Begin to twist the dough together by placing the right side over the left side.
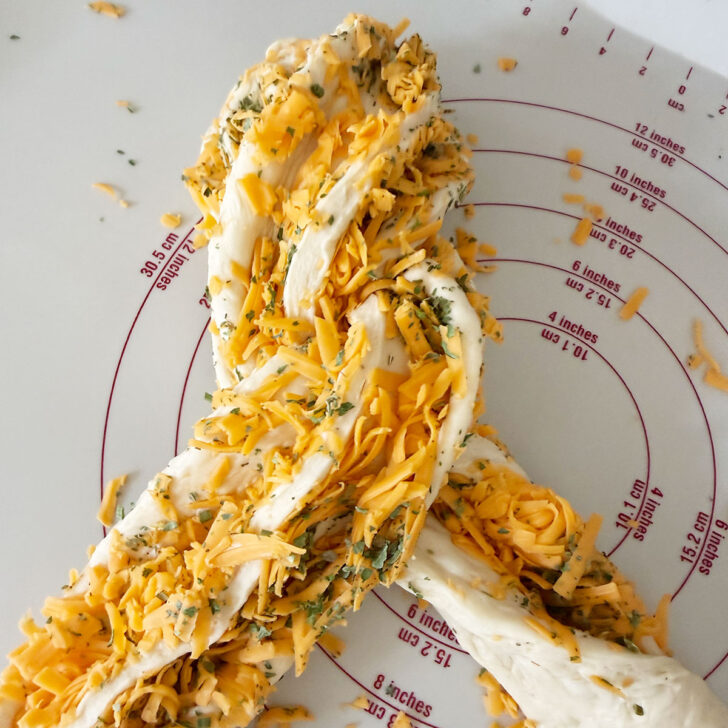
Step 19: Continue twisting the dough pieces together.
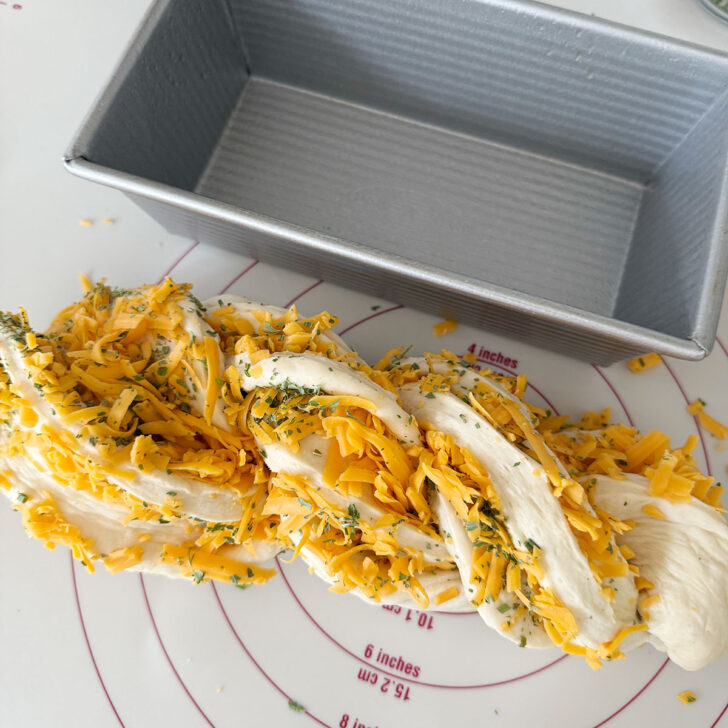
Step 20: Pinch together the closest ends once the dough is fully twisted together.
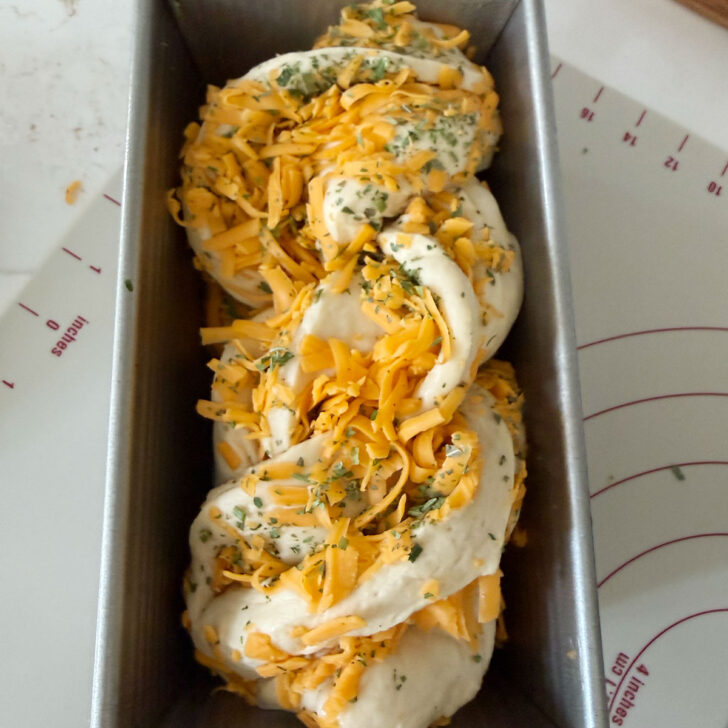
Step 21: Gently lift the shaped dough into a greased 8 1/2 x 4 1/2-inch loaf pan, then repeat with the second piece of dough to make two loaves.
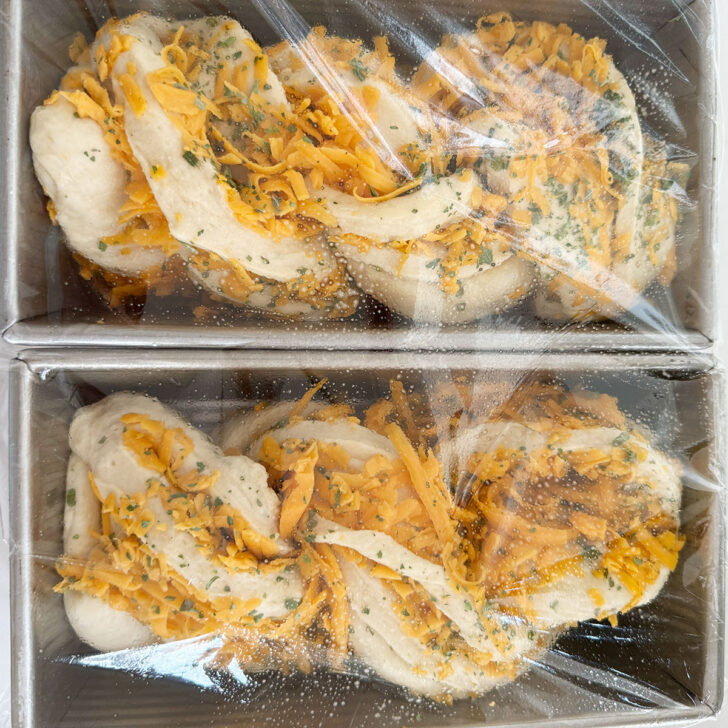
Step 22: Cover the loaves with plastic wrap and set to rise until they rise to an inch above the sides of the pan, about 30 minutes. Bake and enjoy!
How to make homemade cheese bread: video
Confused about how this cheese bread is shaped? Be sure to watch the video to see how easily it is done!
Recipe tips!
- If you want to take your bread game to the next level, you really need to be using a kitchen scale and weigh out the ingredients. You will quickly find that doing so will produce a perfect loaf every time! No more uncertainty about how dry measuring cups were filled. No more variations between the exact volume of a liquid cup. You can pick up a kitchen scale for only $20, and it’s the best investment you will make for your kitchen.
- This bread is endlessly customizable. All kinds of cheese, herb and other add-in combinations will work. Want to throw in some sun-dried tomatoes and/or a bit of pesto? Why not! Olives? Sure. Lots of cheese or just a bit? It’s up to you.
- There is an option to overnight-rise this dough in the fridge. I rarely do that, because I’m a) impatient and b) not that organized, but feel free to do so. There’s no doubt that any bread benefits from a longer rise for better flavour.
New to bread baking? Here is my best advice!
I think most of the problems people have when starting out baking bread are treating bread recipes like, say, a cake recipe, where you just measure the ingredients, mix them all together and bake.
Things like kitchen temperature, humidity, moisture in the flour you are using, the season you are baking in and rising time can differ from one kitchen to the next. All that makes bread recipes less consistent from one kitchen to the next.
Now that you know this, though, that’s more than half the battle :) What you’ll need to add to the mix to be a successful bread baker is some trust in what you see and feel.
- Does the dough look and feel too sticky, and does the recipe say it should be smooth and not sticky? Go ahead and add a bit more flour, as your dough needs it.
- Does the dough look moist and smooth, but you haven’t added all the flour specified? Trust what you see in the bowl and stop adding more flour.
- When it comes to dough rising times, trust your eyes and not the clock. Your dough in your kitchen may rise more quickly or slowly than it suggests in the recipe. Using a straight-sided rising container will make it easier to see when the dough has doubled. (I like to use a 4- or 8-cup glass measuring cup.) In any case, you want the dough to just double in size. No less. No more.
Trust what you SEE and FEEL, and don’t be too tightly tied to the specifics of the recipe. Do that, and all will be good!
Storing and freezing cheese bread
Allow the bread to cool completely, then store at room temperature in a bread bag or simply place on a cutting board with the cut end wrapped tightly with plastic wrap. This bread will keep well for 2-3 days at room temperature.
You can refrigerate bread to extend the shelf life, but I don’t recommend refrigerating it right away. I keep my bread on the counter for about 2 days, then after that I might refrigerate what’s left to extend the freshness another 2 or 3 days.
Bread freezes beautifully! Wrap tightly and freeze for up to 3 months.
Want to save this recipe?
Enter your email and I’ll send it to your inbox. Plus, you’ll get great new recipes from me every week!
By submitting this form, you consent to receive emails from Seasons and Suppers.
You can unsubscribe at any time.
Get the Recipe: Simply Perfect Homemade Cheese Bread
Ingredients
- 6 1/2 cups (794 g) unbleached bread flour, spooned and levelled *see Note 1 below
- 2 teaspoons (14 g) fine salt , reduce slightly if using salted butter
- 5 Tablespoons (64 g) white sugar, or brown sugar or 3 1/2 Tbsp. honey
- 1 cup (227 g) lukewarm water, about 95F
- 1 cup plus 2 Tablespoons (255 g) milk, or buttermilk, lukewarm, about 95F
- 1 1/2 Tablespoons (14 g) Instant yeast or Active Dry Yeast
- 1/4 cup (57 g) unsalted butter , melted and cooled slightly, or the same amount of vegetable/canola oil
Cheddar and herb filling (for two loaves):
- 3 cups (340 g) sharp/old orange cheddar cheese, shredded and packed
- 2-3 Tablespoons (60 ml) dried parsley, optional *see Note 2 below
Instructions
- In a mixing bowl or the bowl of a stand mixer, combine the 6 1/2 cups unbleached bread flour (spooned and levelled *see Note 1 below), 2 teaspoons fine salt (reduce slightly if using salted butter) and 5 Tablespoons white sugar (or brown sugar or 3 1/2 Tbsp. honey ) together and stir together well.
- In a large measuring cup or bowl, combine the 1 cup lukewarm water (about 95F ) and 1 cup plus 2 Tablespoons milk (or buttermilk, lukewarm, about 95F) and whisk in the 1 1/2 Tablespoons Instant yeast or Active Dry Yeast until dissolved. Add this mixture, along with the 1/4 cup unsalted butter (melted and cooled slightly, or the same amount of vegetable/canola oil), to the dry ingredients. Mix by hand or with a dough hook at Speed 2 until the mixture is combined and all the dry ingredients are incorporated into a shaggy dough, about 2-3 minutes. Let the dough rest for 5 minutes.
- Continue mixing the dough with the kneading hook at Speed 2 for 5-7 minutes, until a smooth dough forms that wraps the dough hook and cleans the bowl. The dough should not be sticking to the mixing bowl at all.
- Transfer the dough to a lightly floured surface and knead for a couple of minutes, adding more flour only if the dough is sticking to your hands or the work surface; then form the dough into a ball. (If the dough feels smooth like a baby's bottom, you've nailed it!).
- Place the dough in a lightly oiled bowl or an 8-cup measuring cup, then flip the ball over in the bowl so the top of the dough is covered in the oil from the bowl. Cover the bowl tightly with plastic wrap and allow the dough to rise until just doubled, about 40-60 minutes in a 72F kitchen. (This dough is a fast-riser! Don't wander too far. You want the dough to just double in size – no more and no less – however long that takes.)
- Note: Alternatively, you can refrigerate the dough, well covered, for up to 4 days. If you have refrigerated your dough, remove it from the refrigerator 2 hours before you plan to bake to allow it to come to room temperature.
- Grease two 8-inch by 4-inch loaf pans and set aside.
- Divide the dough into 2 equal pieces. Cover one piece with plastic wrap and set aside. Working with one piece of dough, use a rolling pin to roll it into a rectangle approximately 12 inches wide and 16 inches long. (If the dough seems to spring back and not hold its shape while rolling, allow it to sit for a few minutes and try again.)
- Once rolled out, scatter 1/2 of the shredded cheddar and 1/2 of the herbs evenly over the surface of the dough. Starting with the long side of the rectangle, roll the dough up jelly-roll style and pinch the seam together. Rotate the rolled dough so the seam is underneath.
- Using a sharp knife, cut the roll of dough down the centre, lengthwise. Rotate each piece so that the cut sides are facing upward and place them side-by-side. Pinch together the farthest end. Keeping the cut sides facing upwards as much as possible, place the right-side piece over the left-side piece. Straighten it up all the way and then repeat twisting together down the length of the dough, then pinching together the end closest to you. If any cheese escapes, just place it back on top. Using a bench scraper or spatula, carefully lift the dough into the greased loaf pan. Repeat with the other piece of dough, then cover both pans with a greased piece of plastic wrap (I like to spray the plastic wrap with cooking spray).
- Allow the loaves to rise until the dough rises about 1 inch above the side of the pans in the middle, about 30-40 minutes.
- Preheat the oven to 350F (non-convection/not fan-assisted), with the rack in the centre of the oven.
- Place the loaves on top of a baking sheet to catch any cheese that might fall off the loaves as they bake. Bake the loaves for 40-45 minutes total, but set a timer for 20 minutes, at which time you'll rotate the pans from front-to-back in the oven and loosely cover the top of the loaves with a piece of aluminum foil if the bread is already well-browned. The foil will prevent the top from over-browning. Continue baking the bread for about 20-25 minutes more, until the bread reaches about 185F° internal temperature in the centre when tested with an instant-read thermometer.
- Remove the bread from the oven and allow it to cool in the pans for a couple of minutes. Run a sharp knife around the edge of the bread, then carefully remove the loaves to a cooling rack. Allow the loaves to cool for 1 hour before slicing. *Slicing hot or very warm bread will make for a gummy crumb, so resist the urge and let it cool :)
- Store the baked bread at room temperature for several days, storing it in a bread bag or, at least, wrapping any cut ends tightly. You can also freeze this bread for up to 2 months.
Notes
Watch how to make it
More cheese bread recipes to love!


Hi! I’m Jennifer, a home cook schooled by trial and error and almost 40 years of getting dinner on the table! I love to share my favourite recipes, both old and new, together with lots of tips and tricks to hopefully help make your home cooking enjoyable, stress-free, rewarding and of course, delicious!


Can the second rise be done in the fridge overnight? I am a high school culinary tech teacher and need to stager the process over a couple of days.
Hi Roberta and yes, it could. It will still need some time out of the fridge in the morning I think though, before baking.
This bread was delicious I made one change, i added more cheddar cheese and it overflowed so the 2nd time I used 5×9 inch loaf pans and that fixed the problem and made slicing much easier as the top didn’t expand over the sides of the pan went over very well and have been asked to make again also it makes excellent grilled cheese
Glad you enjoyed it, Loren. Thanks!
This is my go to, beautiful & delicious bread for dinner parties! My friends and I love it!
Glad you are all enjoying it, Taylor. Thanks so much!
I have had this recipe on my reading list for a long time and finally made them both today. They are great. A bit more prep time than most bread but so worth the minimal extra effort. Loved too that they sliced so well. Expected a mess but nice even slices. Can hardly wait for toast in the morning.
So glad you enjoyed it, Patricia. Thanks so much!
Experienced cook but novice bread maker here. This was super easy and so yummy. I used the cheese we had on hand, cheddar and basil for one loaf and parmesan and mozzarella with oregano and basil for the other. My husband, who claims not to be a “bread guy” scarfed it down. Can’t wait to try this with sundried tomatoes
I’m so pleased to hear, Sandra! This is one of my favourite doughs to work with. I return to it often to create all kinds of things :)
This is my go to recipe to make pepperoni rolls with. I roll half the dough out about 1/4” thick and load it with layered sandwich pepperoni and provolone cheese. Roll them up tightly and slice to proof and bake. Always a crowd favorite!
Sounds delicious Katie! Such a great idea and another use for this beautiful dough :)
Absolutely delicious bread! I’ve made it multiple times and every time it does NOT disappoint. Delicious and fluffy!
So pleased you are enjoying it. Thanks!
Thanks for sharing this recipe, it came out exactly like I was hoping. It’s really tasty and taking my sandwiches to another level!
I’m so pleased to hear, Devon! Thanks so much :)
Amazing recipe! the dough was absolutely soft and so was the final product, even a day after. This is truly my go to bread recipe
I’m so pleased to hear, K. Thanks so much!
I made both loaves for a family get together over Christmas and everyone thought they where amazing so as a result I now have orders that every gathering from now on it’s Dad, Grandad, can you bake the loaves again. YES!! I will.
We all loved them….
I’m so glad to hear, Allan! You’ll be busy making these loaves, for sure :) Thanks!
5 star every make
Thanks so much, Barbara :)
About time I thank you for this recipe, love making 1 dough for 2 different gorgeous results. The roll-split-twist is genius & produces consistently better texture than a spiral or knead-in. I use Canadian apf & replace 30g w gluten (5g /cup/125g) to support the rise w all those goodies. Usually make 1 savory: orange x-old Cheddar 1# w a skim of Dijon, or grainy: 100g 12-grain or such hydrated with milk or water to make a stiff paste, sprinkle of cinnamon to highlight the grainy flavour, & 1 sweet: ch pecans-cin-br sugar or ch dried apricots orange zest & juice, ch prunes hydrated in oj &/ rum, endless possibilities, never a dud yet. Thank you, thank you.
So pleased you are enjoying this bread, Barbara. It’s one of my favourites! Thanks so much :)
This recipe came out perfect. I am new to baking and I had no problem with the instructions or video. The only thing I think that was left out was storing instructions. What’s the best way to store this bread when unfinished? I believe the fridge would be best, But how shorts should I wrap it?
So glad to hear, Jennifer! As for storing the bread, it really depends on your consumption rate. Storing in a plastic bag on the counter is best for the first 24-36 hours. After that, if there is a good bit left, I will freeze it. Bread freezes beautifully! I know it seems like the fridge would be a good option, but it tends to dry bread out quite quickly. I only opt for the fridge if I just have a bit left (not enough to bother freezing) and I want to stretch it another day or so for toast. Hope that helps.
Not sure what has happened but there is no video attached to this recipe. I can access other videos but not this particular one.
Hi Linda, it’s loading fine for me. You need to make sure that you have any ad blockers turned off to view the video. Otherwise, you might try refreshing the page or trying a different browser.
This made for a delicious snack. The crusty baked cheese on the outside and fused to the bread on the outside make it superb. I halved the recipe and made a variant on the cheddar herb bread. The only thing that confused me was that there were some very large bubbles in the finished product. Any comments? I tried watching the shaping video, but it wouldn’t load for me.
Hi Shaun, you may have to turn off any ad blockers to view the video. Watching the shaping video may provide the answer to your large bubbles. The shaping technique is quite tight, so it shouldn’t allow for large bubbles to form, unless the bread is really under-proofed before baking.
Bread sunk down in the center. Little disappointed. Did you punch your bread down?
Hi Megan, that can be disappointing and can happen for a number of reasons. I’m not a dough puncher, but I always gently deflate it after the first rise. In this bread, the act of rolling it really takes care of the deflating part. Bread that sinks can be under-kneaded (lack of structure) or over-proofed before baking (the yeast is spent before it hits the oven). Do either of those sounds likely in your case?