Making English muffins at home is easier than you think! These homemade English Muffins are ready in less than 2 hours or there is an over-night rise option, as well.
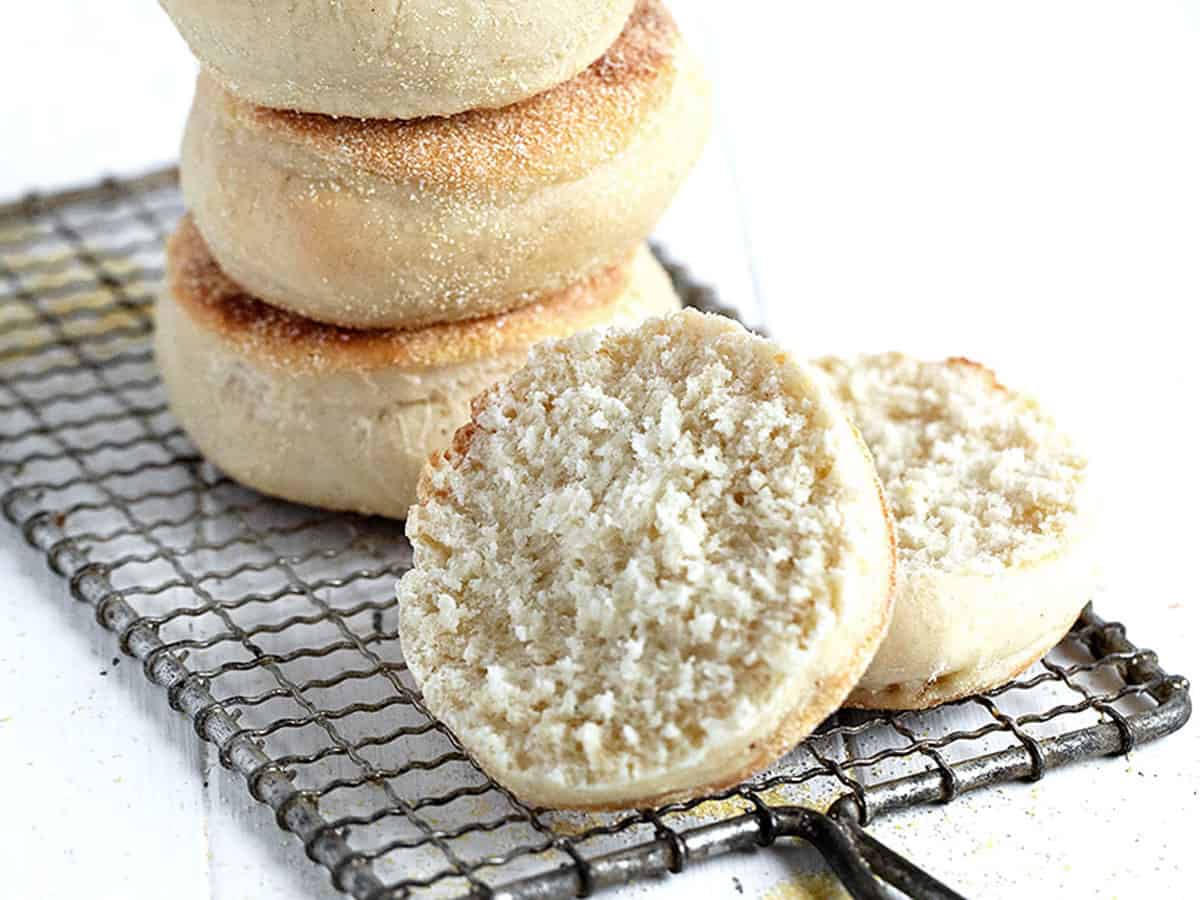
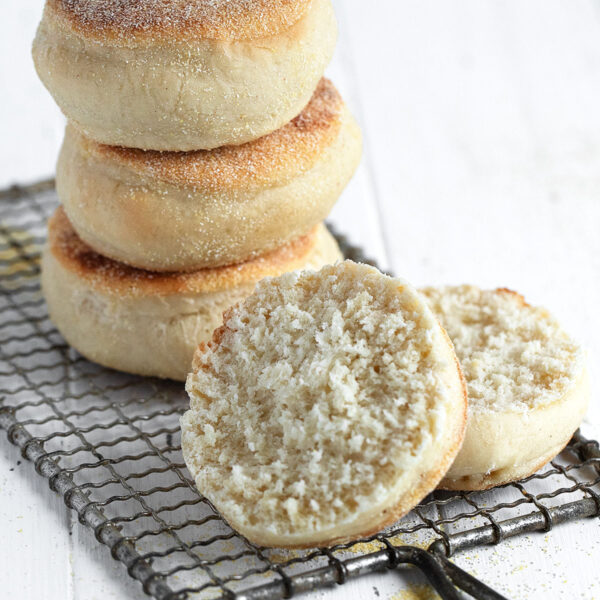
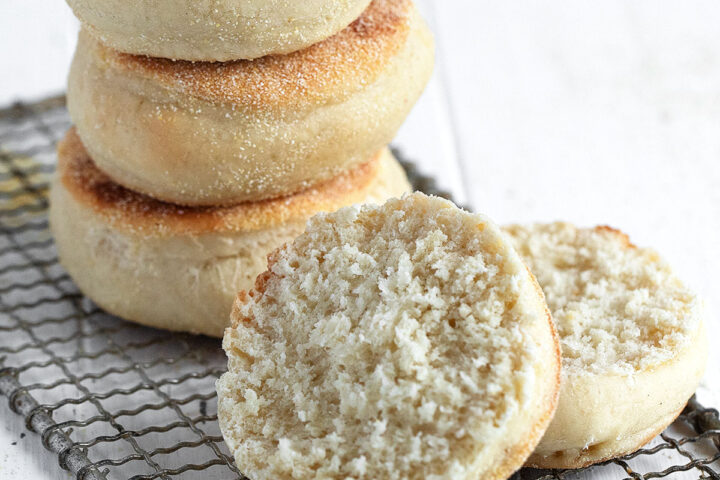
I love a great English muffin breakfast sandwich (for breakfast, lunch or dinner :), so I love to bake up some homemade English muffins every once in a while, to make sure I’m always prepared. This is my favourite recipe. They have great flavour, especially when made with buttermilk, which gives them a sourdough-like tang. They also have great nooks and crannies to hold the butter!
How to make English muffins: step-by-step
This is a visual summary of the steps to make this recipe. Scroll down to the Recipe Card below for the complete list of ingredients and instructions.
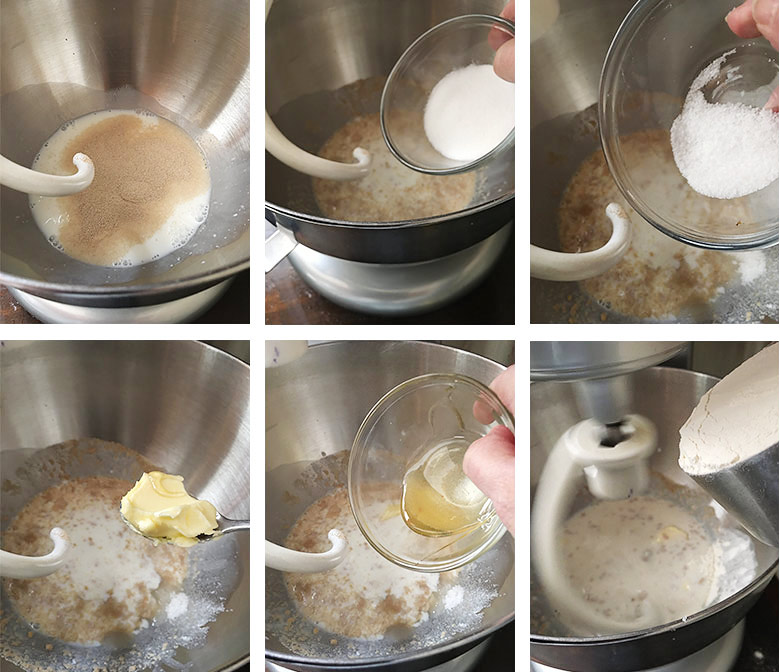
Step 1: Prepare your dough by mixing together all the ingredients. You should end with what looks like a very moist, almost sticky dough. Don’t add any more flour in the bowl. Remove to a floured work surface and knead a few times, adding a bit more flour there, if needed, just until the dough is kneadable and no longer sticky. Place the dough in a greased bowl, cover and refrigerate for 1 hour.
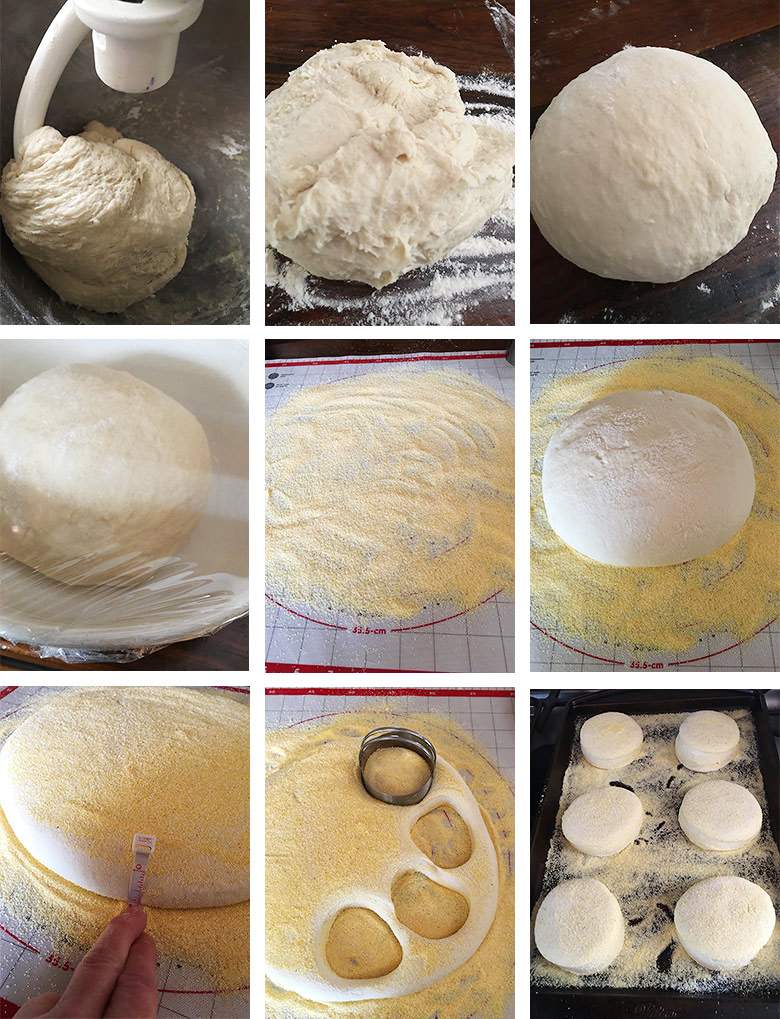
Step 2: After refrigerating, remove the dough to a floured work surface and form into a ball. Sprinkle the rolling surface with some cornmeal, place dough ball on top, then sprinkle the top of the dough with more cornmeal. Roll the dough ball into a circle about 3/4 – 1-inch thick, then cut your rounds out with a 3-inch cutter, trying to cut them as close together as possible, to avoid waste, as you can’t re-roll the left-over dough. Avoid placing your cutter over the outside edge completely. Move it in a 1/4-inch or so, so that you get a clean cut edge. Place your cut rounds onto a cornmeal-sprinkled baking sheet, cover with plastic wrap and let rise 30-40 minutes.
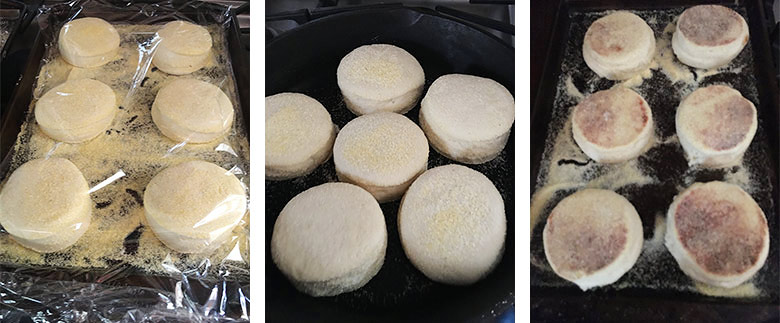
Step 3: Preheat oven to 350F. Fry muffin dough in an un-greased skillet just until they start to colour, then flip and fry the other side. I like to press down lightly with a spatula after they are flipped, to ensure a nice, flat shape. Remove from the skillet to your original baking sheet and pop into the preheated oven to bake for 15 minutes, or until they test at least 195F internal temperature. Remove to a cooling rack to cool completely.
FAQ
- Can I add some whole wheat flour? Sure. The finished muffins with whole wheat flour will be slightly more heavy and dense in texture. I would suggest replacing about 1 cup of the all purpose flour with whole wheat. As whole wheat flour absorbs more liquid, you may not need to add as much total flour to produce the moist finished dough, so hold back that last cup of flour and add in small increments, just adding as much as needed.
- What can I substitute for the honey? You can use any other syrup you might have around – maple syrup, light corn syrup, agave, brown rice syrup, barley malt syrup. If you don’t have any of those, simply add an equal measure of brown sugar.
- Can I make them “cinnamon raisin”? Sure! Simply add 1 – 1 1/2 Tbsp of cinnamon to the dough (add with the flour) and mix in about 1 cup of raisins at the end of mixing the dough. I would soak and dry the raisins before adding to “plump” them, but also so they don’t absorb moisture from the dough as it rises. Simply soak in warm water for 10-15 minutes, then drain and dry well before adding to the dough. Do note that the addition of cinnamon to the dough will slow the yeast activity/rising somewhat, so you may need to extend the rising time slightly.
- How do I store the baked English muffins? After cooling completely, I store my baked muffins in a plastic storage bag and store in the fridge, for maximum shelf life. English muffins also freeze beautifully. Simply store in a freezer bag or container for up to 3 months.
- How do I know when they are baked through? An instant read thermometer is the perfect tool! Insert through the side and just into the centre of the muffin. It should reach 195F at least or between 195-200F internal temperature. If you don’t have a thermometer, use a skewer inserted in the same way. It should come out clean and dry.
- Can I double the recipe to make more? You can. Simply double the recipe ingredients and you’re good to go. I have found the smaller batch easier to work with myself, so I just make what I need, as I need them. That way I’m not having to fry or bake in batches etc.
- Can I keep in the fridge over-night and bake in the morning? Yes you can. Make the muffins through the rolling/cutting, place on the cornmeal-dusted baking sheet, cover tightly with plastic wrap, then pop in the fridge overnight. In the morning, remove from the fridge and let rise at room temperature about 45-50 minutes (with the plastic wrap still on), then fry and bake as per the recipe.
How to enjoy homemade English muffins
- Toasted with butter – or butter and jam/peanut butter etc.
- Classic Breakfast Sandwich – egg, cheese, bacon or sausage or just an egg and cheese on a toasted and buttered muffin, of course
- Open-faced Sandwich – split your muffin, toast and top with a fried egg, ham, asparagus, wilted spinach, eggs benny etc and knife and fork it.
- Sandwich of any sort – just use the split muffin in place of bread slices for any sort of sandwich. One of my favourites is peameal bacon, cranberry sauce and Brie cheese and a warm, toasted and buttered muffin.
- English Muffin pizzas – these were a staple for me growing up! Split your English muffins, spread on some pizza sauce (or even tomato paste or sauce works), top with cheese and bake in a 425F oven for 8-10 minutes, or until crisp and melty.
- Grilled Cheese – English muffins actually make great grilled cheese sandwiches. Simply split, fill with cheese, then butter to outside and grill.
- Hamburger bun – not conventional, but a nice substitute for a burger bun.
- English Muffin Bread Pudding – ideal for when your English muffins are starting to dry out a bit. Simply cube, toss in some ham, cheese (maybe some asparagus or broccoli) and pour an egg/milk custard overtop and bake.
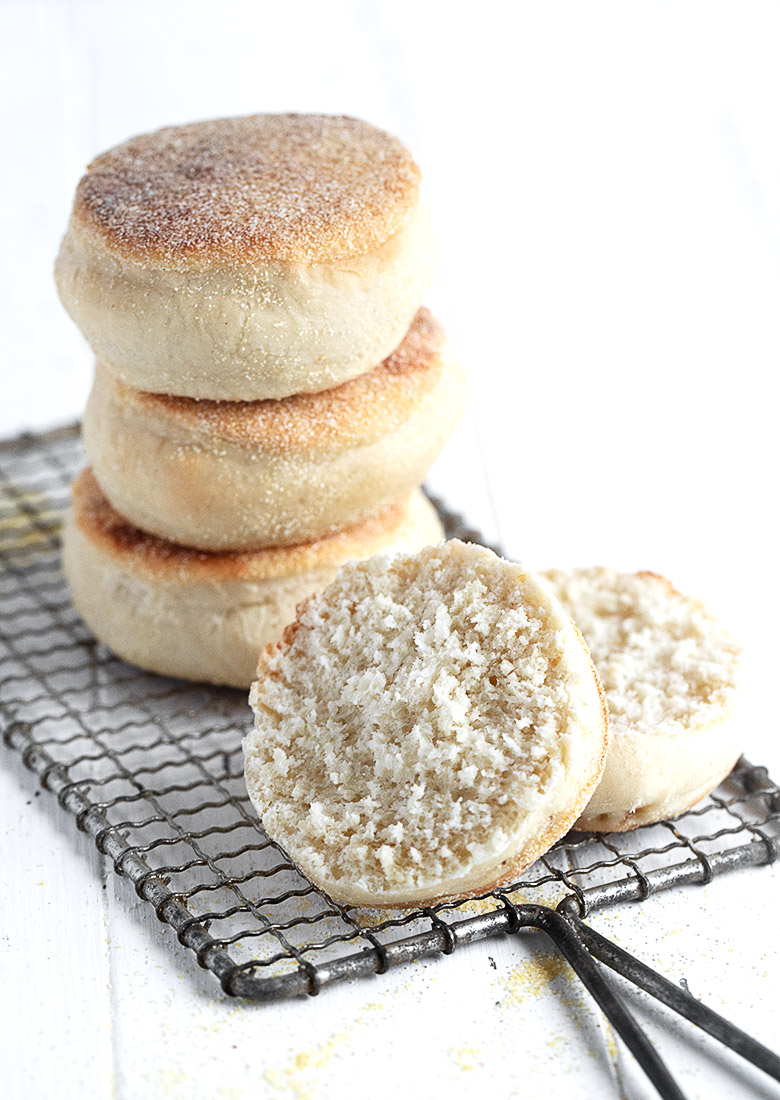
How to Split an English Muffin
To make sure you get maximum nooks and crannies, use a fork to score around the sides, then gently pull your muffin apart to split it.
Want to save this recipe?
Enter your email and I’ll send it to your inbox. Plus, you’ll get great new recipes from me every week!
By submitting this form, you consent to receive emails from Seasons and Suppers.
You can unsubscribe at any time.
Get the Recipe: Homemade English Muffins
Ingredients
- 1 1/4 cup buttermilk, or soured milk, at room temperature *See Note 1.
- 1 Tablespoon Instant yeast, *see Note 2 below if using Active dry yeast
- 2 1/4 teaspoons Kosher salt, or about 1 3/4 tsp fine salt
- 2 Tablespoons white sugar
- 1 1/2 Tablespoons honey
- 1 1/2 Tablespoons butter, at room temperature
- 3 cups all purpose flour
- 1/2 cup cornmeal, *See Note 3 below
Equipment
- 3-inch biscuit cutter (or similar sized glass)
Instructions
- Remove your buttermilk or milk from the fridge for at least 30 minutes before starting, so it comes to room temperature. If you are making soured milk (see Note 1 below), do that and then let stand at room temperature.
- Add the room temperature buttermilk or milk to a large bowl or the bowl of a stand mixer, fitted with a kneading hook. Add the yeast and stir to combine. Let stand 5 minutes. Add the sugar, salt, honey and butter and mix to combine. Add the flour, one cup at a time, mixing as you go. When you have added all the flour, you should have a somewhat sticky looking dough, but it should be wrapping itself around the kneading hook. Don't add anymore flour to the bowl, but rather remove to a lightly floured surface and knead a few times with a bit of flour, if it's too sticky to knead. You'll probably find you don't need to add a lot of flour. Keep the dough moist. Only add as much flour as needed to remove any bit of stickiness. Form the dough into a ball and place into a greased bowl, cover with plastic wrap and refrigerate for 1 hour.
- After the 1 hour, remove the dough to a lightly floured surface. Knead the dough just a bit, adding a bit more flour, as needed, if the dough is too sticky to knead. Add just as much flour as you need and be careful of not adding too much. Form the dough into a ball.
- Scatter 2-3 Tbsp of the cornmeal on a work surface, in a roughly 10-inch circle. Place the dough ball on top of the cornmeal, then scatter another 2-3 Tbsp of cornmeal on top of the dough ball. Scatter the remaining cornmeal onto a baking sheet and set aside.
- Using a rolling pin, roll the dough ball into a roughly 3/4 – 1-inch thick circle. Using a 3-inch biscuit cutter, cut rounds out of the dough, trying to keep them as close as possible as you can't re-roll/re-use the scrap dough. Don't cut right to the outside edge. Move your cutter in about 1/4-inch before cutting. You should get six to eight 3-inch rounds from the single (not doubled) recipe. Place the cut rounds onto the cornmeal dusted baking sheet. Cover the baking sheet with plastic wrap. Let rise at room temperature 30-40 minutes or place in the fridge overnight if you like, and let rise about 45-50 minutes in the morning, then fry and bake as detailed below.
- Preheat the oven to 350F.
- When that time is about up, heat an un-greased skillet on the stove-top over medium-high heat. When ready, add the muffins to the skillet, leaving some room between so you can get a spatula in there to flip them. Reduce the heat slightly to about medium heat and allow the muffins to cook until the underside starts to colour a bit, then flip them and repeat on the other side. After I flip the muffins, I like to gently press down on the top of them with a spatula to flatten them slightly. Not too much. Just enough to remove any large air pockets that might have formed from the heat of the cooking.
- Remove the browned muffins to the same baking sheet and place into the preheated 350F oven. Bake for about 15 minutes, or until they register between 195-200F when tested with an instant read thermometer. If you don't have a thermometer, you can test by inserting a skewer in the side of the muffin and into the centre. It should come out clean and dry.
- Remove muffins from oven, then immediately transfer to a cooling rack to cool completely. Once cooled, store in an airtight container. I like to store mine in the refrigerator if they aren’t going to be used up right away. These will also freeze well up to 3 months.
Notes
More homemade baking recipes to love!

Hi! I’m Jennifer, a home cook schooled by trial and error and almost 40 years of getting dinner on the table! I love to share my favourite recipes, both old and new, together with lots of tips and tricks to hopefully help make your home cooking enjoyable, stress free, rewarding and of course, delicious!
Turned out pretty good I was just curious if yours are normally more puffy and full vs the grocery store English muffins whose texture has more of an airy/chewy texture with holes vs a bun like texture ? I did sub bread flour and use whole milk to make butter milk incase this made a difference?
Glad you enjoyed them, Ashley! I do find the homemade ones have a slightly different texture and shape, though not in a bad way, just a bit different. I still definitely get English Muffin when I toast and eat them, though :)
I made these and they turned out wonderful.
I’m so glad to hear, Kodi! Thanks so much :)
hi Jennifer, I make many of your recipes and they always turn out, however, this is the second one that I have made that asks for room temperature milk or buttermilk and the dough seems really heavy and dry. I had to throw out the last one and feel I should with this as well. Any idea what is happening?
Hi Mary and sorry to hear you’re having trouble. When it comes to room temperature milk or buttermilk, there is no typical warmth to get the yeast going. My buttermilk bread for example takes a long time to rise, so often it’s just being patient and making sure you give it as much rising time as it needs. For this English Muffin recipe, the dough needs to be really quite moist, so possibly you added too much flour trying to make a typical dough from the start? This recipe uses a lot of yeast, but putting it in the fridge keeps the rise slower. That said, all along the way, it should rise. If yours isn’t rising, is it possible your yeast is old?
Hi Jennifer, I don’t think so, I used the other packets this week and all was well. I think I may just stay away from the room temperature stuff going forward. BTW, I absolutely love your pretzel buns and your bagels. They are perfect every single time. Thanks
If you decide to circle back to these, you could very carefully warm the buttermilk a little and see if that helps. Just warm to about 90F and no more.Also, you might want to give regular Instant yeast a try. It’s generally much more forgiving (SAF Instant yeast is the only yeast I use in my kitchen). Glad you are enjoying the pretzels and bagels :)