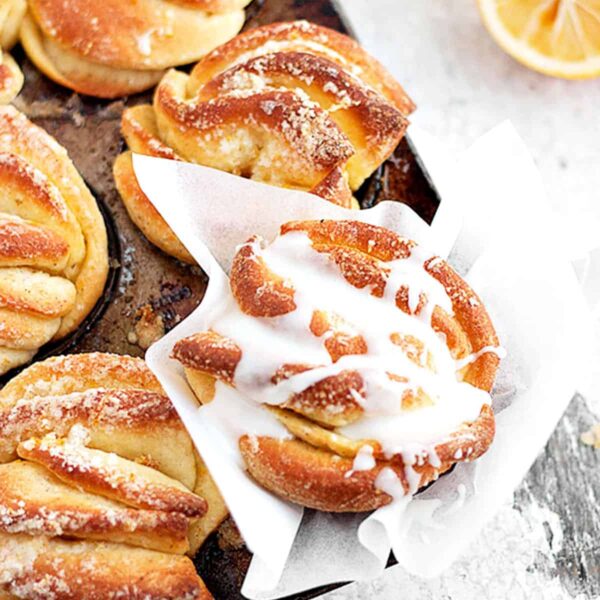
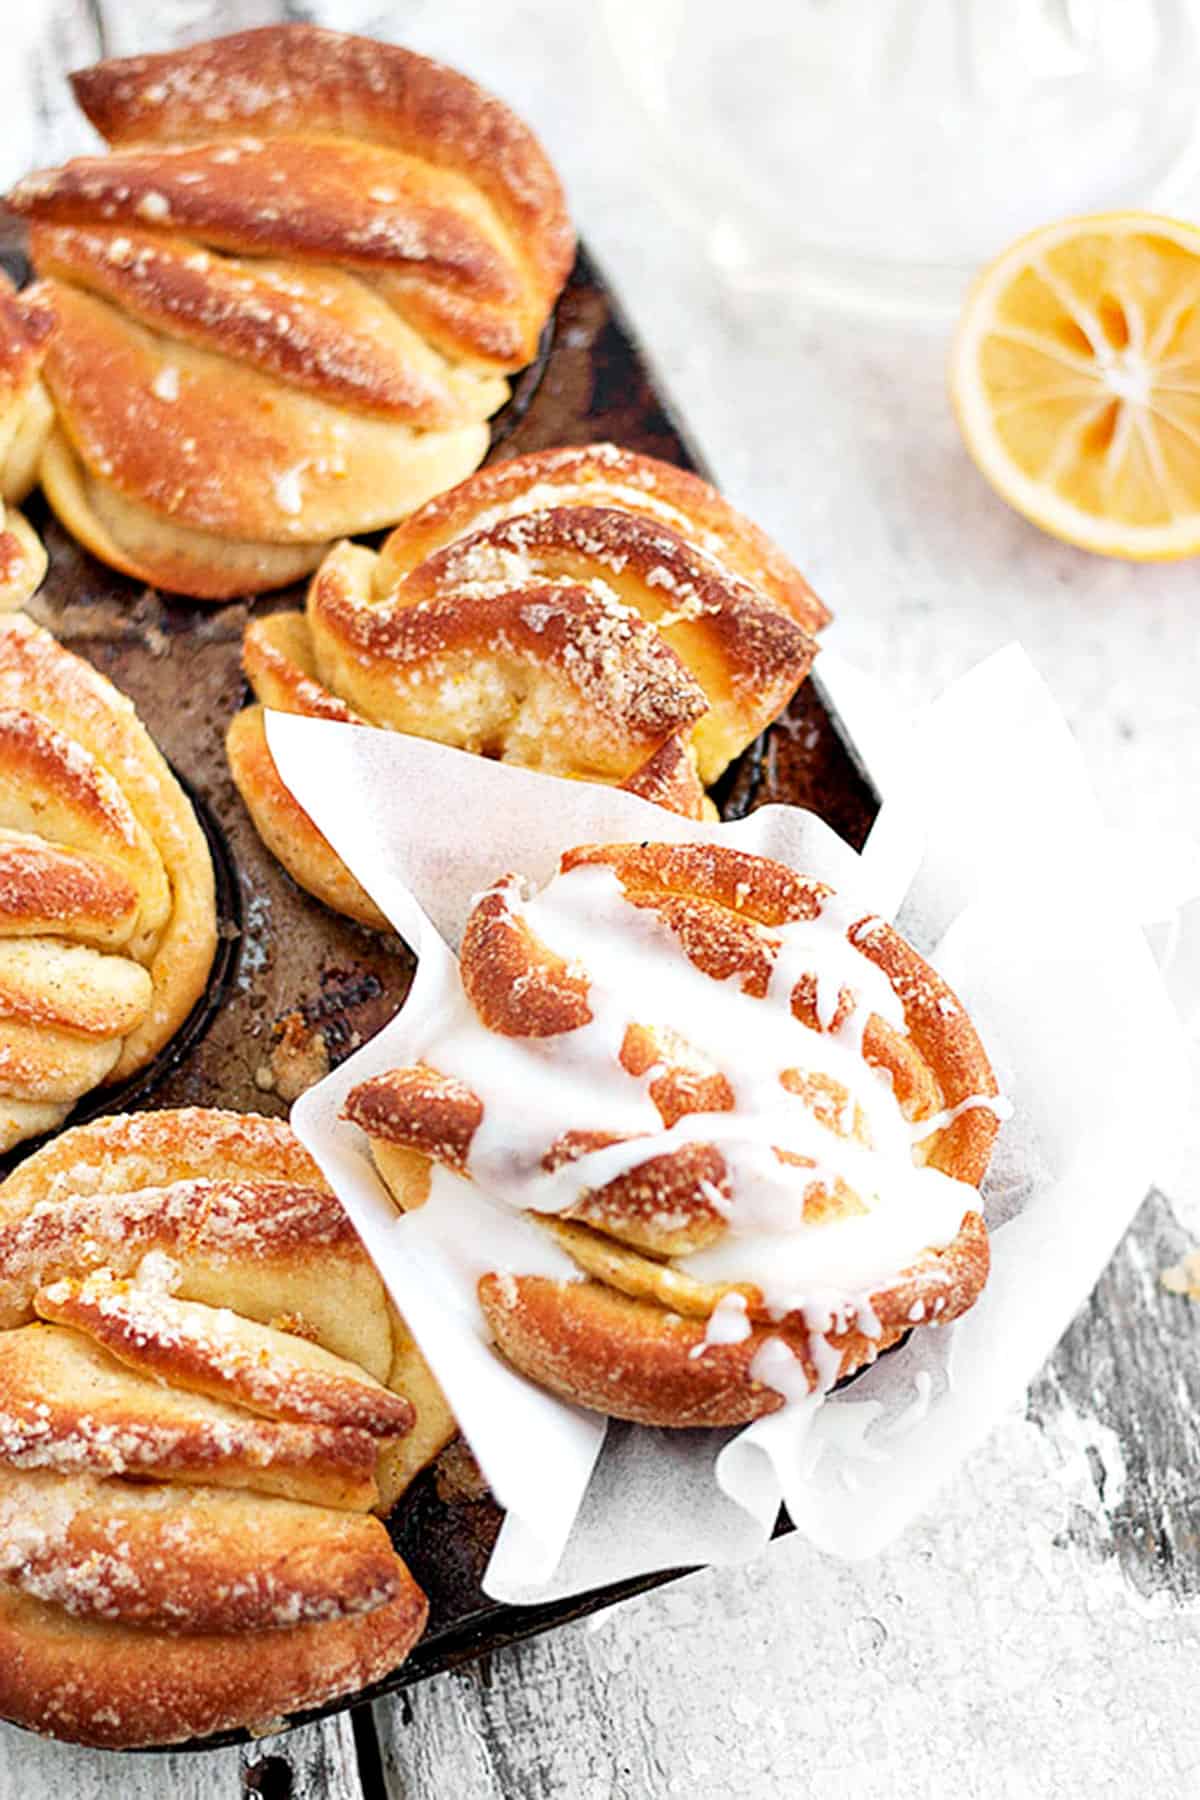
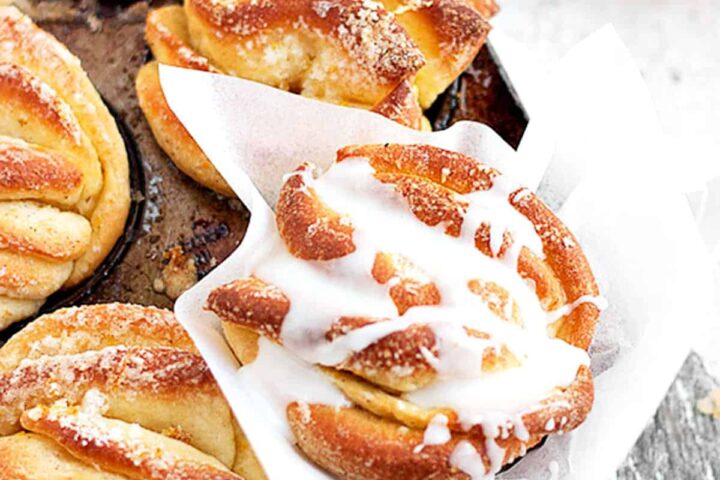
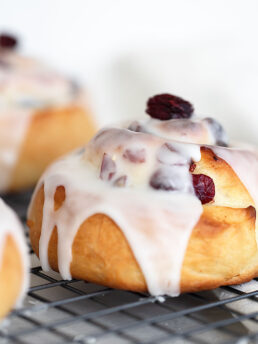
These absolutely delicious pull apart lemon sweet rolls bake up easily in muffin tins for individual servings. A wonderful lemon treat for any time of day.
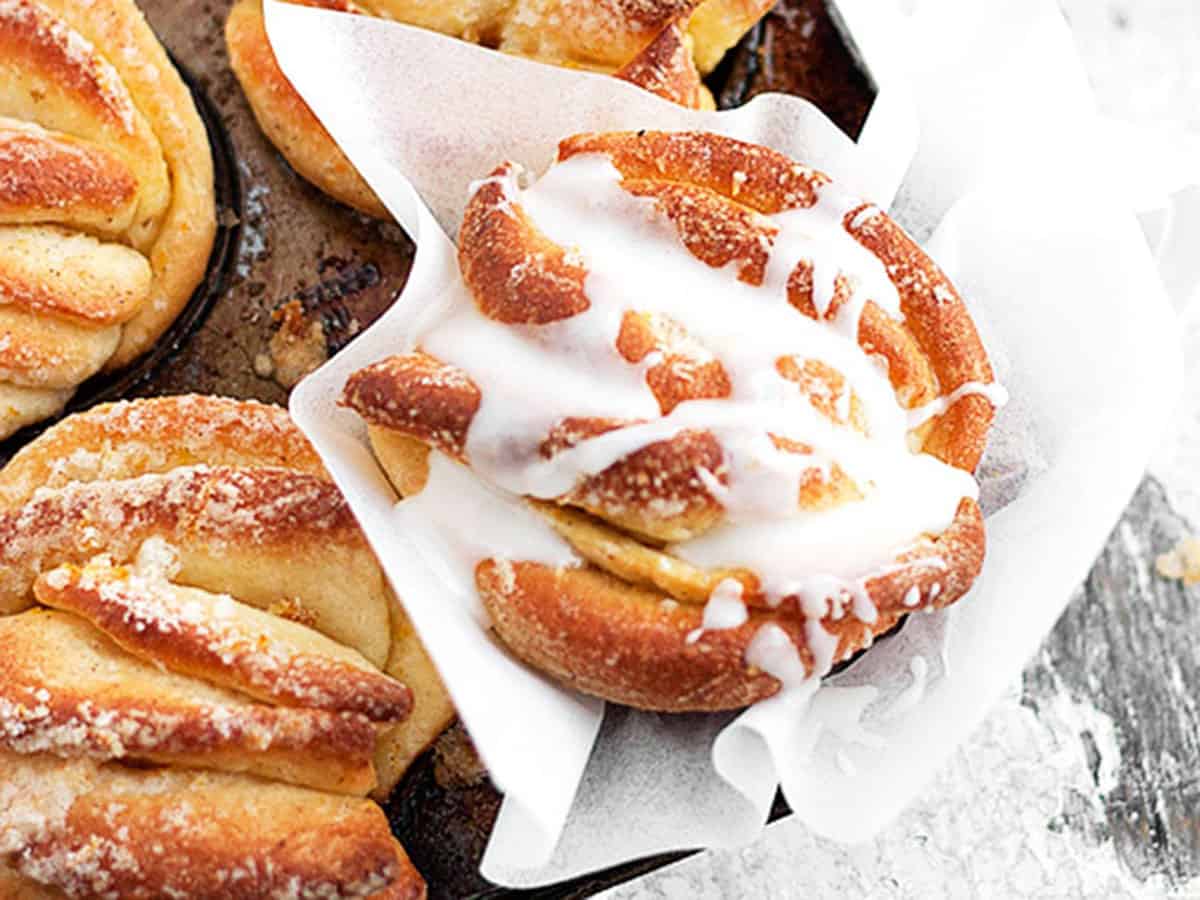
These lemon sweet rolls are a riff on the popular pull-apart bread. Made into individual portions, these rolls offer all the fun and flavours of the pull-apart loaf in a portable, individual serving form.
Ingredients and substitutions
A few notes about the key ingredients …
Yeast – you can use either Active Dry Yeast or Instant Yeast for these rolls. I have included instructions for both.
Lemons – these are lovely with regular lemons or Meyer lemons.
Milk – whole milk is recommended, for best results. Whole milk is usually 3-3.5% butterfat.
Recipe tips!
- A word of warning. This dough is almost batter-like when it’s first mixed. When scraped it out onto the counter, it won’t look like it’s anywhere near knead-able. But a dusting of flour is all it will take to come together into a wonderfully soft, moist dough ball.
- Be patient with the rising, especially during the cooler months. It can be a slow riser. Use the times as a guideline and concentrate more on the increase in size. Let it rise until doubled, however long that takes.
- I’ve tried to be as clear as possible with the shaping directions. It’s not complicated, it’s just not quite as easy to put it into words as I’d hoped. Don’t stress it though. The beauty of these rolls is in their imperfection.
Making ahead, storing and freezing
These lemon rolls are best on the day they are made, but stored in an airtight container, they are nice into the 2nd day.
These lemon sweet rolls also freeze well up to 3 months.
Want to save this recipe?
Enter your email and I’ll send it to your inbox. Plus, you’ll get great new recipes from me every week!
By submitting this form, you consent to receive emails from Seasons and Suppers.
You can unsubscribe at any time.
Get the Recipe: Pull Apart Lemon Sweet Rolls
Ingredients
For the sweet dough:
- 2 3/4 cups all-purpose flour, spooned and levelled
- 1/4 cup white granulated sugar
- 2 1/4 teaspoon instant yeast, or see Notes for active dry yeast
- 1/2 teaspoon fine salt, reduce to 1/4 tsp if using salted butter
- 1/3 cup whole milk
- 4 Tablespoons unsalted butter
- 1/4 cup water
- 1 1/2 teaspoon vanilla , I used the same amount of vanilla bean paste
- 2 large eggs, at room temperature
For the lemon sugar filling:
- 1/2 cup white granulated sugar
- 3 Tablespoons lemon zest, finely grated, from 2 to 3 lemons
- 4 Tablespoons unsalted butter, melted
For the lemon glaze:
- 1 cup confectioners’/icing sugr
- 1 Tablespoon whole milk
- 1 Tablespoon freshly squeezed lemon juice
Instructions
- Make the sweet dough: Stir together 2 cups (9 oz.) of the flour, sugar, yeast, and salt in a large bowl or the bowl of a stand mixer fitted with a paddle attachment. In a small saucepan, heat the milk and butter over low heat just until the butter is melted. Remove from the heat, add the water, and set aside until cooled to just warm (120 to 130°F), about 1 minute. Add the vanilla extract.
- Pour the milk mixture over the flour-yeast mixture and, using a rubber spatula or the paddle attachment, mix until the dry ingredients are evenly moistened. With the mixer on low speed, add the eggs, one at a time, mixing just until incorporated after each addition. Stop the mixer, add the remaining 1/2 cup (2 1/4 oz.) flour. Resume mixing on low speed until the dough is smooth, 30 to 45 seconds. Add 2 more tablespoons flour and mix on medium speed until the dough is smooth, soft, and slightly sticky, about 45 seconds. Note that the dough at this point will be very loose. Don’t fret. It will come together.
- Sprinkle a work surface with flour and turn the dough onto the flour (a silicone bowl scraper comes in handy here). Knead gently until the dough is smooth and no longer sticky, about 1 minute, adding an additional 1 to 2 tablespoons flour only if the dough is unworkably sticky. Place the dough in a large, greased bowl, cover tightly with plastic wrap and let rise in a warm place until doubled in size, about 45 to 60 minutes.
- Make the lemon filling: Meanwhile, while the dough is rising, in a small bowl, mix together the sugar and lemon zest. Set aside. The sugar draws out moisture from the zests to create a wet sand consistency, so don’t be alarmed when you see this.
- Assemble the sweet rolls: Preheat the oven to 350°F (non-convection) with the rack in the centre of the oven. Spray a 12-cup muffin tin with cooking spray.
- Gently deflate the dough, on a lightly floured work surface. Cut the dough in half, setting aside one half and covering with plastic wrap. Using a sharp knife or a bench scraper, cut the portion of dough into thin (3/4-inch) pieces. You should have 15-18 pieces. Using a rolling pin (and extra flour as necessary to prevent sticking), roll each piece of dough into a thin, oblong oval shape (they will be approximately 6 inches long and 3-4 inches wide). Don’t worry about making each one exactly the same size and shape. It’s fine if they are a mix of shapes and sizes.
- Using a pastry brush, spread the melted butter generously over each piece of dough. Using no more than half the sugar/zest mixture, sprinkle some of the zest-sugar mixture over all the buttered ovals. To form the rolls, take one piece of dough and lay it long side towards you. Place 4 more pieces directly on top (or 5, if you have 18 pieces to start with). Cut the dough stack in half width-wise, making two stacks roughly 3 inches by 3 inches. Gently pinch together the edges that were closest to you a little bit towards the centre- not all the way, causing the top layers to open up a bit. This will be the bottom of your roll. Place into a greased muffin cup. Once in the muffin cup, you can adjust the shaping a bit, pulling the layers apart slightly on the top.Repeat this shaping with the remaining prepared pieces and then repeat all these steps with the remaining reserved half of the dough. Sprinkle the tops of the rolls with any extra sugar/zest mixture.
- Cover the pan with plastic wrap and let the dough rise in a warm place until puffy and almost doubled in size, 30 to 60 minutes.
- Bake the rolls until the top is golden brown and they sound hollow when tapped, 18 to 22 minutes. Transfer muffin tins to a wire rack and let cool in the pan for at least 15 minutes. Serve warm or at room temperature, topped with lemon glaze. To re-warm simply pop in the microwave for 15 seconds or pop back into the muffin tins and re-heat in a 350° oven loosely covered with foil for 5 minutes or so. These freeze well.
- Make the lemon glaze: In a medium bowl combine the icing sugar with the milk and lemon juice until the mixture is smooth and desired thickness (you can add more liquid or sugar, as needed).
Notes
- A word of warning. This dough is almost batter-like when it’s first mixed. When scraped it out onto the counter, it won’t look like it’s anywhere near knead-able. But a dusting of flour is all it will take to come together into a wonderful soft, moist dough ball.
- Be patient with the rising, especially during the cooler months. It can be a slow riser. Use the times as a guideline and concentrate more on the increase in size. Let it rise until doubled, however long that takes.
- I’ve tried to be as clear as possible with the shaping directions. It’s not complicated, it’s just not quite as easy to put it into words as I’d hoped. Don’t stress it though. The beauty of these rolls is in their imperfection.
More lemon recipes to love!
Hi! I’m Jennifer, a home cook schooled by trial and error and almost 40 years of getting dinner on the table! I love to share my favourite recipes, both old and new, together with lots of tips and tricks to hopefully help make your home cooking enjoyable, stress free, rewarding and of course, delicious!
I read the directions but it’s hard to visualize would it be possible to make a video?
Hi Carm and yes, I will put this one on the video list. It would be helpful, for sure :) Thanks!
Could you please explain the forming of the buns once each stack is cut in half.
I am having trouble visualising / understanding…Gently pinch together the edges that were closest to you a little bit towards the centre- not all the way, causing the top layers to open up a bit.
Thank you,
Christine
Hi Christine, this really just means that you want to seal up the bottom of the roll, so by pinching together, which should seal the bottom and force the top to open up (layers spread apart a bit) in the process. This prevents the lemon sugar from all flowing out the bottom of the roll into the pan, as well as making it allowing the layers on the top to open up a bit to cook more nicely. Hope that helps :)
Looking for a recipe to use some Meyer lemons I found your post and made the rolls today. I reduced the yeast by 2 grams, and put the dough overnight in the fridge. The rolls were wonderful and I will definitely make them again.
You can simplify the procedure a bit, though, by rolling the dough into one large square, instead of dividing it first and rolling out each little piece separately.
Glad you enjoyed then, Karin and great idea. I’ll try that next time :)
Gracious, this is just gorgeous! And sounds so tasty… I love a lemony glaze on anything, but these buns sound perfect and comforting.
I cannot BELIEVE your cold temperatures! Good grief how do you survive it?!
Thanks so much, Sophie. I loved these buns! As for the weather … it’s been a brutal winter here. Not that we don’t usually have a good old fashioned winter, but this is one for the record books. Cold. Lots of snow. I survive it by spending as little time outside as possible :)
I feel like I’ve just commented on at least 5 different lemon recipes today–I was just in the kitchen whipping up lemon raspberry coconut pound cake myself :) it must be something in the air telling us it’s almost summertime. Thanks for sharing this, can’t wait to get my next lemon kick!
Thanks Ala. It is definitely citrus season. I think because it’s about the only produce that’s at it’s best this time of year. That, and they remind me of warm and sunny :)
I picked up a bag of meyers the other day…can’t wait to bake with them! You are a magician with all things yeast. That is all :)
Thanks so much, Renee. Baking with yeast is definitely my happy place. I’m still fascinated by the process and darn it, I just love eating bread :)