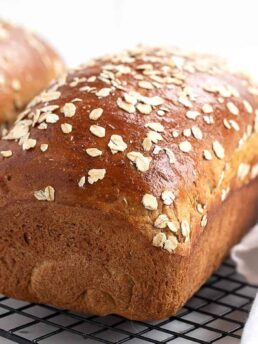
One of my favourite white yeast breads! Sweetened naturally with maple syrup. Lovely and light bread that makes great toast.
I have been making this maple yeast bread for a few years. It is one of my favourites. It’s great sandwich and perfect toasting bread. Since it’s Spring and I needed some great toast to enjoy my Homemade Maple Butter with, I thought I’d share it.
Ingredients and Substitutions
Yeast – you can use either Active Dry Yeast or Instant Yeast for this bread.
Maple Syrup – real maple syrup is best, of course. More specifically, I like to use Grade B or Amber maple syrup, which has a stronger maple flavour.
Milk – I will generally use 2% milk, as it is the milk I most often have on hand. Whole milk (3-3.5% b.f.) is even better. I wouldn’t suggest a lower fat milk. As for non-dairy milk, it should work here, though the texture of the bread will more akin to using all water, than milk.
Recipe Tips
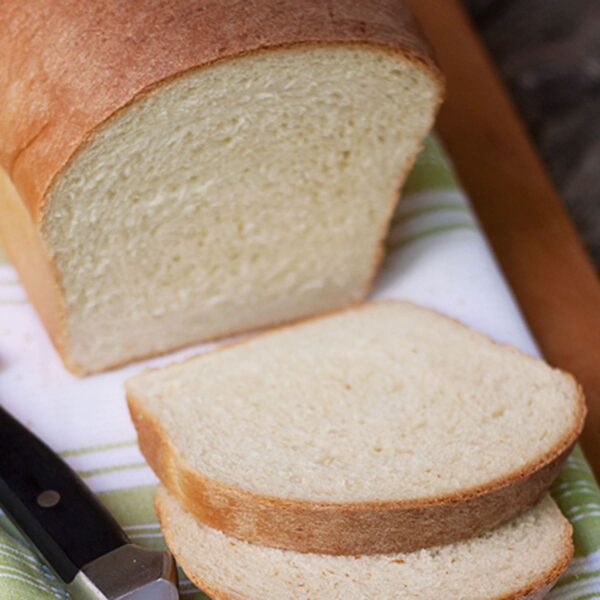
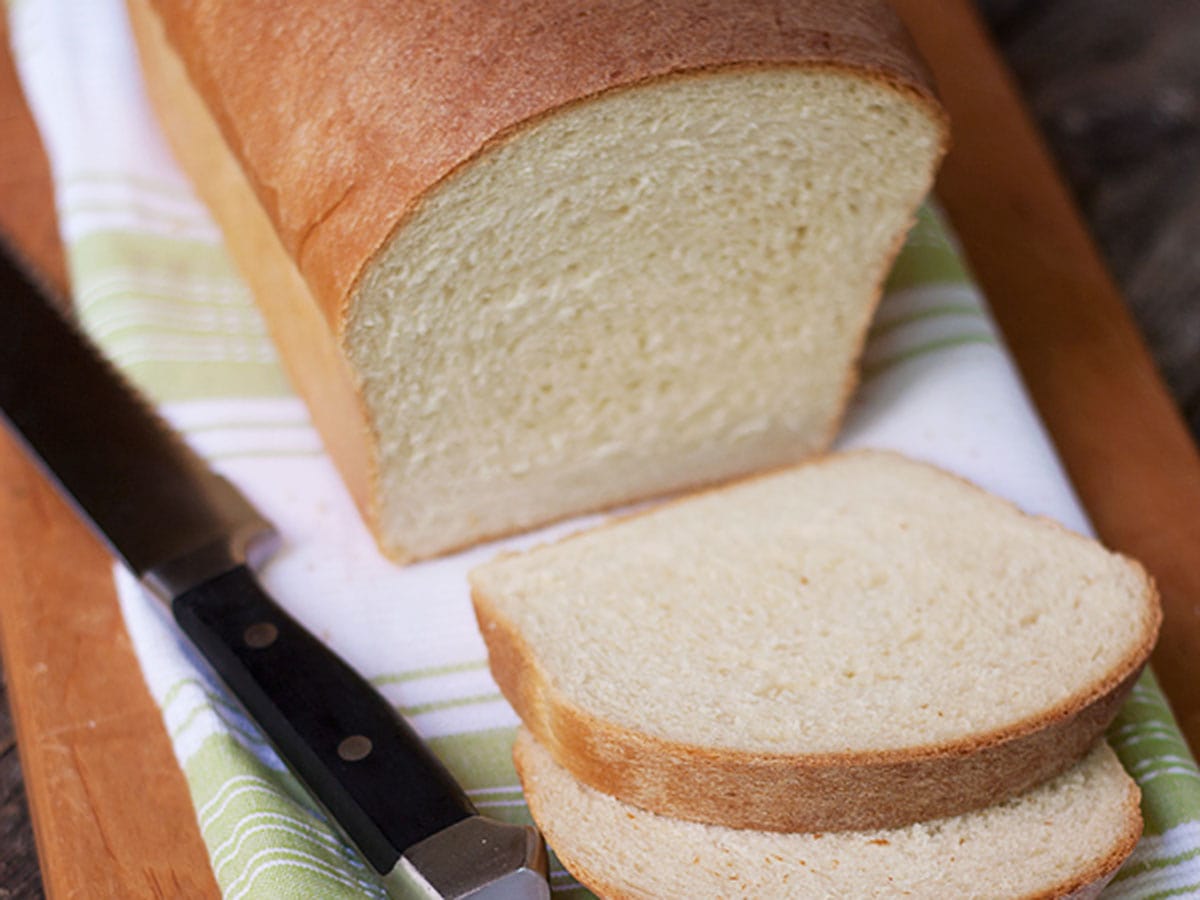
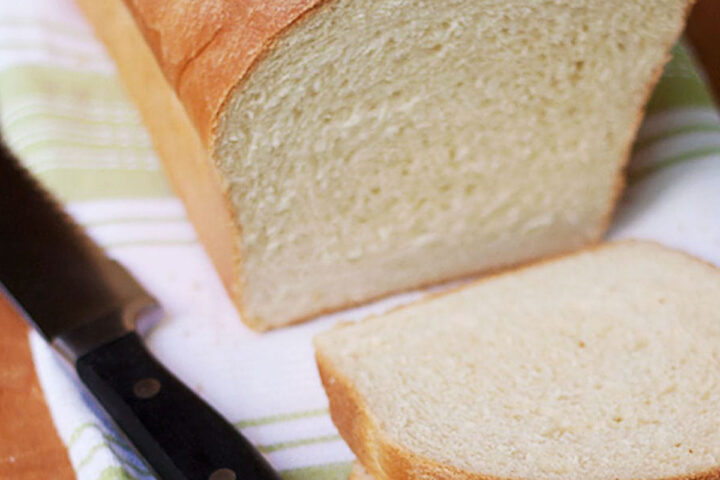
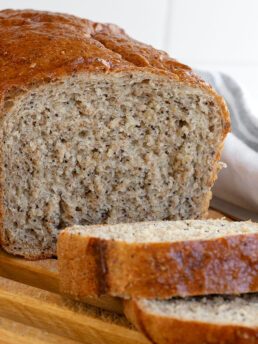
This bread makes excellent toast. That may sound obvious, but trust me, not all homemade bread makes good toast. It’s something about the texture and some are definitely better than others. It also slices beautifully. No crumbly or crushed slices with this bread.
There’s only 1/4 cup of maple syrup in this bread, so it’s maple flavour is subtle. Toasting brings the maple flavour out a bit more. It’s also nice to use a natural sugar in my homemade bread, when I can. If you’d like to add a little whole wheat flour, you can replace up to 1/2 of the all-purpose flour with whole wheat (note that this may make a smaller/denser loaf).
As with all yeast breads, flour absorbs liquid a bit differently from kitchen to kitchen, so the exact amount of flour you will need will vary, as well. Add only as much flour as you need to create a smooth moist dough that is not sticky.
Likewise, kitchen temperatures will vary, so always treat the rising times as approximate. Watch the dough and let it rise only until it has doubled, no more or no less, however long that takes.
Storing and Freezing
Store this bread in an airtight container or bag at room temperature for about 3 days.
This bread also freezes beautifully up to 3 months.
Want to save this recipe?
Enter your email and I'll send it to your inbox. Plus, you'll get great new recipes from me every week!
By submitting this form, you consent to receive emails from Seasons and Suppers.
You can unsubscribe at any time.
Get the Recipe: Maple Yeast Bread
Ingredients
- 1 cup milk
- 1/4 cup pure maple syrup
- 4 Tablespoons unsalted butter
- 1 teaspoon salt, reduce slightly if using salted butter
- 2 1/4 teaspoons active dry or instant yeast
- 1/4 cup warm water, about 110 degrees
- 1 teaspoon sugar , or maple sugar
- 1 large egg, beaten
- 4 cups approximately unbleached all-purpose flour
Instructions
- Place milk, maple syrup, butter and salt in a saucepan and scald (heat to just below boiling – when steam rises). Allow to cool to lukewarm (105F).
- Dissolve yeast in the 1/4 cup of lukewarm water (about 105F) along with the tsp. of sugar. Stir and set aside for five minutes until the mixture becomes frothy. Transfer the milk mixture to a large bowl or the bowl of a stand mixer, fitted with a kneading hook. Stir in the yeast mixture and then the beaten egg.
- Stir in two cups of the flour and stir to combine. Start adding more flour in 1/2 cup increments to start, and then in smaller increments, until the dough forms a ball that cleans the bowl and is smooth, but not sticky. *You may not need all of the 4 cups or you may need a bit more. Use as much as you need to make a smooth dough).
- Turn the dough out onto a floured board and knead for about eight minutes until the dough is smooth and elastic, adding more flour as necessary to keep the dough from sticking.
- Place the dough in an oiled bowl, turn the dough to oil on all sides, cover lightly and set aside to rise until doubled, about an hour.
- Turn onto a lightly floured board and roll dough into a rectangle about nine by 12 inches. Roll up jellyroll style, starting from the narrow side. Pinch the seam and ends closed.
- Place the dough seam side down into a greased 9-by-5-by-3-inch loaf pan.
- Cover and set in a warm place to rise until doubled, about 45 minutes (dough should crest that pan by about an inch in the centre).
- Preheat oven to 350° F. Bake for about 45 minutes, until well browned.
- Remove from pan and allow to cool on a rack before slicing.
More Yeast Bread Recipes to Love!
Hi! I’m Jennifer, a home cook schooled by trial and error and almost 40 years of getting dinner on the table! I love to share my favourite recipes, both old and new, together with lots of tips and tricks to hopefully help make your home cooking enjoyable, stress-free, rewarding and of course, delicious!
Could I knead the bread in my stand mixer instead of by hand. Would it still be 8 minutes in the stand mixer? Thanks
Hi Laurel and sure, you could do it in the stand mixer as well. I think it would only need about 4 minutes or so of kneading in the mixer, or until it’s nice and smooth.
can this easily be doubled?
Yes it can! You can use the “2X” button on the recipe card to automatically double the ingredients.
You have the best bread recipes! Your raisin loaf is our family favorite but this maple white sandwich bread looks and smells like it could be a close runner-up. Will know later today! Thank you for making me look like I’ve always been a baker.
Thanks so much, Sandi :) Enjoy!
Delicious! Came out perfect the first time making it.
The dough expanded so much during the first raise (1 hour) that I only needed to let it raise for 30 minutes the second time.
I will definitely be making this bread again – thanks for posting!
So glad to hear, Cody :) Thanks so much!
Hi Jennifer: I made this bread today and I am blown away with the results… Perfect!!! One thing I found was how easily it cuts. I made a Tomato sandwich and it was also perfect. I think this just became my go to bread recipe. Thank you for all your recipes and your time and effort in bringing them to us.
So glad you enjoyed it, Betty! Thanks so much :)
Hi Jennifer,
Been away for a while, I just want to let you know I made this bread for the first time today. I used bread flour and used bread machine until the kneading part (carpal tunnel issue). Then move to a grease bowl for the first rise and moved to 5″×9″ loaf pan for the second rise. Timing is very accurate on this recipe from the rising part until baking. Bread is very light and fluffy. Definitely, I will make this again. Lastly, I would like to say a huge thank you!!!
So glad you enjoyed it, Anne :) It’s in regular rotation here. I love the subtle maple note and the texture. Makes great toast :) Thanks!
Hi Jennifer,
Thank you so much for the recipe! We love it, I used bread flour, it turns out huge and tastes good!
BTW, can I substitute maple syrup with honey or golden syrup?
Thanks
Hi Siam and so glad you are enjoying this bread :) And yes, you can substitute honey or golden syrup. Obviously there would be a slight change in flavour and possibly a small change in amount of flour needed. Thanks!
Hi Jennifer,
Can I use bread flour instead of all-time purpose flour?
Hi Jennifer,
Oops sorry, can I use bread flour instead of all- purpose flour I mean…
Yes you can, Anne :)
Hi Jennifer,
Thank you for the recipe! We LOVE it! It’s so easy, and your recipe is accurate (rising times).
Yesterday I doubled the recipe! (I’m going out of town and one loaf is for my family who is NOT GOING and the other one is for the road (we’re driving), and my out of town family. I experimented, adding 1 cup whole wheat flour and 1/2 cup ground flaxseed. The loaves still rose beautifully (and timely). Before baking I brushed with egg white, and sprinkled on more ground flaxseed and chia seed. It tastes AMAZING!!!! And it makes a beautifully shaped, HUGE loaf of bread!
My husband and stepson are not health food enthusiasts, and they loved it!
Thanks Carolyn and so glad you enjoyed it! I love your whole wheat version :) I’ve had great luck when I keep the whole wheat flour to 1/4-1/3 (in terms of loaf size/density). Seeds are always a nice addition and I don’t find they affect the rise at all.
Oh my your bread looks so perfect! I have only made bread once and it sure did not look like this. I have been wanting to learn to make it so bad and your recipe looks easy not sure if it is but I’m going to try it.
Thanks so much, Beth. Hope you try it. The best way is to just jump in and practice makes perfect!
There is nothing quite like homemade bread and this looks particularly yummy. Can’t wait to try it. Thanks.
I’m sure you will enjoy this bread.
Thanks Kathy. I love one big loaf for a change, too. I always have to freeze the second when the batch makes two, because we just can’t eat that much bread before it goes stale.
Your bread looks perfect! It’s nice to know that this bread slices well and toasts well! Also, love that it only makes one loaf. So many of my bread recipes make several loaves at a time. I will be trying this soon!
This sounds delicious! And I love how your knife says, “bread” on the bottom of the handle! Where did you get it?
Thanks Ruthy. Yes, I have a set of these knives and they all say what they are for on the bottom. I guess so there’s no confusion :) I don’t even remember where I got them. I’ve had them for many, many years.
Oh I love a good piece or two of hot buttered toast with my tea before bed. Your bread always looks so gorgeous Jennifer!
Thanks Renee. I can only credit it to years of practice :)